Today we’re going to make Banana Nut Muffins! These freeze beautifully, by the way. After they’ve cooled, put them on a baking tray in the freezer for about 30 minutes. Remove them, wrap in aluminum foil and freeze in an air-tight container for up to 2 months. You can also reduce the fat in these muffins, by substituting half (or all) of the oil with unsweetened applesauce.
Banana Nut Muffins
1-1/2 cups all-purpose flour
1 cup sugar
1 teaspoon baking soda
1/2 teaspoon salt
3 medium ripe bananas
1 large egg, room temperature
1/3 cup vegetable oil
1 teaspoon vanilla extract
In a large bowl, combine dry ingredients. In another bowl, mash the bananas. Add egg, oil and vanilla; mix well. Stir into the dry ingredients just until moistened. Fill greased or paper-lined muffin cups half full.
Bake at 375° for 18-22 minutes or until a toothpick inserted in the center comes out clean. Cool for 10 minutes; remove from pan to a wire rack to cool completely. Enjoy!
We love pretzels at our house and this recipe takes store bought pretzels and turns them into a flavorful snack. I use 2 full bags of pretzels (I like Snyder’s) which sounds like a lot, but this recipe will keep if stored in an airtight container for a long time!
Baked Pretzels
2 1-lb bags of hard pretzels (broken into bite sized pieces)
1 cup oil (not olive!)
1 package Hidden Valley Ranch Dressing mix (original)
1/2 tsp lemon pepper
1/2 tsp dill weed
1/2 tsp garlic powder
Preheat oven to 350*. Mix all the ingredients (except the pretzels) in a small bowl. Put the broken pretzels in a large bowl and pour the seasonings/oil mixture over them. Stir to coat the pretzels. Pour the pretzels onto a baking tray and bake for 7 minutes. Remove from the oven and carefully stir the pretzels on the tray. Bake an additional 7 minutes. Remove from the oven. Continue to stir several times as the pretzels cool. Enjoy!
This is one of my favorite recipes from my grandmother. When my dad was growing up, times were tough, and nothing got wasted. Whenever there was some leftover mashed potatoes, too much to throw away, but not enough for anyone to have with another meal, my Grandmother would make potato candy. Since it was a favorite of mine, when I got old enough, Grandma taught me how to make it. You can always make potato candy with a freshly cooked potato though never fear—you can cook a potato just for this! If you wish to go that route, peel and cook the potato, drain, and then mash with a little butter and milk—omit salt, pepper or anything else. Cool completely. (If you are using leftover mashed potatoes, allow them to come to room temperature.)
Potato Candy
Mashed potatoes at room temperature
Powdered sugar
Flour
Peanut butter
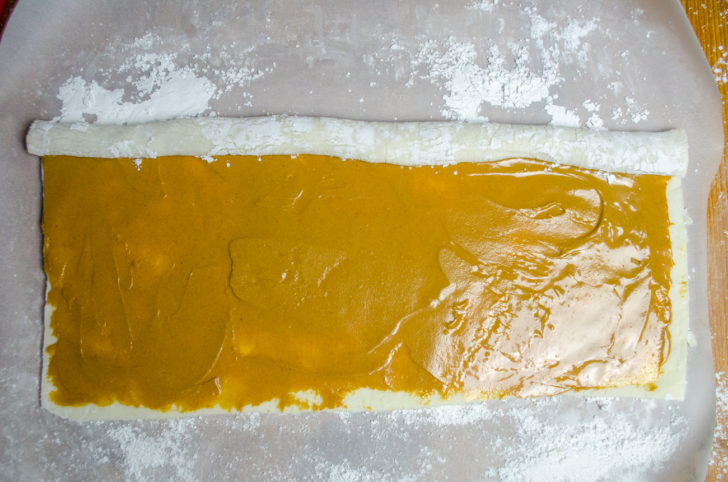
You’ll notice there are no specific amounts given for the ingredients, that’s because it all depends on the amount of mashed potatoes you start with. A few tablespoons are more than enough to begin with. You’ll need several cups of powdered sugar to start with. You’re going to mix that with the potatoes to form a stiff dough. I add a little sprinkling of flour to the dough to avoid adding more and more powdered sugar. It will be very sweet. Grab a piece of the potato “dough” and roll it out on a lightly floured board.* (Grandma taught me to use my hands to press it out rather than “dirty the rolling pin”.) Thick or thin is a personal choice—I leave mine a little thicker. Spread peanut butter on the dough (again, your preference as to how much peanut butter.) Roll up like a jelly roll and slice. Repeat with the rest of the dough. Chill. This freezes for a long, long time.
The picture above shows one long roll, but I use smaller pieces of dough to make several rolls. It’s much easier and less messy in my opinion, but the picture gives you an idea of what you’re shooting for. Enjoy!
*Some recipes call for the dough to be rolled out in powdered sugar, that would make it even sweeter, but that’s an option if you prefer.
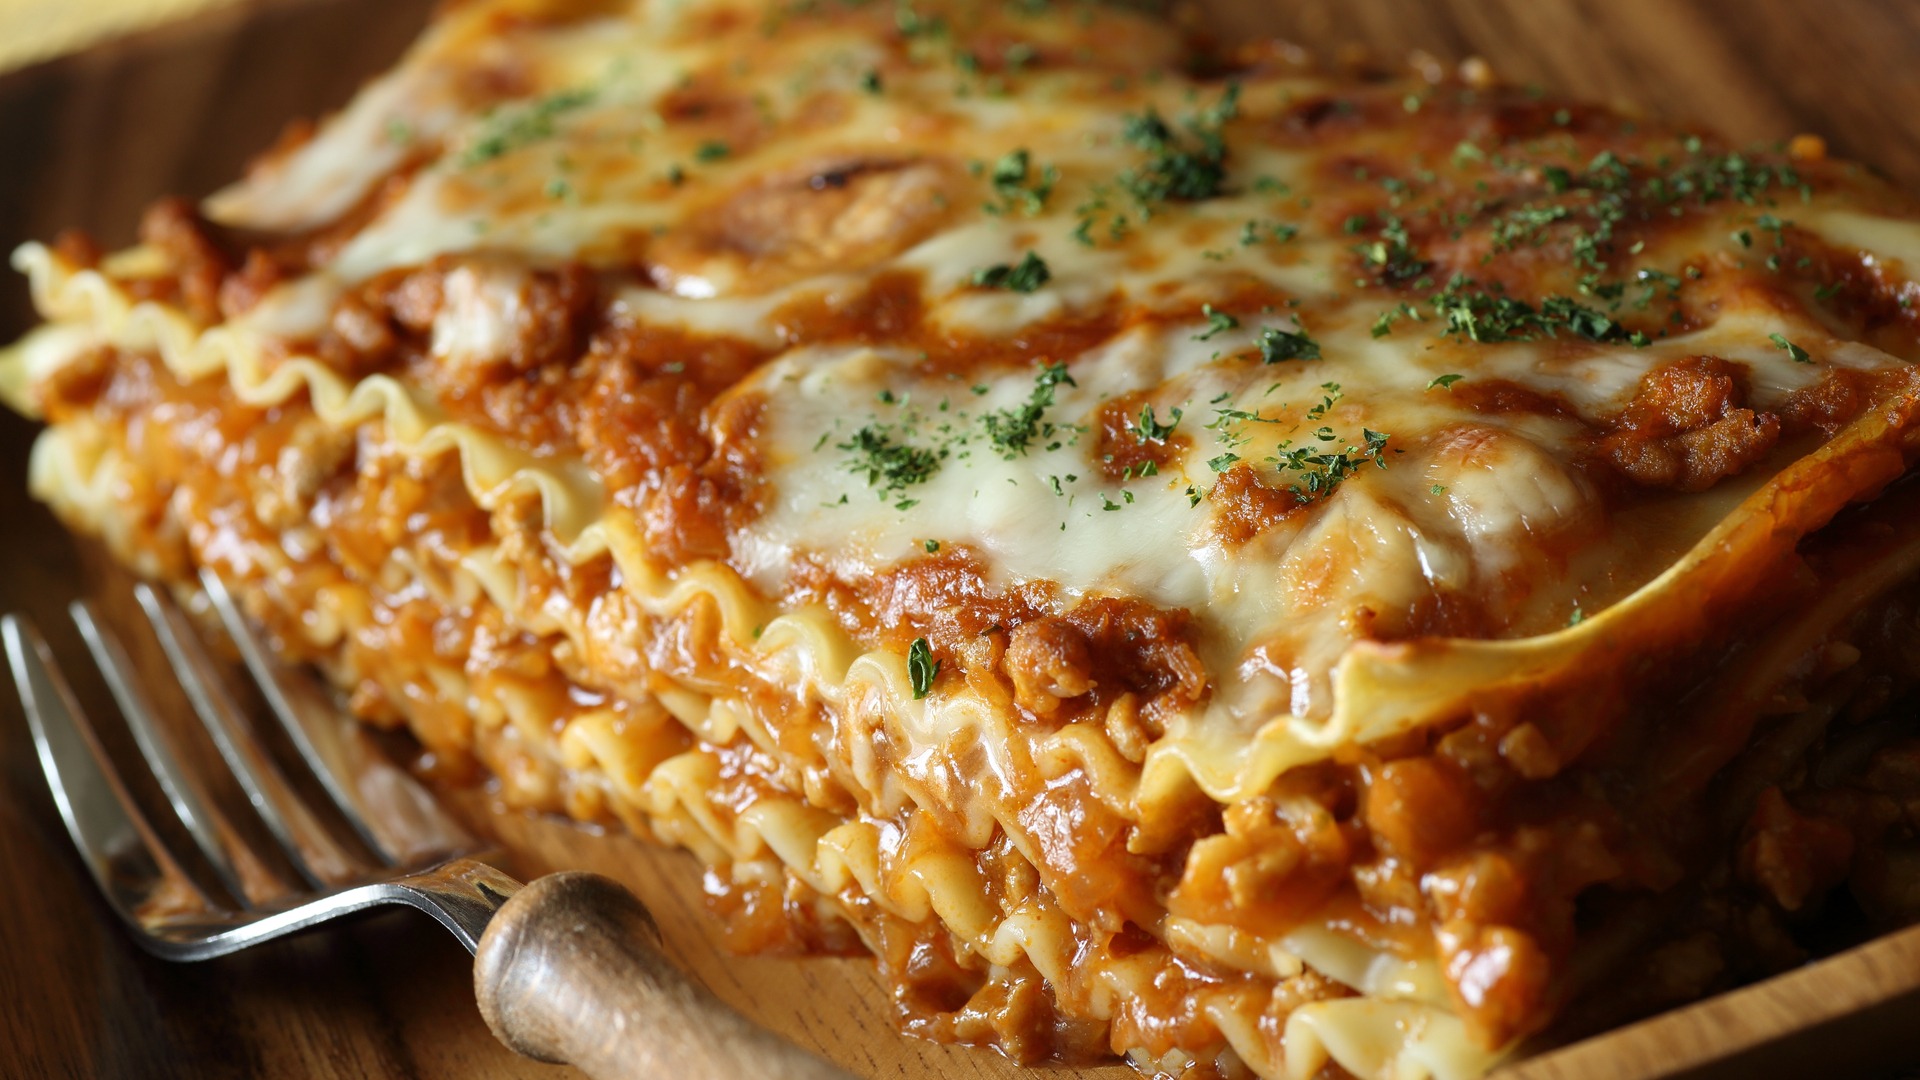
Today I am sharing my favorite lasagna recipe! I do not like ricotta cheese, so I use a combination of sour cream and cream cheese instead. I have tried the lasagna noodles that do not require pre-cooking, but I was unsatisfied with the results, but you could always choose to substitute those if you wish. And while I like mozzarella cheese, I am not in love with it, lol, so I do not add it between layers—some folks do. Again, it’s what YOU like that counts. This is a wonderful dish to assemble early in the day and put in the fridge till an hour or so before supper. Then remove from the fridge while you preheat the oven. Slide it in the oven for an hour and it’s done!
LASAGNA
1 pound ground beef, browned, rinsed, drained and seasoned to your taste
1 jar Spaghetti sauce (we like Prego)
9 Lasagna noodles cooked and drained*
1 8-ounce cream cheese slightly softened
1 16-ounce sour cream
Mozzarella cheese (I prefer finely shredded)
Preheat oven to 350*. Combine the seasoned, browned ground beef with the spaghetti sauce. In a bowl, beat the cream cheese and the sour cream. Spray a 13 x 9 baking dish with non-stick cooking spray. Assemble the lasagna in this manner: a layer of 3 noodles, then ladle 1/3 of the sauce/ground beef, then drop tablespoons of the sour cream/cream cheese mixture over that using approximately 1/3 of the mixture per layer. You should be able to make 3 layers ending with the sour cream/cream cheese mixture. Top with mozzarella cheese. I top that with oregano, but any Italian seasonings you prefer would work also. Cover the dish with aluminum foil and bake at 350* for 45 minutes. Uncover and bake for an additional 15 minutes or until the mozzarella is melted. Enjoy!
*Lasagna noodles expand slightly when they are cooked, so you may want to trim them to fit your dish (I do, but I am admittedly anal about such things).
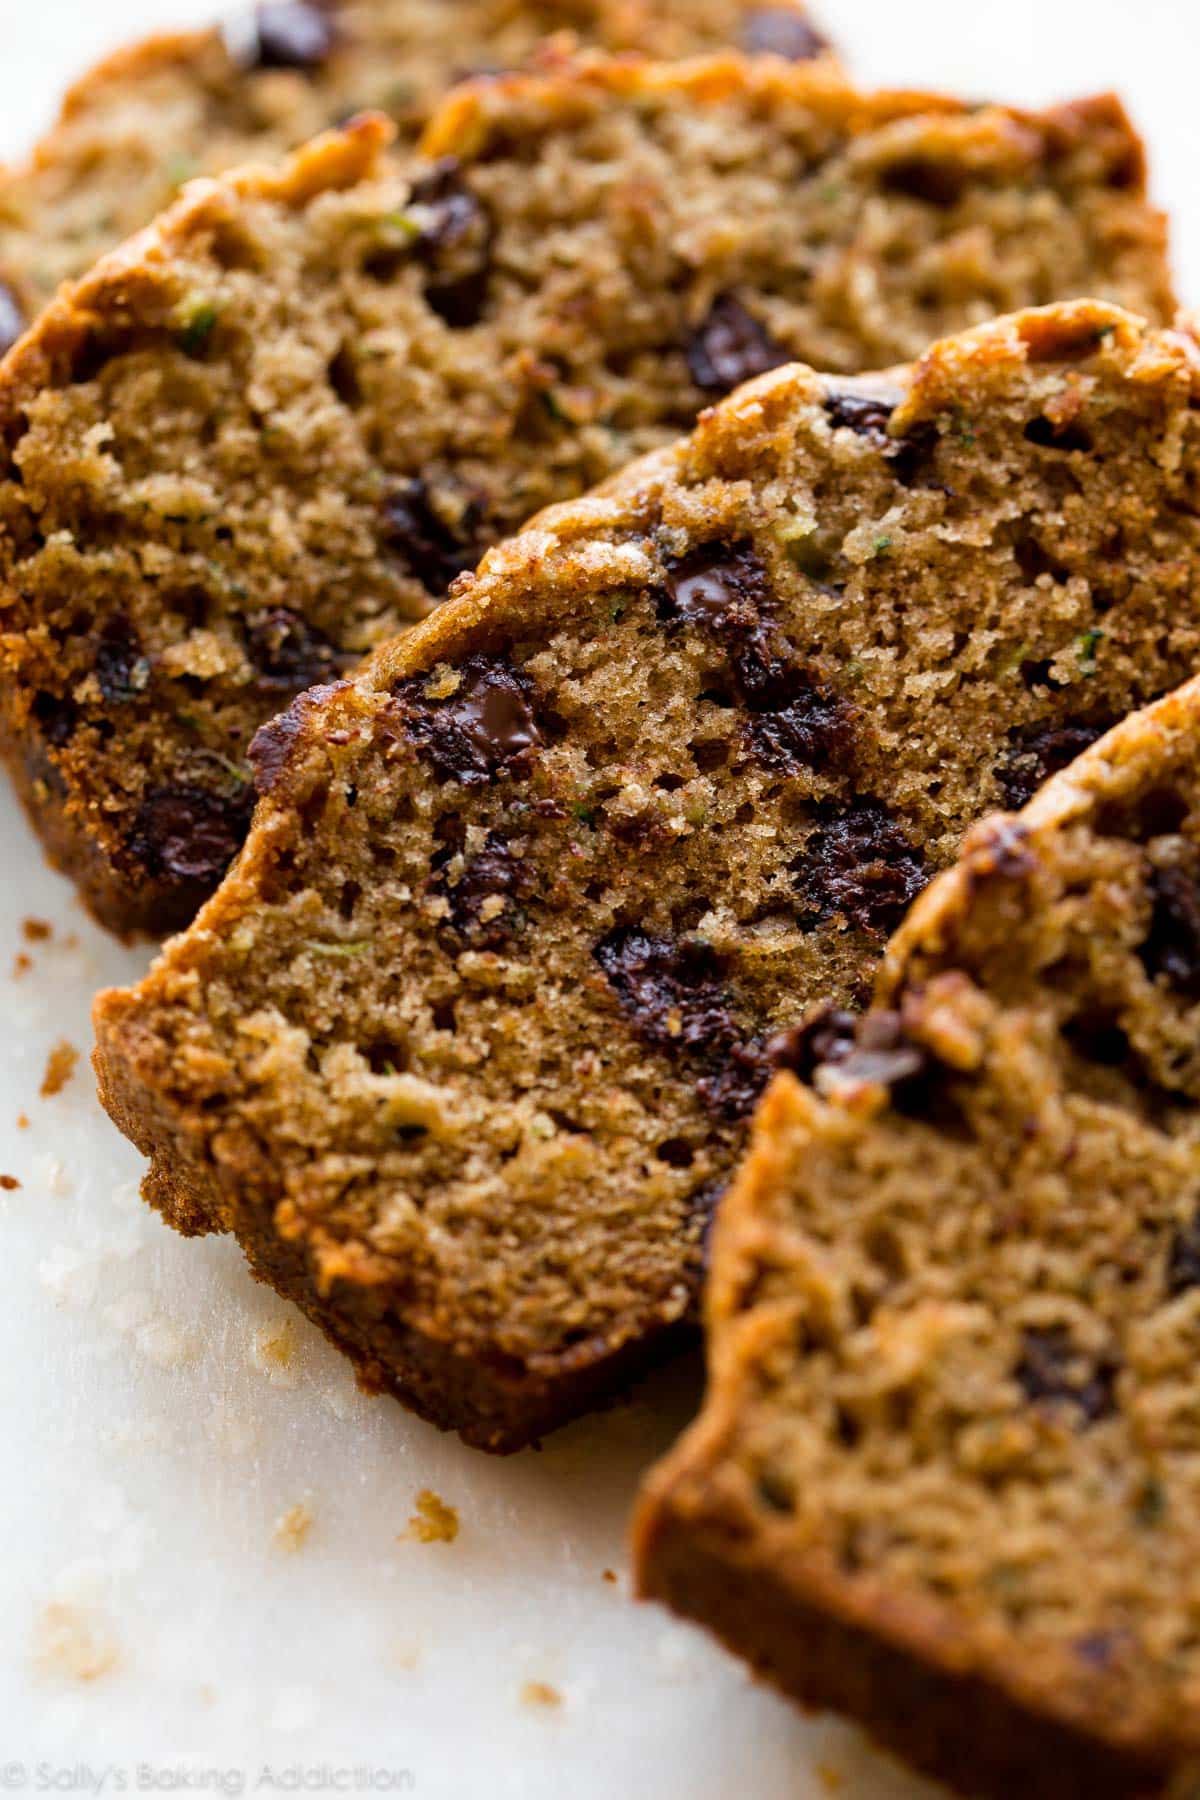
Since it will soon be time to harvest veggies from the garden, I thought I’d share my 2 favorite zucchini dessert recipes. The first is zucchini bread—a moist, flavorful bread.
Zucchini Bread
3 eggs
2 cups sugar
1 cup oil
1 Tbsp vanilla
2 cups grated zucchini
2 cups flour
1 Tbsp cinnamon
1 tsp baking soda
1 tsp baking powder
Chopped nuts and/or raisins (optional: I use both)
Preheat oven to 350*. Grease and flour 2 8-inch loaf pans. Beat the eggs till frothy. Then add the sugar, oil and vanilla. Beat till thick and lemon colored. Stir in the zucchini. Mix all of the last ingredients (except the nuts or raisins) in a smaller bowl, then add to the egg mixture. Mix well. Stir in the nuts and raisins if desired. Divide into the 2 loaf pans. (I have also made this recipe using the mini loaf pans to share.) Bake for one hour. Enjoy!
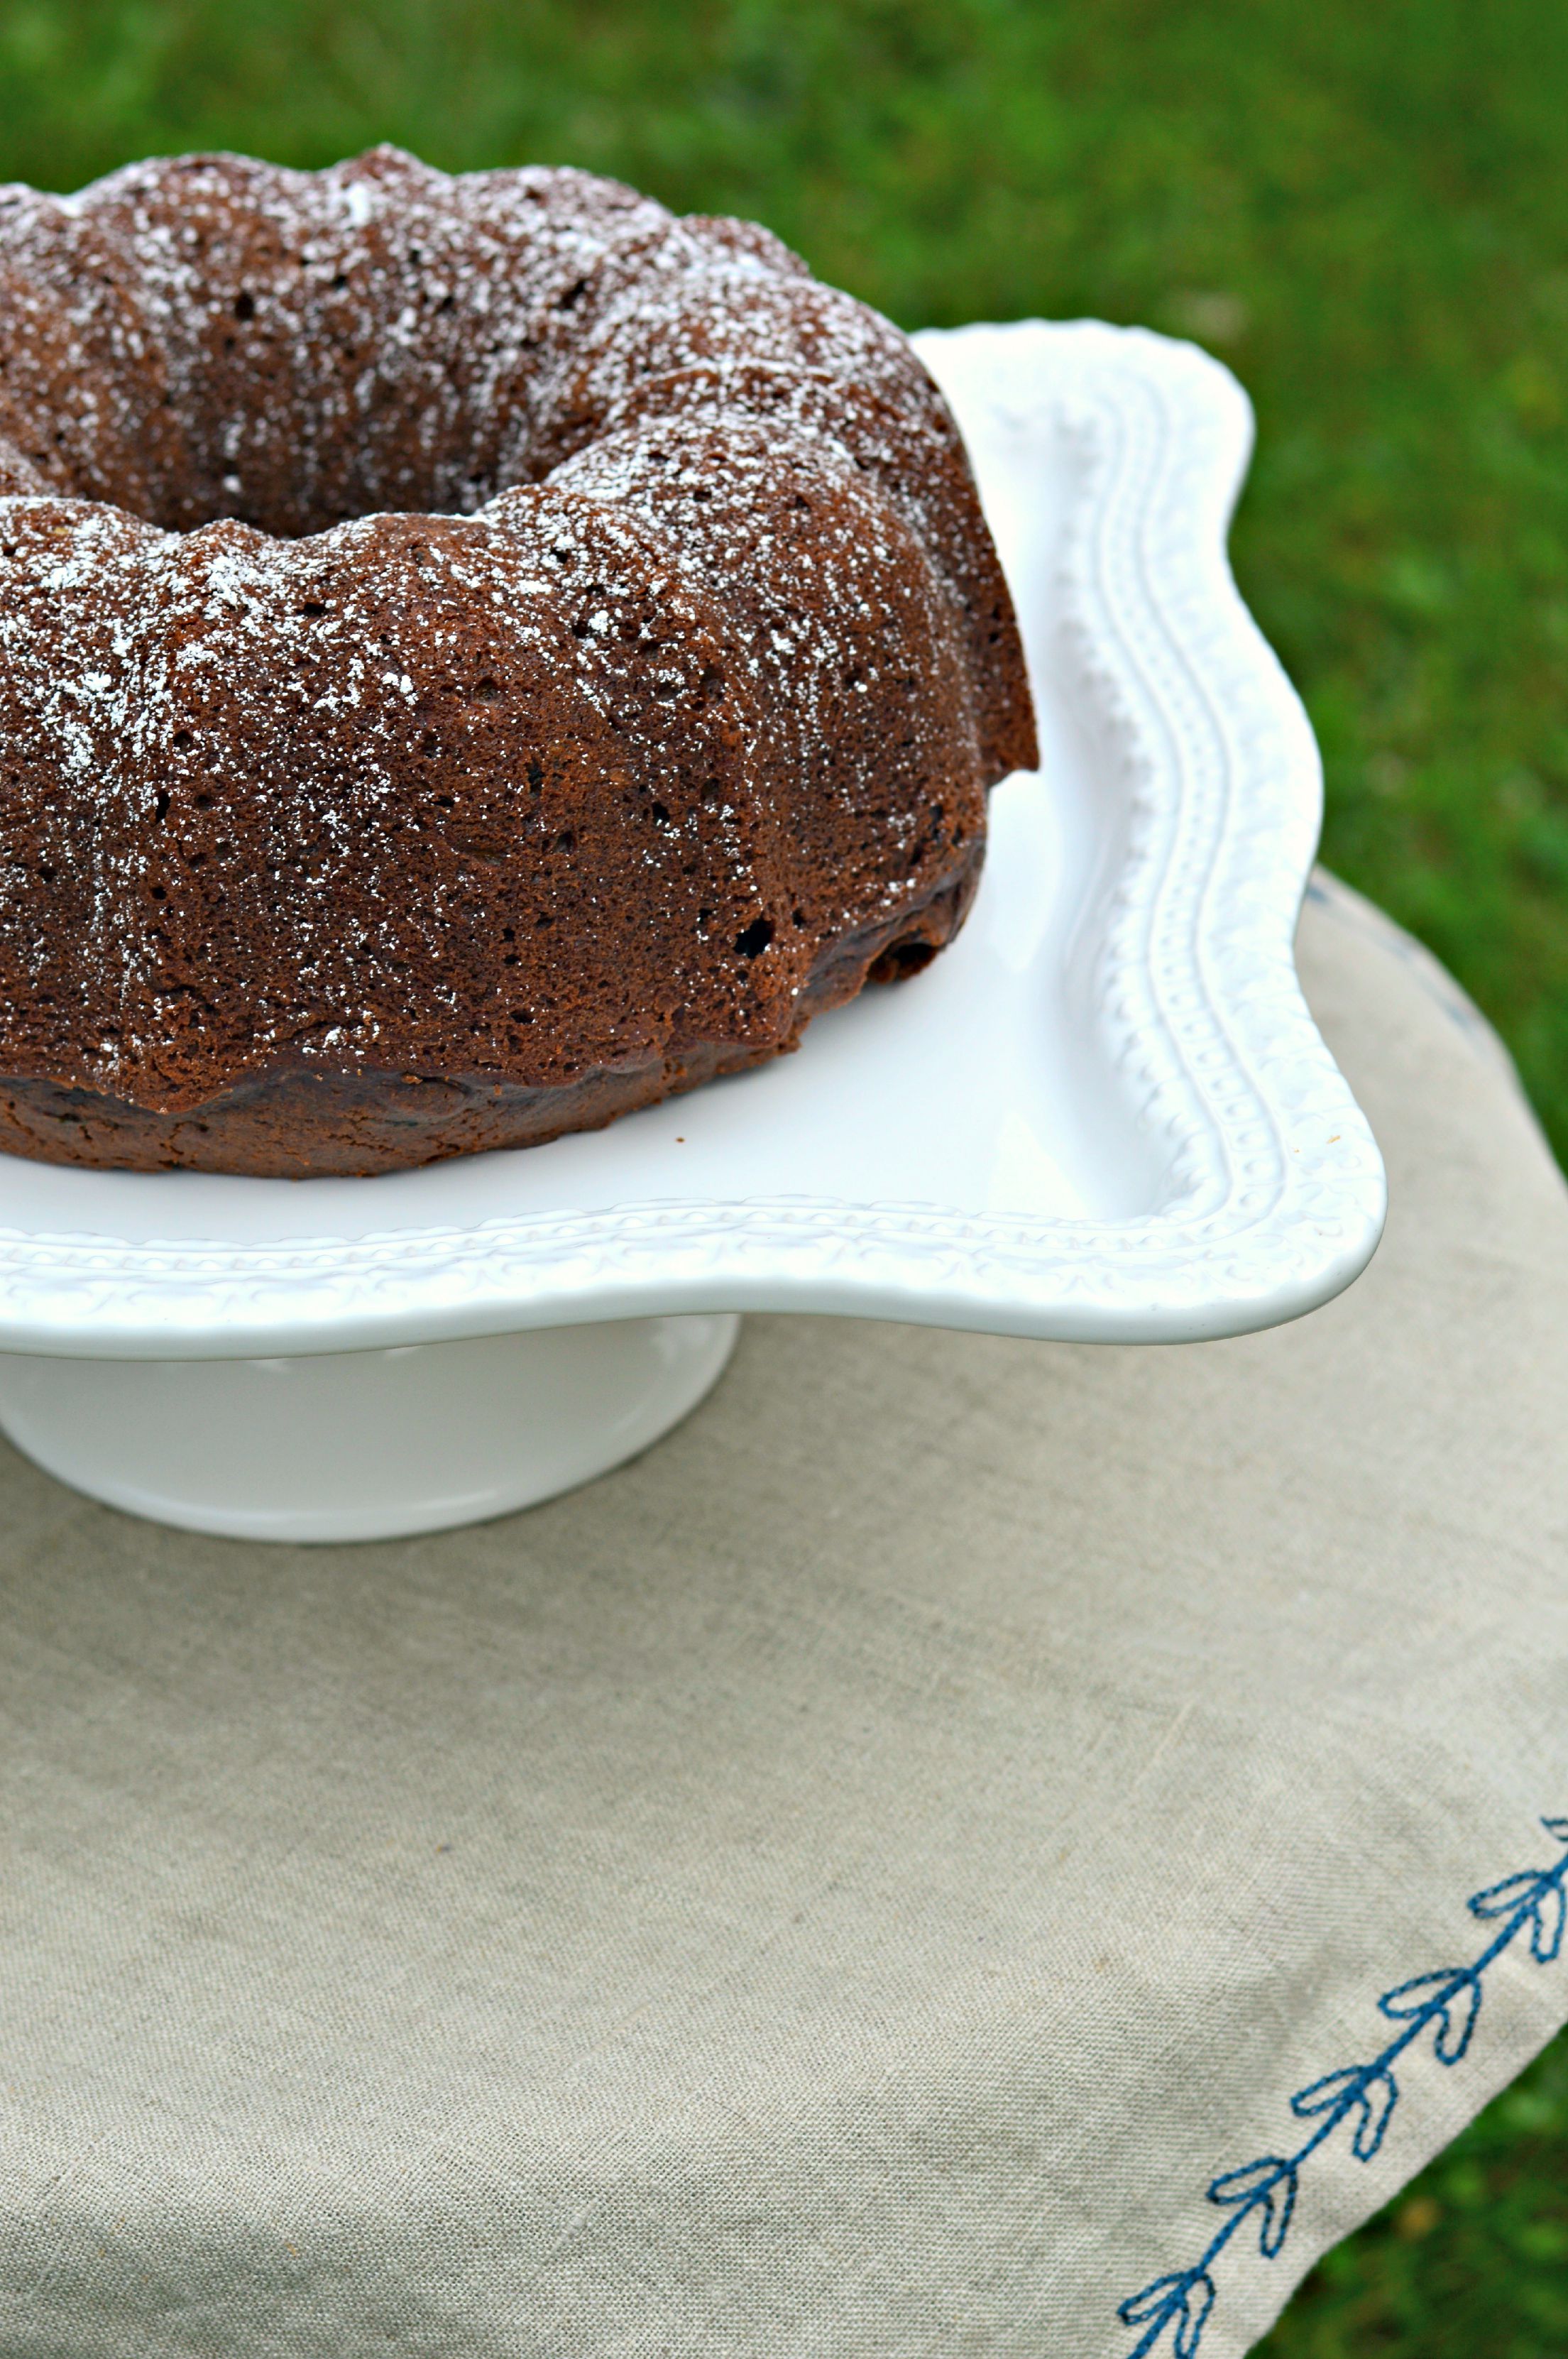
Chocolate Zucchini Cake
2 cups flour
2 cups sugar
¾ cup cocoa
2 tsp baking soda
1 tsp baking powder
½ tsp salt
1 tsp cinnamon
4 eggs
1 ½ cups oil
3 cups grated zucchini
¾ cup chopped walnuts
Preheat oven to 350*. Grease and flour a bundt or angel food pan. In a medium bowl, stir together the flour, sugar, cocoa, baking soda, baking powder, salt and cinnamon. Add eggs and oil, and mix well. Fold in the zucchini and nuts. Pour into the prepared pan. Bake for 50-60 minutes. Cool completely before frosting with your favorite frosting. I like to dust with powdered sugar. Enjoy!
Today we’re going to make carrot cake! I like this recipe because it uses a cake mix, genuine carrots and chopped nuts!
Carrot Cake
1 package yellow cake mix (I like Duncan Hines Moist Deluxe)
4 eggs
1/2 cup crisco oil
3 cups grated carrots
1 cup finely chopped walnuts (pecans also work in this recipe)
2 tsp ground cinnamon
Preheat oven to 350*. Grease and flour 2 8-inch cake pans. Combine cake mix, eggs, oil, carrots, nuts and cinnamon in a large bowl. Beat at low speed until moistened, then for 2 minutes beat on medium speed. Pour into pans. Bake at 350* for 35-40 minutes. Cool in pans for 10 minutes, then turn out onto wax paper lined plates. When completely cooled, frost. I have included a recipe for cream cheese frosting which I do not use because I don’t like cream cheese frosting…LOL
Cream Cheese Frosting
1 8-ounce package cream cheese, softened
1/4 cup butter, softened
2 tsp vanilla
4 cups confectioners sugar
Place cream cheese, butter and vanilla in a large bowl. Beat at low speed until smooth and creamy. Add confectioners sugar gradually, beating until smooth. (If the frosting needs to be thickened, add more confectoners sugar. If it needs to be thinned, add a little milk. ) Fill and frost the cooled cake. Garnish with additional chopped nuts if desired. Enjoy!
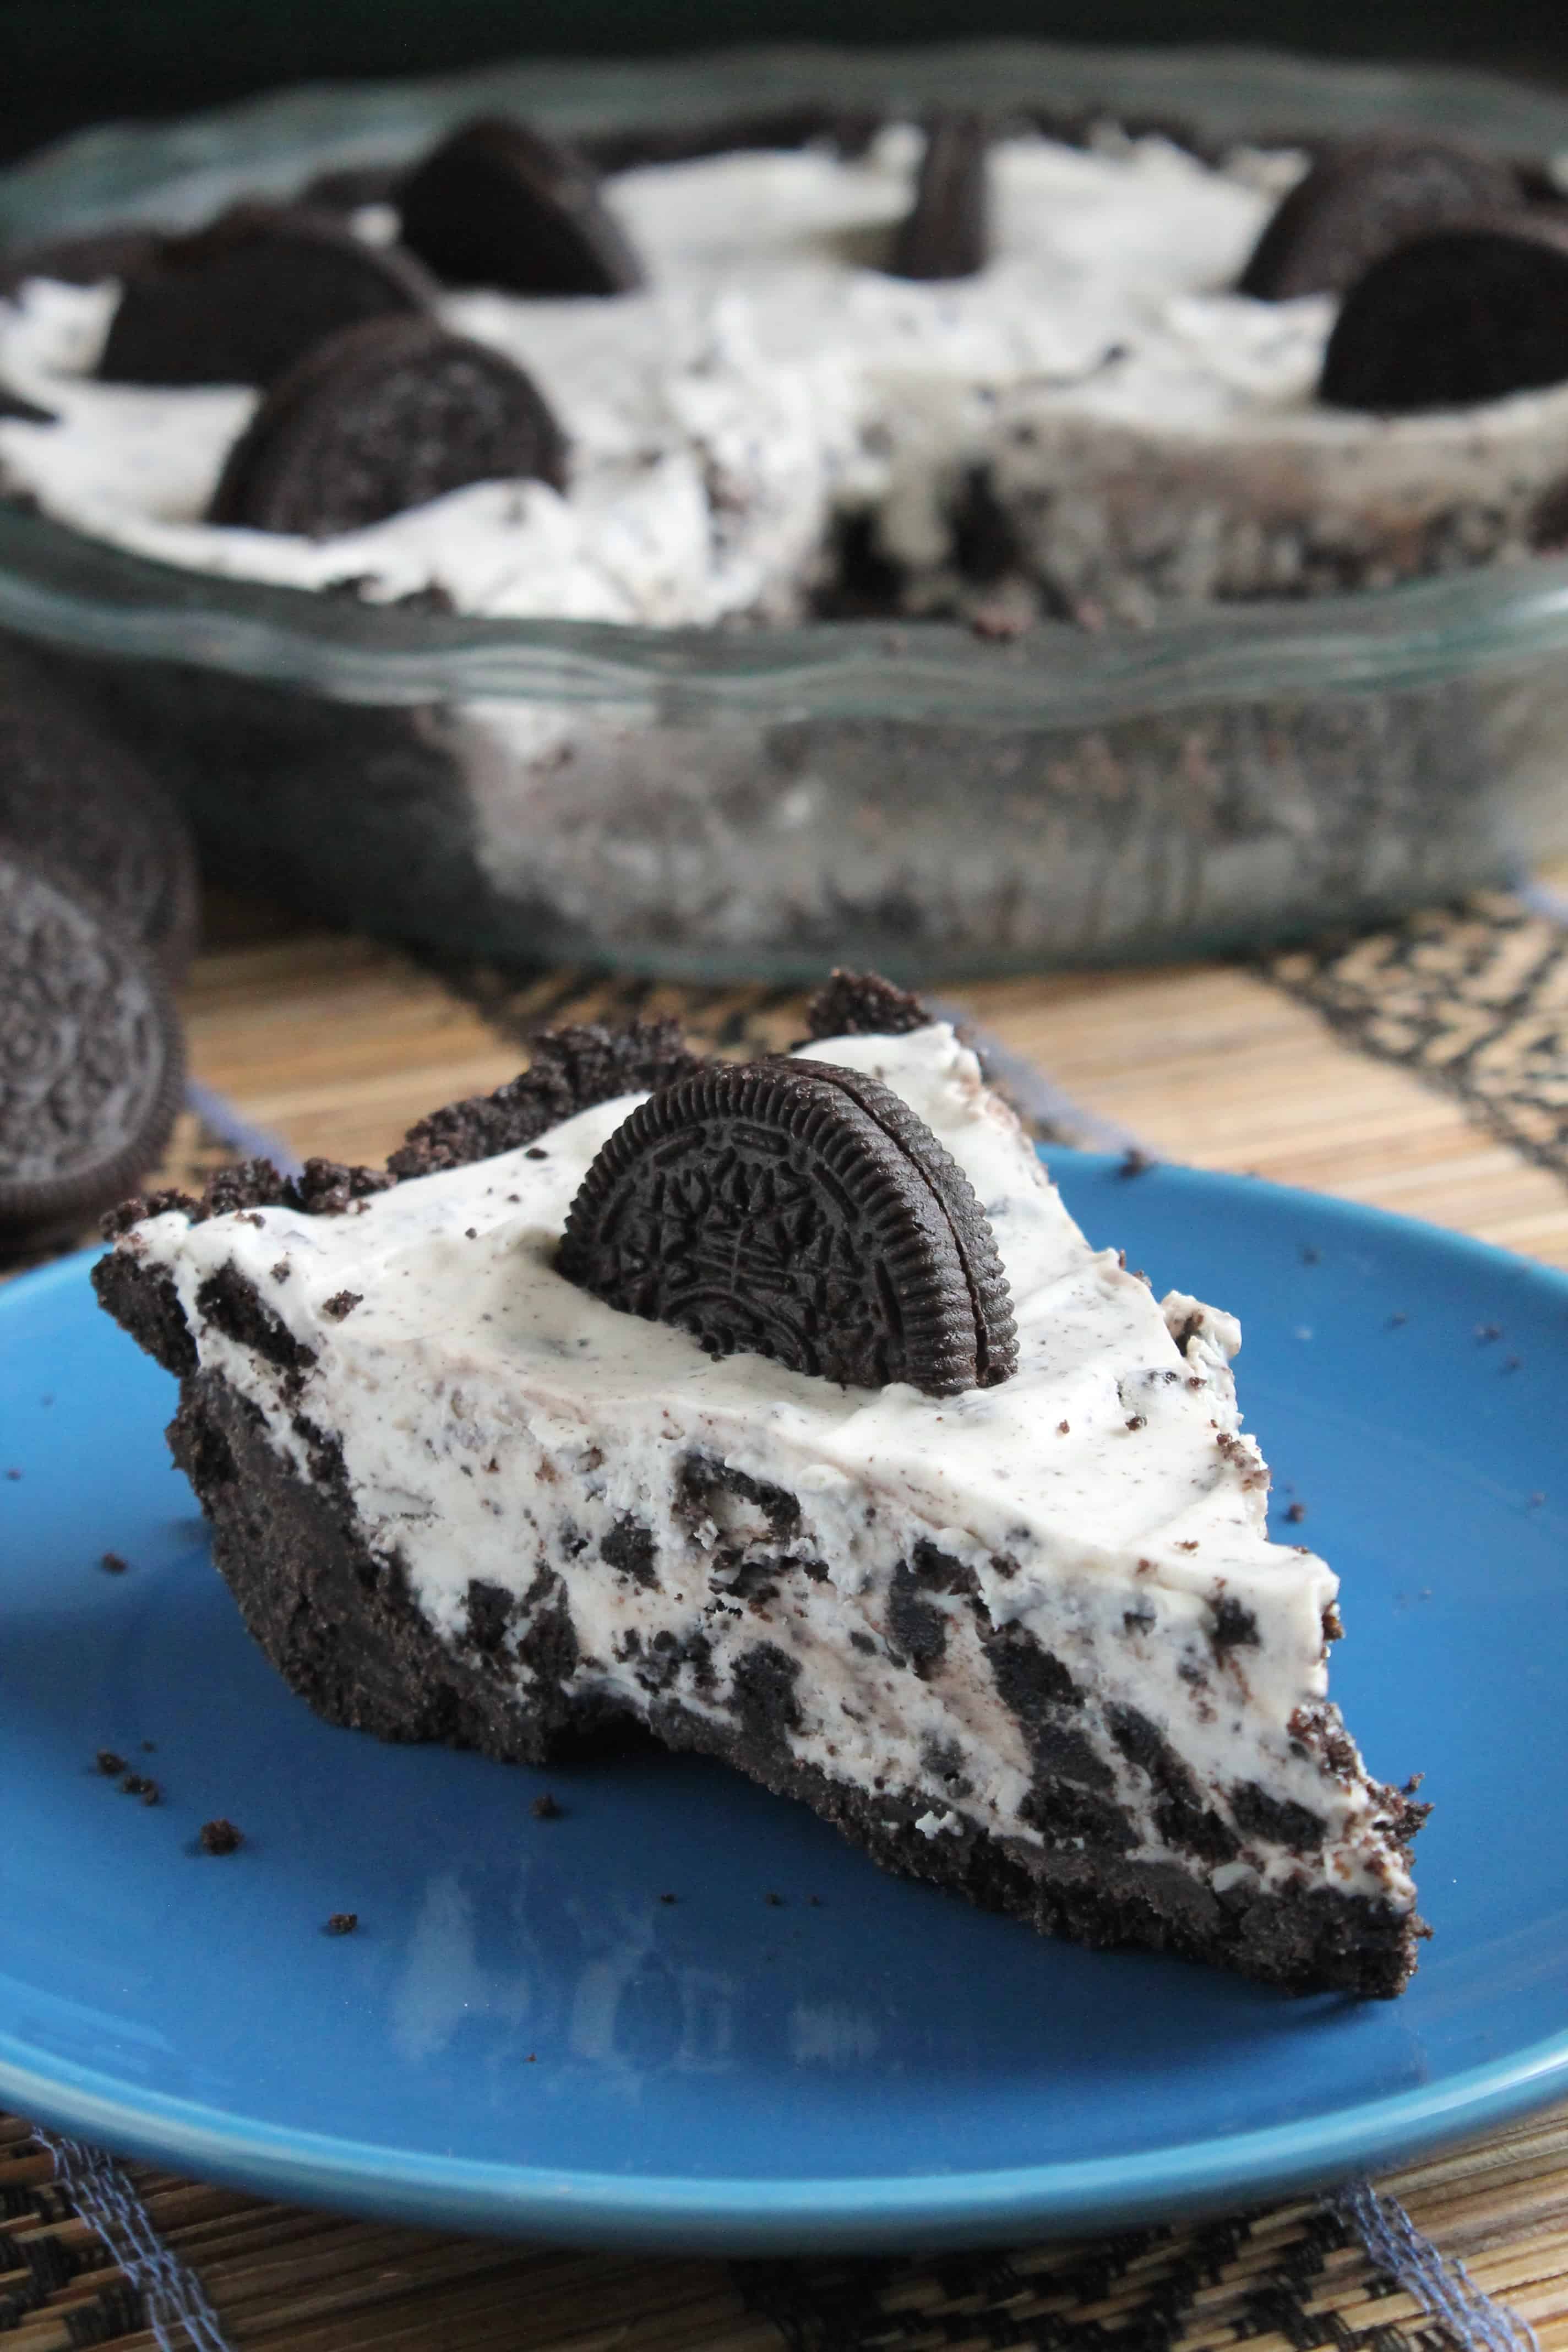
Summertime is the best time for NO BAKE (!) recipes and today I’ve got 3 delicious and super easy ideas using a store bought Oreo cookie crust. Easy Peasy!!
Ice Cream Oreo® Cookie Pie
Ingredients:
16-ounce package chocolate sandwich cookies
1 quart vanilla ice cream, softened
1 8-ounce container of Cool Whip, thawed
I Oreo Cookie Crust
Reserve 8 cookies–place the remaining cookies in a plastic Ziploc bag and using a rolling pin, crush the cookies. Stir the crushed cookies into the softened ice cream and mix well. Spoon the ice cream mixture into the Oreo crust. Place into the freezer until firm, about an hour. Remove from the freezer and spoon the Cool Whip over the ice cream layer and top with the Oreos. Enjoy!
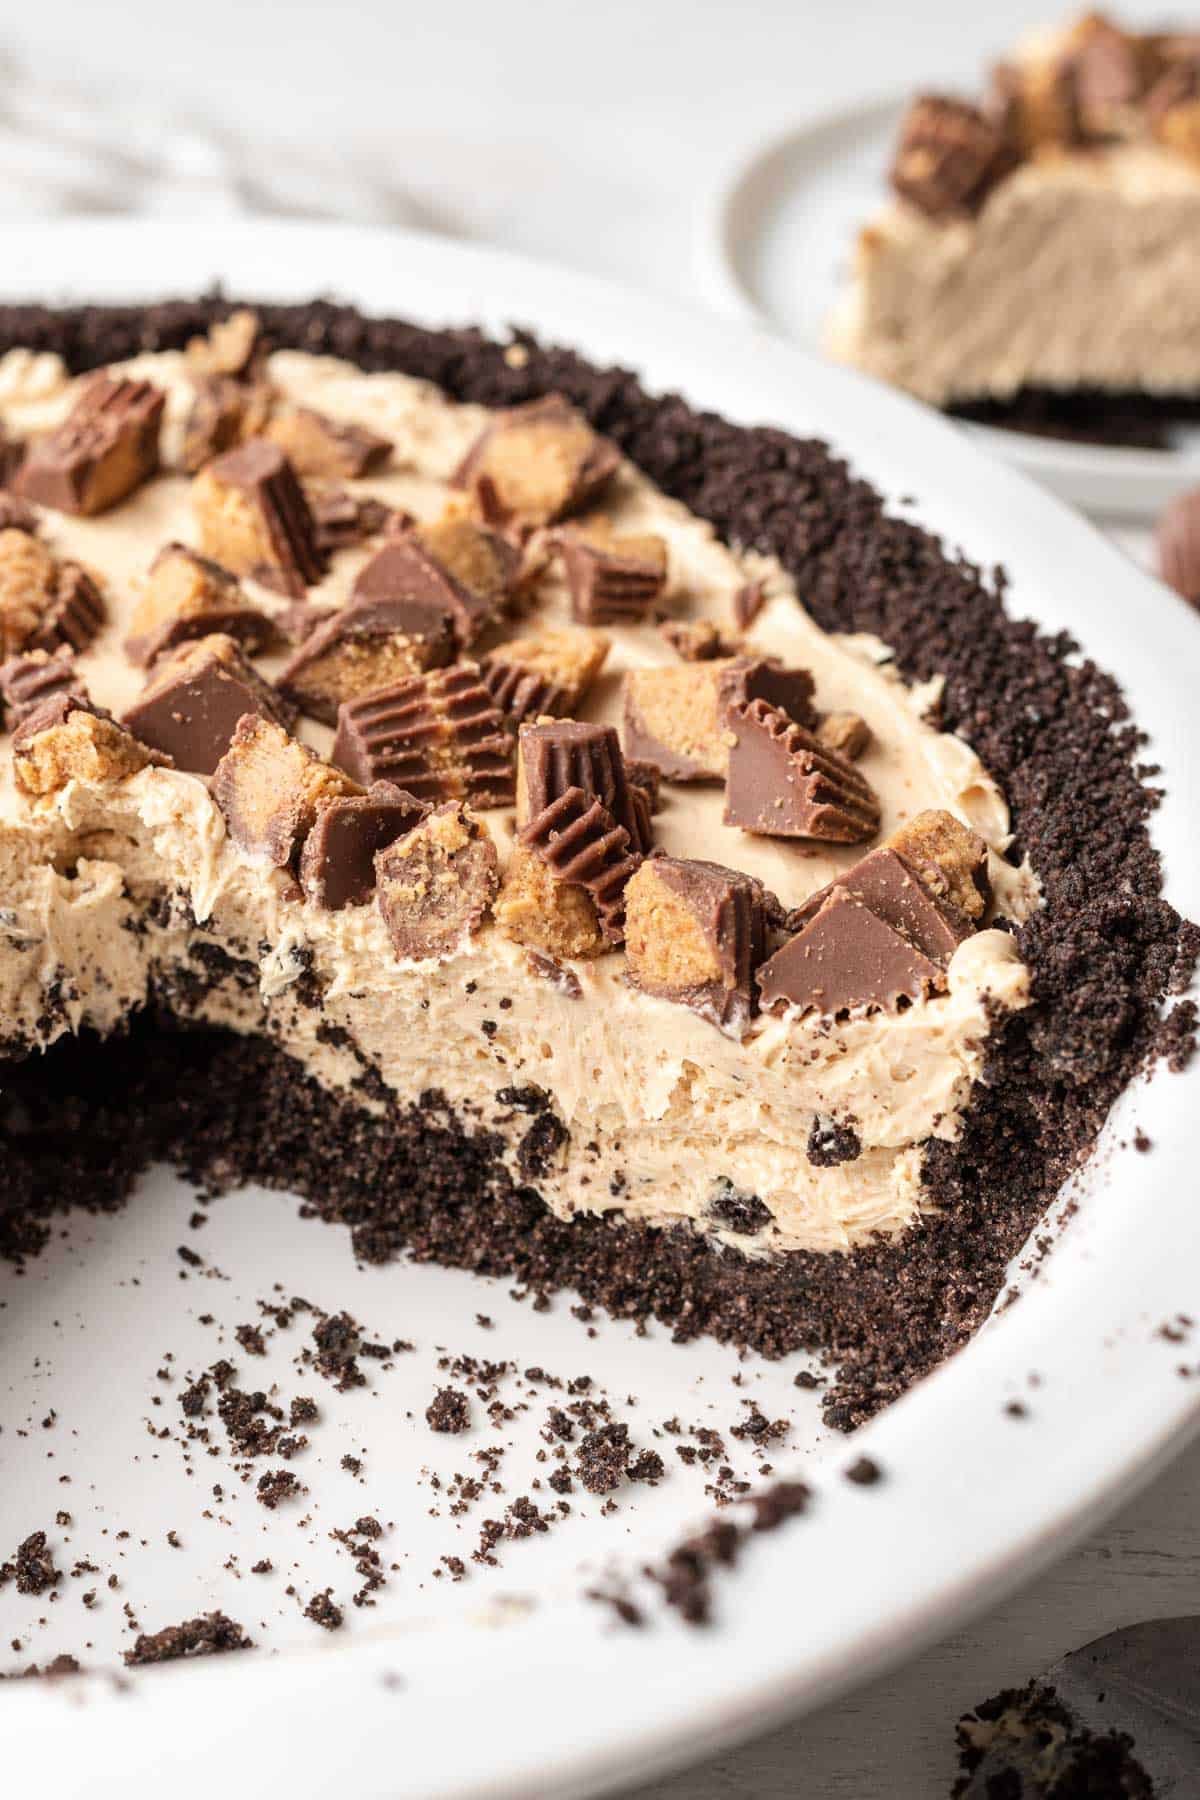
Peanut Butter Pie
Ingredients:
Oreo cookie crust
1 8-ounce cream cheese, softened to room temperature
1 cup creamy peanut butter
¾ cup powdered sugar
1 8-ounce Cool Whip, thawed
Reese’s peanut butter cups (chopped—for topping)
With an electric mixer, beat the peanut butter and the cream cheese until smooth. Add in the powdered sugar and mix. Add the Cool Whip. Spoon into the Oreo cookie crust and top with the chopped peanut butter cups. Chill in the freezer for at least 3 hours (or 5 hours in the refrigerator). Enjoy!
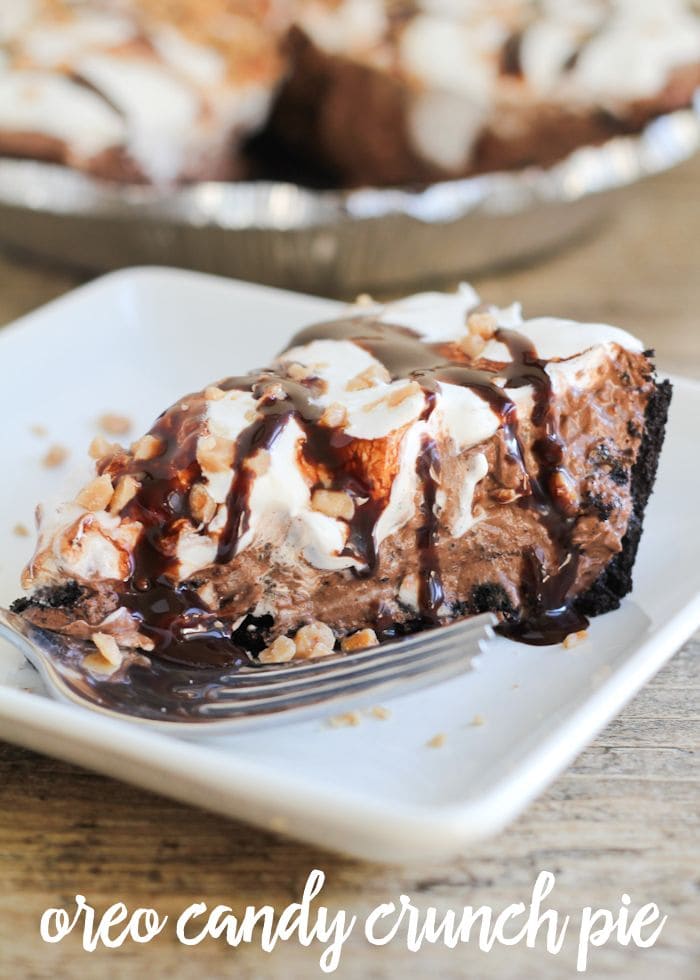
Oreo Candy Crunch Pie
Ingredients:
3.9-ounce instant chocolate pudding mix
2 cups milk
1 8-ounce Cool Whip, thawed
1 cup Heath toffee bits
2 Tbsp Hershey’s syrup
6 Oreos, crushed
1 Oreo cookie crust
Make pudding as directed. Add half the Cool Whip and ¾ cup of the Heath bits. Stir in the crushed Oreos. Pour into crust. Drizzle the Hershey’s syrup over pudding mixture. Top with the remaining Cool Whip and toffee bits. Refrigerate for 3-4 hours before serving. Enjoy!
Many years ago, when all of our families were younger and we lived much closer to one another, we had wonderful picnics and parties. We would rotate who hosted, who brought the meats, who was in charge of games for the kids and so on. No one family was stuck doing it all, all the time.
not us, but could be
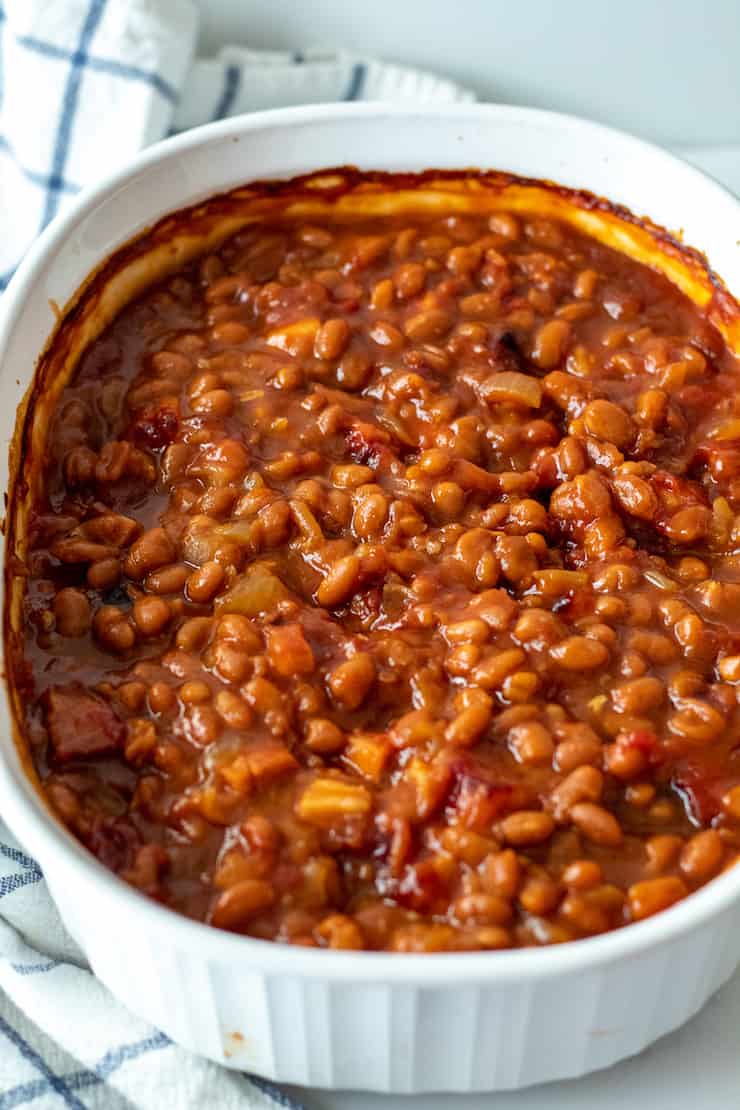
There were traditions, of course, my mom made the potato salad and I was always in charge of games. My mother-in-law always made either the beans or occasionally mac & cheese. Her beans, though, were the STANDARD for baked beans! They were homemade, soaked overnight, honest to goodness baked beans! And the flavor? Perfection! So much so that my sister-in-law and I repeatedly asked for her recipe.
She always promised to give us the recipe, but event after event would pass, and still we were recipe-less. One day, while we were planning the next picnic, my sister-in-law and I decided we would tag team her to get the recipe. (After all, she never said it was her own secret, never-to-be-revealed recipe. That we would have respected.) When we invited her and my father-in-law (it was at my sister-in-law’s house this time), I told her I would come over the morning of the picnic and help with the beans. That way, I told her, I could write the recipe down as we made the beans and she wouldn’t have to worry about it.
Imagine my surprise when she told me she already had it written down for us! And true to her word, she brought us each a recipe card! I tucked the card into my purse, and didn’t give it another thought. A few weeks later, I was planning hamburgers for supper and pulled out the recipe to make a pot of beans. Hmmmmm…there was no need to soak beans overnight? Her recipe was just throwing ingredients into a casserole, baking for half an hour, stirring and repeating that process 2 more times. Puzzled, I called her and asked. Sure enough, she said she no longer soaked the beans, just used northern beans and assured me this was her recipe.
At dinner that night, the beans were good, but not my mother-in-law good, so the next day I called my sister-in-law. I wondered if she made the beans and how they turned out. She said she tried the recipe—and while they were good—they weren’t quite like our mother-in-law’s. We puzzled over it for a bit, and then she asked, do you think it’s the Worcestershire Sauce? I asked what Worcestershire Sauce? Hmmmmmmm…as we compared the recipes, each of our recipes contained ingredients the other did not. Sigh…
When we confronted my mother-in-law about the discrepancies, she denied knowing that she did that. She explained that she was always “tweaking” the recipe and we both got possible versions. Neither of us bought the excuse, but filed it under “keeping the family peace” and moved on.
Several years later, my mother-in-law passed away suddenly and since my sister-in-law was no longer a part of the family, my daughter and I were tasked with cleaning out her kitchen. We came upon the recipe box and sat down to thumb through the recipes. My daughter was anxious to “inherit” the mac & cheese and nut tassie recipes and I was curious about the beans. None of those was in the box. We were stumped. Perhaps she had her recipes memorized and never wrote them down?
We moved on to other cabinets and eventually found the casserole dish she always brought the mac and cheese in. My daughter gleefully claimed the dish. If she couldn’t have the recipe, she could at least have the dish! Then she opened the freezer. There on the shelf were a half dozen Stouffer Mac & Cheese dinners…the size that would fit perfectly into the casserole dish she was holding.
Our eyes locked over the casserole dish and we burst out laughing. To this day, I will always believe I am making the best baked beans there is. Here is my adopted recipe:
Today’s recipe came to me some 40 years ago when I worked in a small factory with a group of Portuguese women. They brought this sponge cake for all the parties we had and it always went so fast! It only takes 4 ingredients and is fairly easy. The only drawback is beating the egg whites till stiff peaks form. (If you have a stand mixer, you can ignore that last remark…lol)
Portuguese Sponge Cake
12 eggs separated
2 cups of sugar
1 1/2 cups flour
1 tsp baking powder
Preheat the oven to 350*. Grease an angelfood cake pan using 1/2 tablespoon butter or margarine. After the pan is greased, coat the pan with granulated sugar. This butter/sugar coating gives the sponge cake an excellent crust. DO NOT use a bundt pan!
In a large bowl, cream the egg yolks with the sugar. Add the flour and the baking powder. In a separate large bowl, beat the egg whites on high until stiff peaks form.
Gently fold the egg whites into the first mixture, folding until the 2 mixtures are combined. Spoon into the prepared angelfood pan.
Bake for 45 minutes.
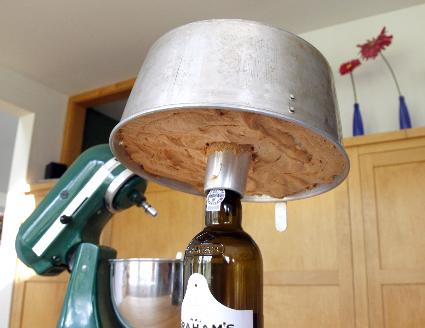
After removal from the oven, invert the cake on a bottle or covered upside funnel as you do regular angelfood cakes.