Whenever anyone asks me what I want for Christmas, I always reply…make me something! I love handmade gifts. My son has made me several that I treasure! When he was in college and wanted a knitted blanket, he taught himself to knit. That Christmas I got a hand knitted shawl. (It is cream colored, dainty and perfect, but not me at all, lol). For Mother’s Day, he got a glass cookie jar and used a cricut to put “Make Mother’s Day Great Again” on it.
One Christmas he gave me a picture he painted—I have it hanging in the living room. It’s a winter scene in the forest—I think it’s beautiful!
Then he discovered his love of woodworking! He made me this wooden tray out of so many tiny pieces for Christmas one year, intending for me to use it for cookies, but I won’t risk anything happening to it!
Last year he made me a new cutting board that I can use for rolling out cookies. He made the board—it has a delicate scroll on the side– and then he added a lip so the board won’t budge while I’m rolling out dough!
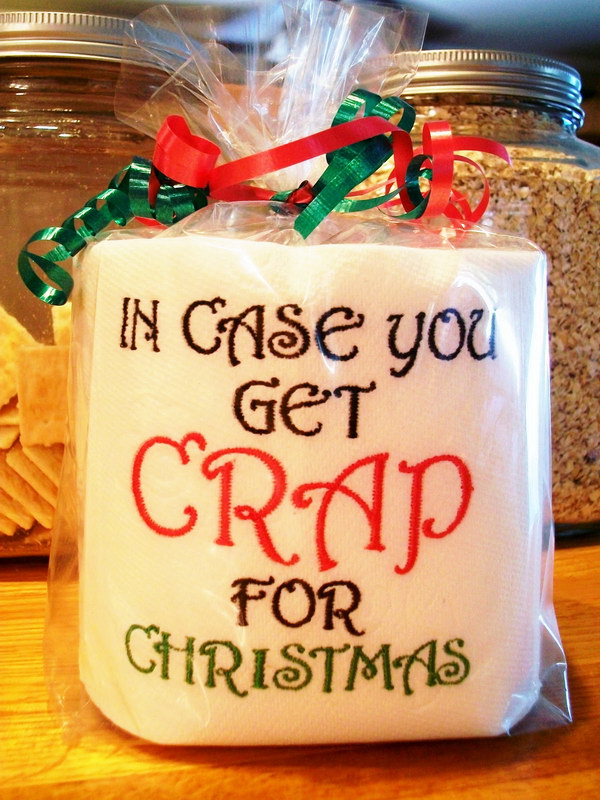
Now I know I’m lucky to have such a talented son, but homemade gifts do not need to be so complicated! Take a look at some of the funny suggestions for stocking stuffers that are sure to tickle someone’s fancy! And quite easy to make yourself!
Preheat oven to 200°F. Mix applesauce and cinnamon in small bowl until a smooth ball of dough is formed. (You may need use your hands to incorporate all of the cinnamon.) Using about 1/4 of the dough at a time, roll dough to 1/4-inch to 1/3-inch thickness between two sheets of plastic wrap. Peel off top sheet of plastic wrap. Cut dough into desired shapes with 2- to 3-inch cookie cutters. Make a hole at top of ornament with drinking straw or skewer. Place ornaments on baking sheet.
Bake 2 1/2 hours. Cool ornaments on wire rack. (Or, to dry ornaments at room temperature, carefully place them on wire rack. Let stand 1 to 2 days or until thoroughly dry, turning occasionally.)
Insert ribbon through holes and tie to hang. Decorate with opaque paint markers, found in arts and crafts stores, if desired.
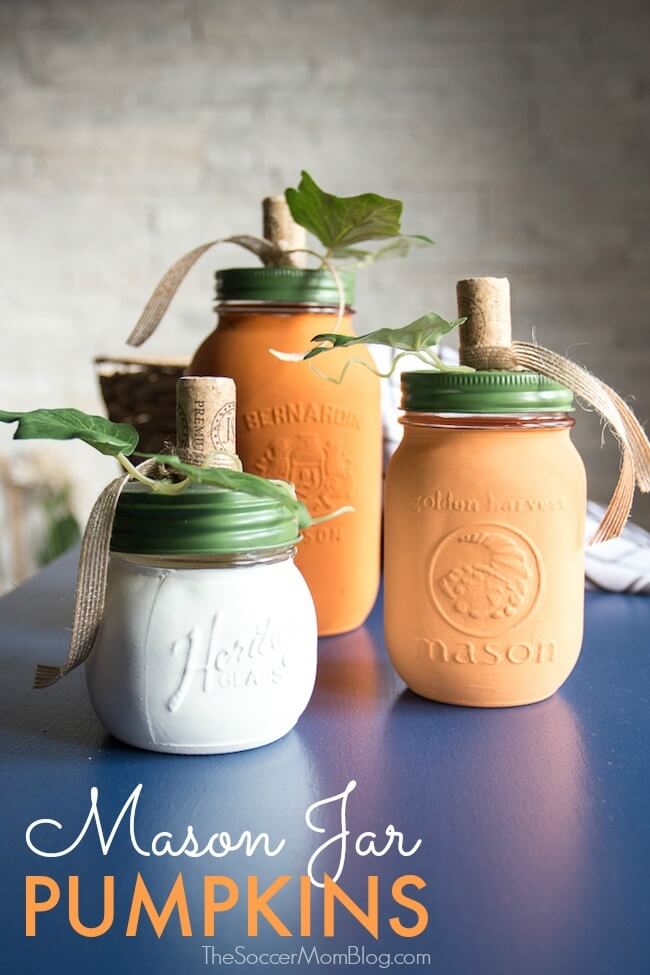
We all know the turkey is the STAR of Thanksgiving, and even though that “puppet” above is do-it-yourself, lol, I was thinking of something a little more grownup. The first offering is painted mason jars. (Seems you can use mason jars for every holiday there is!)
They make a wonderful grouping, require little skill (being able to paint and glue) and they look awesome! If you’d like step by step instructions, please visit TheSoccerMomBlog.com
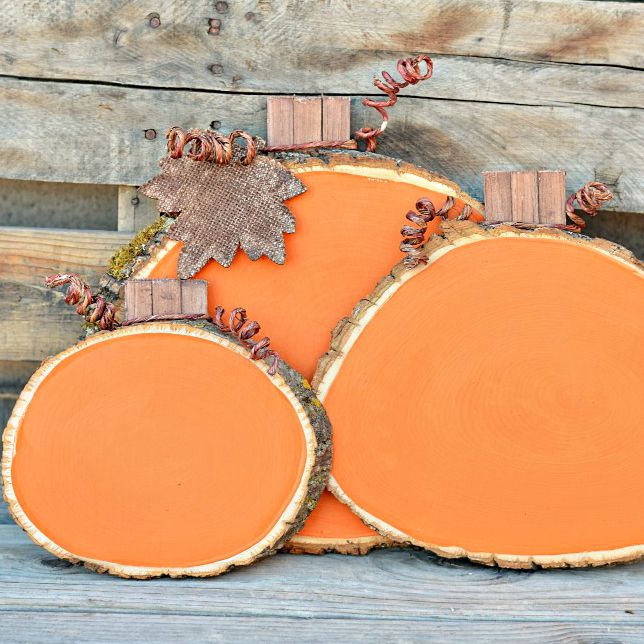
The second offering is also pumpkins, but these require certain skills.
This is from: woodyouliketocraft.blogspot.com. A slice is cut from a log (the skilled part). Then apply paint to nearly the edges. The “stem” is a 2 1/2 inch piece of thin wood glued to the back of the wood slice. Spray stiffener (starch) or mod podge can be applied to burlap, and then when dry, leaves can be cut from that. Spray the stiffener on thick jute to create the curlicue. (Wrap the jute around a thick dowel, apply the stiffener and allow to dry before sliding it off the dowel.) Glue in place.
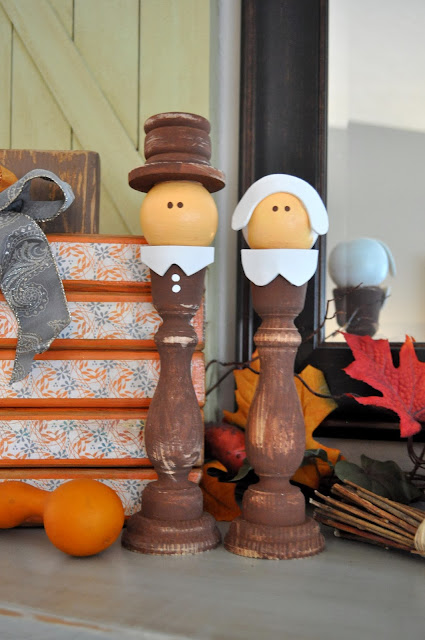
The last offering is a “reclaimed” project that I adore!
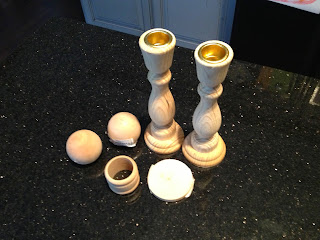
When I saw the pilgrim pair, I remembered I had 2 wooden candle holders in a box in my basement. But they could be found at flea markets and yard sales. The heads are 2 inch wooden doll heads (Hobby Lobby $1.99 each). The hat is a reclaimed wooden napkin ring and a wooden disk (Hobby Lobby $.29 each). The collars and the lady’s hat brim are white foam remnants.
There are 2 ways to approach this project: glue the wooden pieces together before painting OR paint the pieces first and glue second.
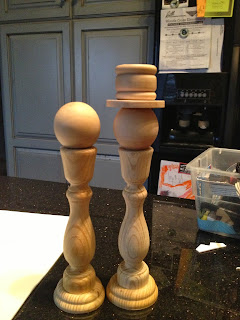
The directions say to first remove the metal insert in the candle holders or bend them inward. Mine did not have them at all. He then glued his pieces together.
He painted the pilgrims next, allowed them to dry, and cut out the foam pieces. Then he glued the foam pieces on and viola, they’re done! Easy peasy!
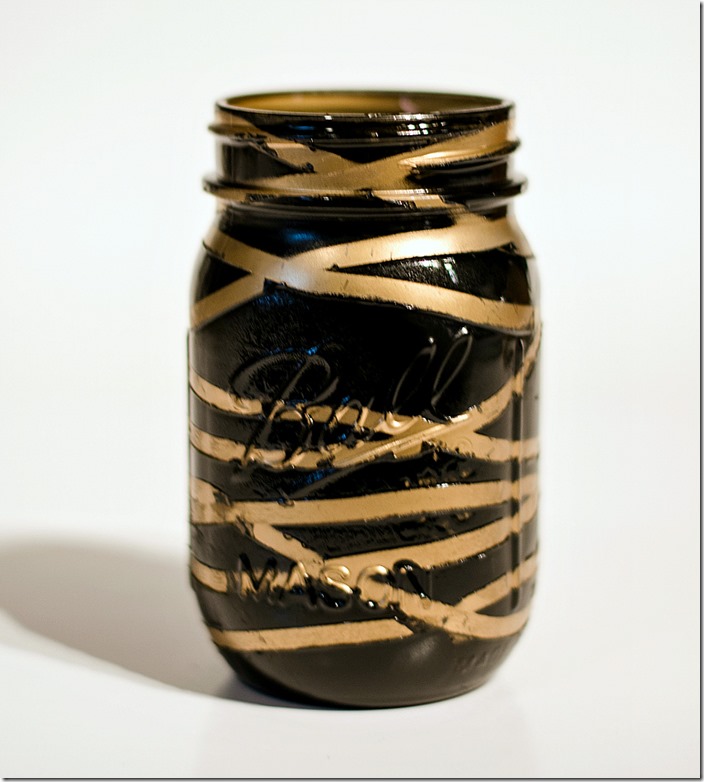
How adorable are these? And they are super easy to make yourself! Start by spray painting the jars metallic gold (I would have chosen white). Any type of jar will work. Allow to dry overnight; maybe give a second coat. Allow to completely dry. Wrap rubber bands around the jar. Make sure to leave a larger opening for the eyes.
Spray paint with black paint…let dry.
Remove rubber bands and touch up if desired.
Add white dots for eyes. Let dry…add pupils. Viola!
As you can see from the above photo, (I am on the left) I love Halloween and costumes. My own mother didn’t recognize me when I showed up at her door for Trick or Treat. My father? he knew right away…lol…
And it doesn’t matter if you’re dressing a little one up for Halloween, or you need a costume for yourself, costumes can be expensive! But a little creativity and a dollar store can turn ordinary into extraordinary!
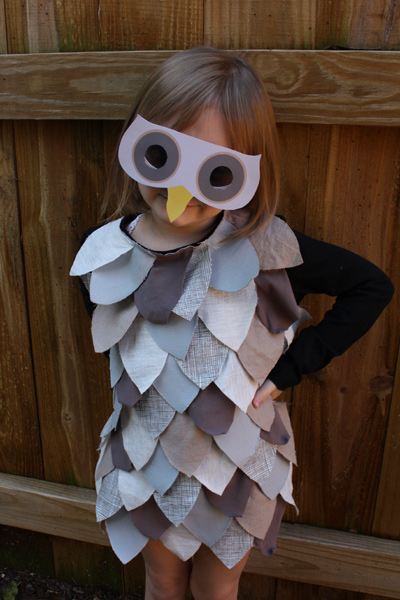
This OWL costume requires no sewing (you can sew the feathers on, but gluing is fast and easy.)
You cut the “feathers” out of old t-shirts or (dollar store to the rescue!) get some of their vinyl tablecloths—in any colors you want—and cut the feathers out of those. If you’re using those instead of gluing, you can simply tape them! The mask is simply glued to a pair of sunglasses.
Click here to download the template for mask and feathers: Download file
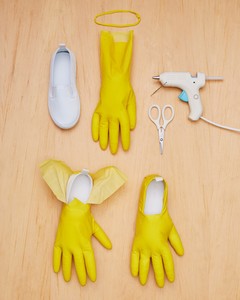
If you want to make any sort of bird feet, you’ll need rubber gloves, old shoes, some stuffing and a glue gun.
For making any sort of a hat, here is a great picture of how to make an inexpensive base that can be covered with anything.
Want to be an octopus? The legs from tights (from the dollar store!) can be stuffed and tied to a belt to wear around the waist.
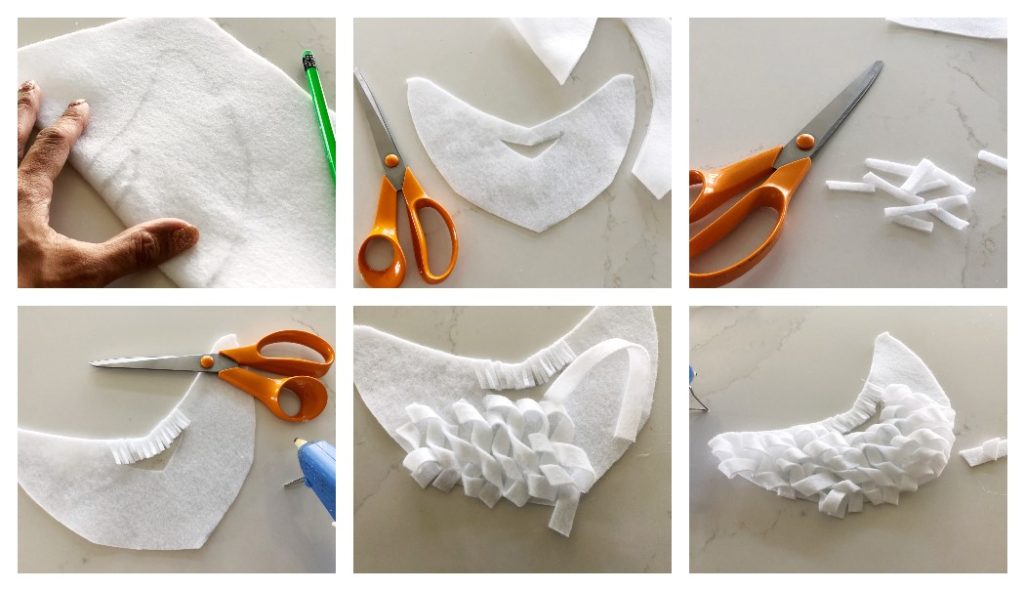
Do you need a beard and mustache for your costume? They can be expensive, but with felt, a string and some glue…it’s not expensive at all!
If you’re choosing to be an animal with a mane and a tail (think horse, lion or even unicorn) you could get yarn and cut and tie a lot of lengths together…or you could purchase pompoms from the dollar store. You may need more than one depending on the fullness you desire.
Wanna be a Minion? Grab a yellow knit cap and some black pipe cleaners. The glasses can be made with some black fabric and aluminum foil wrapped around cardboard tubes.
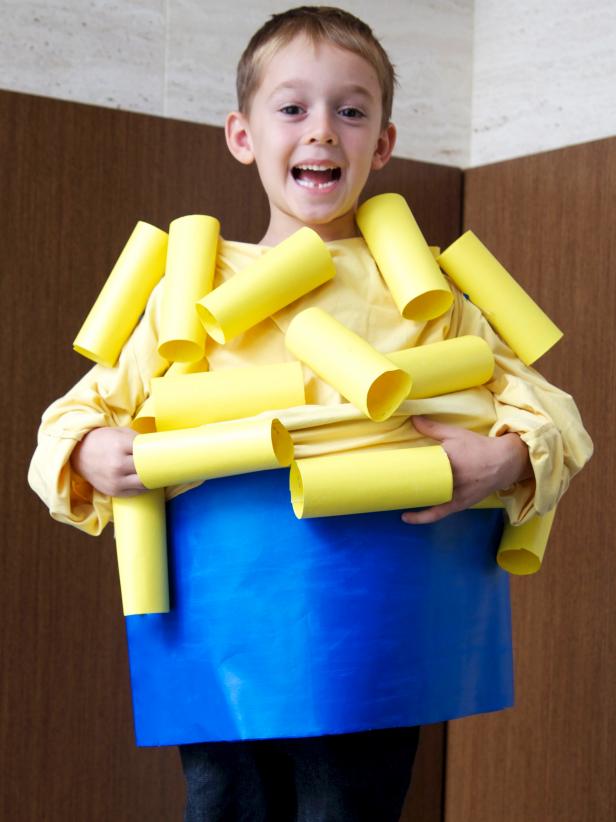
And speaking of cardboard tubes…paint them yellow/orange and glue them to a matching colored shirt to be mac & cheese!
Now if you’re thinking more high tech, and you need a jetpack (LOL), this is a very clever idea. And it can be upgraded! Plastic soda bottles are painted, then fastened to a strap around the chest. (Adding a clock dial and changing the color and adding more straps certainly kicks this up a notch!)
If you’re okay with using shirts you won’t wear again, you can make a giraffe costume. There are 2 ways to do this. First, get a shirt and pants (if you’re fanatical about having a total costume, lol) in a red/orange/brown color. Then simply use masking tape to create the look. This method should not render the clothes unusable afterwards. The second method will. Get a white shirt and white sweatpants. Use masking tape to create the giraffe block pattern, then PAINT the unmasked parts with red/orange/brown paint. Once dry, remove the masking tape.
One of the easiest and most clever costumes is the one you don’t have to wear! It’s a jellyfish. You get an umbrella, festoon it with twinkle lights and colored streamers. You can wear a black outfit while you stroll with the umbrella!
I saved this one for last—it’s not cheap or easy I would imagine—I just thought it was just so AWESOME!!!
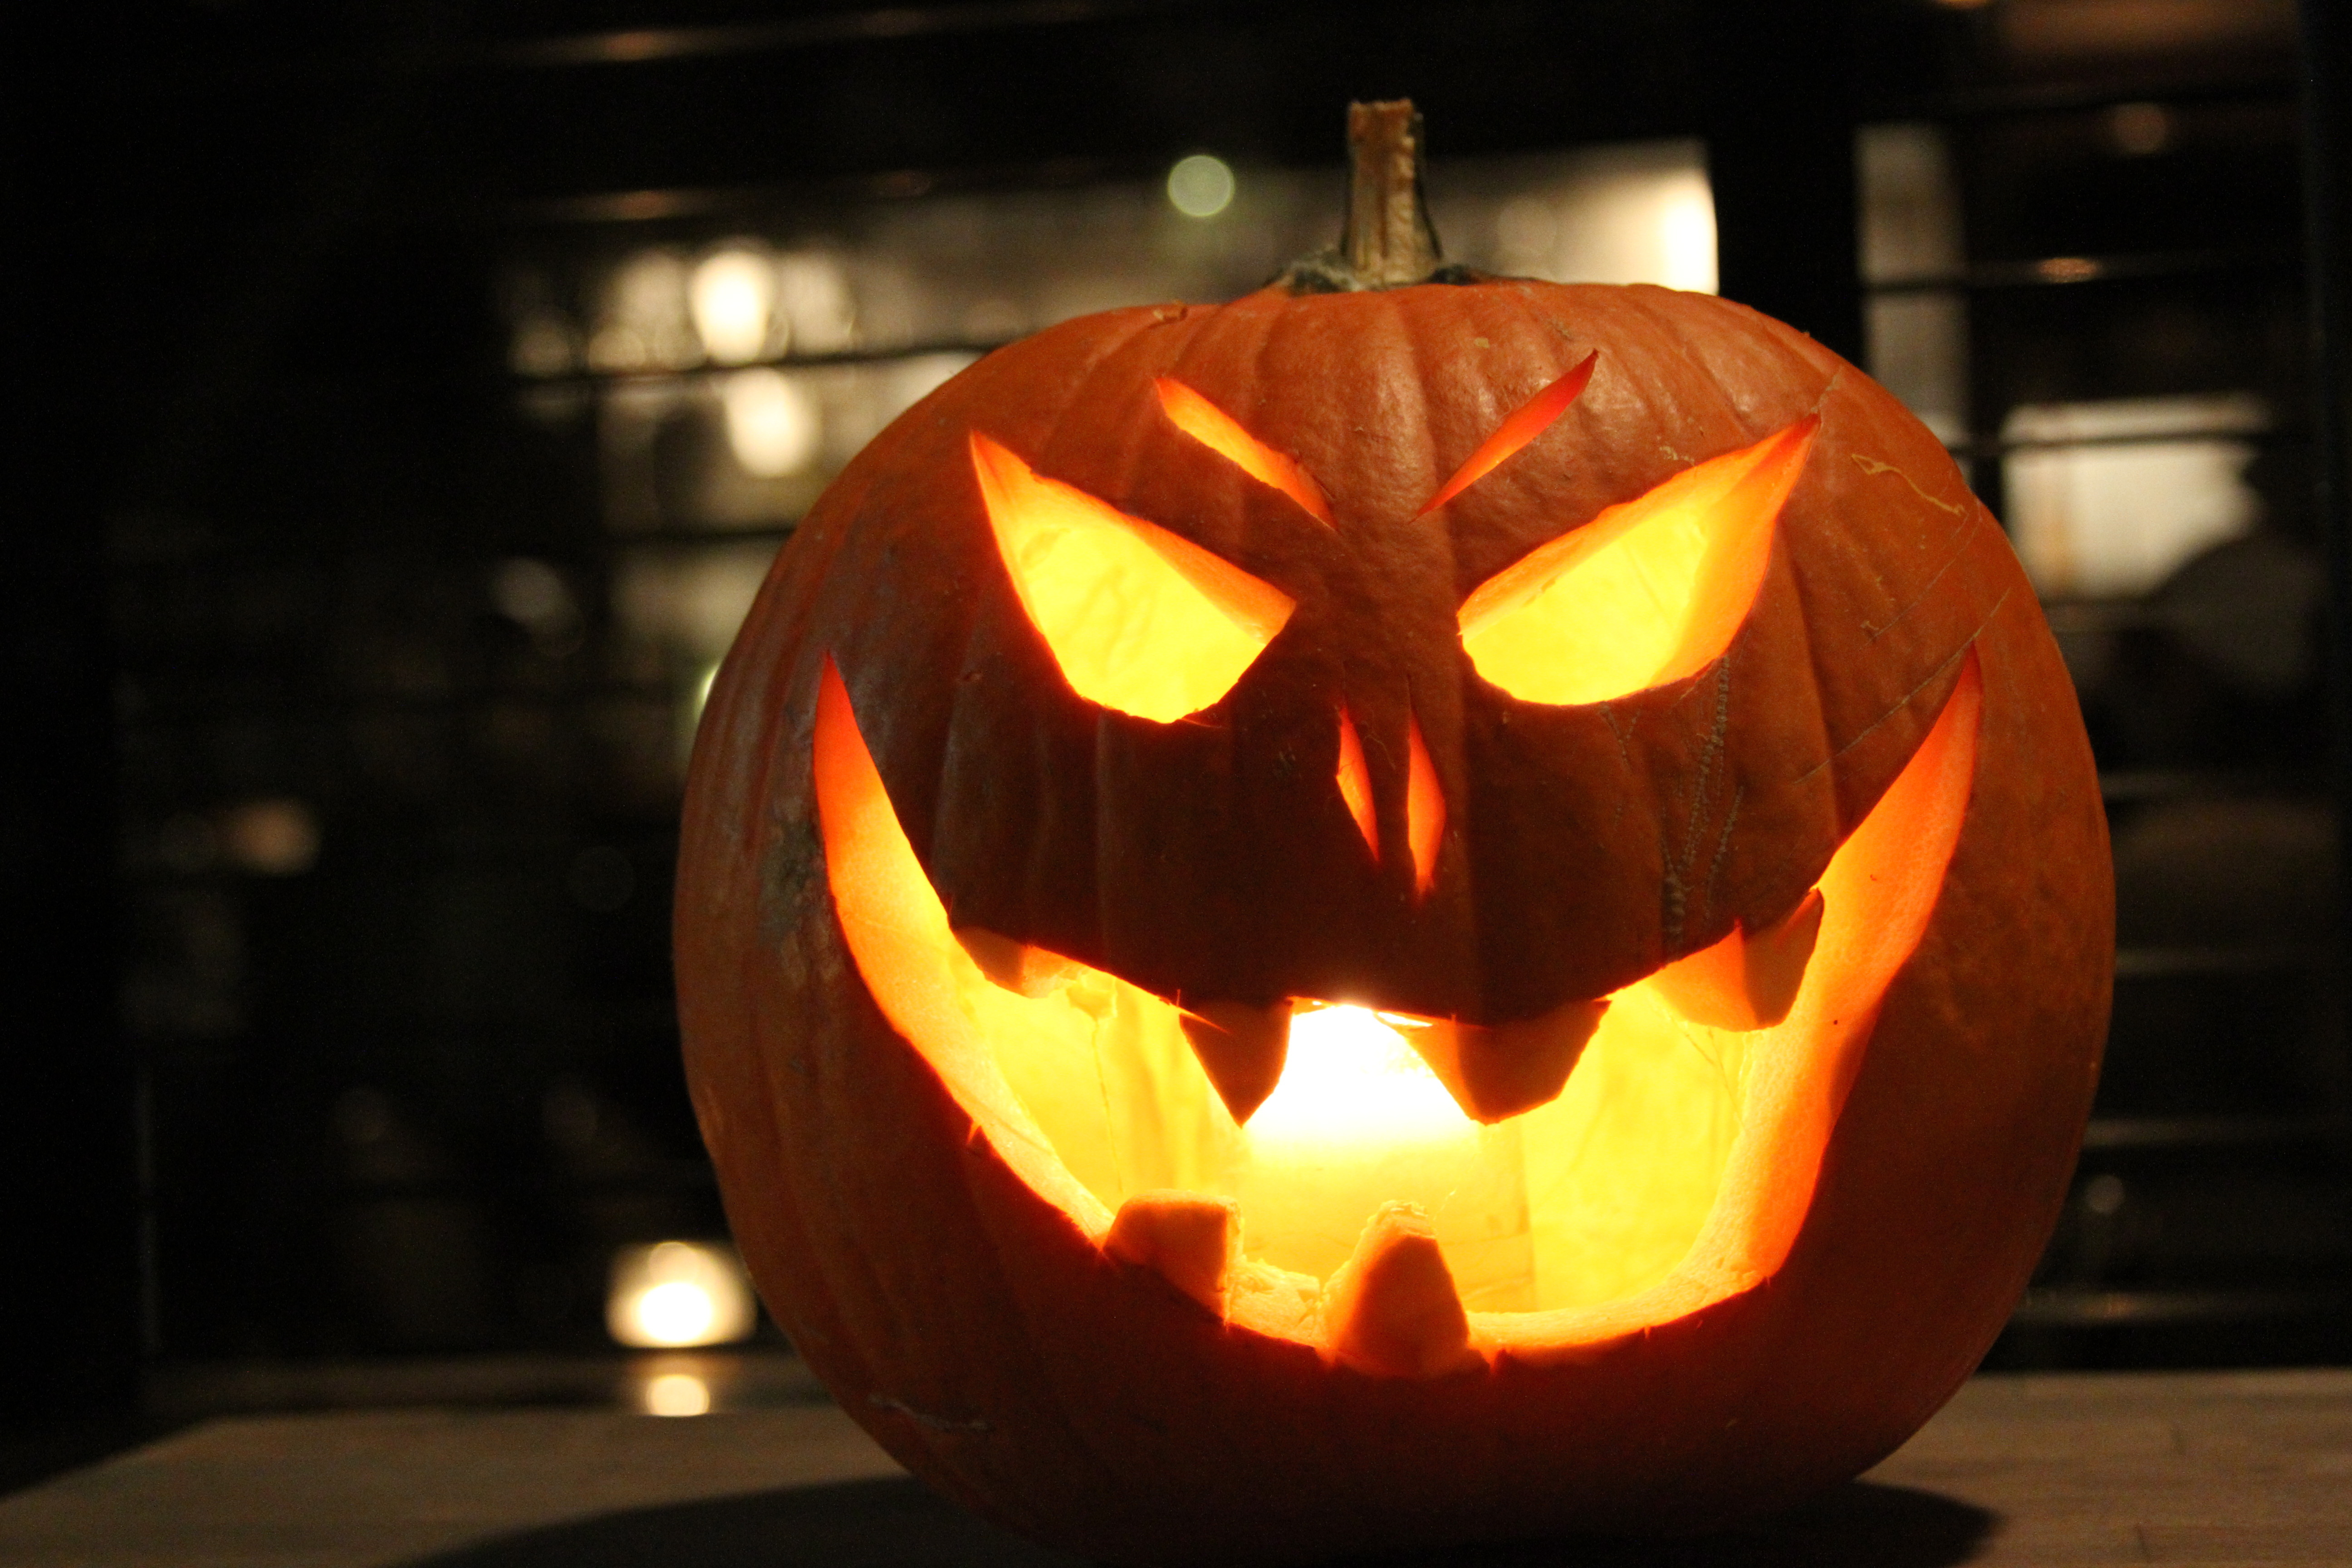
I was scouring websites looking for pumpkin carving tips and I found these at Taste of Home!
1. You Don’t Need Fancy Tools
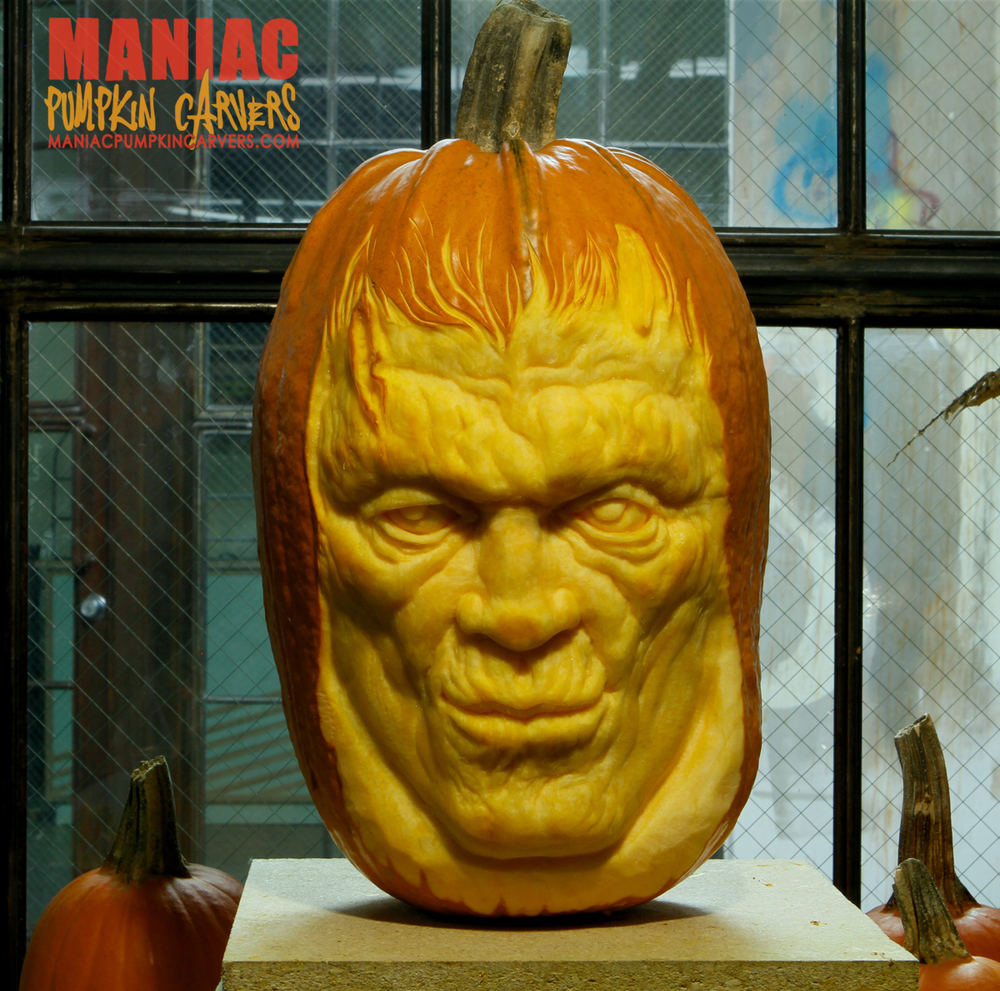
A simple $7 kit is sufficient for most classic jack-o’-lanterns and veggie carving projects, says Marc Evan and the crew at Maniac Pumpkin Carvers, who specialize in extraordinarily detailed etchings that are nothing short of stunning. For detailed work, you can use paring knives, linoleum cutters and precision blades. Rely on household items to step up effects. Lemon zesters are great for varying textures on your pumpkin. Melon ballers are useful for hollowing out a pumpkin or to create scooped-out balls that can later be pinned onto a pumpkin as eyes or a beaded necklace, says Evan. Scrubber sponges are optimal for smoothing out the surface (that is, if you plan on sculpting like Michelangelo).
2. Opt for an Imperfect Gourd
Most of us go to the pumpkin patch, or let’s be real, Wal-Mart, looking for the roundest and smoothest pumpkin. Don’t be afraid to get one that’s more visually interesting or even misshaped—as long as it doesn’t have any soft spots, according to Masterpiece Pumpkins‘ Gene Granata, who has been expertly carving pumpkins for more than 20 years. If you have a pattern, bring it with you. That way you can find the pumpkin that suits the shape of the pattern you’re going to carve. For the freshest pumpkin or one with the most staying potential, look for one that’s solid to the touch with a strong, sturdy stem.
3. Open From the Bottom
Here are a couple hacks that will simplify the job. Granata recommends always cutting open the bottom instead of the top around the stem. “When you pull that plug out, a lot of the seeds and stringy stuff comes out with it. Half your job of cleaning out the pumpkin is already done,” he says. Wipe down the exterior of the pumpkin before carving. If you’re creating a classic jack-o’-lantern, cut from the top so you can easily slip a candle (but beware it’ll dry out your pumpkin quicker) or battery-operated tea light into it.
4. Extra Scooping Saves Time
Scrap the walls of the pumpkin with a big metal spoon or the scooper from the classic carving kit until the walls are an inch thick. “This one is really important, especially for people who carve from stencils and patterns,” Granata says. How can you tell when you’ve scraped enough? Have inch-long dressmaker pins or thin screws ready to poke through a cut-out region to test the thickness. Or you can tape your template onto the pumpkin from the start and add pins all around the pattern. That way when you’re scraping down the inside, you can feel exactly when the thickness is right. “That will probably cut your carving time in half,” according to Granata.
5. Trace the Design
Thoroughly clean the face of your gourd. Then use sewing transfer paper (found in most arts-and-crafts stores) to replicate the pattern or design onto the pumpkin. Put the transfer paper between your design and the pumpkin, and make sure the transfer paper is facing down onto the squash. Use masking tape to tape down the design on the corners and the sides. Then trace the design with a ballpoint pen. “You can draw that whole pattern on there and now it’s on the pumpkin, waiting to be carved,” Granata says.
6. Be Patient While You Carve
You probably can’t wait to see your creative carving idea to come to life. So you’re likely carving and pulling the pieces out as you go. But to preserve your art’s stability, you should do the opposite and leave the pumpkin intact. Granata says, “It will help keep the whole thing stable and keep it from breaking. Then when you’re done and want to see the design, reach into the inside and gently poke the pieces from the inside out of the pumpkin. Things will come out way easier. If something gets stuck, go back with your tool and revisit the corners. Then you should have no problems.”
7. Save It for Later
Evan advises that if you’re carving something incredibly intricate like your favorite TV character of the year and need an extra day to complete it, wrap it tightly in plastic wrap and refrigerate.
8. Let the Kids Join In
If you’re in charge of carving, include your kids on the action with a few easier tasks like scooping out the pumpkin guts and separating the seeds from the stringy stuff.
For a simple yet spooky project, have your little helpers embellish a pumpkin without carving or sharp tools. Instead, decorate using glitter or stickers. Water-based paint such as acrylic or tempera works nicely on pumpkins, Evan says.
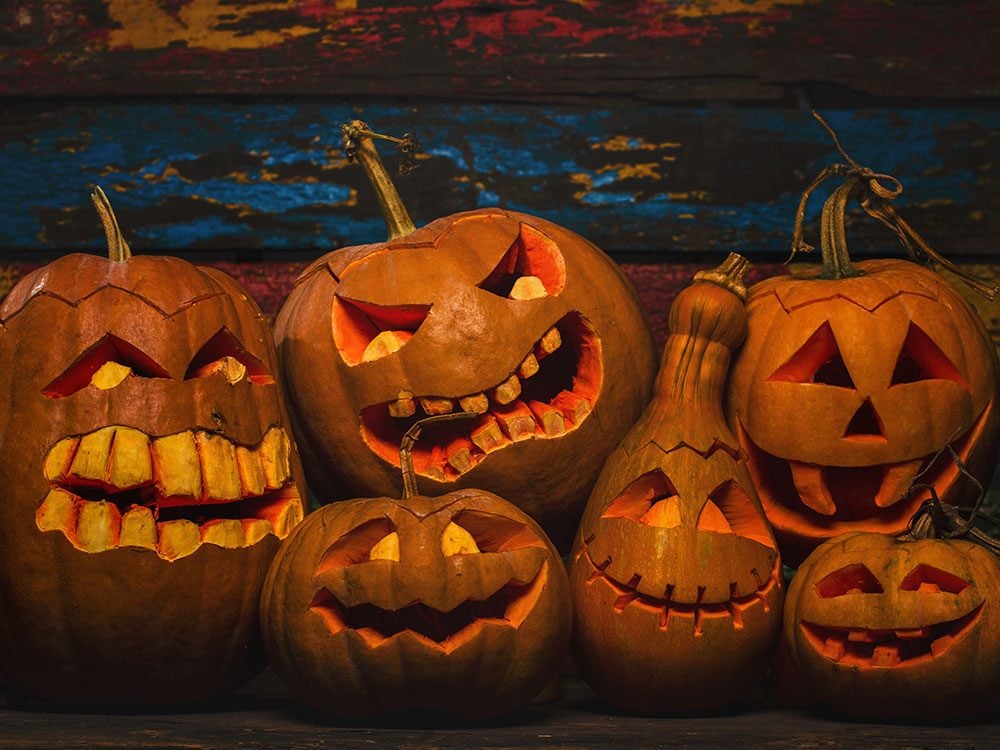
Some of the fabulous pumpkins done by pumpkin carvers:
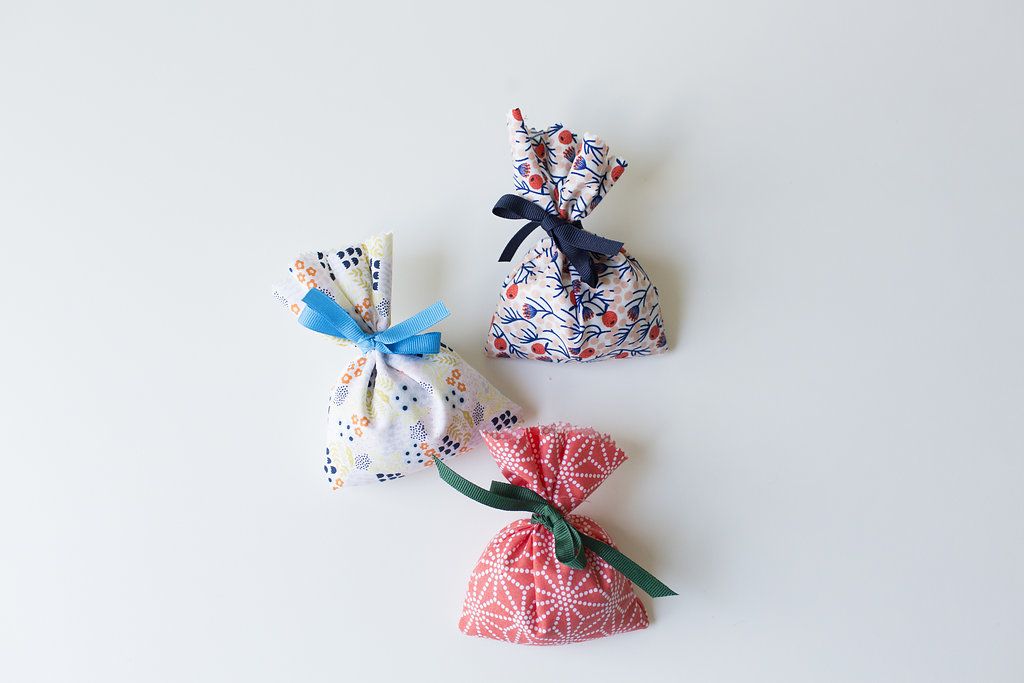
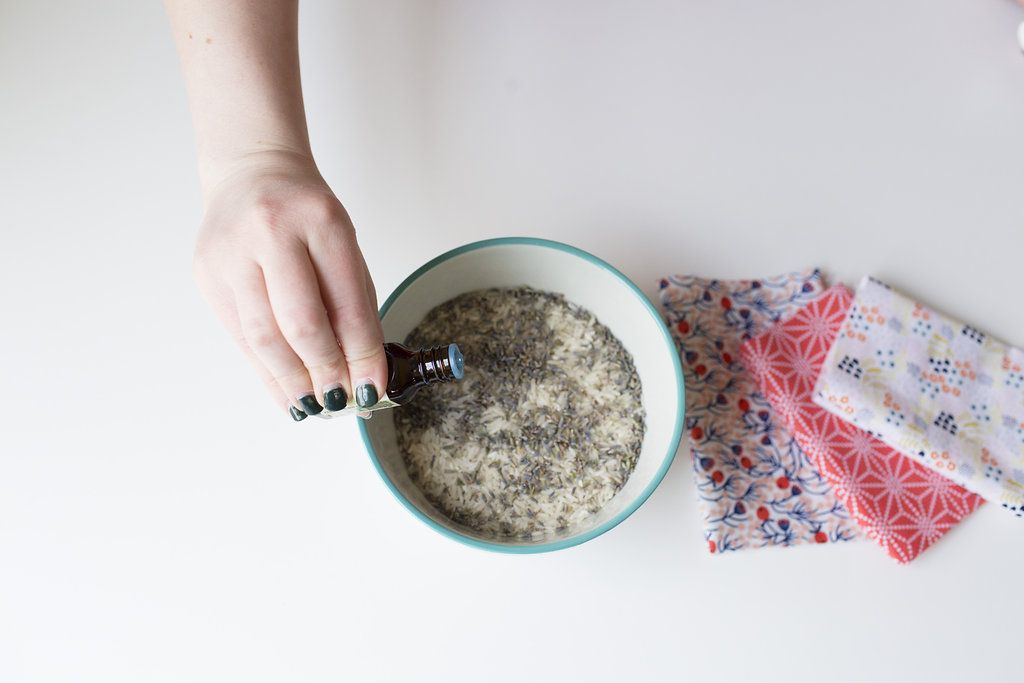
I found this idea on The Pioneer Woman’s website, and it’s simple, easy to do and great for your drawers, your car, or anywhere you’d like a nice scent. And YOU control the density of the fragrance.
I’m thinking about making some in Christmas fabrics and maybe using cinnamon or pine scent!
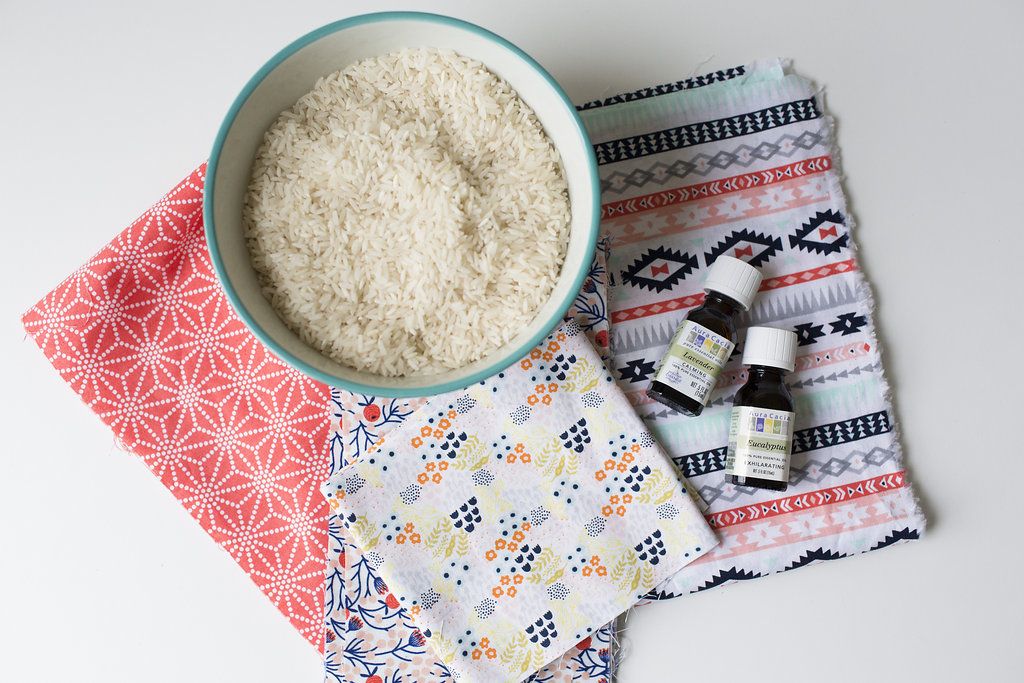
You’ll need:
fabric scraps
needle
thread
rice
your favorite dried flowers or spices
essential oil
ribbons
scissors
pinking shears
clear nail polish
Step one: Choose your fabric and start by making a pouch. Fold over a rectangular piece of fabric so the pattern is on the inside. Sew the two outer sides together. Use whatever stitch you want as long as it’s going to hold! If you’re not a strong sewer, fabric repair adhesive works well too. Just go light on the application; the adhesive spreads as you smooth the edges.
(Note that if you don’t want to worry about seams at all, you can just make a circle and gather it and tie it to make it easy!)
Step two: Turn the pouches pattern-side out and set aside. Mix together your rice and dried flowers or herbs. We used lavender and it was nice and potent, but try eucalyptus, rose, vanilla—just follow your nose. If you’re looking for a scent you might not be able to find in a dried plant, use a drop or two of essential oils mixed in with the rice until you reach your desired level of scent.
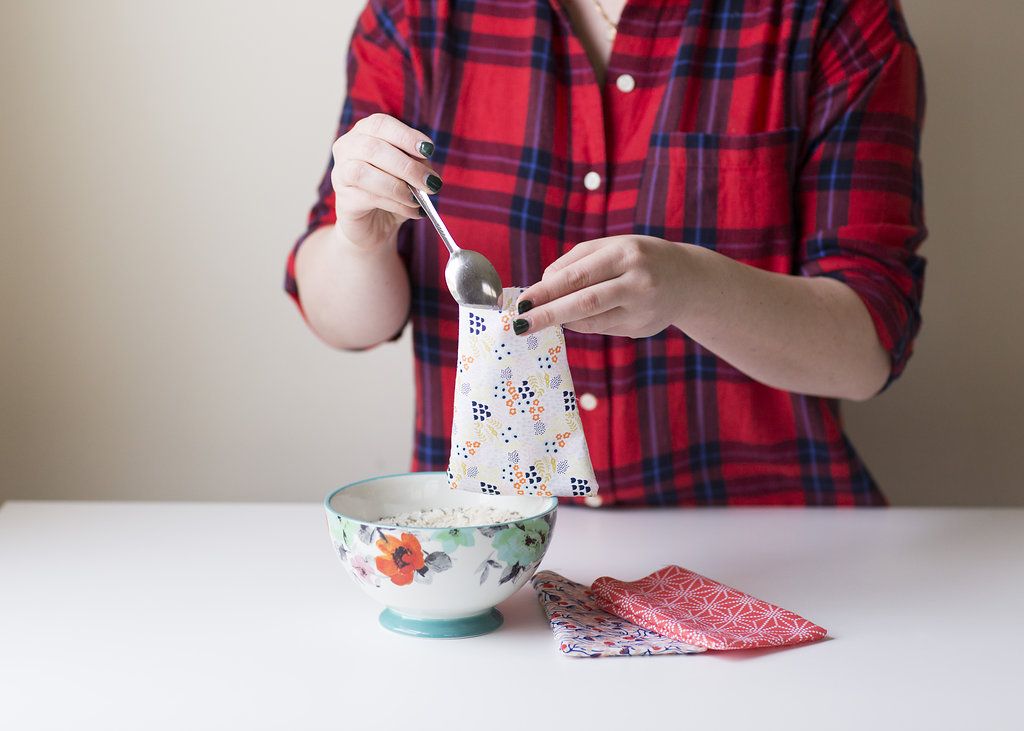
Step three: Fill your pouches with the scented rice concoction and be extra careful! Those tiny pieces of rice spill easily and get everywhere.
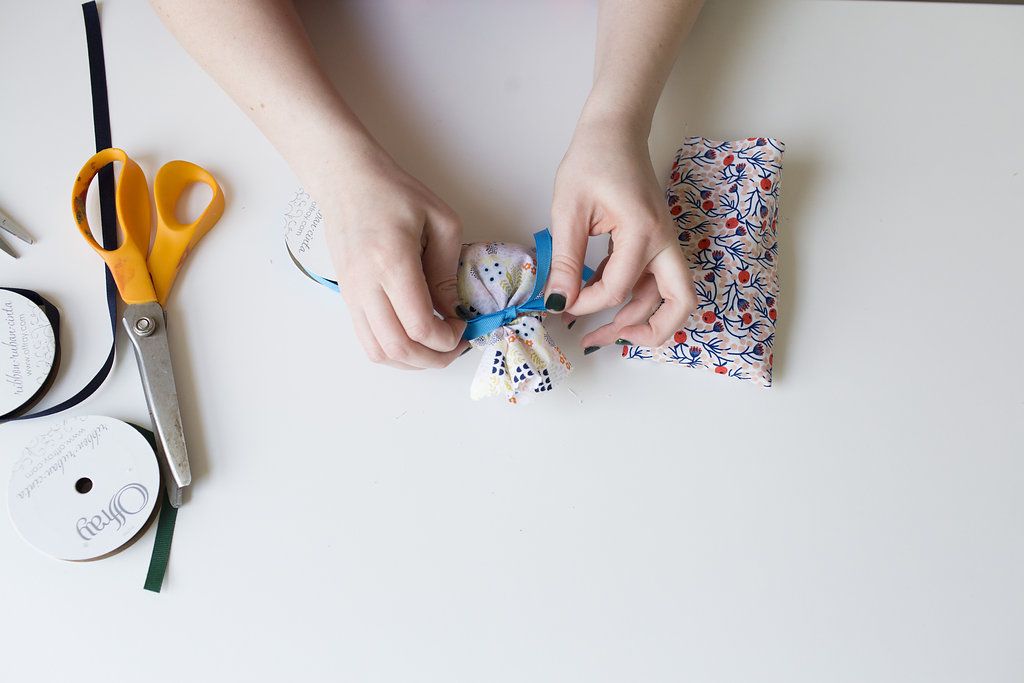
Step four: Once the pouch is at your desired level of plumpness, tie the top with a colorful ribbon. Finish the fabric at the top with the pinking shears. To prevent the top from fraying, gently coat the edge with a thin layer of clear nail polish. And you’re done! The beauty of not sewing the top closed is that you can refresh the inside as needed if it’s starting to lose its scent.
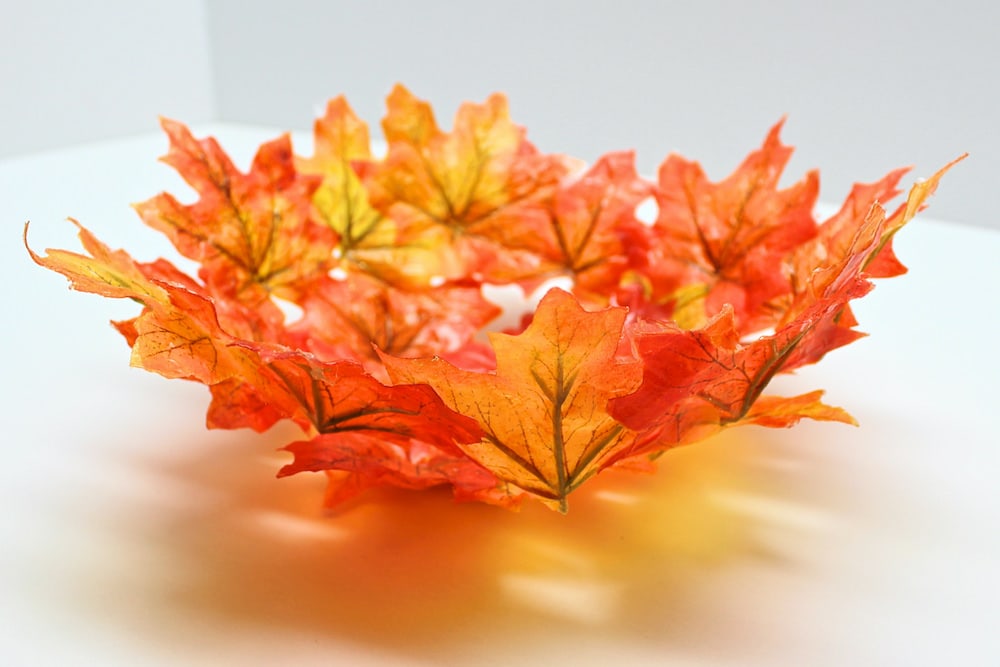
My granddaughter and I were looking for fall crafts that we could do and I found step by step instructions on how to make a leaf bowl! They’re gorgeous and it seems to be straightforward and fairly easy. Then we saw the picture (near the end) of what a leaf bowl looks like in a year or two! I decided to purchase fake leaves now and save them till next year when we will attempt these!
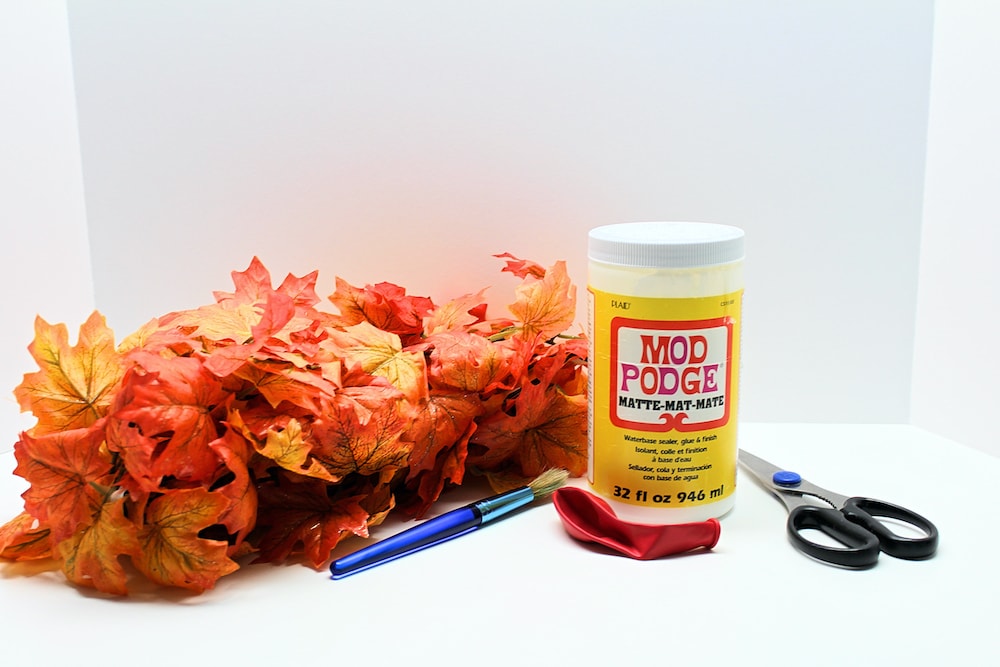
Here’s what you’ll need to craft a gorgeous fall leaf bowl at home:
Real fall leaves (make sure they’re still fresh and pliable as this project won’t work with leaves that are already dry) or artificial fall leaves
Balloon (or plastic mixing bowl in the size that you want to make your leaf bowl)
Mod Podge (matte or glossy—I prefer to use matte)
Scissors
Large paintbrush or sponge brush
Plastic wrap (optional)
Step-by-Step Instructions
Remove Leaf Stems
Whether you’ve chosen to use real or artificial fall leaves, your bowl will look much nicer and come together much better if you remove the leaf stems. Use scissors to cut off the stems so that only the leaf remains.
Once you’ve cut off the leaf stems, blow up a balloon to the size of your choosing. The size of the balloon will determine the size of the leaf bowl.
If you’re using artificial leaves, stick with a smaller size. The humidity in real leaves makes them stick to the balloon a lot better, even if its size is larger, but artificial leaves are a lot stiffer and they may simply slide right off if the balloon is too big.
Note: Skip this step if you’re planning on using a plastic bowl instead of a balloon as the base for your leaf bowl.
Place Balloon in Bowl
Take your inflated balloon and place it neck-down in an appropriately-sized mixing bowl to keep it in place while you go through the rest of the steps.
Add Plastic Wrap (Optional)
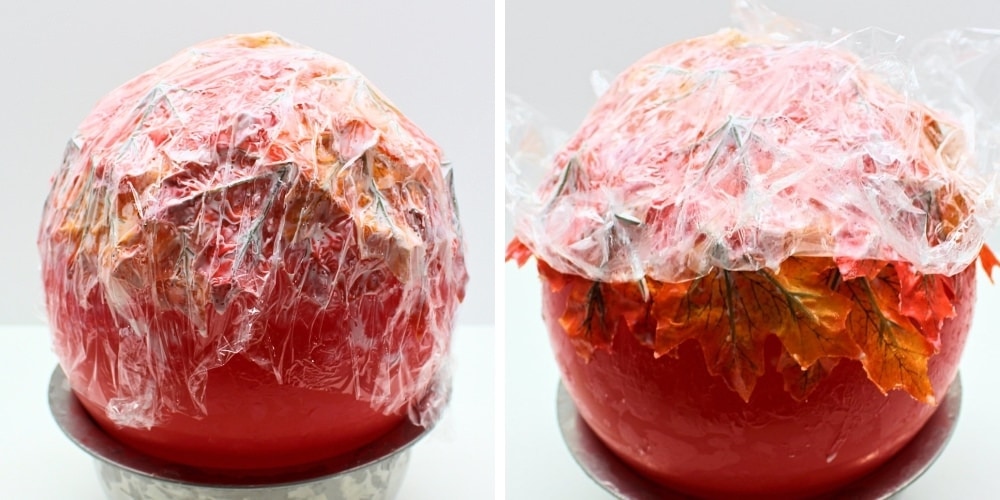
Because you’ll be using the balloon to create the shape of the leaf bowl, you’ll need to glue the leaves to the balloon using Mod Podge and let the Mod Podge dry before you can peel them off.
If ever you’re worried that the leaves will stay stuck or won’t peel off properly, feel free to cover the balloon in a layer of plastic wrap before you get started.
Note: This step is optional if you’re using a balloon, but if you’ve chosen to use a plastic mixing bowl to create the shape of your leaf bowl instead, cover it with plastic wrap as this will both protect your bowl and make the leaves a lot easier to peel off.
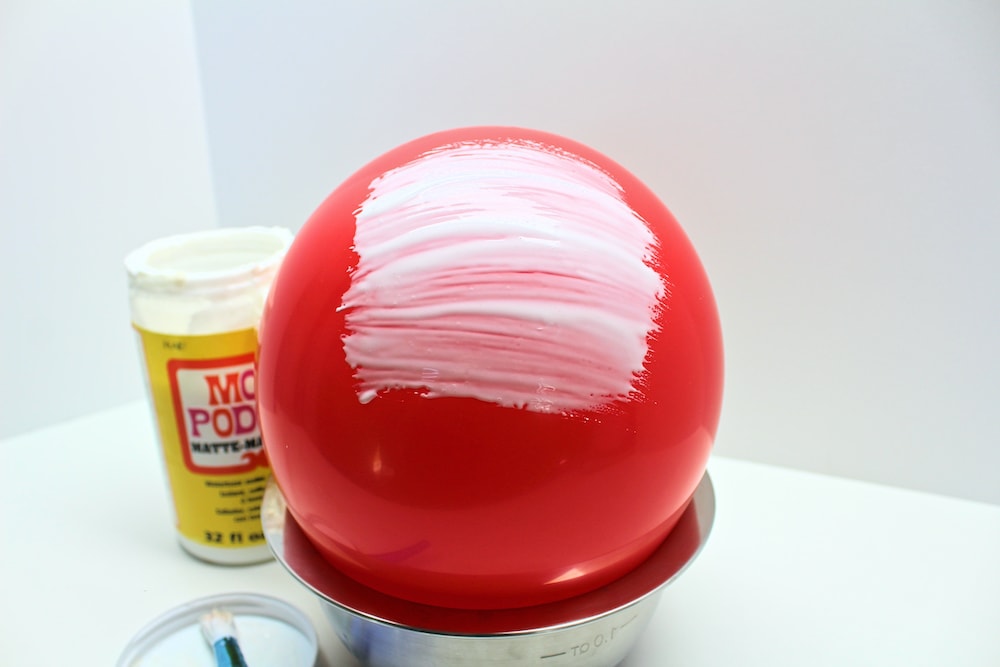
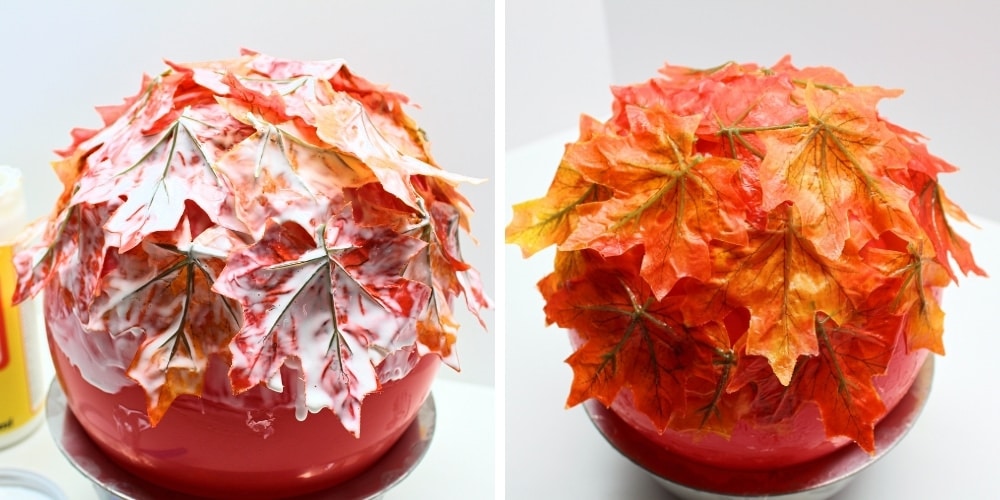
Add Mod Podge
Use a large paintbrush or sponge brush to cover some of the balloon’s surface with Mod Podge. Make sure the area you cover is larger than the leaves you’ll be using, as you’ll be layering them and will need the entire area beneath them to be covered with Mod Podge.
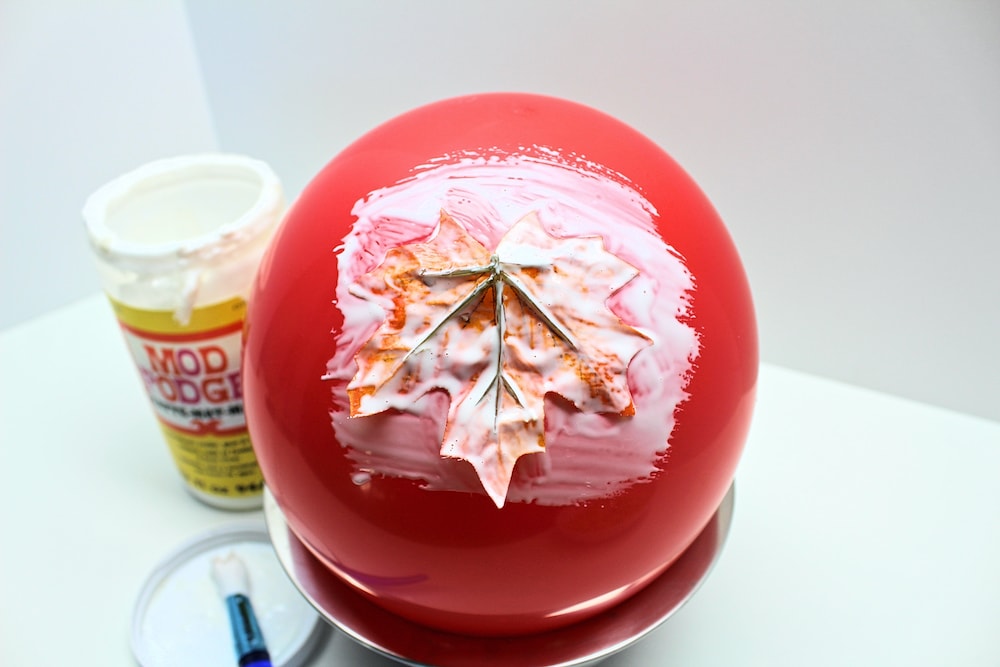
Cover Balloon with Leaves Press a leaf face-down onto the balloon, then cover it with Mod Podge as well.
Continue doing this until you’ve covered as much of the surface of the balloon as you wish to in order to create your bowl, covering each new leaf with more Mod Podge as you work.
If needed, brush the Mod Podge directly onto the surface of the leaf before pressing it onto the balloon.
Let Dry
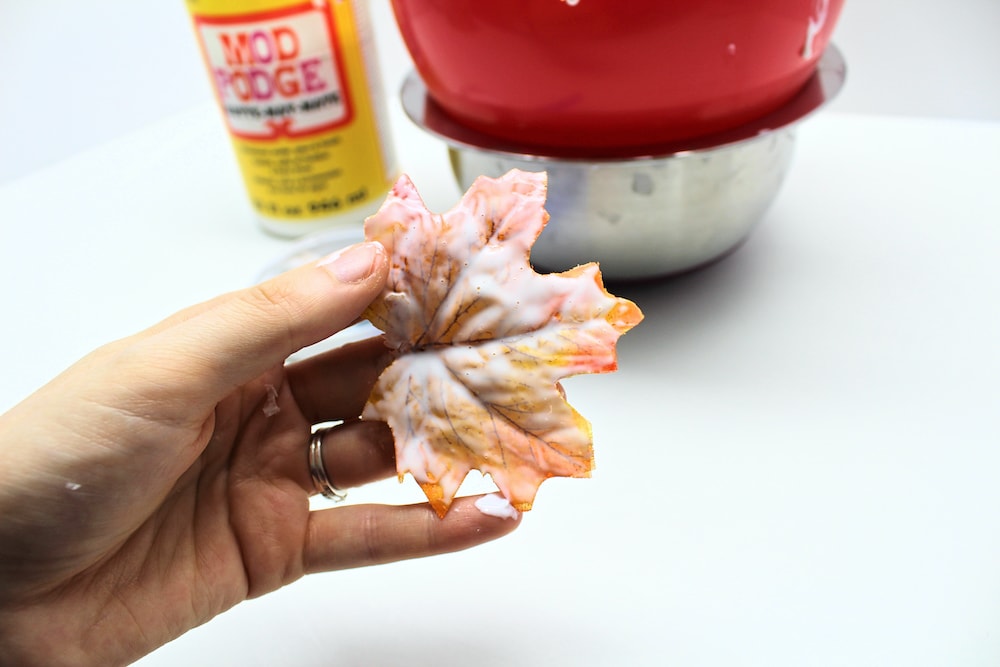
When you’ve added all the leaves you wish to add and can no longer see any parts of the balloon that have been left uncovered, put away the Mod Podge and let your project dry completely before moving on to the next step.
If your leaves keep sliding down the surface of the balloon instead of staying in place while the Mod Podge dries (which will probably happen if you’re using plastic leaves), try covering the entire balloon in plastic wrap and peeling it off a little bit at a time, allowing each uncovered section to dry before uncovering the next section.
8. Peel Off Leaf Bowl
Once the entire surface of the leaves is completely dry, carefully peel the leaf bowl off the balloon and place it on a flat surface.
The Mod Podge on the inside of the bowl may still be a little wet; if that’s the case, simply let it sit for a while uncovered to allow its entire surface to dry.
Once all the Mod Podge is dry, your bowl is ready to use.
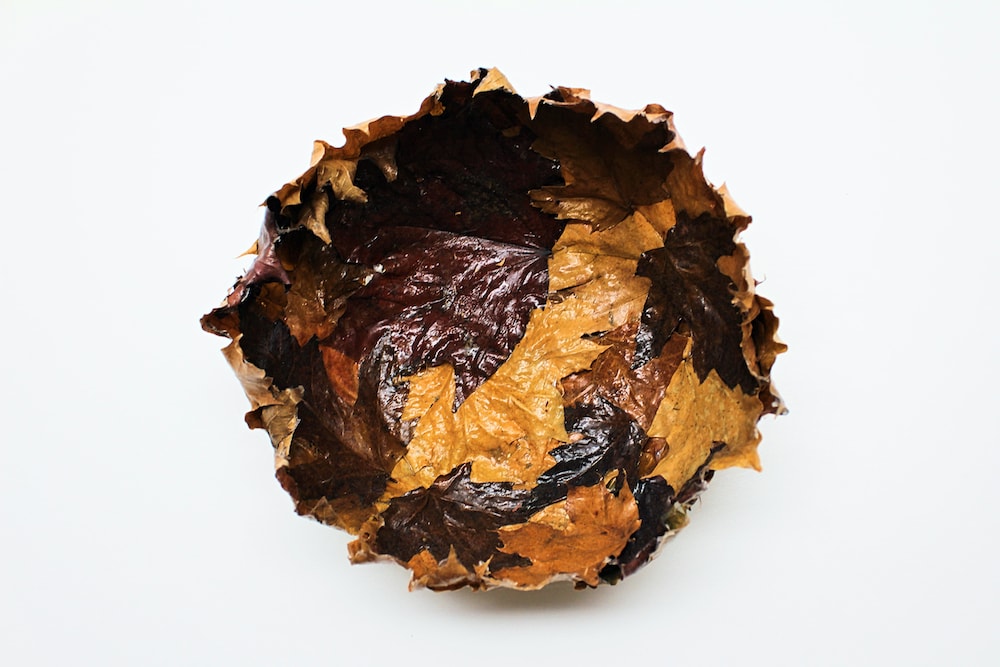
A NOTE ABOUT USING REAL LEAVES:
This project can work with both real and artificial leaves, and they both have advantages and disadvantages.
The first time we tried it, we used real fall leaves that had been freshly collected from the ground. Because the leaves came straight from outside, they were soft and pliable, which made them easy to craft with—especially with young kids participating.
Using real leaves also meant that this project cost us next to nothing, and it gave us an opportunity to spend time outdoors and craft with nature!
However, because the leaves were real, they did eventually go brown and lose their bright fall hues. Here is what that bowl looks like today, two years after it was made:
SOURCE: From Sacha’s website September 25, 2021 by Sacha
Nothing says Fall more than pumpkins to me. But buying a bunch of fresh pumpkins each year can be expensive. So, I learned to make fabric pumpkins, using old clothes, fabric scraps or just about anything cloth—like napkins or tablecloths. There are 3 different methods to make these and the method you choose depends on the shape pumpkin you want and how much hand sewing you want to do.
Circular Pattern Pumpkins
General Supplies
Fiberfill
Fabric
Thread
Needle
Felt, stick, or saved pumpkin stem
Felt for leaves, or berries for top of pumpkin or ribbon
Instructions
Trace a circle on a piece of paper—the size will determine your pumpkin. If you want to make small pumpkins for place cards at Thanksgiving dinner, you will want to use a circle of about 4-6 inches wide. Increase the circle size to make larger pumpkins. Using the paper pattern, trace the circle on the fabric and cut out.
With the needle and thread, sew a running stitch around the outside of the circle about ½ of an inch from the edge. Gather the edges somewhat so that you can stuff the fiberfill inside. When the pumpkin is filled to your liking, draw the thread tight. Knot the thread. Use another length of thread (or yarn) to create the pumpkin sections. Insert the needle close to the stem and go downward through the center. Loop over the pumpkin and back to the center, drawing tight enough to create an indentation in the pumpkin side, and insert the needle again, making another loop. Continue in this fashion around the pumpkin until you make 5 pumpkin ridges. Knot the thread or yarn. Place hot glue in the indention, place the stem in the glue, then hold it until it sets up. Add raffia, ribbon, tendrils, and or leaves to decorate your pumpkin.
Rectangular Pumpkin Pattern
General Supplies
1 rectangle piece of fabric – any size will do but 12” x 8” is great 1 8” x 3” piece of felt Thread & Needle; yarn Hot glue gun & glue Fiberfill (pillow stuffing)
Instructions
With your fabric lying flat on a table and the long side laying horizontal, fold the fabric in half inside out. Stitch up the side opposite to the fold. You can do this by hand if you don’t have a sewing machine.
Next, taking your needle and thread do a simple gathering stich along the bottom of your fabric. Don’t cut the thread yet. Pull the thread tight so the fabric gathers in the center. Tie off the thread and cut the extra thread.
You are ready to start stuffing the pumpkin. Try to get the stuffing placed evenly throughout the pumpkin. Now at the top of the pumpkin you are going to do the same thing with a gathering stich like you did at the bottom. Gather the fabric by pulling the stich tight, tie off the thread and cut extra thread off.
Using a large needle, thread the yarn starting at the bottom of the pumpkin up through the center. Pull tight and loop back over the side of the pumpkin back through the bottom.
Repeat 4 – 5 times around the pumpkin. Tie off with a knot. Next, take your felt fabric with the long end horizontal. Place a line hot glue along the short end and start rolling the fabric on itself. You should end up with a short and thick roll of fabric.
Cut the felt to the desired length you would like for the pumpkin stem. Attach the stem to your pumpkin with a generous dollop of hot glue.
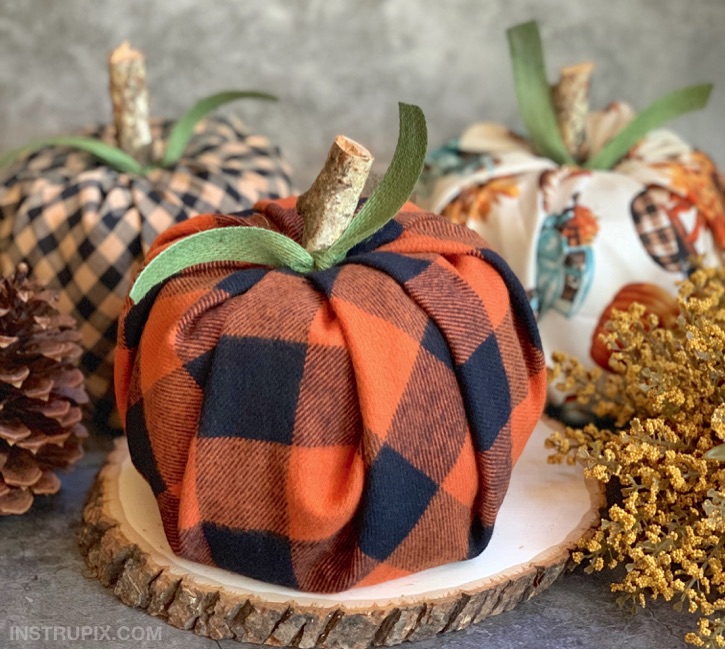
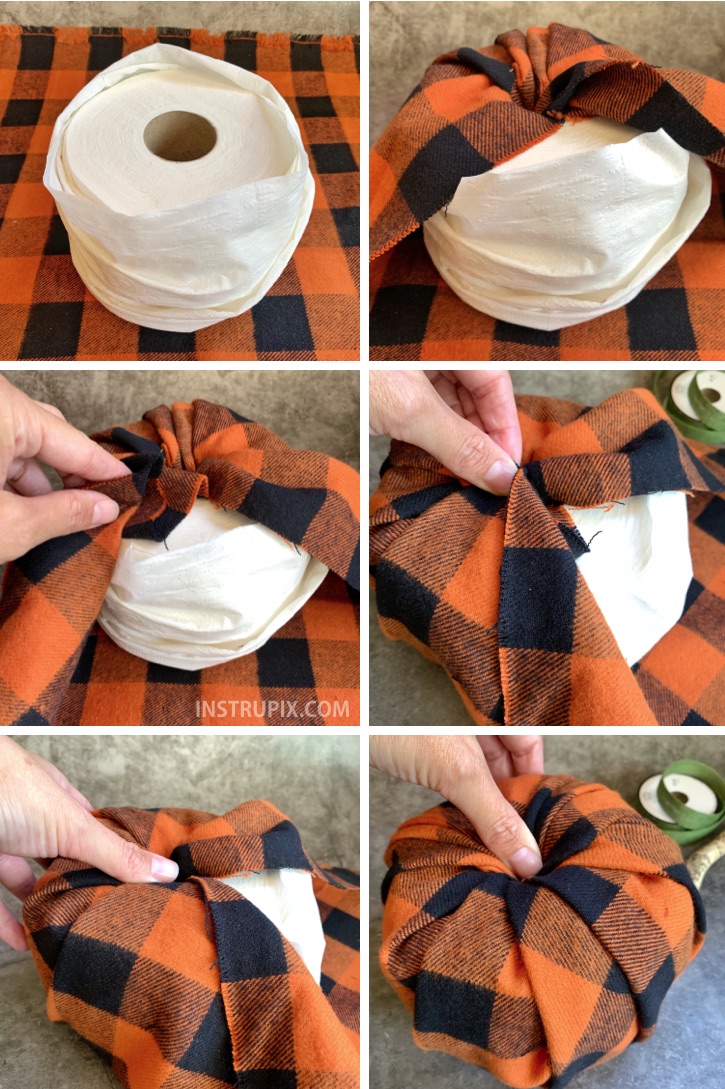
Toilet Paper Pumpkins (NO SEW)
Supplies
roll of toilet paper
rectangle of fabric approximately 18″ x 22″
stick for stem
ribbon
Instructions
Unroll the toilet paper about 10 times, and then roll it loosely back up to give more of a round shape.
Lay out your fabric and place the toilet paper in the center.
Grab one corner of the fabric and tuck it inside of the toilet paper roll. Slowly work your way around gathering up the fabric and tucking each corner into the roll.
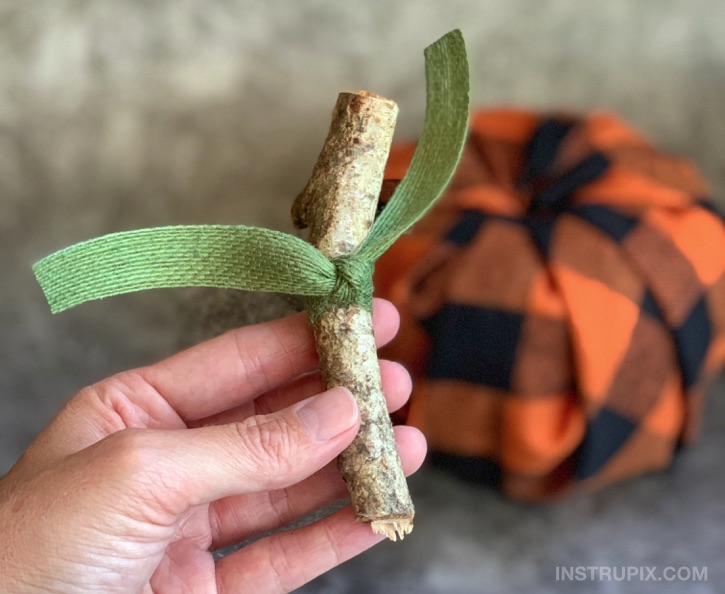
Tie a ribbon around your branch piece and stuff it into the center.
Ants can be a particularly persistent problem in the house, because they leave scent trails for others to follow. Here are some “natural” home remedies you can try the next time you see these little aggravating pests.
White Vinegar
A recipe for ant-controlling success? Three parts vinegar and one part water. Spray under doorways, in the yard or even around your picnic blanket. The pungent liquid helps cover up ant scent trails, messing with their tracking abilities. Next time you mop the floor, pour a bit of vinegar into the bucket for good measure.
Borax
Borax, a mineral used in many cleaning products, is lethal to ants, interfering with their digestive system. Create a syrupy paste with borax, confectioner’s sugar and water. Put the mixture inside shallow containers with narrow, ant-sized openings and place them near ant mounds or wherever you see ants. Enticed workers carry the sweet substance back to the nest to share with their friends.
Note: Although borax has a low toxicity rate for humans, home expert and CEO of Pest Strategies Ed Spicer recommends keeping borax-laced bait away from children and pets.
Pepper
To be clear: Pepper doesn’t kill ants, but the strong odor will chase them away. Pour the ground black or cayenne version onto ant scent trails. Or mix pepper and water in a spray bottle and spritz your home’s entry points.
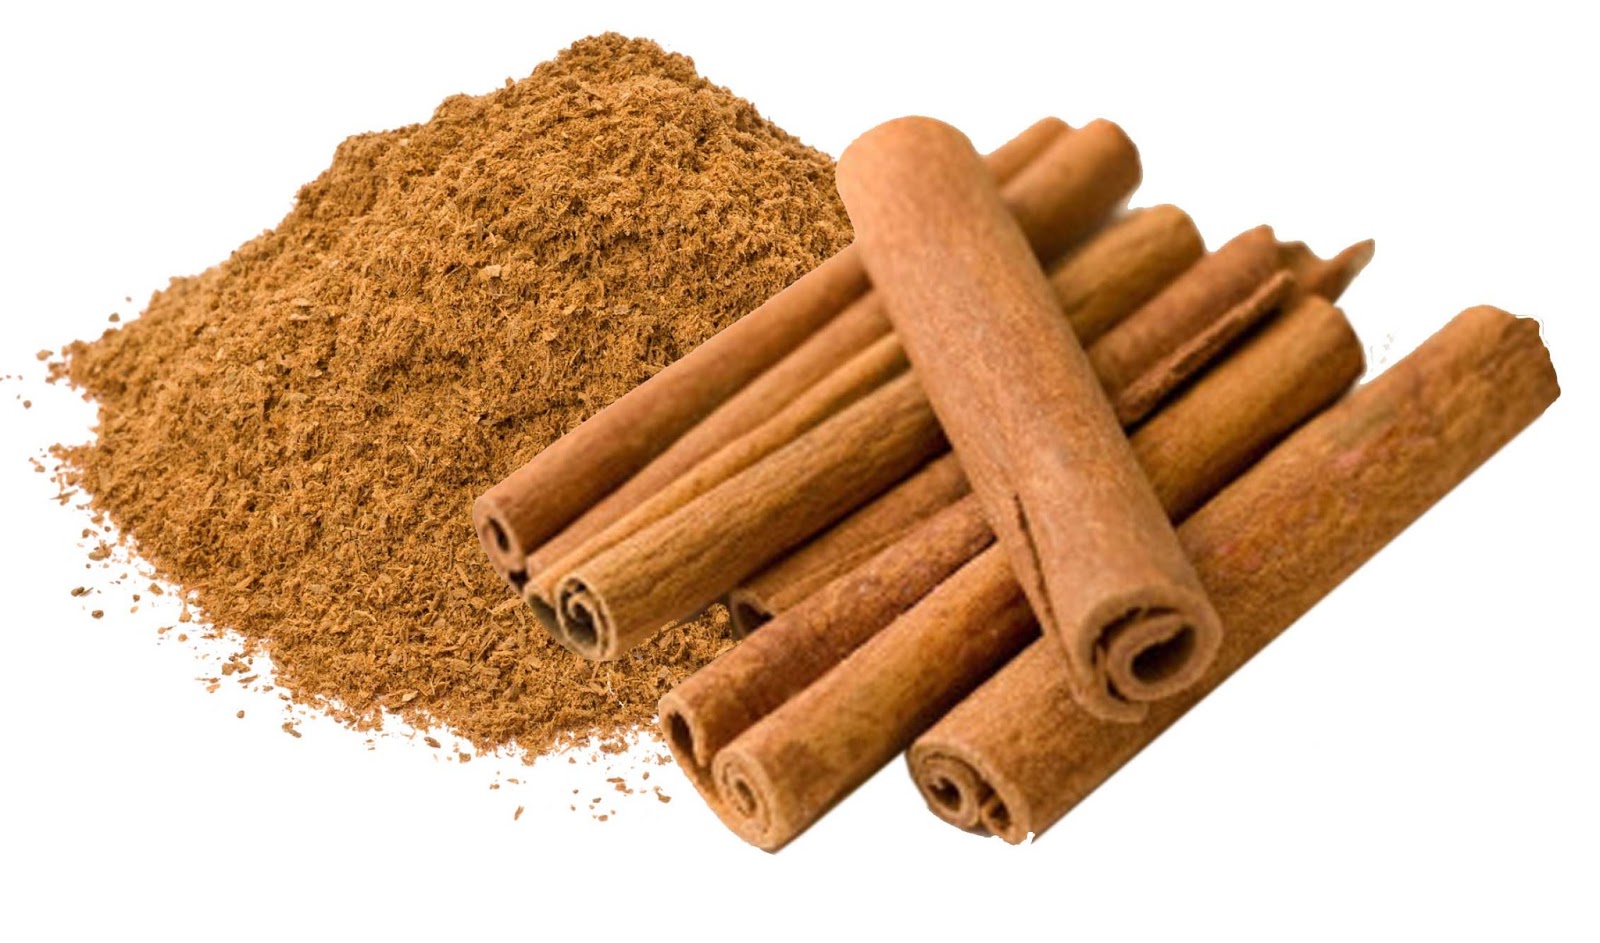
Cinnamon
The best spice for getting rid of ants in your kitchen? Cinnamon. Natural and non-toxic, cinnamon not only kills ants, but its strong smell makes it shine as a repellent, too. According to Spicer, Saigon cinnamon can be especially effective when sprinkled around anthills, across their paths, on kitchen countertops and along floorboards. And cinnamon essential oil can effectively repel and exterminate ants, too.
Fresh Mint
Ants don’t like the smell of fresh mint, so planting it in vegetable patches and flower beds deters ants and other insects while giving your garden a lovely aroma. Minty essential oils from peppermint, wintergreen, geranium, thyme, clove and rosemary work, too!
Cornmeal & Boric Acid
Contrary to popular belief, cornmeal does not kill ants, by exploding them or otherwise. “Ants are pretty keen on cornmeal,” Spicer says, “so spreading too much of it around might worsen your infestation.” You can, however, weaponize cornmeal in your fight against ants by mixing it with boric acid, a cousin to Borax that’s available online and at home improvement stores. Mix nine parts cornmeal with one-part boric acid, adding a generous helping of soybean oil or peanut butter to create a paste. Place the homemade bait near gaps and crevices, anywhere ants are on the march.
Like borax (above), any bait containing boric acid should be kept away from kids and animals.
Flour
Stop ants in their tracks. Scatter all-purpose flour liberally at door thresholds, on window sills and across foundations. Or use a sifter to apply a dusting of flour directly along their path to disrupt their pheromone trail.
Citrus
The natural acids in tangy citrus, such as lemon, orange, lime and grapefruit, work wonders at keeping ants at bay by masking their scent trails — at least temporarily. Squeeze lemons into a spray bottle, or rub a pureed blend of orange peel and water on window sills and doors jambs to discourage the itsy-bitsy insects from crossing over.
Bonus: Toss the leftover rinds in the garden as an organic disincentive.
Coffee Grounds
This popular ant-repelling tactic has been around for years: Sprinkle coffee grounds around the stems of indoor and outdoor plants and flowers. Some say it’s the smell that repels them; others claim ants don’t like the feeling of the grounds under their feet. Either way, it works!
Sugar
If you can’t beat ’em, divert ’em! Extend a sugar trail from your house to your outdoor compost pile. Ants can feast to their hearts’ content and needn’t darken your door again. (Pat’s note: this seems counterproductive to me, but I’m no expert.)
Ant-Repellent Myth: Baking Soda
You see it all over the internet: Baking soda kills ants by drying them up or exploding them. Not true. According to Spicer, “There’s virtually no scientific evidence that supports the theory that baking soda can kill ants.” Best to save your baking soda for baking.