DIY: Patriotic Wreath

I found this easy to make wreath that can be saved and used over and over for all patriotic holidays!

From GardenCare.org:

DIY PATRIOTIC FELT WREATH

Today we are sharing an easy DIY Patriotic Felt Wreath.  This wreath is easy to make and the use of felt keeps the cost low too.

You too can easily make this wreath with just a few supplies.  The straw wreath form is from Wal-Mart and is under $3.00.  It was wrapped in cellophane and I just left it on.   I used 5 sheets each of blue, white and red felt and straight pins to attach the felt pieces to the wreath form.  Sheets of felt are around 25 cents a piece.

Step 1: Hand draw a tear drop pattern on a thin piece of cardboard.   This tear drop shape measures 2 inches long and an inch and a quarter at it’s widest point.

Step 2: Cut out the tear drop shape and use as a template to cut similar shaped pieces from the felt.  At first I traced the pattern on the felt with a pencil.  I quickly realized that this method was going to take a while, so I started cutting through two pieces of felt at a time, and that made the process go a lot faster.   I cut as many tear drops as I could get out of each piece of felt.

Note: Depending on how big your pattern is, and how close you pin the pieces together, will determine the amount of felt pieces you need.  I used almost all of the pieces I cut.

Step 3: Fold the bottom edges together to make a petal shape and attach to the wreath with a straight pin.

Step 4: Work in a slanted pattern starting at the outside edge of the wreath form and work to the center of the wreath form. The blue felt was added last.

Step 5: The use of felt makes this a vibrant and colorful wreath!  I attached a few white foam star stickers on the blue felt to finish the wreath.

This wreath comes together in just a couple of days.  It did take some time to cut out all the felt pieces, but it was worth it!

SOURCE: GARDENCARE.ORG

Pat’s Note: There were no other pictures with this project, sorry.

DIY: Garden Feature

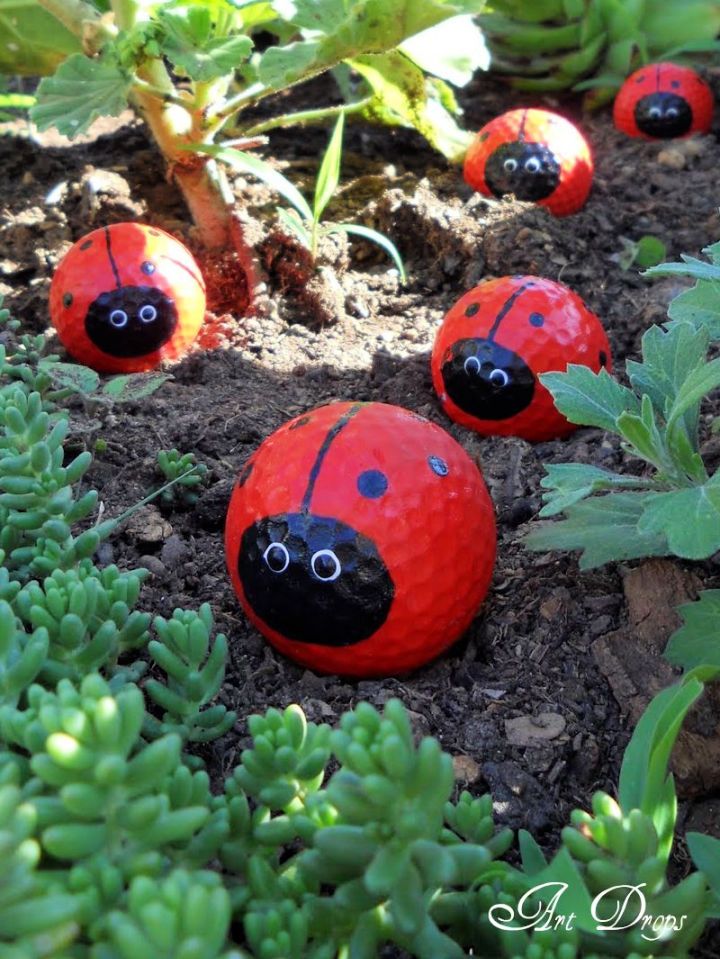
I thought these ladybugs were so cute and so easy to do!

You need golf balls…

spray paint Primer…

some acrylic paints…

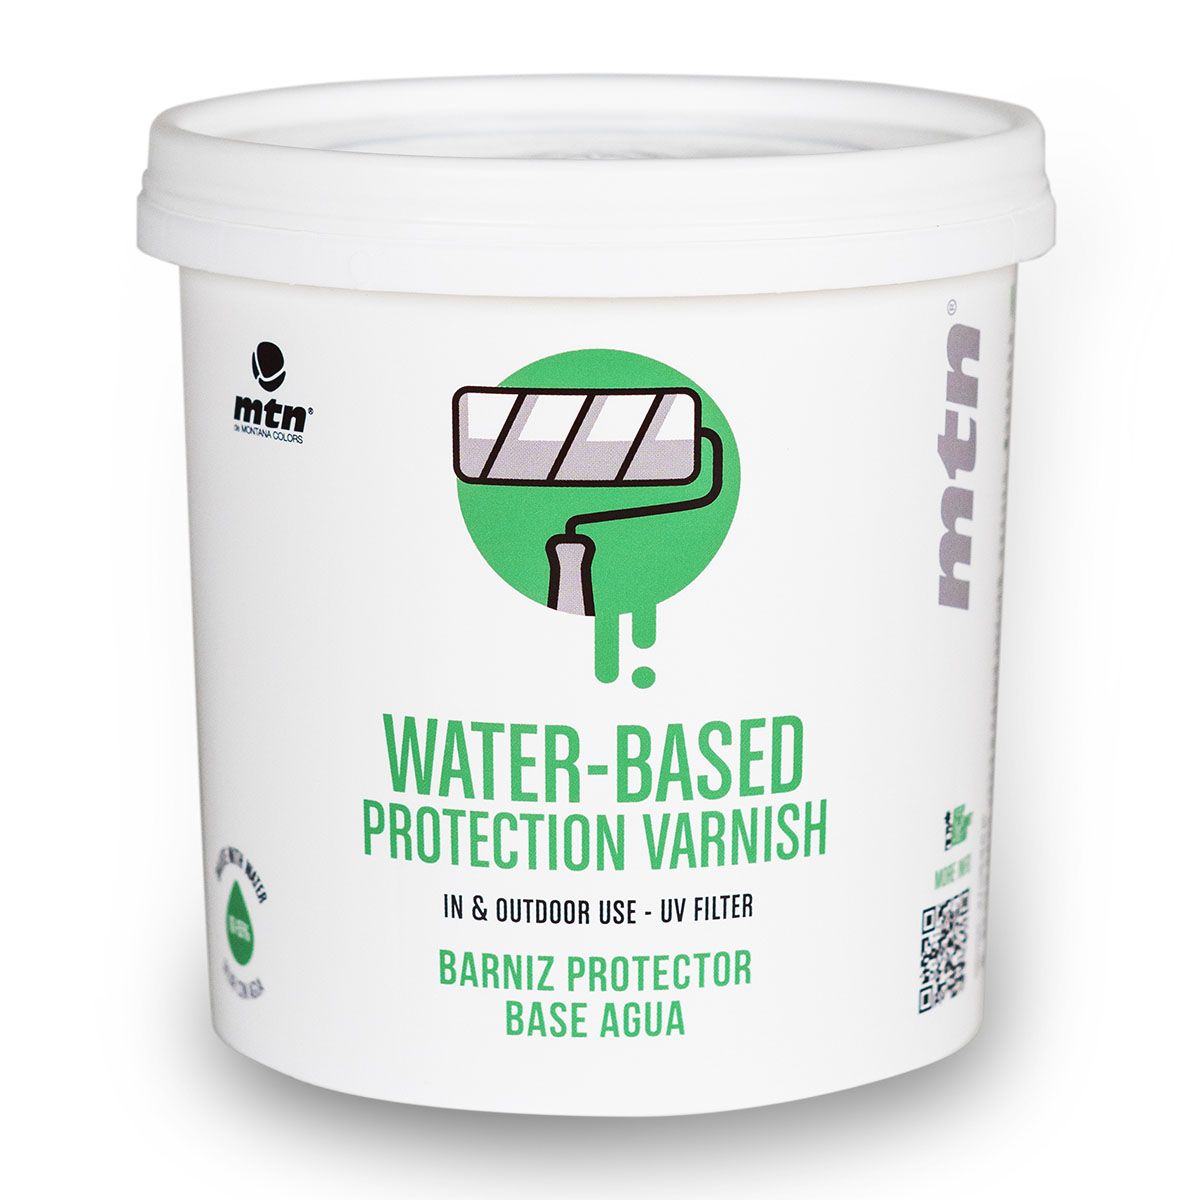
and water-based varnish.

The procedure is simple:  Use some sandpaper to lightly smooth the surface of the balls.  Spray the primer to help the paint adhere to the surface.  When the primer is dry, use the acrylics to paint the ladybug.

Seeds Versus Starter Plants

From: gardeningchannel.com

When you’re planning what to grow each season in your garden, there’s an additional choice you may not have considered: whether to grow each plant from seeds or starter plants. Each gardening method has its benefits as well as its drawbacks, and they both perform best in certain situations. Most people choose to use a combination of growing plants from seed and starting with transplants in their gardens. Keep reading to find out when it makes sense to grow plants from seeds and when starter plants are the best option so that you can choose what’s best for your unique situation.

Benefits of Starting from Seeds

Wider Selection: It’s much easier to find exactly what you’re looking for when you’re shopping for seeds. There’s a much wider array of seeds to choose from compared to starter plants, when you can order from online seed companies or seed catalogs as well as checking the seed racks at stores near you. While you can order starter plants from some companies or individual sellers online, the possibilities aren’t nearly as numerous. Whether you’ve been recommended an heirloom variety of zucchini that you want to try growing or you just enjoy choosing what you’ll grow this year from the widest variety possible, seeds win out when it comes to the diversity of your options. 

Lower Cost: Some seeds are more sought-after than others, so you can find seeds at a variety of prices—but most of the time, buying seeds will be less expensive than purchasing starter plants. The small, light seed packages are also much less complicated (and therefore less expensive) to ship than a live starter plant.

You’ll need to purchase additional supplies to be ready to plant either seeds or young live plants, so even considering the complete cost of both options, the lower initial cost of seeds makes them a more economical choice than starter plants. The exception is if you don’t have a spot indoors that offers enough light for your seedlings. In this case, the purchase of grow lights can tip the balance and make starter plants a less expensive option for you.

Some Varieties Don’t Transplant Well: For some of the plants in the garden, transplanting just doesn’t work. Some varieties have delicate roots that are best not disturbed, while other plants just grow so quickly that there’s no real chance to start them indoors. Here’s a list of plants that do best when direct seeded: baby salad greens, beans, corn, greens that grow quickly (like arugula and spinach), microgreens, nasturtiums, peas, poppies, and root vegetables.

The Miracle of Life: A lot of gardeners get so much joy from the process of growing plants from seeds that they couldn’t imagine doing things any other way. While starter plants offer lots of convenience, they can’t compare to the experience of watching a tiny seed come to life underground and grow into a full-sized blooming plant. 

Benefits of Using Starter Plants

Convenience and Simplicity: Raising plants from seeds requires quite an investment of time and energy as you baby the seeds through their germination and sprouting. With starter plants, you simply tuck the plant into the spot you’ve chosen for it, provide it with some water, and you’re done.

Fewer Timing Restrictions: When you plant seeds, you have to do your research about the plant variety and make sure that you’re planting at the correct time for gardeners in your USDA Hardiness Zone. You have much more freedom with starter plants, which mature as the season progresses and are ready for purchase throughout their growing period. Nurseries online tend to hold off on delivering out-of-season plants (like spring vegetables, for example) until it’s time to plant them in your area. Brick and mortar stores will tailor their selection to offerings that make sense for gardeners in your area throughout the year. 

If you just purchase seeds without doing some research into timing and hope to plant them all at once, you’ll be disappointed. We recommend, if you plan to grow plants from seeds, that you spend some time planning with a calendar. Take into account when each plant variety will need to be sown, when flowers will be in bloom, and when edible plants will be ready for harvest.

Higher Performance: While the time from sprouting to transplant can be a lot of fun to witness, it’s a dangerous time for plants, and gardeners tend to lose some of the seeds they plant to illness, insects, and other factors. Starter plants have been cared for by professionals, and they’ve already been through this risky stage in a plant’s life. The starter plants available at nurseries near you have also been especially selected for gardeners in your region, so you have a better chance for success with starter plants from the outset. Just follow the advice in this article on how to choose healthy plants at the nursery or garden center.

No waiting period: Starter plants are ready to go into your garden and start beautifying your home from the day you purchase them, with one exception. If you make a pre-order for an out-of-season plant, the seller will wait to send your purchase until it’s time for gardeners in your zone to put transplants into the outdoor garden. Unless you plan very carefully, you’ll usually need to wait to plant seeds you’ve purchased as well. Starter plants offer more variety and availability year-round.

As you can see, there’s no right answer for everyone, and there’s no right answer all of the time. Starter plants are better when it comes to performance, simplicity, and freedom from a waiting period or timing restrictions.

Seeds work better for gardeners who are seeking a diverse selection, want to grow varieties that don’t transplant well, those on a budget, and those who just want to enjoy witnessing the miracle of life. After learning more about each option, you’re ready to choose which one is right for you regardless of the situation.

SOURCE: GARDENINGCHANNEL.COM

Happy National DIY Day!

I found a cheap and easy DIY project for spring…Coffee Filter Peonies!

From taunieverett.com:

Hi friends!  Today I’m showing you how to make Coffee Filter Peonies.  Not only are they pretty, they are easy to make.  There are so many possibilities for colors with this project too.  Let’s get started, here’s what you’re going to need:

Coffee Filters

Scissors

Floral Wire

Floral Tape

Food Coloring

Glue or Hot Glue Gun

1.  Fold your coffee filter in half {I did two filters at a time}.

2.  Fold again in to fourths.

3.  Fold again in to sixths.

4.  Last fold so that it is in eights.

5.  Take your scissors and create a scalloped edge around the top of the filter.  You can create a short scallop or a deeper scallop depending on how you want your petals to look.

6.  Unfold to see your pretty scalloped edges.

7.  Once all your coffee filters are scalloped {I used 8 filters per flower, and the flowers are large…so you can use that as your guide for how many filters to cut}.

8.  Grab your floral wire and cut in to 12″ lengths, double that if you want your wire extra sturdy.  Using a pencil wrap the end of your wire several times in to a coil, then press your coil together after you slide it off the pencil.  This gives you a center for your flower that won’t slip through the filters.

9.  Poke the floral wire through the center of the first coffee filter petal, I used a small dot of hot glue on the floral wire coil to secure my filter to it and twist the bottom of the filter.  You can either use regular tacky glue or hot glue {if using hot glue just be careful, it’s hot and the filters are thin}.  I repeated this step until all my filters were on the wire, I glued every two filters, and the very last filter.

10.  Tear off a long strip of your floral tape, about 12 – 16″ long, once you tear it off the roll you will need to gently stretch it – this activates its stickiness.

11.  Starting at the base of the coffee filter where your wire pokes through place a dot of glue and adhere the end of your floral tape.  Start wrapping and spinning your floral tape all the way down your floral wire to create your stem.  I wrapped all the way down and then back up again to give it some sturdiness.

12.  I wanted colored peonies, but you could also leave them white.  If you choose to dye them all you need is food coloring.  Just mix a bowl full of water and tint the water with your food coloring until it’s the color you want.  You can test it by dipping an extra filter in and see how it turns out.  All I did was gently dip my peony one at a time half way in to the water.  Quickly pull it out and lay on a cookie sheet to dry.

13.  Once completely dry you can fluff your peonies and place them in your favorite vase.

SOURCE: TAUNIEVERTT.COM

DIY: Fabric (or Ribbon) Eggs

Save this one for your most ambitious crafters – because the results are absolutely extraordinary. Folded ribbon and fabric triangles pinned one by one onto a styrofoam egg creates a dazzling, almost jewel-like Easter decoration that genuinely looks like a professional display piece. It’s meditative, satisfying, and completely addictive once you get the rhythm going.

What You’ll Need:

Styrofoam egg shapes (available at craft stores in multiple sizes)

Ribbon and fabric scraps in two or three coordinating colors per egg

Straight pins (lots of them – get the glass-head kind for easier handling)

Scissors

Optional: a large decorative ribbon bow for the top of the finished egg

How to Make It:

Cut your ribbon and fabric into squares – roughly 2 inches square works well for a standard-sized styrofoam egg.

Fold one square in half diagonally to make a triangle. Fold it in half diagonally again to make a smaller triangle – you now have a folded “petal” shape with a pointed tip and a folded edge.

Hold the folded triangle with the pointed tip facing toward the bottom of the egg, and use a straight pin to pin it securely to the styrofoam egg, pushing the pin through the two folded layers at the base of the triangle.

Repeat this process with the next square, positioning it so it slightly overlaps the first triangle. Pin it in place.

Continue working in rows around the egg, overlapping each triangle to cover the pins of the previous row. The goal is to cover the entire styrofoam surface so no white egg is visible.

Alternate between your two or three fabric/ribbon colors in a regular pattern as you go – this creates the beautiful quilt-like visual effect.

Once the egg is fully covered, add a decorative bow at the top pinned in place as a finishing flourish.

Pro Tip: Start at the bottom point of the egg and work your way upward in rings – this makes it much easier to keep your rows even. Using ribbon with a slight sheen (like satin ribbon) alternated with a coordinating patterned fabric creates the most stunning color and texture contrast. These eggs look spectacular arranged in a bowl or Easter basket as a centerpiece!

(Pat’s Note: This technique can also be used to make Christmas balls!)

SOURCE: PLAYPARTYGAME.COM

Spring Cleaning Tips: Part 2

From: The Pioneer Woman:

Clean Your Dishwasher the Natural Way

“Did you know that you need to clean your dishwasher? You do!” says Becky Rapinchuk, the blogger behind Clean Mama and author of the new book Clean Mama’s Guide to a Peaceful Home. “Luckily, white vinegar is all you need.”

Becky recommends pouring one cup of vinegar and running your dishwasher on a quick wash, hot, sanitize cycle. That’s it!

Trade in Conventional Cleaners for All-Natural Products

Conventional cleaning products and products with chemicals that emit harmful VOCs (volatile organic compounds) are not good for you or your home. Making the switch to all-natural, plant-based cleaning products like Humble Suds will bring joy to cleaning and simplify your life with their multipurpose uses.

Three Ways to Dust Your Blinds

“Dusty, dirty blinds? Cleaning them isn’t as difficult as you think,” says Becky. “You can use a special tool, a vacuum cleaner, and/or a little elbow grease and a microfiber cleaning cloth.”

Freshen Up Your Mattress with Baking Soda

Need to freshen up your carpet or mattresses while you’re spring cleaning? Becky has a simple DIY with baking soda that you can make today. Not only does it work but it looks cute too, thanks to some lavender buds mixed in.

Clean Your Shower with a Dish Wand

Are you not exactly a neat freak until spring cleaning time rolls around? Dana K. White gets it. The blogger behind A Slob Comes Clean and author of the books How to Manage Your Home Without Losing Your Mind and Decluttering at the Speed of Life has the hacks for you. She recommends keeping a dish-soap filled, non-scratch dish wand in the bathtub and using it whenever you take a shower. Genius!

Clean Bathroom Exhaust Fan Vents with a Broom

When it comes to spring cleaning, leave no corner uncleaned. If it never occurred to you to clean the exhaust fan vents in your bathrooms, we can’t say we blame you. But Warren says it’s now or never, so remove the vents, shake them out, spray them, and wipe them down.

“If they’re not removable, use a whisk broom to clean them off,” he adds. “They get pretty dirty over the winter.”

Wash Your Kitchen Kitsch in the Dishwasher

Kitschy decor can brighten up even the most basic kitchens. Unfortunately those tchotchkes get the worst kind of dust: greasy dust. Instead of trying to clean them by hand, Dana recommends running them through the dishwasher. Talk about a time-saver!

Clean Grout Without Any Elbow Grease

Get the sparkling clean bathroom tiles of your dreams by cleaning grout without any scrubbing whatsoever. Dana discovered the most brilliant trick on Pinterest: Simply soak cotton balls in bleach and place them on grout overnight. You won’t believe your eyes when you remove them the next morning!

Declutter by Starting with the Trash

We get it: Decluttering can be overwhelming. Dana recommends breaking the ice with this simple step: Grab a trash bag and start removing trash from all around your home (think: food wrappers, empty packaging, or broken toys). You’ll be amazed what a difference it makes, and the results will motivate you to continue decluttering!

Clean Walls Quickly Using a Sock

Who needs microfiber cloths when you have old white socks? Katrina Springer of The Organized Housewife recommends wiping your walls clean with a multi-purpose wall cleaner and a sock on the hand. “This quickly and easily picks up all dirt on the walls and I find it easier to glide the hand flat over the wall,” she says.

Clean Your Showerhead with a Baggie of White Vinegar

As you may have surmised, a little vinegar can go a long way when it comes to cleaning. “It’s especially great for lazy cleaning,” says Kimberly Button, a certified green living expert and founder of GetGreenBeWell.com. “Just soak something in or with vinegar and let it dissolve the dirt and scum for a few minutes before you come back and quickly wipe it away.”

For instance, soak a showerhead or faucet nozzle in a baggie of white vinegar (using a rubber band to secure the bag) for 15 to 30 minutes. Then, easily wipe away the grime and mineral deposits that have accumulated over time.

Descale Your Coffee Maker

You may be cleaning your coffee maker semi-regularly, but when spring rolls around, it’s a good time to try descaling. This process tackles limescale buildup caused by hard water, which can affect the taste of your coffee. To keep your cups of joe tasting fresh and delicious, brew a pot with a mixture of water and white vinegar or use a professional descaler.

Clean Cast Iron Pans

There are a few household items you should never clean with vinegar. One of them is cast iron. Instead, scrub your cast iron pans with a paste of coarse kosher salt and water to remove any food bits, and then rinse or wipe them clean with a paper towel or clean cloth.

Clean Your Curtains with a Steam Cleaner

“A steam cleaner is one of the easiest ways to effectively clean with no chemicals,” says Kimberly. “High temperatures will kill germs and sanitize.”

Kimberly recommends using a hand held steamer for plush toys, curtains, and pillows. Just remember to do a test patch to make sure the fabric or item can withstand high heat!

Dust Off Your Houseplants

House plants need spring cleaning love too! In addition to doing your usual watering and pruning, you can actually dust off your house plants using a microfiber cloth. This will help your plants breathe better, which in turn will help you breathe better.

Buff Leather Furniture with Coconut Oil

Give your leather furniture a glow up with a little coconut oil and a clean, soft rag.

“You’ll need to apply a very thin layer, and be sure to gently buff it in over the entire piece,” says Kimberly. “You’ll notice dirt and oils on the cloth after cleaning. Let the oil absorb into the leather for at least an hour (if not longer) before using.”

Clean Your Cell Phone

Cell phones are notoriously germ infested, but most of us probably don’t clean them as often as we should. To keep your phone squeaky clean, wipe it down with a microfiber cloth, which is designed to pick up even the most microscopic particles, including bacteria and viruses. Don’t forget to power down first!

Trade in Your Broom for a Microfiber Mop

Kiss your broom goodbye! (Okay, don’t actually do that because, gross.) Jokes aside, you really should ditch your broom. “It actually moves harmful dust into the air and elsewhere,” says Jennifer Parnell, the co-founder of Humble Suds, a line of non-toxic mineral- and plant-based cleaning products. “Instead, choose a microfiber mop to collect dust and get your floor squeaky clean. I really like this version this version where you can collect dust on one side and mop with the other.”

Clean Your Baseboards with Used Dryer Sheets

Used dryer sheets can be repurposed to do a variety of household tasks, including wiping your baseboards clean and buffing water spots from any glass and mirrors around your home.

Cut Costs by Using 10% Vinegar

Holli Schaub, co-founder of Humble Suds, says her favorite vinegar hack is buying 10% vinegar and diluting it per the directions. “It’s much more cost-effective,” she explains. “Vinegar is an awesome all-natural cleaner but can get expensive when you use it for a rinse-aid in your dishwasher, fabric softener in your washing machine and so on.”

SOURCE: THE PIONEER WOMAN

Wake Up Your Garden in Spring

I found a good article on the Almanac website with tips on how to gently wake up your garden this spring.

From: Almanac:

Spring may be calling, but in many parts of the country—especially cooler regions—it’s important not to rush the season. Early spring gardening is all about taking a gentle approach, allowing soil to dry, plants to wake naturally, and beneficial insects to emerge safely. After seeing gardens already in full bloom in warmer climates, it can be tempting to dive right in, but patience pays off. These early spring gardening tasks will help you clean up winter’s leftovers, protect tender growth, and prepare your garden for a healthy, productive growing season—without doing more harm than good.

Early Spring Gardening Chores

Wait for the right conditions: Avoid walking on soggy soil, which can compact and damage plant roots. If you must enter wet areas, use stepping stones or boards.

Correct frost damage: Gently press frost-heaved plants back into the soil to protect roots.

Preserve beneficial insects: Delay leaf and debris removal until temperatures consistently reach 50°F or higher. Many insects overwinter in garden debris.

Pick up winter debris: Start by gathering fallen branches and sticks, giving you a clear view of how plants survived the winter.

Rake carefully: Begin with early bloomers so they can poke through the soil without damage.

Prune and clip: Remove old leaves from hellebores and epimediums. Cut back ornamental grasses before new growth begins, leaving 8–12 inches above the crown. Remove broken rose canes. Wait to prune spring-blooming shrubs until after flowering.

Divide overgrown perennials: Early spring is ideal for dividing and moving perennials before buds and leaves emerge.

Weed control: Remove early weeds before they get established—they are easier to manage now.

Soil testing: Test your soil in early spring to determine which amendments are needed before planting.

Early vegetable planting: Cold-hardy crops like peas, lettuce, spinach, radishes, carrots, beets, and chard can be planted once the soil is ready. Use local planting guides or check soil temperature (e.g., peas need at least 45°F to germinate).

Pot summer bulbs: Give begonias and other summer-flowering bulbs a head start indoors or in protected areas.

By following these early spring gardening tips, you’ll protect your plants, soil, and beneficial insects while setting yourself up for a productive and beautiful garden all season long.

Frequently Asked Questions

When is the best time to start spring garden cleanup?

Wait until soil is no longer soggy and daytime temperatures consistently reach 50°F or higher. This protects plants and overwintering insects.

Why shouldn’t I clean up leaves and debris too early?

Many beneficial insects overwinter in garden debris. Early cleanup can harm these important pollinators and pest controllers.

Can I plant vegetables in early spring?

Yes! Cold-hardy crops like peas, spinach, lettuce, radishes, carrots, beets, and chard can be planted once soil temperatures are appropriate.

Should I prune my shrubs and perennials now?

Remove broken branches and old leaves. Wait to prune spring-blooming shrubs until after flowering. Ornamental grasses should be cut before new growth emerges.

Is early spring a good time to divide perennials?

Yes. Dividing perennials before buds and leaves emerge minimizes stress on the plants and encourages healthy growth.

Should I test my soil in early spring?

Yes, testing now gives you guidance on which amendments to add before planting, ensuring optimal growth.

SOURCE: ALMANAC.COM

Spring Cleaning Tips: Part 1

Polish Stainless Steel Appliances with Olive Oil

Make your stainless steel appliances sparkle this spring by polishing them with a surprising kitchen staple—olive oil! Simply apply a small amount of olive oil to a soft cloth, buff the surfaces, and you’ll be rewarded with a streak-free, gleaming finish.

Clean Oven Racks in the Bathtub

Effortlessly refresh your oven racks by placing them in the bathtub for a deep-cleaning session. Let them soak in warm, soapy water to loosen grime, and then use dryer sheets to easily wipe away grease and residue.

Wash Bed Pillows in the Washer

Want a more refreshing sleep experience? It all starts with tossing your pillows into the washer this spring. A quick spin removes dust, allergens, and the winter blues, leaving you with fresh, fluffy pillows for a rejuvenating night’s sleep.

Scrub Grout with Baking Soda and Hydrogen Peroxide

Scrub any tiled spaces with a simple yet effective DIY cleaning solution of baking soda and hydrogen peroxide. Watch as this powerful combination lifts away stains and brightens grout lines, leaving your floors and walls looking good as new.


Use a Lint Roller to Clean Lampshades and Fabric Surfaces

Simplify your cleaning routine by grabbing a lint roller to remove dust and debris from lampshades and other fabric surfaces. This quick and efficient method ensures a polished, lint-free look with minimal effort.


Clean Tall Windows with a Swiffer Mop

Tall windows don’t have to be a tall order! Cheryl Sousan, the self-proclaimed “neat freak” behind the blog Tidy Mom, recommends using a Swiffer mop to clean high or hard-to-reach windowpanes. Simply wrap some paper towels around your Swiffer, spray some glass cleaner, and wipe your way to sparkling clean windows.


Steam Clean Your Microwave


Look no further than your microwave itself for a quick and easy cleaning tip! You’ll need to mix two cups of water and two tablespoons of distilled white vinegar in a bowl and heat it on high in your microwave until it comes to a boil. Let it stand inside for about three minutes and then use a sponge or cloth to wipe your microwave clean.


Clean Your Bath Mats


If your bath mats are machine washable, this will be an easy one. Simply shake out any debris and then run your rug through a regular wash cycle on the cold setting. Most rugs can also be put in the dryer on low, but be sure to hang dry memory foam mats or ones with rubber backing.


Shake Out Your Doormats
Your doormats, whether indoor or outdoor, get a lot of foot traffic. Give them a good spring cleaning by shaking out debris outside, vacuuming them, and then rinsing them off with a garden hose to remove any lingering dirt.


Polish Your Silverware with a Toothbrush

Is your silverware looking a little less than guest-ready? Remove residue and tarnish easily using a toothbrush and Hagerty Silver Foam.

Wash Your Brooms

Dust bunnies, be gone! To clean your broom, simply take it outside and smack it against a tree to loosen up all the dust and dirt. Then place your broom in a bucket filled with warm, soapy water and let it soak for 30 minutes for rinsing it off with warm water.

Deep Clean Your Washing Machine with Vinegar

Disinfect your washing machine to help it reach its maximum cleaning potential. First run the machine with hot water, then add white vinegar and baking soda, and let them sit for about an hour. Finally, restart the cycle, let the water drain, and wipe it clean.

Wash Your Shower Curtain Liners

Did you know you can wash shower curtain liners in the washing machine? Instead of replacing yours, take a few extra minutes to toss it into your washing machine along with a bath towel or two. After washing, simply hang your curtain back up to dry in your shower.

Give Your Toilet Bowl a White Vinegar Bath

To eliminate hard water stains inside your toilet, soak toilet paper in white vinegar and let it sit on top of the stain overnight. Then simply flush to rinse away the stains!

Freshen Up Your Trash Cans

Make your trash smell a little better by placing dryer sheets on the bottom of the can to help absorb spills and mask odors.


Throw Away Expired Makeup

Using old makeup and tools can lead to skin irritation or infection. Look through your medicine cabinet and toss concealer, eye shadow, foundation, lip gloss, and nail polish that you’ve had for more than one year. Lipstick and blush last a little longer so you can keep them around for up to two years.


Care for Your Garbage Disposal with Lemons


“For spring cleaning, I like to do the little extras that don’t get done on a daily, weekly or even a monthly basis (unfortunately!),” says Warren Weiss of Scrub!, a cleaning service in Philadelphia, Pennsylvania.
To make the garbage disposal smell nice and to keep the blades sharp, Warren suggests cutting a lemon in quarters and run it through. Easy peasy, lemon squeezy!


Use a Pillowcase to Dust Ceiling Fans

Use an old pillowcase to dust all of your ceiling fans, says Cheryl. Simply slide the pillowcase over each blade and then pull the fabric back, keeping all the dust and dirt contained.

Add Essential Oils to Your Cleaning Solutions

While you’re up there wiping down the blades of your ceiling fans, Warren suggests adding an essential oil to your cleaning solution.

“That way, when I turn on the fan, it makes the room smell great,” he shares.

Unclog Kitchen and Bathroom Drains

“Did you know that some Feng Shui masters say that clogged drains deplete finances, health, aspirations, travel, clog sinuses, and simply, wreak havoc in general?” asks Cheryl.

SOURCE: THE PIONEER WOMAN

DIY: Easy Leprechaun Hats

Supplies Needed for Clay Pot Leprechaun Hats:

      Small or Medium Clay Pots

Green Multi-Purpose Acrylic Paint (you can also use spray paint!)

Paint brush

Black Ribbon (I used 3/8” and 1/2”)

Gold scrapbooking paper or Gold Vinyl

Hot Glue Gun/Hot glue Sticks

scissors

Xacto knife

Step 1: Spray or paint the pots

Step 2: Make the hat band

I wrapped with black ribbon towards the bottom of the clay pot.  Since the pot is not a true cylinder, you will have to adjust in the back to get the ribbon to sit properly in the front.  Use hot glue to secure in place.

Step 3: Add the Buckle

Next I used my Xacto Knife to cut out the buckles.  I had some gold cardstock left over from this Santa Bin.   I just used that.  I hot glued them in place as well.

Voila! You’re done!

SOURCE: https://www.thatswhatchesaid.net/clay-pot-leprechaun-hats/

DIY: Romantic Valentine’s Gift

I saw this DIY tutorial for a birch log candle holder and I fell in love!  It does take a little bit of skill with a drill (my husband will handle that part), but it really is a clever, romantic Valentine’s gift.

Items you‘ll need:

Birch pillar from the craft store OR a piece of birch log you cut yourself

Tealight candle

Colored pencil – light brown

Pencil

Knife

Drill

Drill bit – 1 3/8″ spade bit or slightly larger

Start by marking out the size of your candle and drilling a hole in the top of your birch pillar. Trace the bottom of the tealight in the center of the birch log, then place the bit down in the middle of it.

With this kind of bit, you might need to rock the drill back and forth a little while drilling to get a good hole.

Sketch the design you want on the front of your birch pillar.  It doesn’t need to be perfect. You want it to look like it was carved spontaneously into the side of a tree.

Carve your design with an old, dirty pocket knife. You know, to make it as authentic as possible. But really, if you have some kind of special carving knife, that would probably be even better.

I wanted the design to “pop” a little bit more from far away, so I shaded it in with a light brown (hazel) colored pencil. Not 100% necessary, but I think it made it look better.

Put a tealight candle in the top of your birch candle holder and you’re done!

SOURCE: DIYCANDY.COM