[I found this article on alternate uses for baby powder on a website devoted to frugality.]
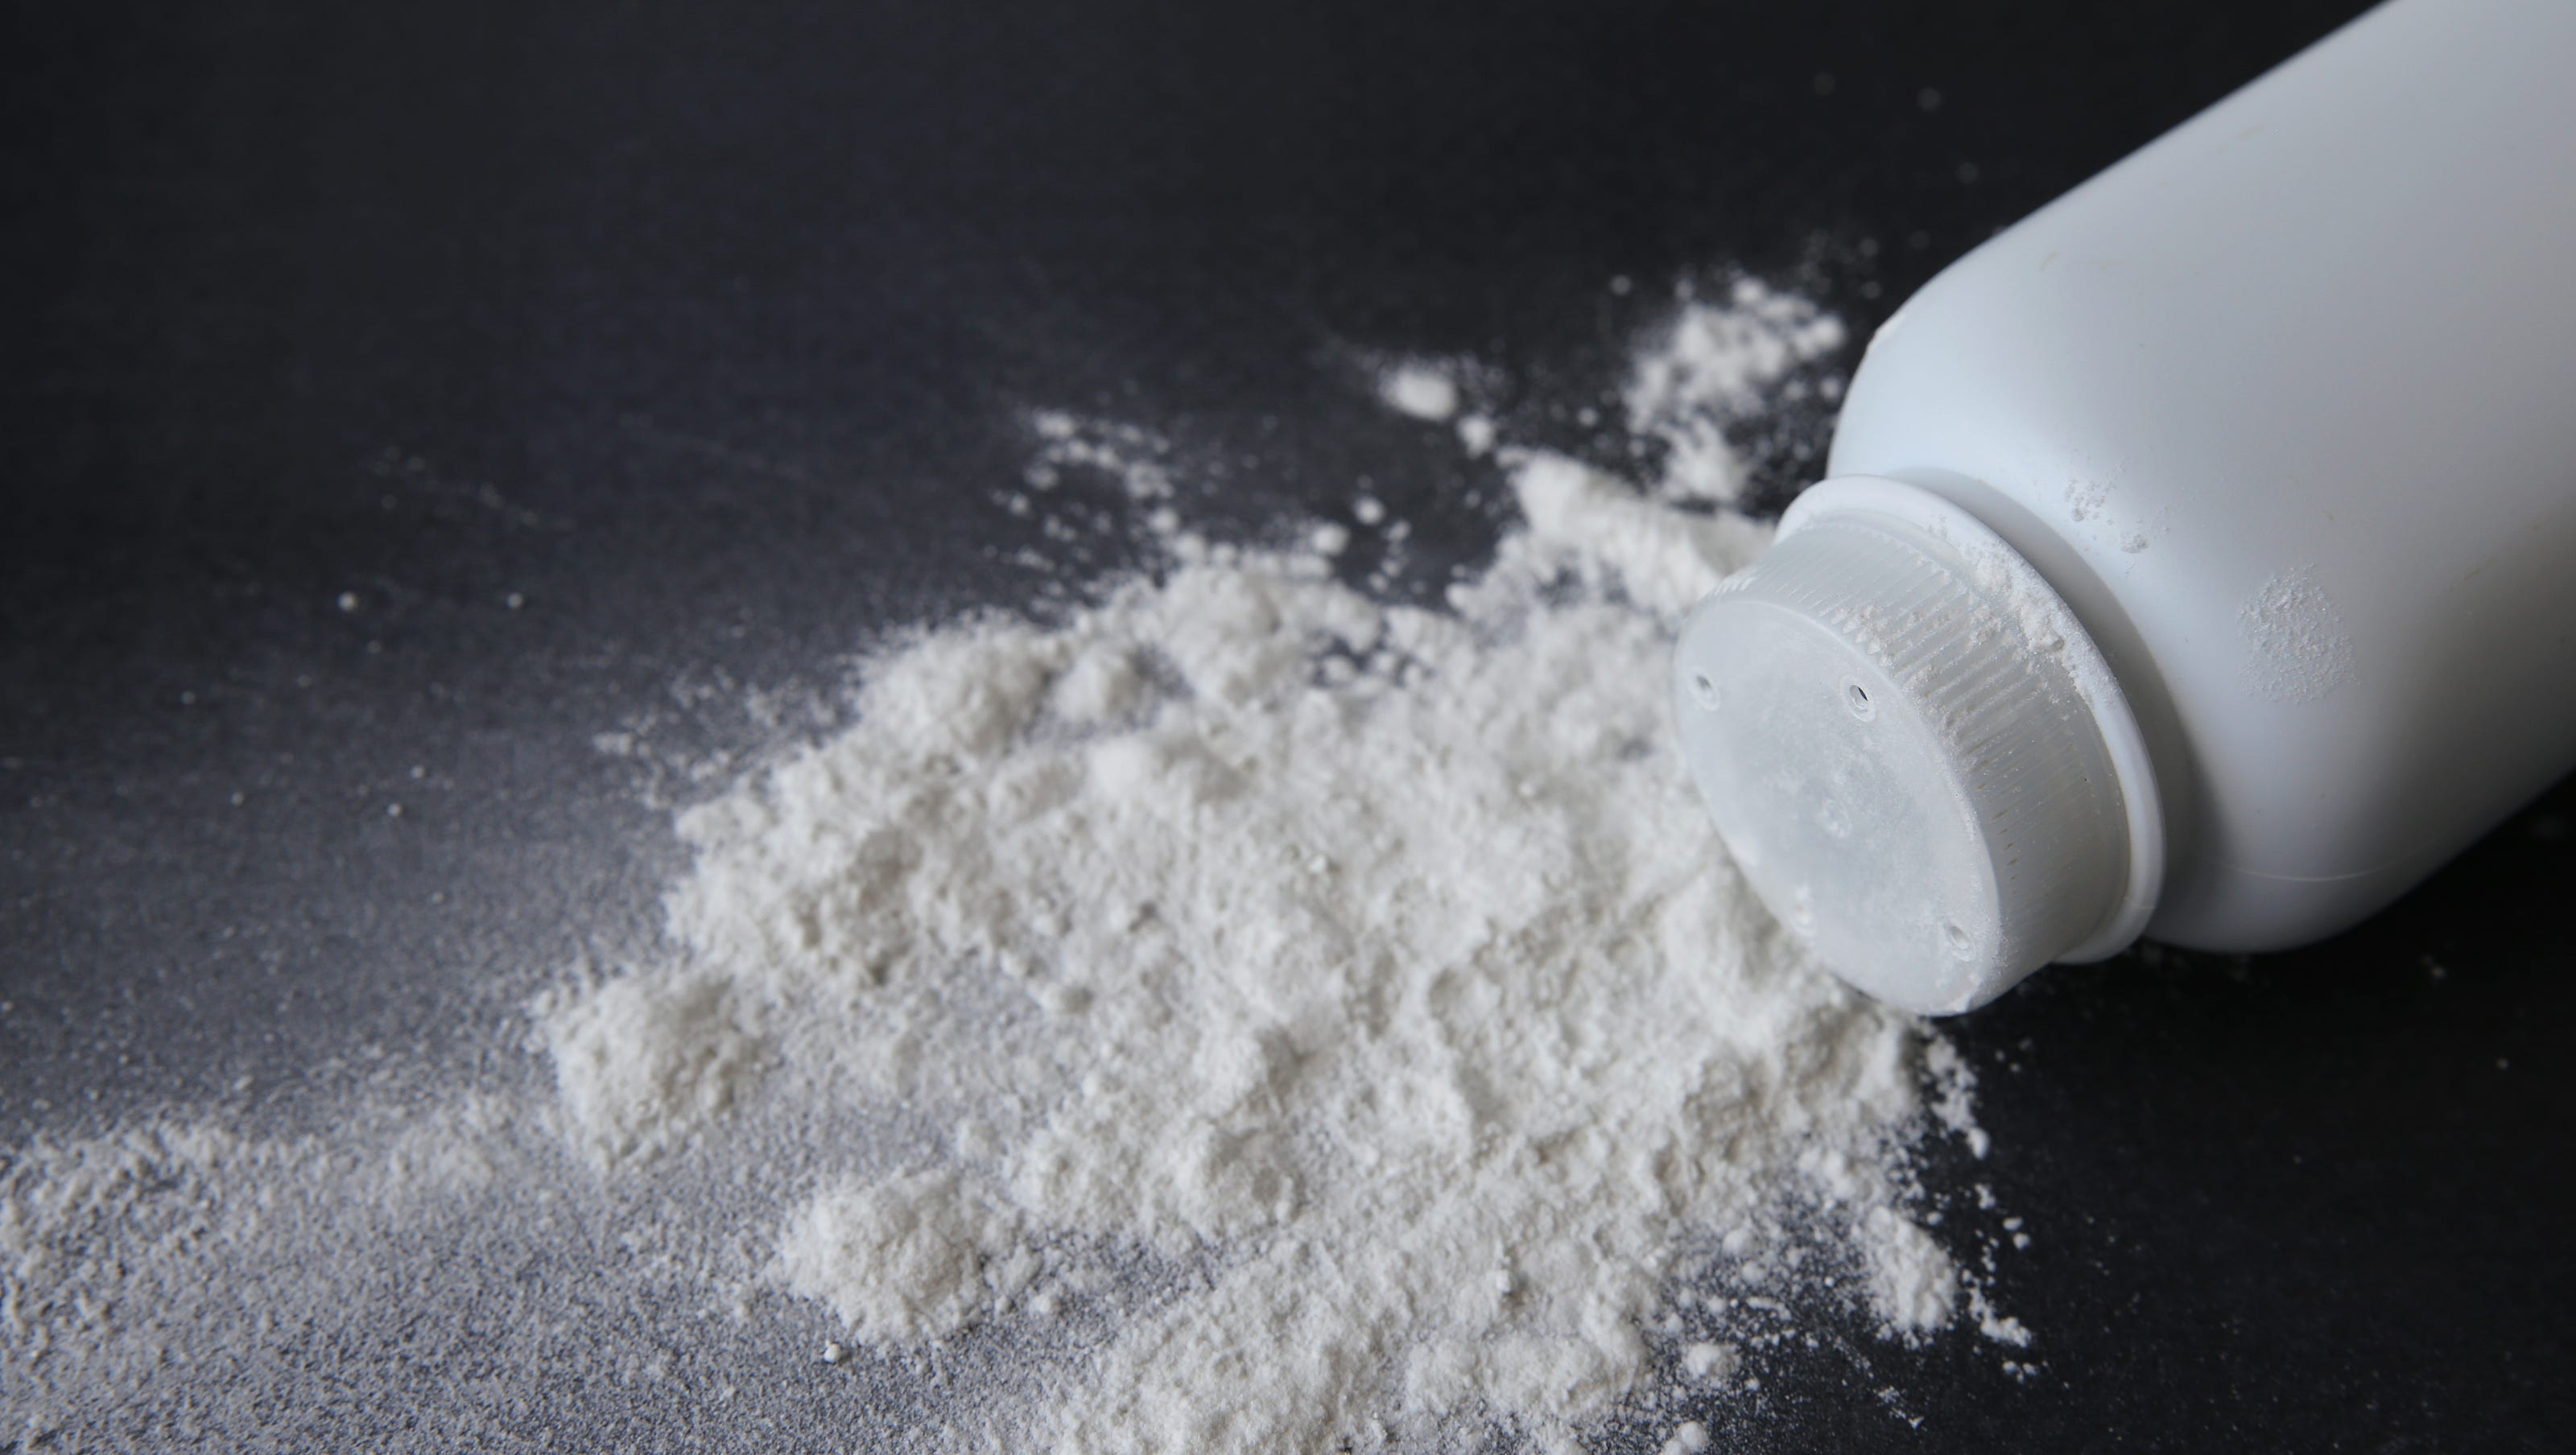
Baby powder isn’t just for babies anymore {though, to be fair, I never did use it on my babies}. Turns out, there’s actually lots of way to put baby powder to good use. Here’s my top 10 favorite ways to use it:
Throw a bottle in your beach bag because it helps to get the sand off of your body at the end of the day. Sprinkle it on, it will absorb the moisture and the sand should easily brush right off.
Sprinkle a little in your dish washing/cleaning gloves. It makes it easier to get them on and off.
Sprinkle on the sheets in the summer. It is supposed to give sheets a cool feeling {my guess is that it does more for your sticky summer body than anything else, but it probably still feels soft and luxurious, so I am totally trying it.}
Give your flower bulbs a little baby powder bath before you plant them. The baby powder deters mold in the bulbs and supposedly deters critters from wanting to eat them. Just sprinkle some baby powder in a ziploc bag, add the bulbs and shake.
Get playing cards to stop from sticking. Put the cards and the baby powder in a baggie and shake. Dust the cards off, and they shouldn’t stick anymore.
Give your dog a dry bath. Sprinkle some baby powder on, let it sit a few minutes and then brush your dog. {Hmmm, I know some people I’d like to try this on.}
Use as an aftershave–for men and women. It’s cheaper and leaves skin feeling as soft as, well, a baby’s bottom. Ha.
Untangle knots. Got a necklace that has a knot, or a shoelace that won’t budge. Sprinkle a little baby powder on it, it will help loosen the knot.
Freshen those old books you snagged at a garage sale by sprinkle baby powder in the pages. Let the book sit for a bit, and then shake the baby powder out.
Use to absorb grease stains on clothes. Sprinkle baby powder on the spill and blot the grease out. Repeat until stain is gone, brushing off excess baby powder each time.
By Mavis Butterfield on September 23, 2013 @https://www.onehundreddollarsamonth.com/10-alternative-uses-for-baby-powder/
Today is National Crayon Day, so I went looking for crafts using broken crayons…there are a lot of them! From lip gloss to room candles, if you’ve got broken crayons, you can recycle them. I found this particular craft at TheSuburbanMom.com website. She made the craft, then provided additional tips afterward to make your experience better!
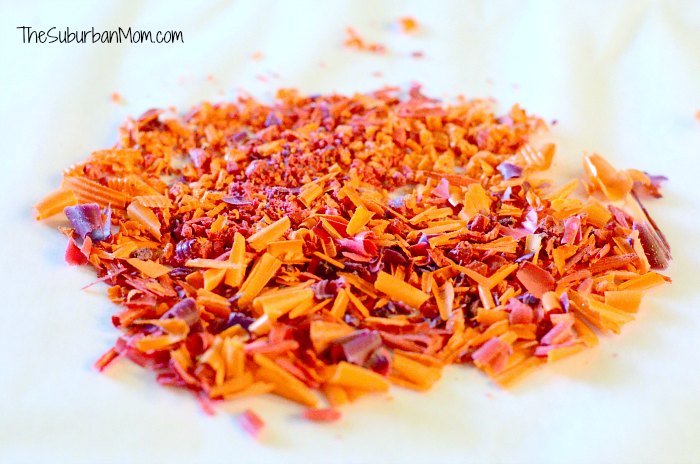
After removing any paper from the crayons. Sharpen crayons with a manual sharpener. Since we were using old broken crayons, while my daughter sharpened the crayons she could, I used a knife to chop up smaller bits.
TIP – The first one I made I used a LOT of shavings, like 5-6 crayons worth. That’s overkill. You only need one crayon for each piece of wax paper. Otherwise, it is too thick and you will lose the translucent sun catcher effect.
For the first few sun catchers we made, we mixed colors. But we discovered that when the colors melted, they became one dark shade of red. So we decided we liked the look of a single color best.
Once you have your shavings, place them on a piece of wax paper – approx 12 x 12 inches. Fold the wax paper in half and then double fold the edges to create an envelope that will contain the shavings. This is very important. Make sure you double fold over your edges or wax will run out when you iron.
Using a low setting, place your wax paper envelope between a large piece of folded parchment or kraft paper. Wax will ooze out — do not skip the parchment or kraft paper. (At first I tried using a rag as a drop cloth, but it got messy. The parchment works well because it contains the melted crayon.)
As you iron, let the melted crayon run in the wax paper envelope filling it with color.
When the melted crayon is more or less evenly distributed, set it aside to cool (just a couple of minutes).
Once cool, use a pencil to draw large hearts on the wax paper envelopes, and then cut out hearts. (I was surprised how easy it is to cut the wax paper with melted crayon inside.) Initially, I was going to trace perfect hearts, but I decided to freehand them and let my daughter cut them out.
Punch a hole in your hearts and hang in the window.
Super pretty, right?
(Pat’s note: This can easily be used to make patriotic suncatchers using a star template or a Halloween/pumpkin one, or whatever.)
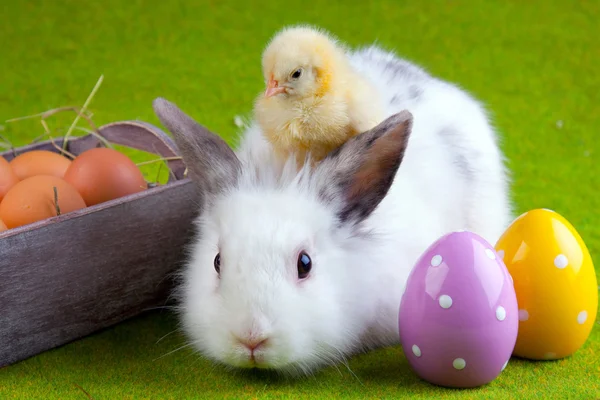
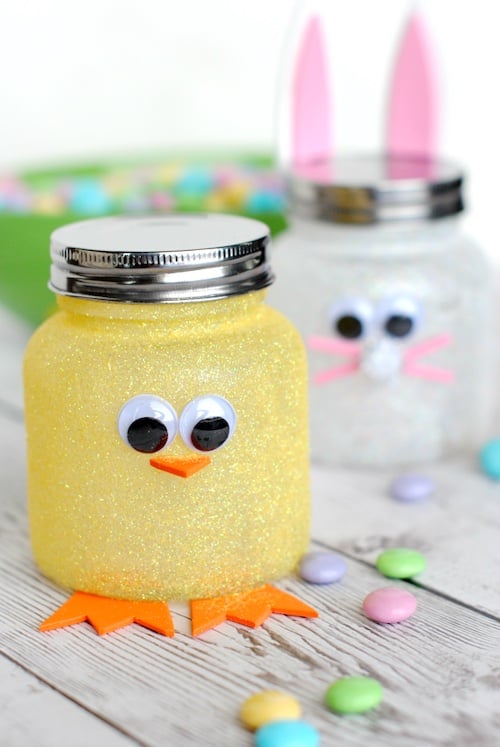
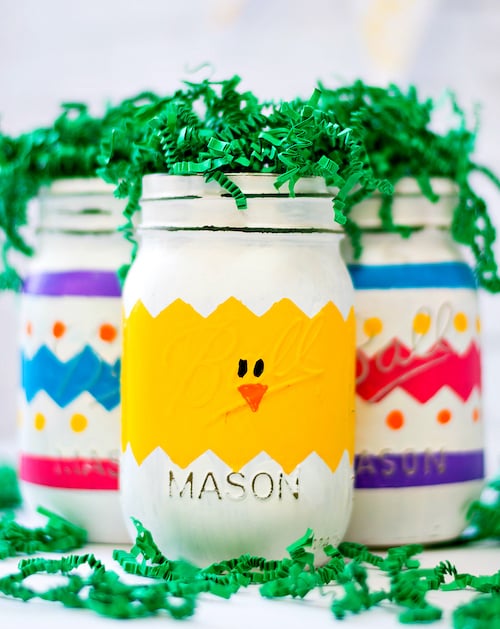
Several years ago, my granddaughter and I made these adorable (and EASY!) Easter jars. They require clean, empty jars, paint, googly eyes, pipe cleaners, a puff ball and some foam or felt scraps.
Of course, there’s ALWAYS Mason Jars to paint…LOL
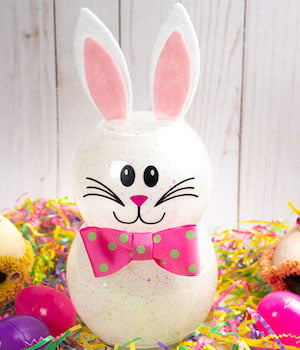
This bunny is basically the same idea only you use 2 small glass globes. I used rounded glass containers that I saved after I burned the candles in them. I microwaved the glasses to liquefy the remaining bits of wax and poured that out. Then I washed them and used them!
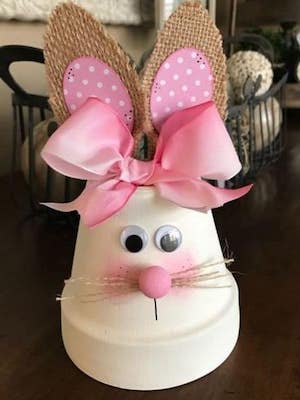
This idea uses a flowerpot, some burlap for the ears, googly eyes, a wooden ball (for the nose) and ribbon!
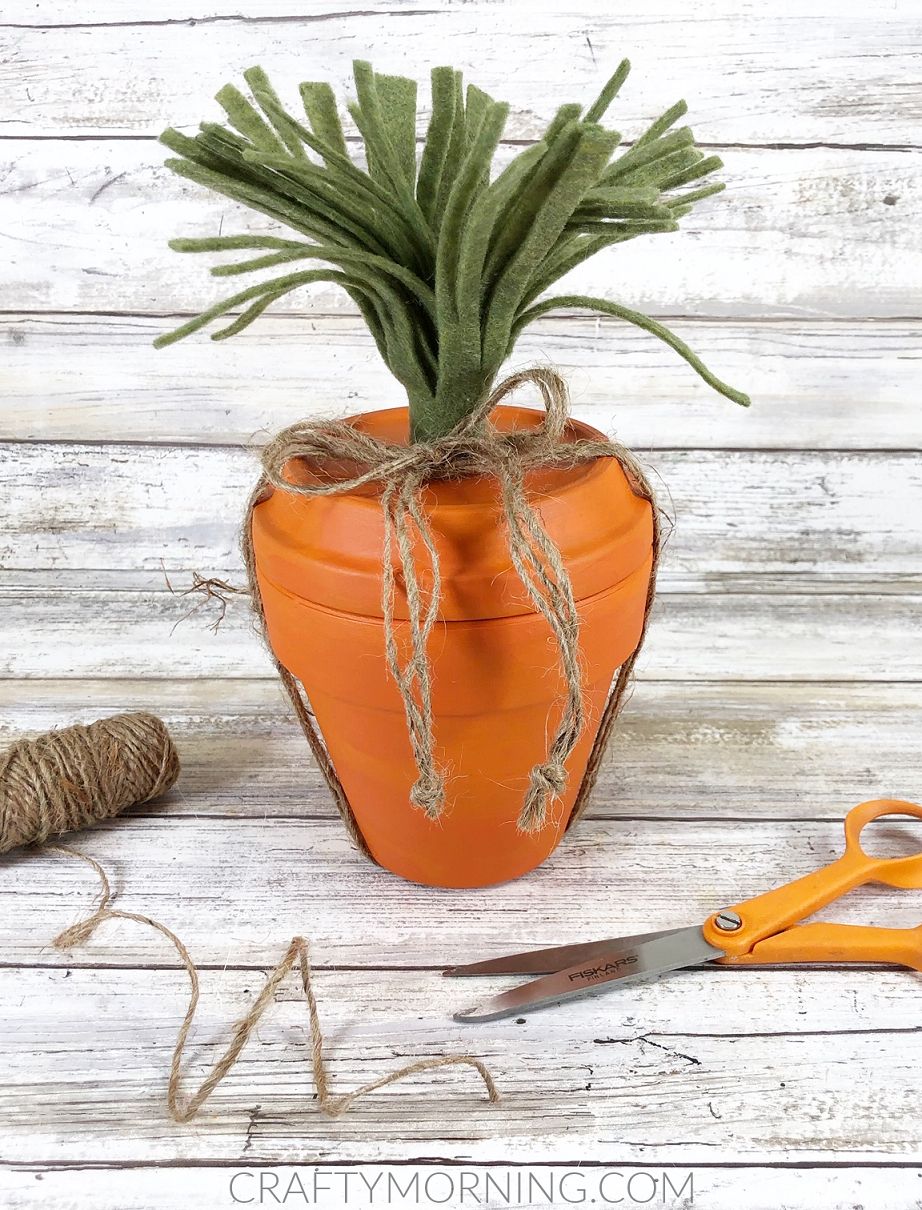
How about a super easy carrot? You’ll need a clay pot and saucer, some twine, felt, acrylic paint and glue.
Lastly, I offer these bunny sachets!!
You’ll need to draw a bunny shape (see picture below) on doubled fabric, and then, starting at the flat bottom part, sew around the edge. (If you want that exact size, add a ¼ to ½ inch around the edge for a seam.) Leave an opening so you can turn the bunny inside out. Turn the sewed bunny inside out and then tie a ribbon at the base of the ears to prevent the filling from going into the ears. Use a funnel to spoon a mixture of dry rice and dried lavender into the bunny head. Stitch the opening closed. Add a face with a fabric marker if desired.
In searching for some tips on fixing something totally unrelated, I happened upon this article by Juliana LaBianca in Reader’s Digest.
The beauty of nail polish
Nail polish can be used for a lot more than just adding a little color to your nails. If you have a few extra bottles lying around the house, check out these clever ways you can use them up.
Smooth out slightly splintered wood
Seal a wooden surface with a coat of clear nail polish (for stained wood surfaces, first find a color that matches the wood). The new finish will stop supplies such as wooden hangers from snagging clothes and keep fingers splinter-free.
Waterproof your garden labels
Make plant labels waterproof by coating them in clear nail polish. You’ll never have to Google how often to water your herb garden again. This trick also works for waterproofing address labels on packages.
Prevent rust stains
Coat the bottom of metal cans (think shaving cream and hair spray) with clear nail polish to prevent rust from developing and staining your sink or medicine cabinet.
Stop a run in tights in its tracks
Keep a small hole from spreading by dabbing the run with clear nail polish.
Prevent frayed fabric from getting worse
Tame frayed fabric, such as the wisps on the cuffs of a nylon-lined jacket or the tiny broken threads on the bottom of a well-worn wool pencil skirt, with clear polish.
Fix peeling pearl buttons
Coat (fake) pearls with clear nail polish to stop them from peeling.
Stop a cracked windshield from getting worse
Stop a small windshield crack in its tracks with clear polish. Working in the shade, paint the crack on both sides of the glass. Move the car into the sun to allow it to dry. You’ll eventually need to repair the windshield, but in the meantime, use polish to buy time and shop around for the best estimate.
Treat an unraveling shoelace
Dip an unraveling shoelace in clear nail polish. Twist it back into shape and allow it to dry.
Protect tarnish-prone costume jewelry
Prevent costume jewelry from tarnishing by brushing over it with clear nail polish. This hack will also stop skin discoloration and irritation from cheap jewelry.
Seal an envelope
Seal an envelope with a brush of nail polish. For a fun letter, such as a party invitation or thank you note, use a bright color.
Hide scuff marks on a shoe or bag
Fill in a scuff with a dab of nail polish that matches the piece. No one will be any the wiser. (Note: If you plan to resell a vintage or designer item, the paint could lower its value.)
Hide a chipped tile
Color in a small chip on a kitchen or bathroom tile with a matching nail polish color. The small brush and variety of colors available will ensure accuracy.
Tighten a loose screw
Secure a screw by first painting it with nail polish, which will give it extra stickiness. Paint over the top of the screw to prevent it from developing rust.
Prevent chipped car paint from rusting
A small indent or piece of chipped paint could develop rust once the spot is exposed to the elements. Seal yours off with a coat of clear nail polish.
Organize a jumbled set of keys
Organize your mess of keys by painting the tops of the most important ones with different colored nail polish. You’ll always know that blue means home and red means gym locker.
Reattach a loose rhinestone
The ultimate wedding must-have? A bottle of clear nail polish. In addition to fixing any manicure fiascos, the polish can also be used to reattach a loose rhinestone or crystal.
Fix a window screen
Mend a torn window screen with a dab of clear nail polish.
Maybe you go all out for St Patty’s Day, like the person above did with decorating the whole door or maybe you’d rather be a little more low key. Here are 3 very easy and cute ideas for St Patty’s day crafts. The first one requires a clean jar, some felt scraps, ribbon scraps, a hat (these can be purchased at any place that has St Patty’s decorations), a button and some orange colored candies. Easy Peasy!
Here’s a thrifty idea! We all save small plastic containers (for leftovers and whatnot). Take a small tub bowl with lid and paint it green. Add construction paper for a hat band and buckle and add a construction paper shamrock. Fill with rollos or chocolate gold coins!
And what’s St Patty’s Day without some gold! You can paint rocks to look like gold nuggets, or you can be more creative if you choose to be.
How about THIS for an easy decoration? Buy GREEN Mason jars! (Mason jars CAN be used for just about everything! lol)
So your St Patty’s decorations can be festive AND easy…but there’s always that one house…
Today I offer 2 simple, easy to create Valentine crafts: a fleece pillow and a Valentine Gnome. Let’s get started!
No Sew Heart Pillow
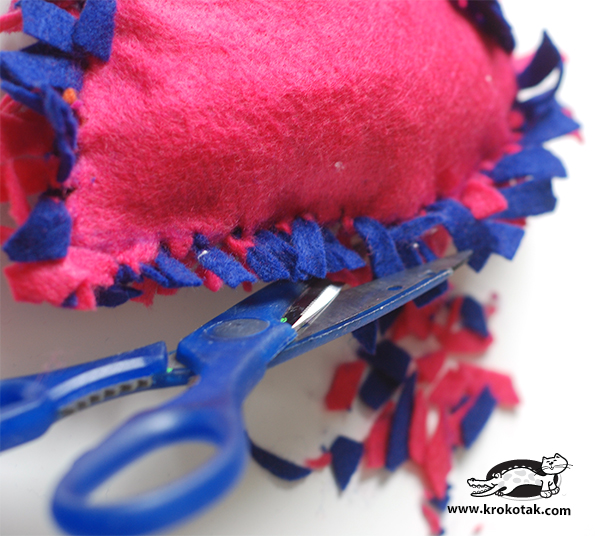
Have a look at this easy way to make such a pillow from felt fabric or polar fleece (the cloth must be threadless). You need polar fleece in two different colors, scissors, and stuffing to stuff the pillow with, when it is ready.
Put the fabrics one over the other. Cut a big heart. After that draw a smaller heart inside the bigger one. Be sure to leave at least an inch to an inch and a half between the two borders. This is very important, because when you cut the strips (as shown at the image) they must be long enough so that you can tie them.
Start to tie every two strips, which one over another.
Tie all the strips in this way.
Do not forget to stuff the heart before you close the heart.
At the end, you can reduce the length of the strips to make your heart bushy. This heart pillow comes from the krokotak.com website.
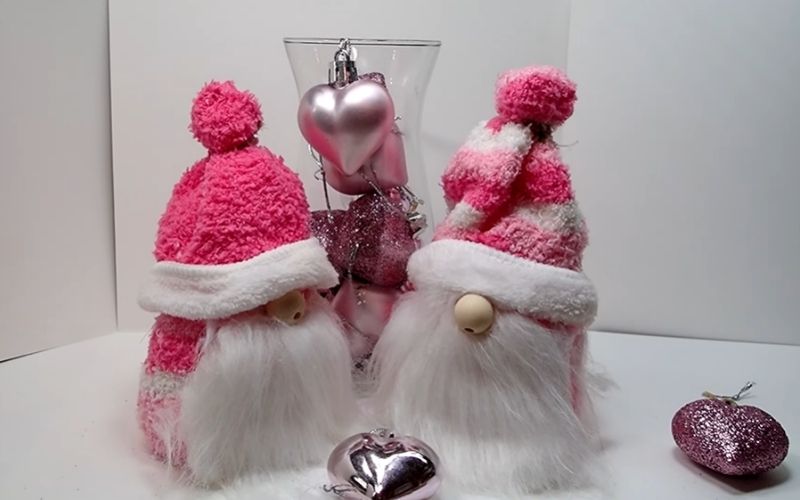
Gnomes
Old yarn socks
Wooden beads
Faux beard
Rice
Polyester fiberfill
Jute string
Microfiber cleaning cloth, white
Hot glue gun & glue sticks
Directions
Cut the socks at the heel. Use the lower half for the body and the upper half for the hat.
Fill the body with half a cup of rice for the weight, then add fiberfill to complete the body. Tie with string to seal the body.
Tie the end for the hat, then turn it over and tie again to make the pompom at the top.
Cut a strip of white microfiber cloth, then glue it to the bonnet. Fold the microfiber upward to keep the unfinished seams out of sight.
Glue the hat to the top of the body. Glue on a faux beard and a wooden bead for the nose.
Do you have dry hair, hands, scalp, or skin? If there’s one thing that we love, it’s making our own natural remedies and treatments. Check out these fantastic recipes that will restore and liven up your hair, face, and skin—and not break the bank.
Remedies for Dry Hair
Weekly Conditioner for Fly-Away Hair
Try a weekly deep-conditioning. For a rich conditioning treatment that you’d pay $30 to $100 for at a salon, mix a couple of tablespoons of olive, coconut, or castor oil with 1/2 cup of full-fat mayonnaise (alternatively: a ripe, mashed avocado), and massage into your hair and scalp. Then wrap your hair in a large plastic grocery bag and top it off with a warm, dry towel for about 30 minutes. Wash and rinse as usual (but sometimes twice is needed, to remove the oil).
Moisturizing Leave-in Conditioner
Mix two parts water, one part witch hazel, two parts vegetable glycerin (a natural moisturizer available online or in health/natural food stores), and a tablespoon of olive or other cooking oil per cup of liquid in a spray bottle. If you have aloe vera gel on hand, add one part of that to the mixture. A few drops of essential oil will give you a scented product. Spritz on wet or dry hair before styling.
More Body and Bounce
Mayonnaise, straight from the jar, will make hair soft and shiny. The egg nourishes brittle hair with protein, while the vinegar gives it body and bounce.
Try this mixture to regain supple hair: Mix one teaspoon powdered brewers’ yeast with four ounces of apple cider vinegar to create an after-wash rinse. Pour it over wet hair and let stand at least a minute before rinsing.
Oily Hair and Skin
Add one teaspoon baking soda to two ounces of your shampoo. This works as an alkali to absorb excess oil.
Baking soda works the same way with skin, it will absorb oil and also neutralize excess acid in your skin. Make a paste with baking soda and water.
Try lemon juice as an astringent facial cleanser.
Remedies for Dry Hands and Nails
Let’s start with some good tips and basics on keeping your hands from getting dry and cracked.
Add moisturizer right after you wash your hands. Apply when your skin is a little wet to help it hang on to some of the water.
Avoid any alcohol-based cleansers on your skin. Consider liquid soap that contains moisturizers.
Use the right moisturizer! Look for products which lists ceramides (oils), dimethicone (a type of silicone), and shea butter provide a good seal for your hands. The thicker the cream, the better.
If you polish your nails, find an acetone-free polish remover, as acetone is a serious drying agent.
It goes without saying that you need to wear gloves when using any harsh or chemical ingredient to clean the house.
Also make sure to wear gloves or mittens when you go outside to prevent the dry winter air from drawing moisture from your hands and nails.
If your hands get so dry that they crack, be careful of infection. Clean the area with hydrogen peroxide and apply an over-the-counter antibiotic ointment.
Some dermatologists suggest coating hands and nails with Vaseline or another strong barrier and wearing cotton gloves overnight to treat dry nails and cuticles.
To prevent brittle nails and ragged cuticles, try this handmade cuticle massage:
Cuticle Massage: 5 red seedless grapes 1 tablespoon sugar Wash the grapes, then slice them in half widthwise. Dip the cut side into the sugar. Using half a grape for each finger, massage the skin around each fingernail for about 30 seconds each. Wipe off the excess sugar with a soft towel, then rub hand cream onto hands and cuticles.
Remedies for Dry, Itchy Skin
Again, let’s start out with some basic tips on caring for your skin so that it doesn’t become dry and itchy.
Apply moisturize every day or even twice a day if you are over 40. Apply immediately after showering or bathing when your skin is still a little damp. Do not scrub skin dry.
Choose a lotion brand that has petroleum jelly or lanolin high on the ingredients list.
For super-dry skin, use olive oil. Rub it in prior to a bath or shower. You may substitute peanut, sesame or sunflower oil.
Avoid steaming hot water or lengthy immersions, which will strip your skin of its natural oils. Dermatologists suggest taking shorter baths or showers in warm (not hot) water. If you have severe dry skin problems, keep your showers to no longer than 5 minutes and use lukewarm water.
Use a mild, glycerin-based soap. And stay away from hair or skin-care products that contain any forms of alcohol, which are drying agents.
Wash gently. Vigorous scrubbing can further irritate sensitive skin. Gently clean around the “fold” areas of your skin—underarms, neck, and groin—and feet. Use very little, if any soap, on your trunk and limbs.
Don’t go outside in any season without using SPF of at least 15 on your face and hands.
To soften dry skin, add 1 cup powdered milk to your bath. (It worked for Cleopatra, supposedly.)
Try adding lemon juice or vinegar to your bathwater. Soap, being highly alkaline, may make your skin feel itchy.
Oatmeal Bath for Itchy Skin
If you have itchy skin, try a soothing oatmeal bath.
Blend one cup of oats in a food processor or blender. Run a lukewarm bath (NOT hot). Pour the oat into the warm water and stir. Soak in bath for 15 to 20 minutes and very gently rub into skin. Rinse with warm water and pat skin dry. While skin is still moist, apply a hypoallergenic moisturizing cream.
A quart of milk in a hot bath is a luxury as well as a skin toner. It’s a trick nearly as old as time.
Homemade Oatmeal Scrub
For a homemade scrub, mix ground oats and honey. Rub all over your face—especially your nose. The abrasive mixture will remove dry, scaly skin while the honey seeps in as a moisturizer. Rinse completely off and pat dry, and your skin will be glowing and baby soft. Only use this remedy once a week.
Chickpea Facial
¼ cup chickpea flour
¼ cup tumeric. (Note: use Kasturi tumeric because regular turmeric can temporarily stain the skin)
Yogurt, as needed
In a small bowl, mix the chickpea flour and turmeric. Store the mixture in an airtight bottle. When ready to use, place a teaspoon of the mixture in a small bowl and add enough yogurt to make a paste. Apply the paste evenly to the face and leave on until it dries, about 10 to 15 minutes. Wash off with warm water.
Coffee Scrub
Coffee grounds work to help diminish cellulite and varicose veins, in addition to improving circulation and smoothing the skin’s texture.
2 cups used coffee grounds
½ cup sugar or sea salt
⅔ tablespoon unscented massage oil
Mix all of the ingredients in a large bowl. Massage gently on the skin, then rinse with warm water.
Remedies for Dry, Tired Eyes
Used teabags make excellent eye cosmetics. After being dunked (and allowed to cool slightly), drain the tea bag and place it over your closed eye (one for each) and hold it there for a few minutes. Redness, soreness, swelling and irritation will disappear like magic.
If you suffer from dry, scratchy, itchy, eyes, try laying a warm, moist washcloth over your closed lids for a few minutes each day.
This simple, effective treatment helps to liquefy the lubricating oil in glands located along the eyelids. It may take a few days, but if you use the compresses faithfully, you should experience relief.
Remedies for Dry, Chapped Lips
To prevent cracked or chapped lips, use a lip balm and apply it often. See our post on how to make your own lip balm. If you make a big batch that’s a bit heavier on the olive oil, you can use your homemade balm for hands, fingernails, facial moisturizer, and (just a dab) hair conditioner, too.
Plain honey is an excellent remedy for chapped lips. Blend fully into lips.
General Advice for Beating Drys!
Forget the idea that drinking plenty of water is the only thing necessary for keeping your skin (eyes, nasal passages, nails) moist and your hair well behaved. Dermatologists say that while drinking water is important for overall health, as far as moisturizing skin, hair, and nails are concerned, you need to add moisture from the outside and prevent it from escaping into the drier surrounding air.
Use a humidifier. Indoor heating removes moisture from the air and your body. Humidifying dry indoor air helps to provide that indoor moisture. Try to maintain indoor air at 30 to 50 percent humidity. It’s especially important if you suffer bloody noses and lots of respiratory infections. You could run an electric humidifier, but passive solutions may do the trick for you. We maintain a lot of well-watered houseplants that transpire water into the indoor air. We keep steamers going on each of our stoves that pump moisture into the air whenever the stove is running.
Hanging your laundry on bars indoors is another great strategy. It doesn’t take much longer to dry near the wood stove than it would in an electric dryer, and while it dries, your laundry humidifies the air around it.
When Dry Skin is Severe
If your dry skin just gets to a point of inflammation, unbearable itchiness, or scabbing, you may need to see a doctor. They can prescribe thicker, richer emollients.
You also need to ensure that you don’t have psoriasis, atopic dermatitis and other skin conditions may also need prescription medication and treatment.
It’s going to be a long winter, but we can still have fun creating crafty things! I found some adorable and easy to make Snowman crafts!
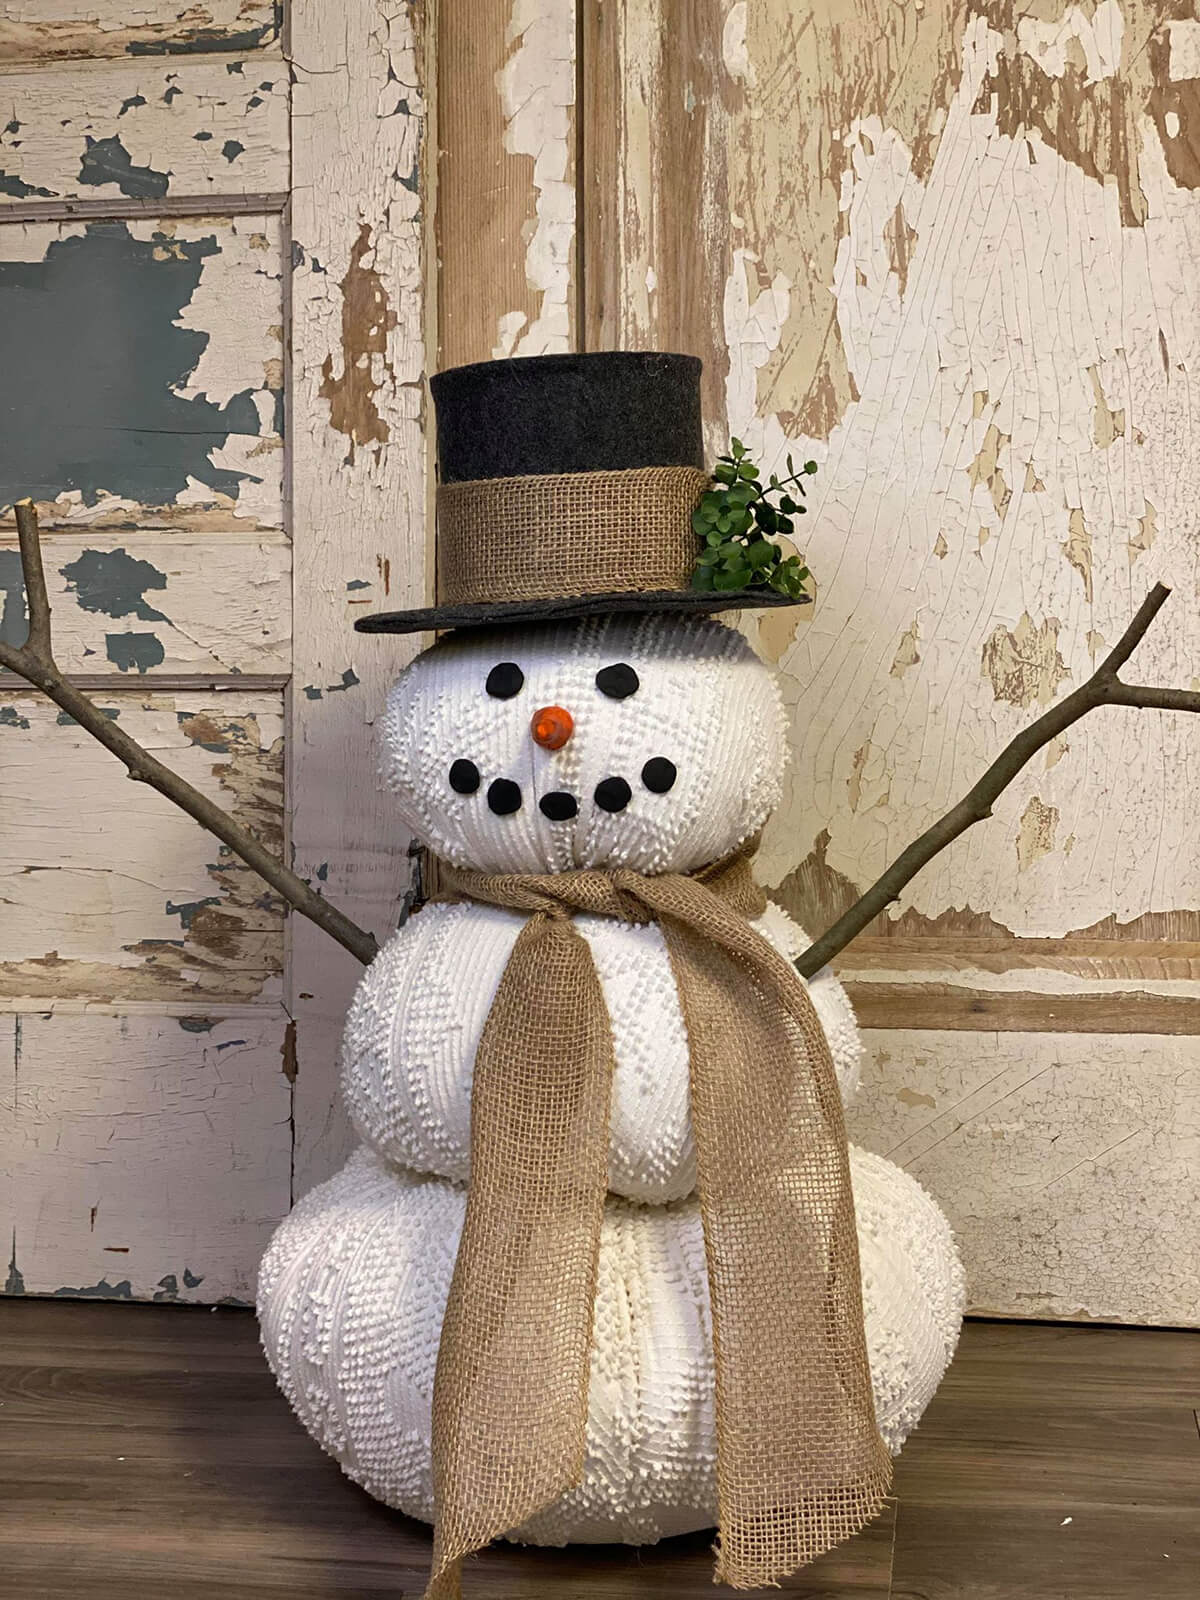
Fabric Snowman
This fabric Snowman is made by making 3 fabric balls—similar to the fabric pumpkins detailed in October. Make three sizes and stack and glue together. The hat is made with cardboard and felt. The eyes and smile can either be buttons or felt. Add an orange carrot nose, branches for the arms and whatever you like for the scarf and hatband.
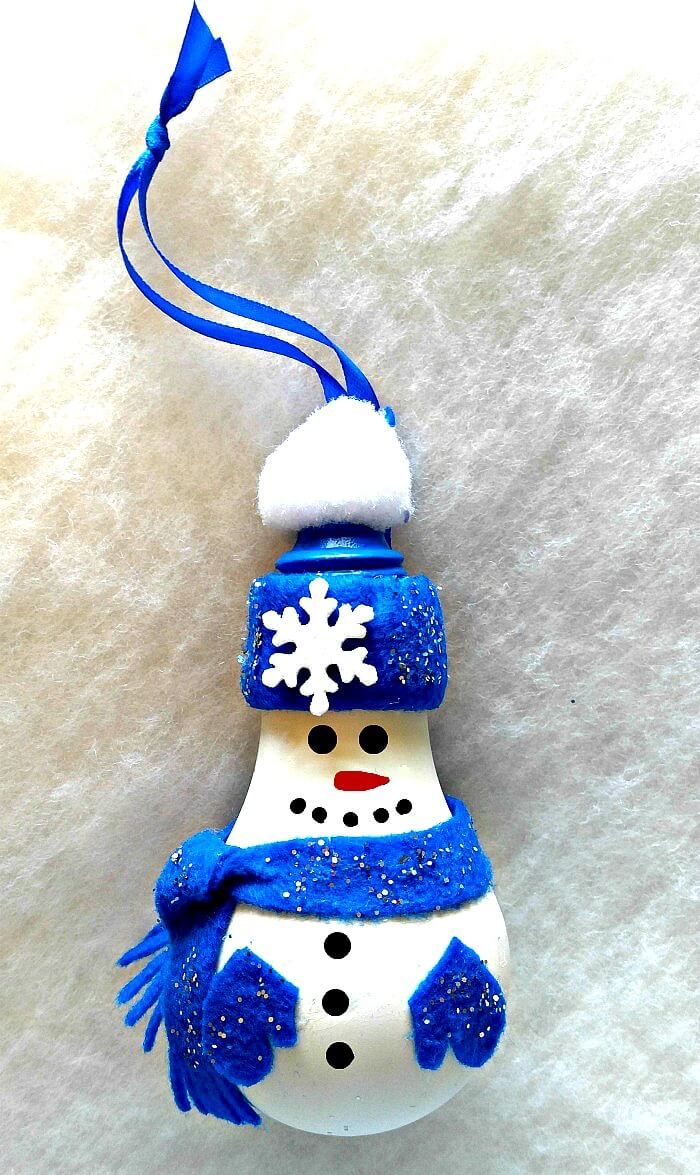
Light Bulb Snowman
This guy is super simple. Paint the light bulb white, with black details and an orange nose. Paint the top (hat) blue. The scarf and mittens are blue felt. Add a string to hang it, some glitter to add pizzazz and a cotton ball pompom for the hat and you’re done! (You will have to purchase the snowflake though.)
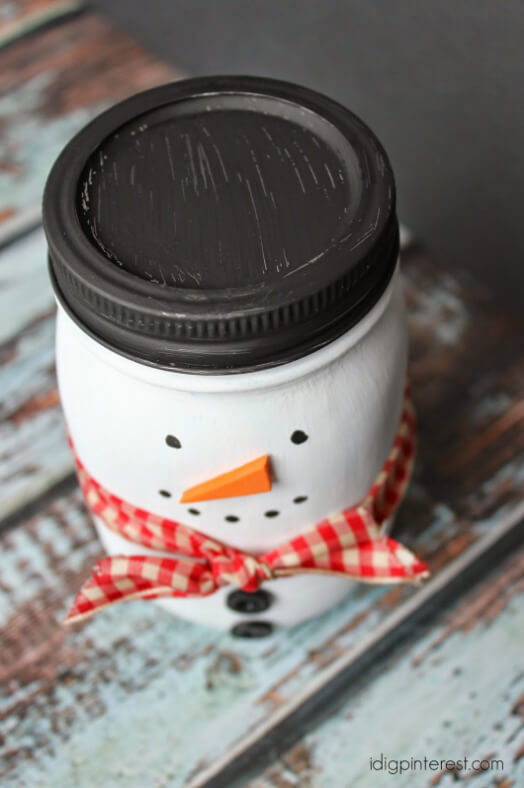
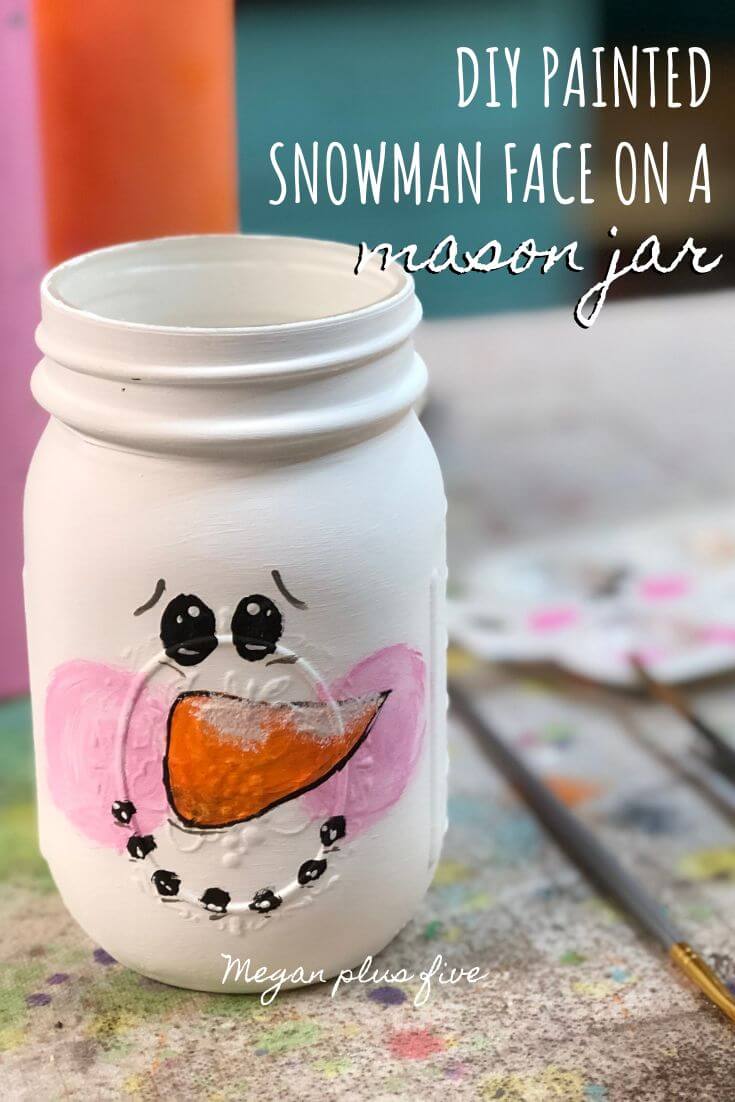
Mason Jar Snowman
You can use Mason jar for a lot of craft ideas! This is another super simple idea. Simply paint, add a small orange wood chip (felt would also work) nose and a scrap of fabric for the scarf. Some buttons finish this little guy!
This mason jar version has even less details and is all paint!
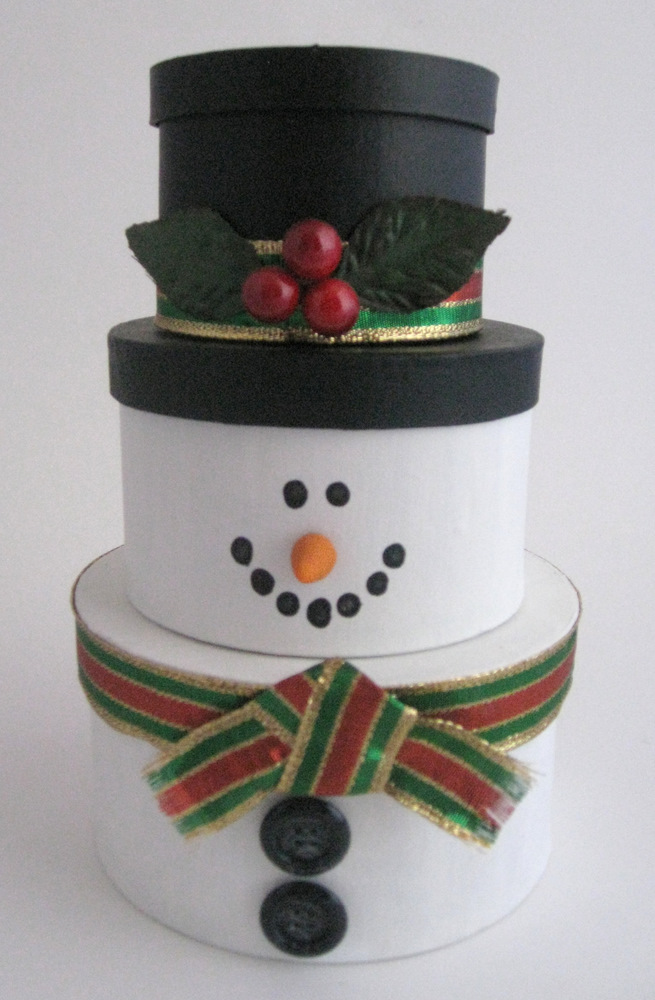
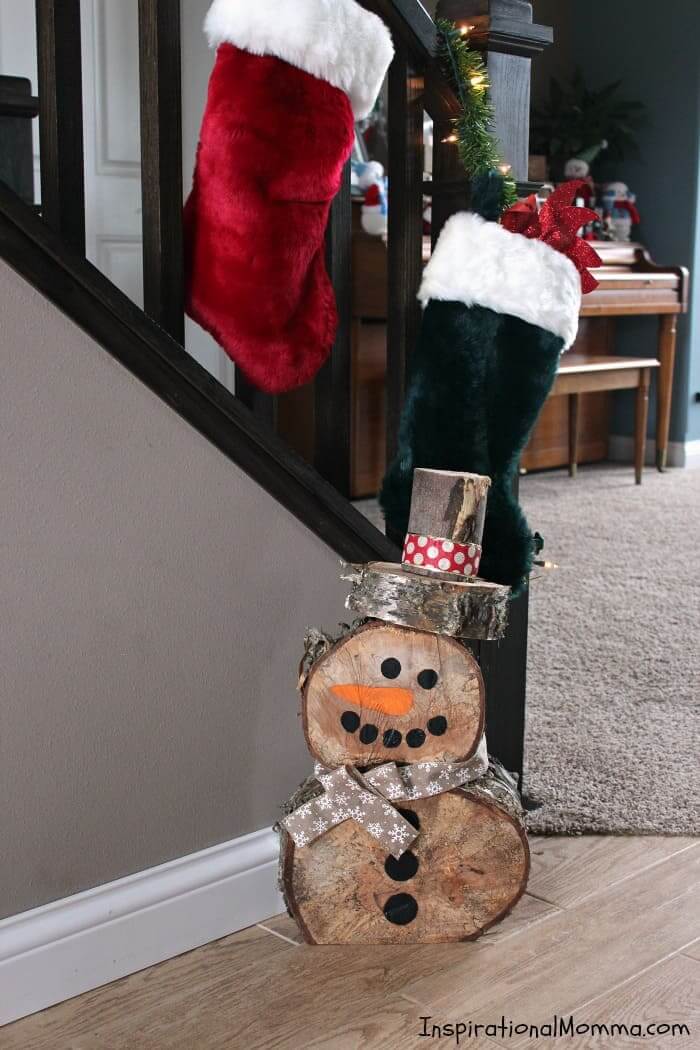
Log Snowman
The log snowman takes a little painting, but only AFTER you get someone to cut you the exact sized pieces you need. Glue the pieces together, paint, and add ribbon… super easy!
I found this list in my old notebook of funny emails I sister sent me years ago. Some of these tips work well…but I can’t vouch for them all. As with anything from the internet, take these with a grain of salt.
Colgate (or Crest) toothpaste makes an excellent salve for burns.
Instead of reaching for an expensive drugstore inhaler to clear your stuffed nose, try chewing a couple of Altoid peppermints.
Achy muscles from a bout of the flu? Mix 1 tablespoon of horseradish in 1 cup of olive oil. Let the mixture sit for 20 minutes, then apply it as a massage oil.
Sore throat? Mix ¼ cup of vinegar with ¼ cup of honey and take 1 tablespoon 6 times a day.
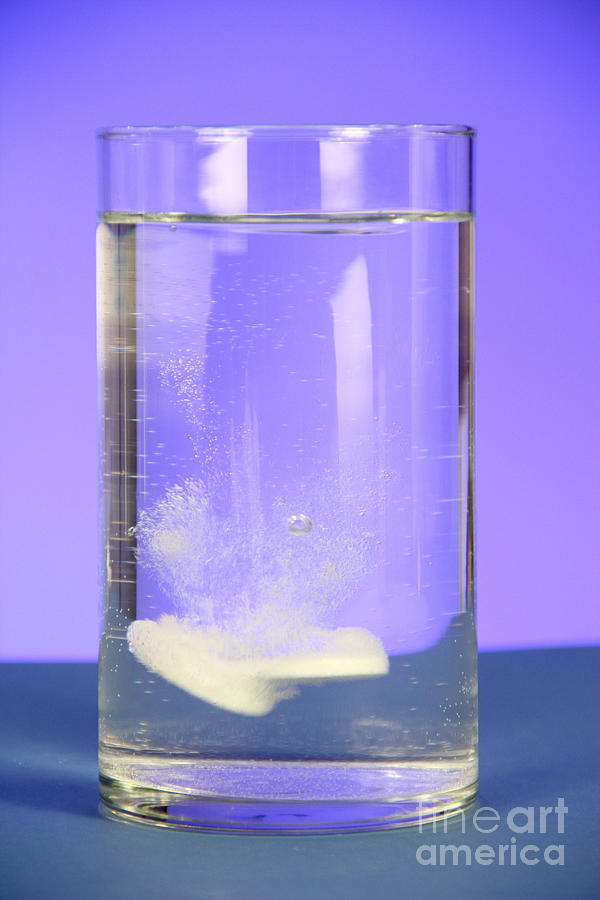
Cure urinary tract infections with Alka Seltzer. Dissolve 2 tablets in a glass of water and drink it at the onset of symptoms. It begins eliminating urinary tract infections almost instantly—even though the product has never been advertised for this use.
Honey can cure blemishes. Cover the blemish with honey and place a band-aid over it. Honey kills the bacteria, keeps the skin sterile and speeds healing.
Got toenail fungus? Soak your toenails in Listerine mouthwash. The powerful antiseptic leaves your nails looking healthy again. Listerine will also clean dirty grout.
Formula 409 can double as a bug killer. If menacing bees, wasps, hornets or yellow jackets get in the house, spray Formula 409—one shot and they drop.
Got a splinter? Pour a dab of Elmer’s Glue over the splinter and let dry. The peel off the glue and the splinter will adhere to the glue.
Got a bruise? Soak a cotton ball in white vinegar and apply it to the bruise for an hour. The vinegar reduces the blueness and speeds up the healing process.
Arthritis pain in your hands? Mix 2 cups oatmeal and 1 cup water in a bowl and microwave for 1 minute. Cool slightly and apply to your hands for soothing relief.
Dawn dish washing liquid can kill your dog’s fleas instantly. Add a few drops to your dog’s bath and shampoo the animal thoroughly. Rinse well to avoid skin irritation.
A few drops of corn oil in your cat’s ear will eliminate ear mites. Massage it in, then clean with a cotton ball. Repeat daily for 3 days. The oil soothes the cat’s skin, smothers the mites and accelerates the healing.
Beer or Cool Whip conditions the hair. Mayonnaise will too and it also kills lice.
Pam cooking spray will dry finger nail polish and remove paint and grease from your hands.
Burn your tongue? Try a little sugar to soothe it.
WD-40 also helps arthritis (just rub it in) but it also kills insect stings.
Speaking of stings…meat tenderizer will lessen a sting. Preparation H will help with chigger bites (and puffy eyes).
Got a paper cut? Use a little crazy glue or chap stick.
Soaking your feet in jello helps remove odor.
Cornstarch will help cure athlete’s foot.
Peanut butter will remove sticky label residue on glass and plastics. (I can personally vouch for this one. I use a soft cloth and rub.)
Remove wine stains by pouring on the Morton’s salt.
To remove a wax stain, take a paper towel and iron it over the wax stain. It will absorb into the paper towel.
Got baked on food? Try filling the container with water and a Bounce fabric softener sheet—let stand overnight. Or you can use 2 Efferdent tablets—soak overnight.
Karo syrup removes grass stains.
Coca Cola removes grease stains. (It even works on grease stains IN THE DRIVEWAY.)
To keep flowers fresher longer, use 7-up instead of water or add 2 aspirin to the water.
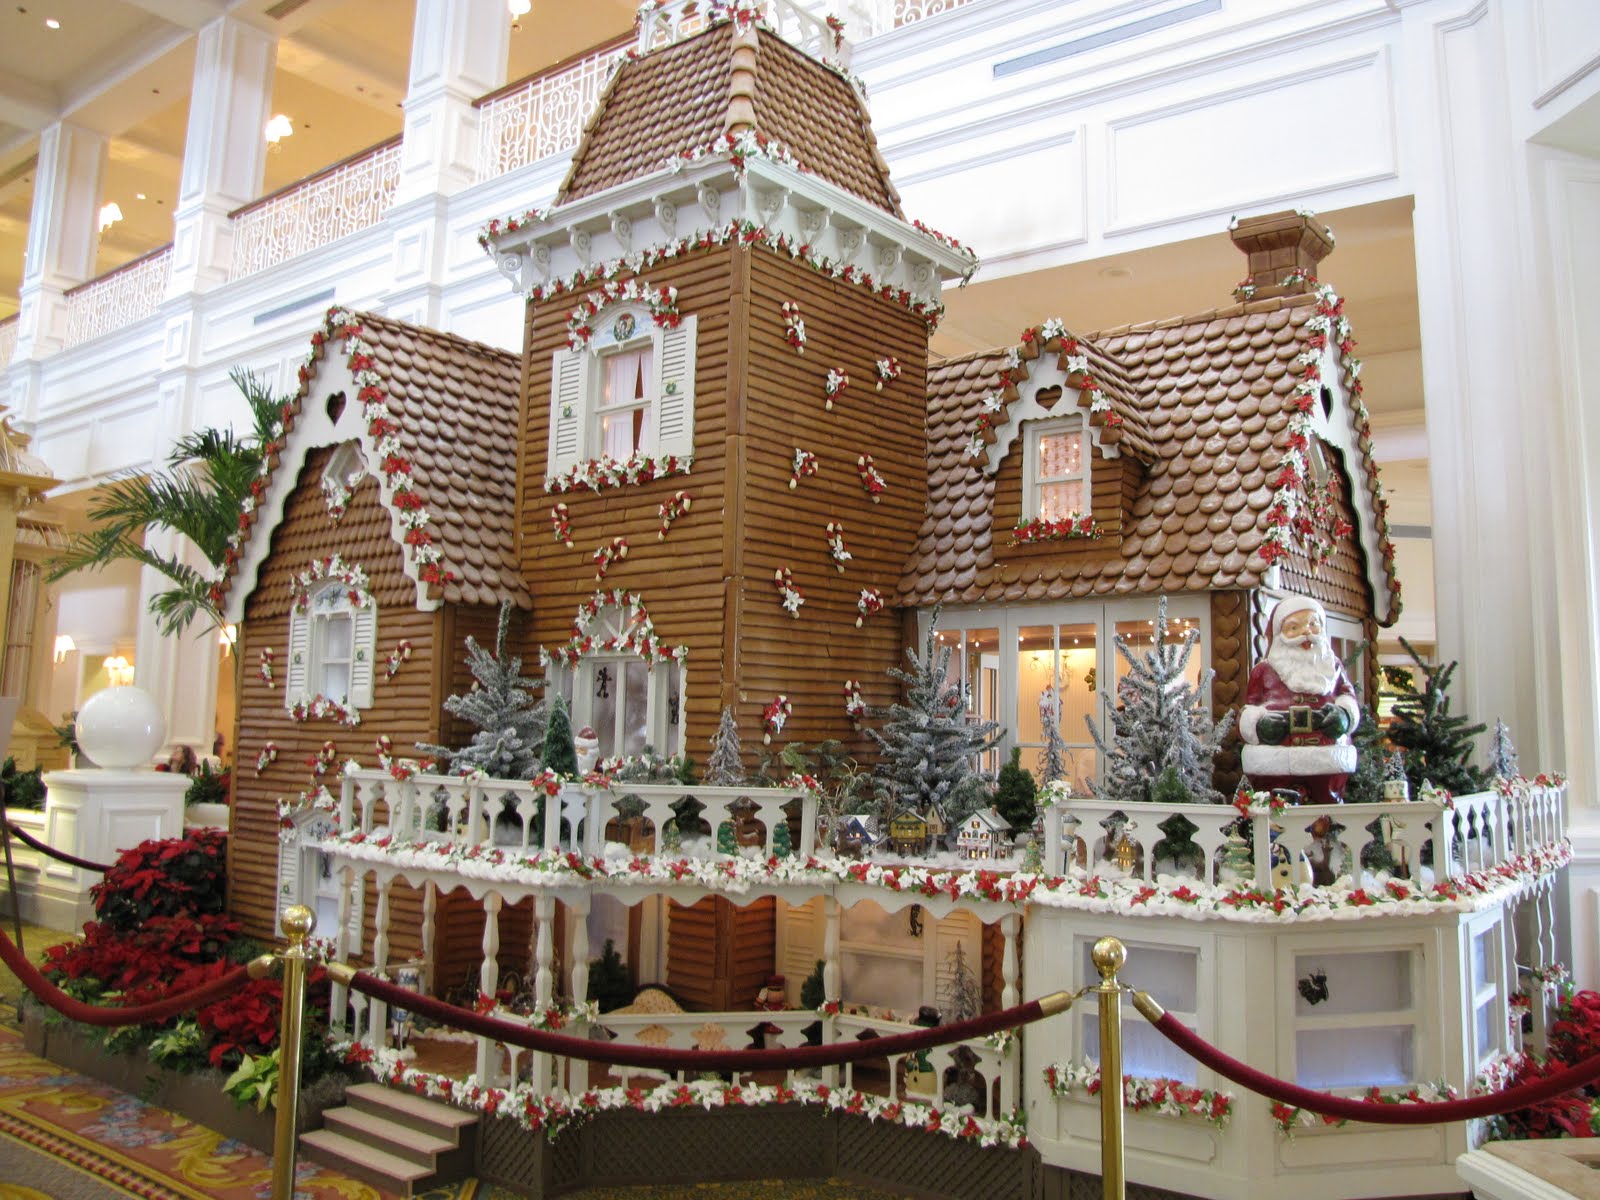
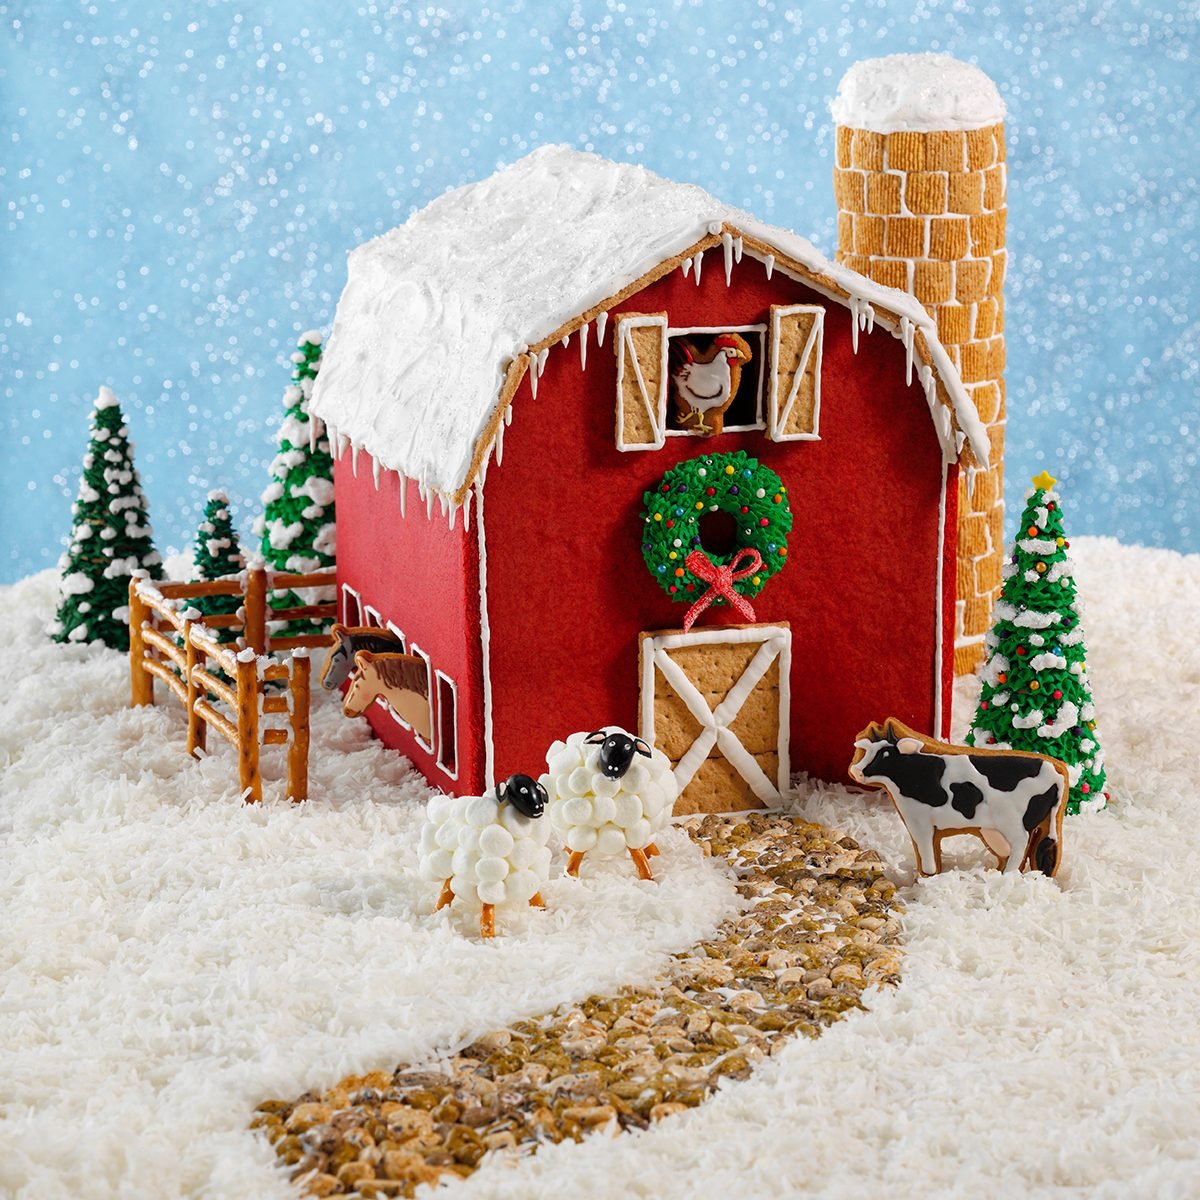
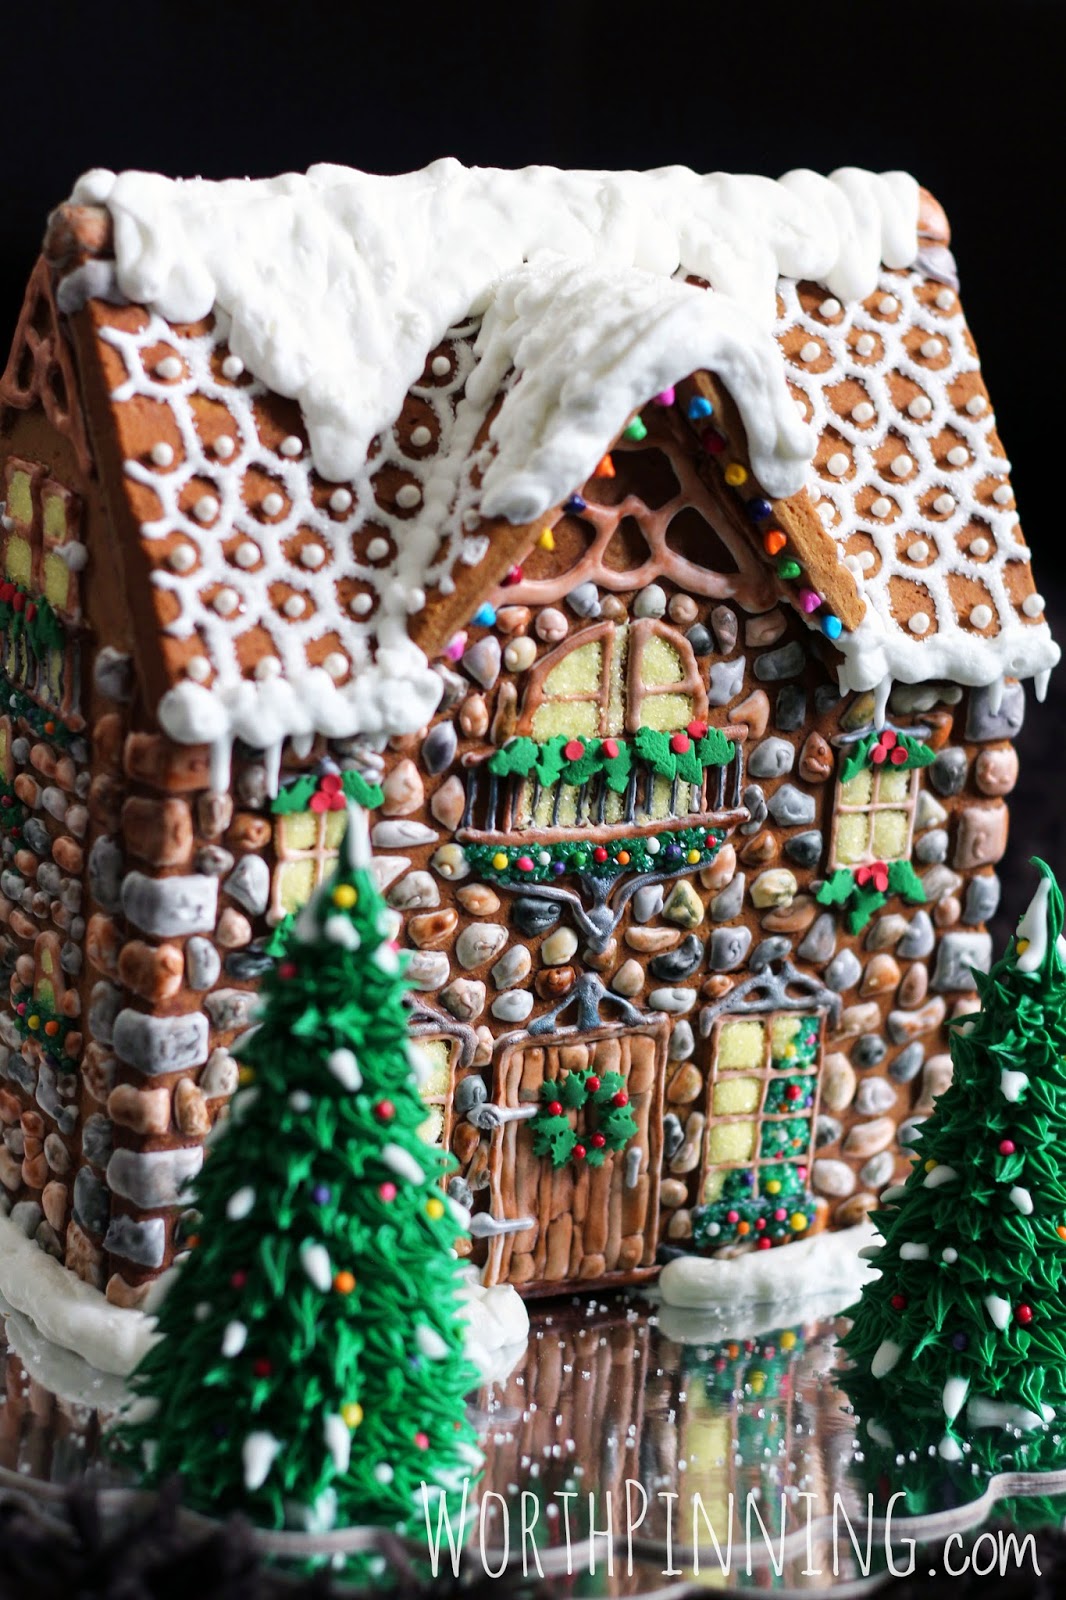
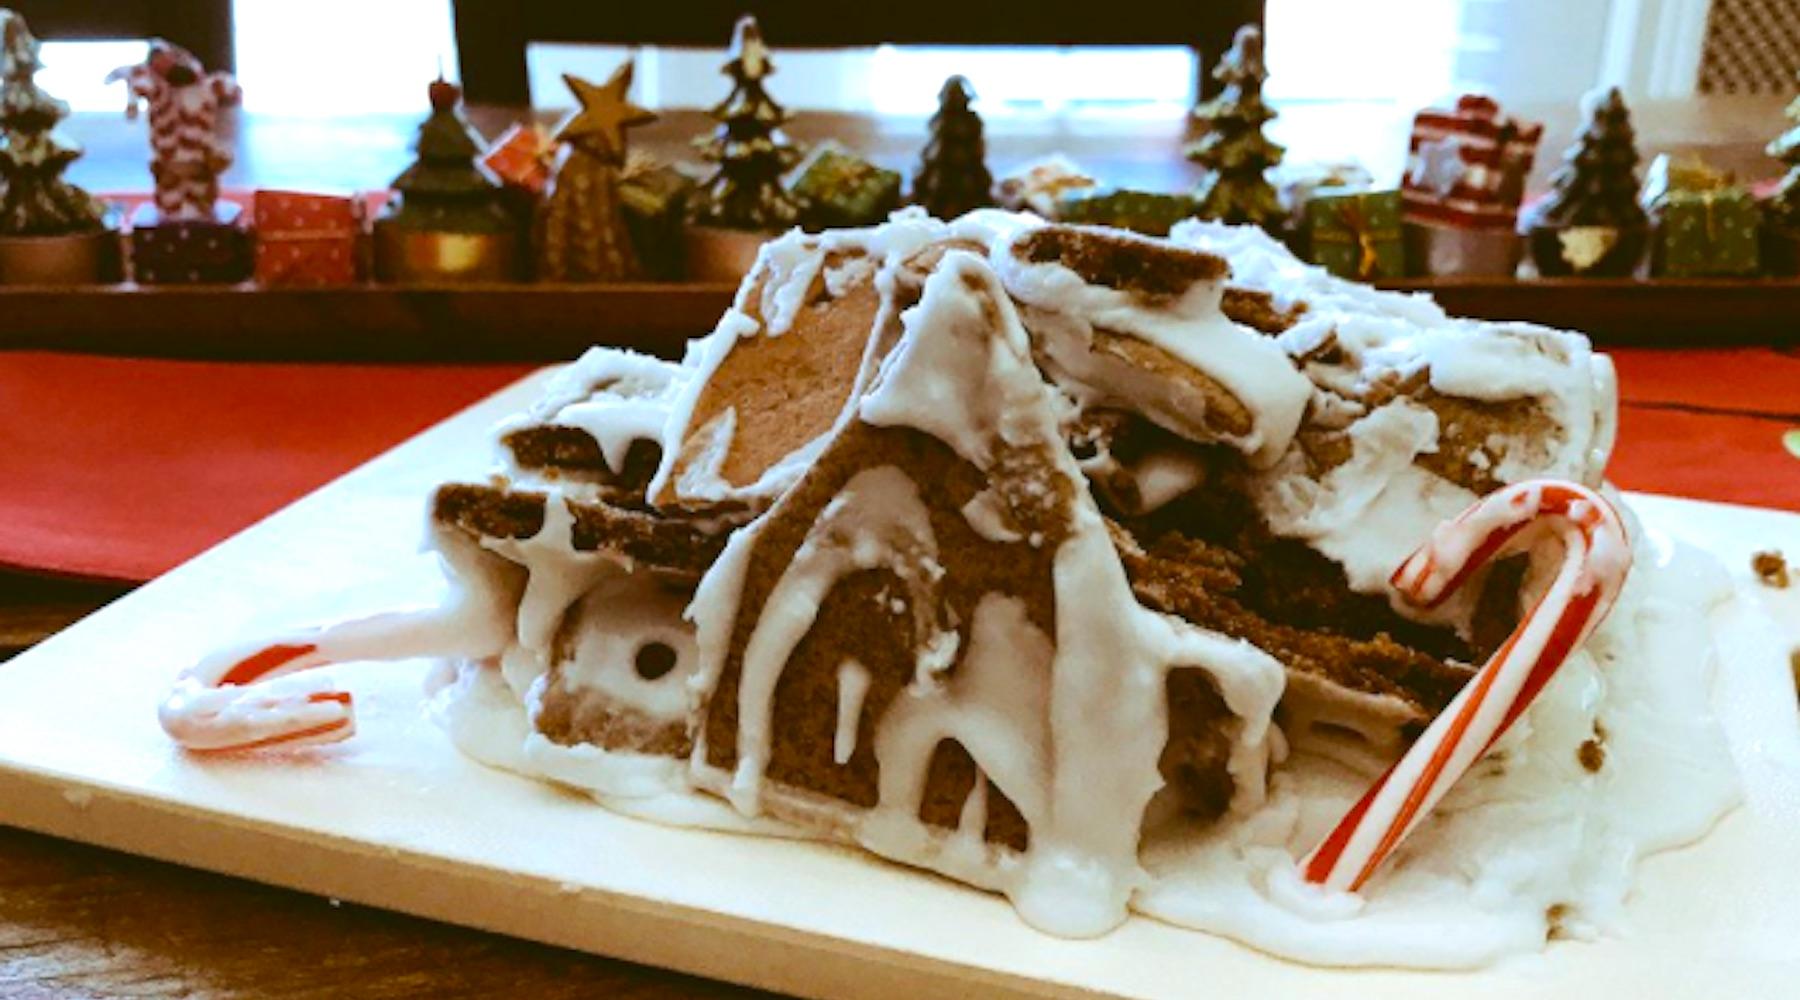
At our house we only made a gingerbread house once. I bought a kit and with minimal assistance from me, the kids assembled and decorated it. We left it in the center of the dining room table while they went up to their rooms to finish homework and I did some cleaning. The dog—a large yellow lab—jumped onto the table and bit a piece off. It obviously didn’t agree with him because he threw it up all over the rest of the house. End of gingerbread making at our house…lol
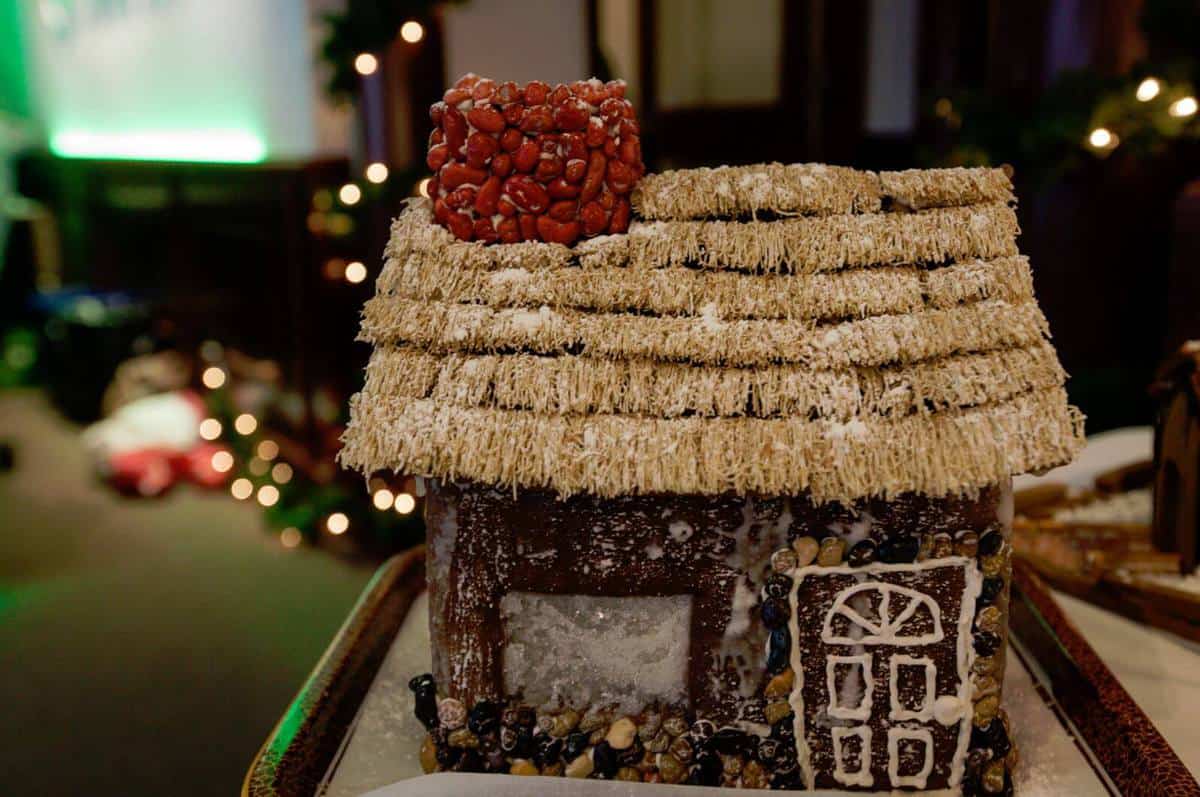
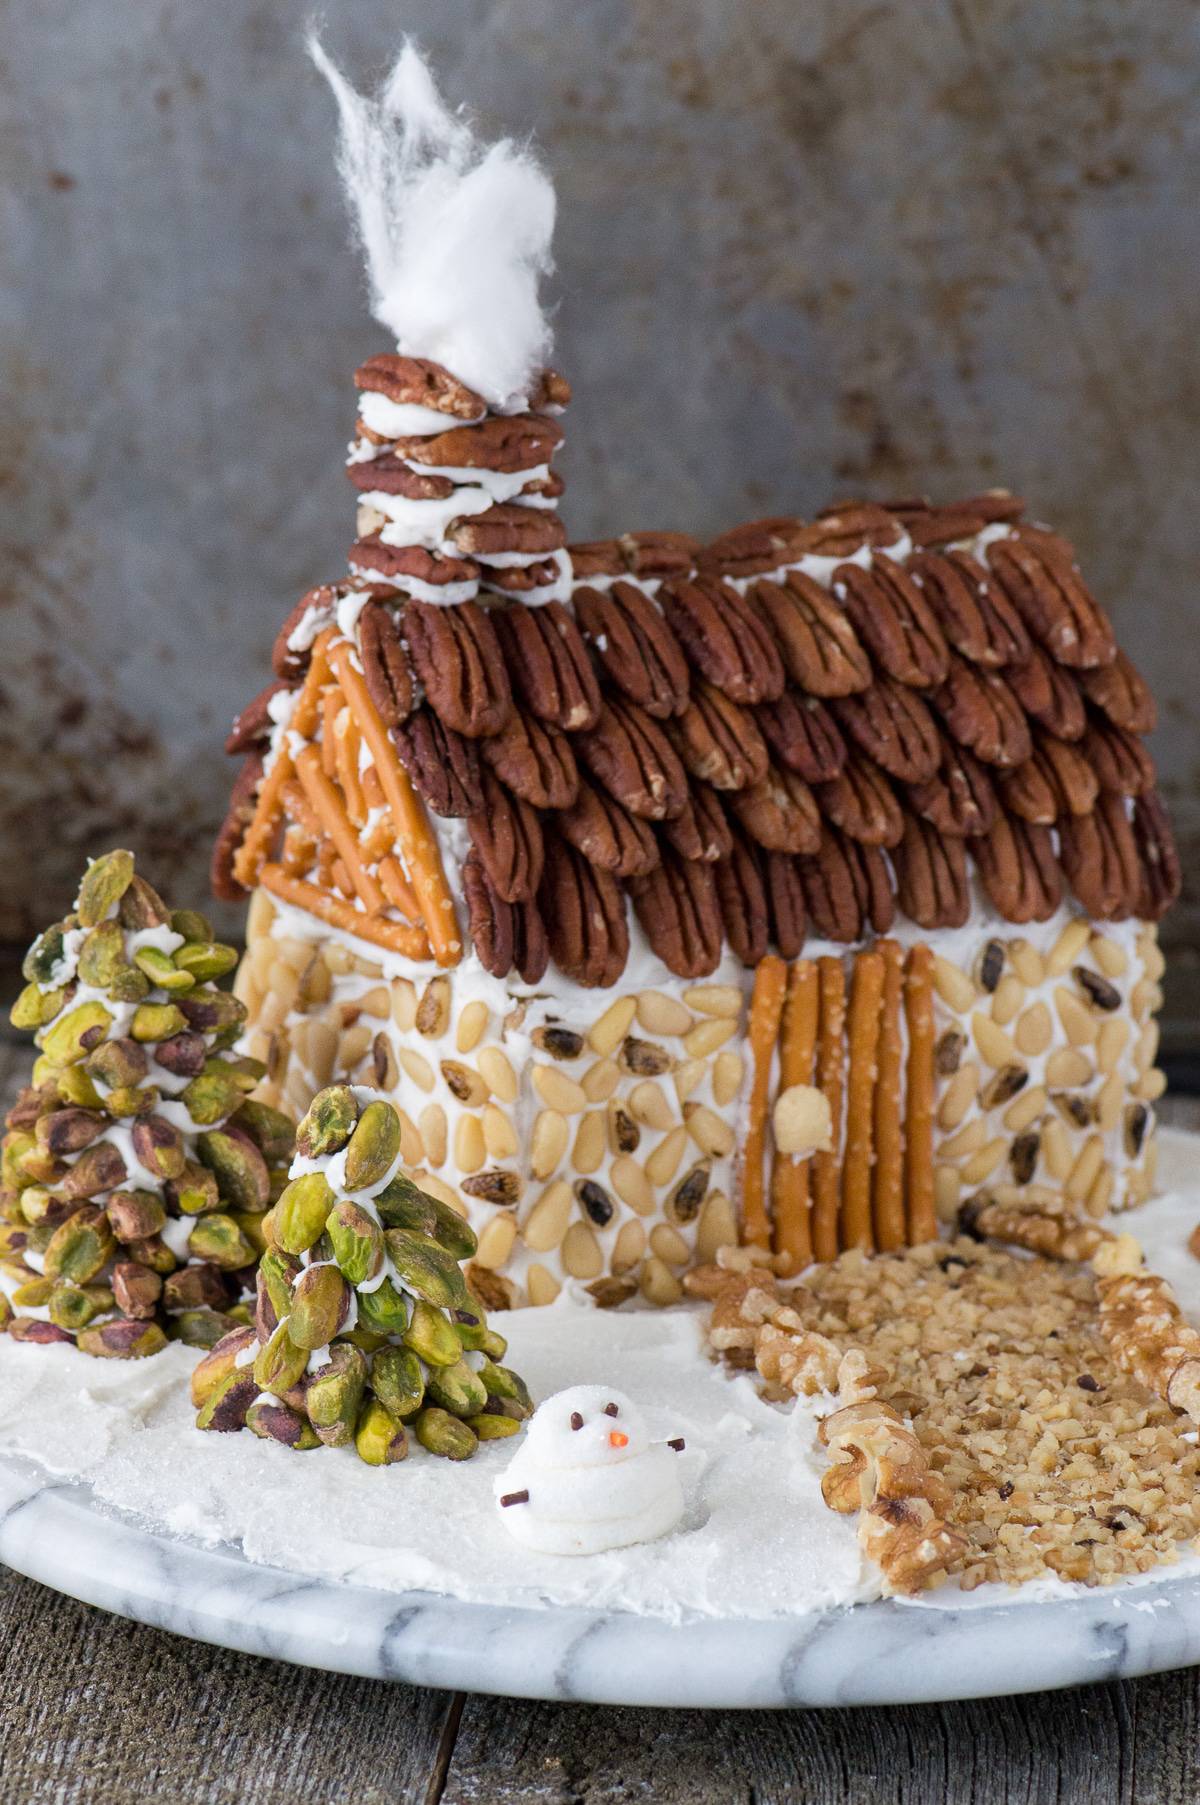
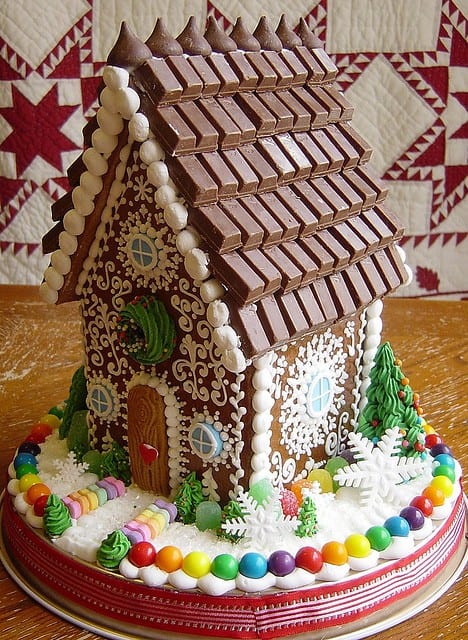
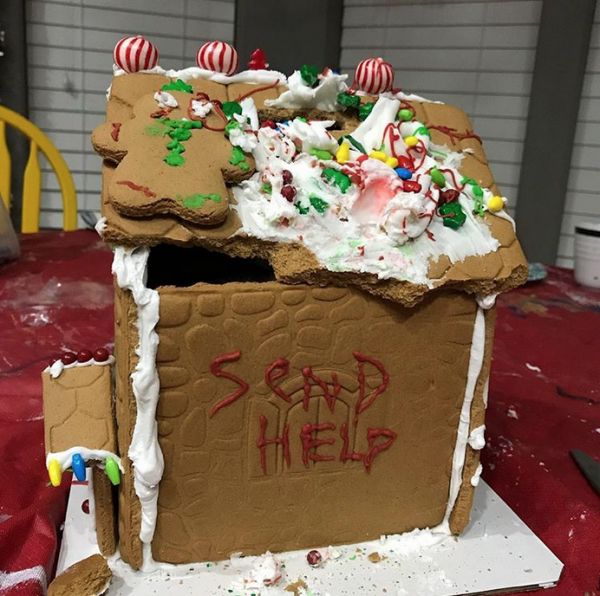
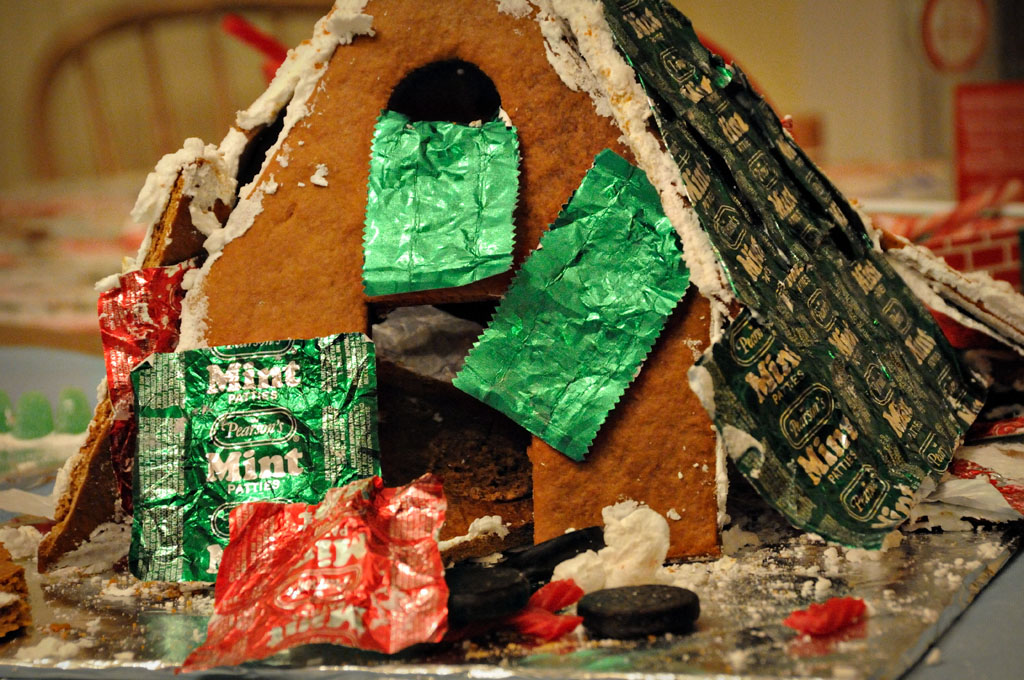
But I love to look at them! I offer for your consideration these gingerbread creations in several different competitive divisions. Which is YOUR favorite?