Natural Home Remedies for Dry Hair and Skin

Do you have dry hair, hands, scalp, or skin? If there’s one thing that we love, it’s making our own natural remedies and treatments. Check out these fantastic recipes that will restore and liven up your hair, face, and skin—and not break the bank.

Remedies for Dry Hair

Weekly Conditioner for Fly-Away Hair

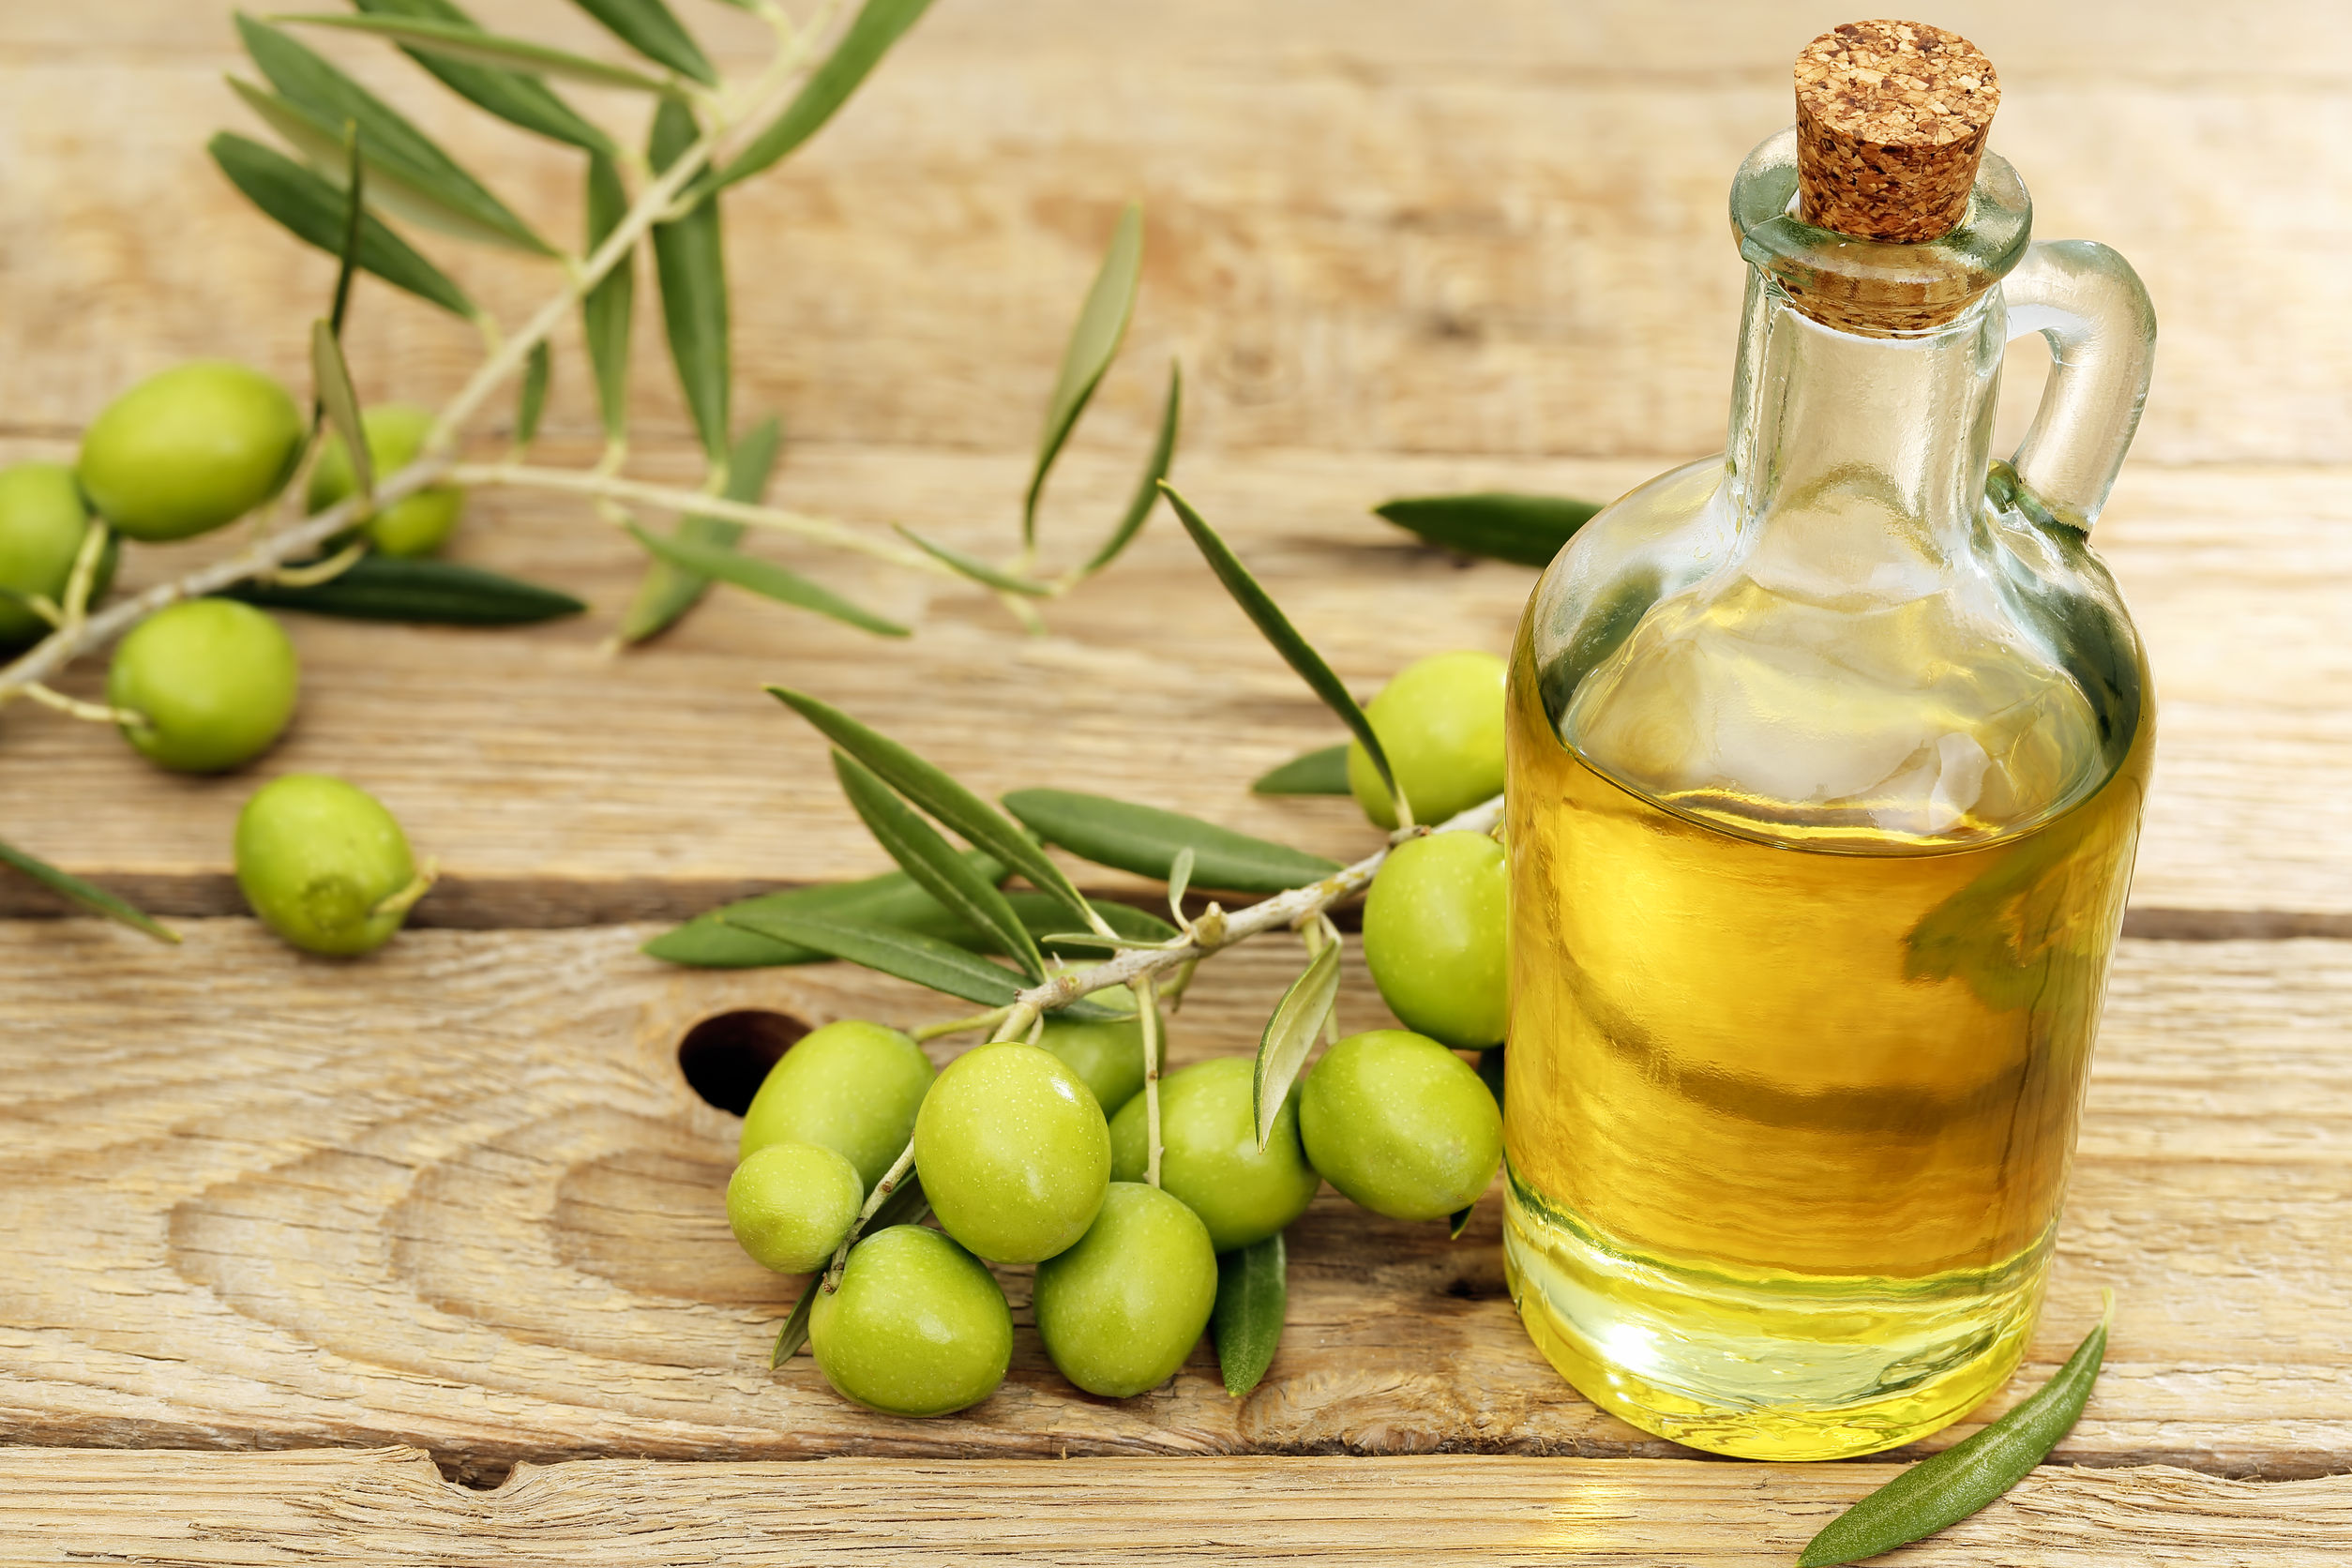
Try a weekly deep-conditioning. For a rich conditioning treatment that you’d pay $30 to $100 for at a salon, mix a couple of tablespoons of olive, coconut, or castor oil with 1/2 cup of full-fat mayonnaise (alternatively: a ripe, mashed avocado) and massage into your hair and scalp. Then, wrap your hair in a large plastic grocery bag and top it off with a warm, dry towel for about 30 minutes. Wash and rinse as usual (but sometimes twice is needed to remove the oil).

Moisturizing Leave-in Conditioner

Mix two parts water, one part witch hazel, two parts vegetable glycerin (a natural moisturizer available online or in health/natural food stores), and a tablespoon of olive or other cooking oil per cup of liquid in a spray bottle. If you have aloe vera gel on hand, add one part to the mixture. A few drops of essential oil will give you a scented product. Spritz on wet or dry hair before styling.

More Body and Bounce

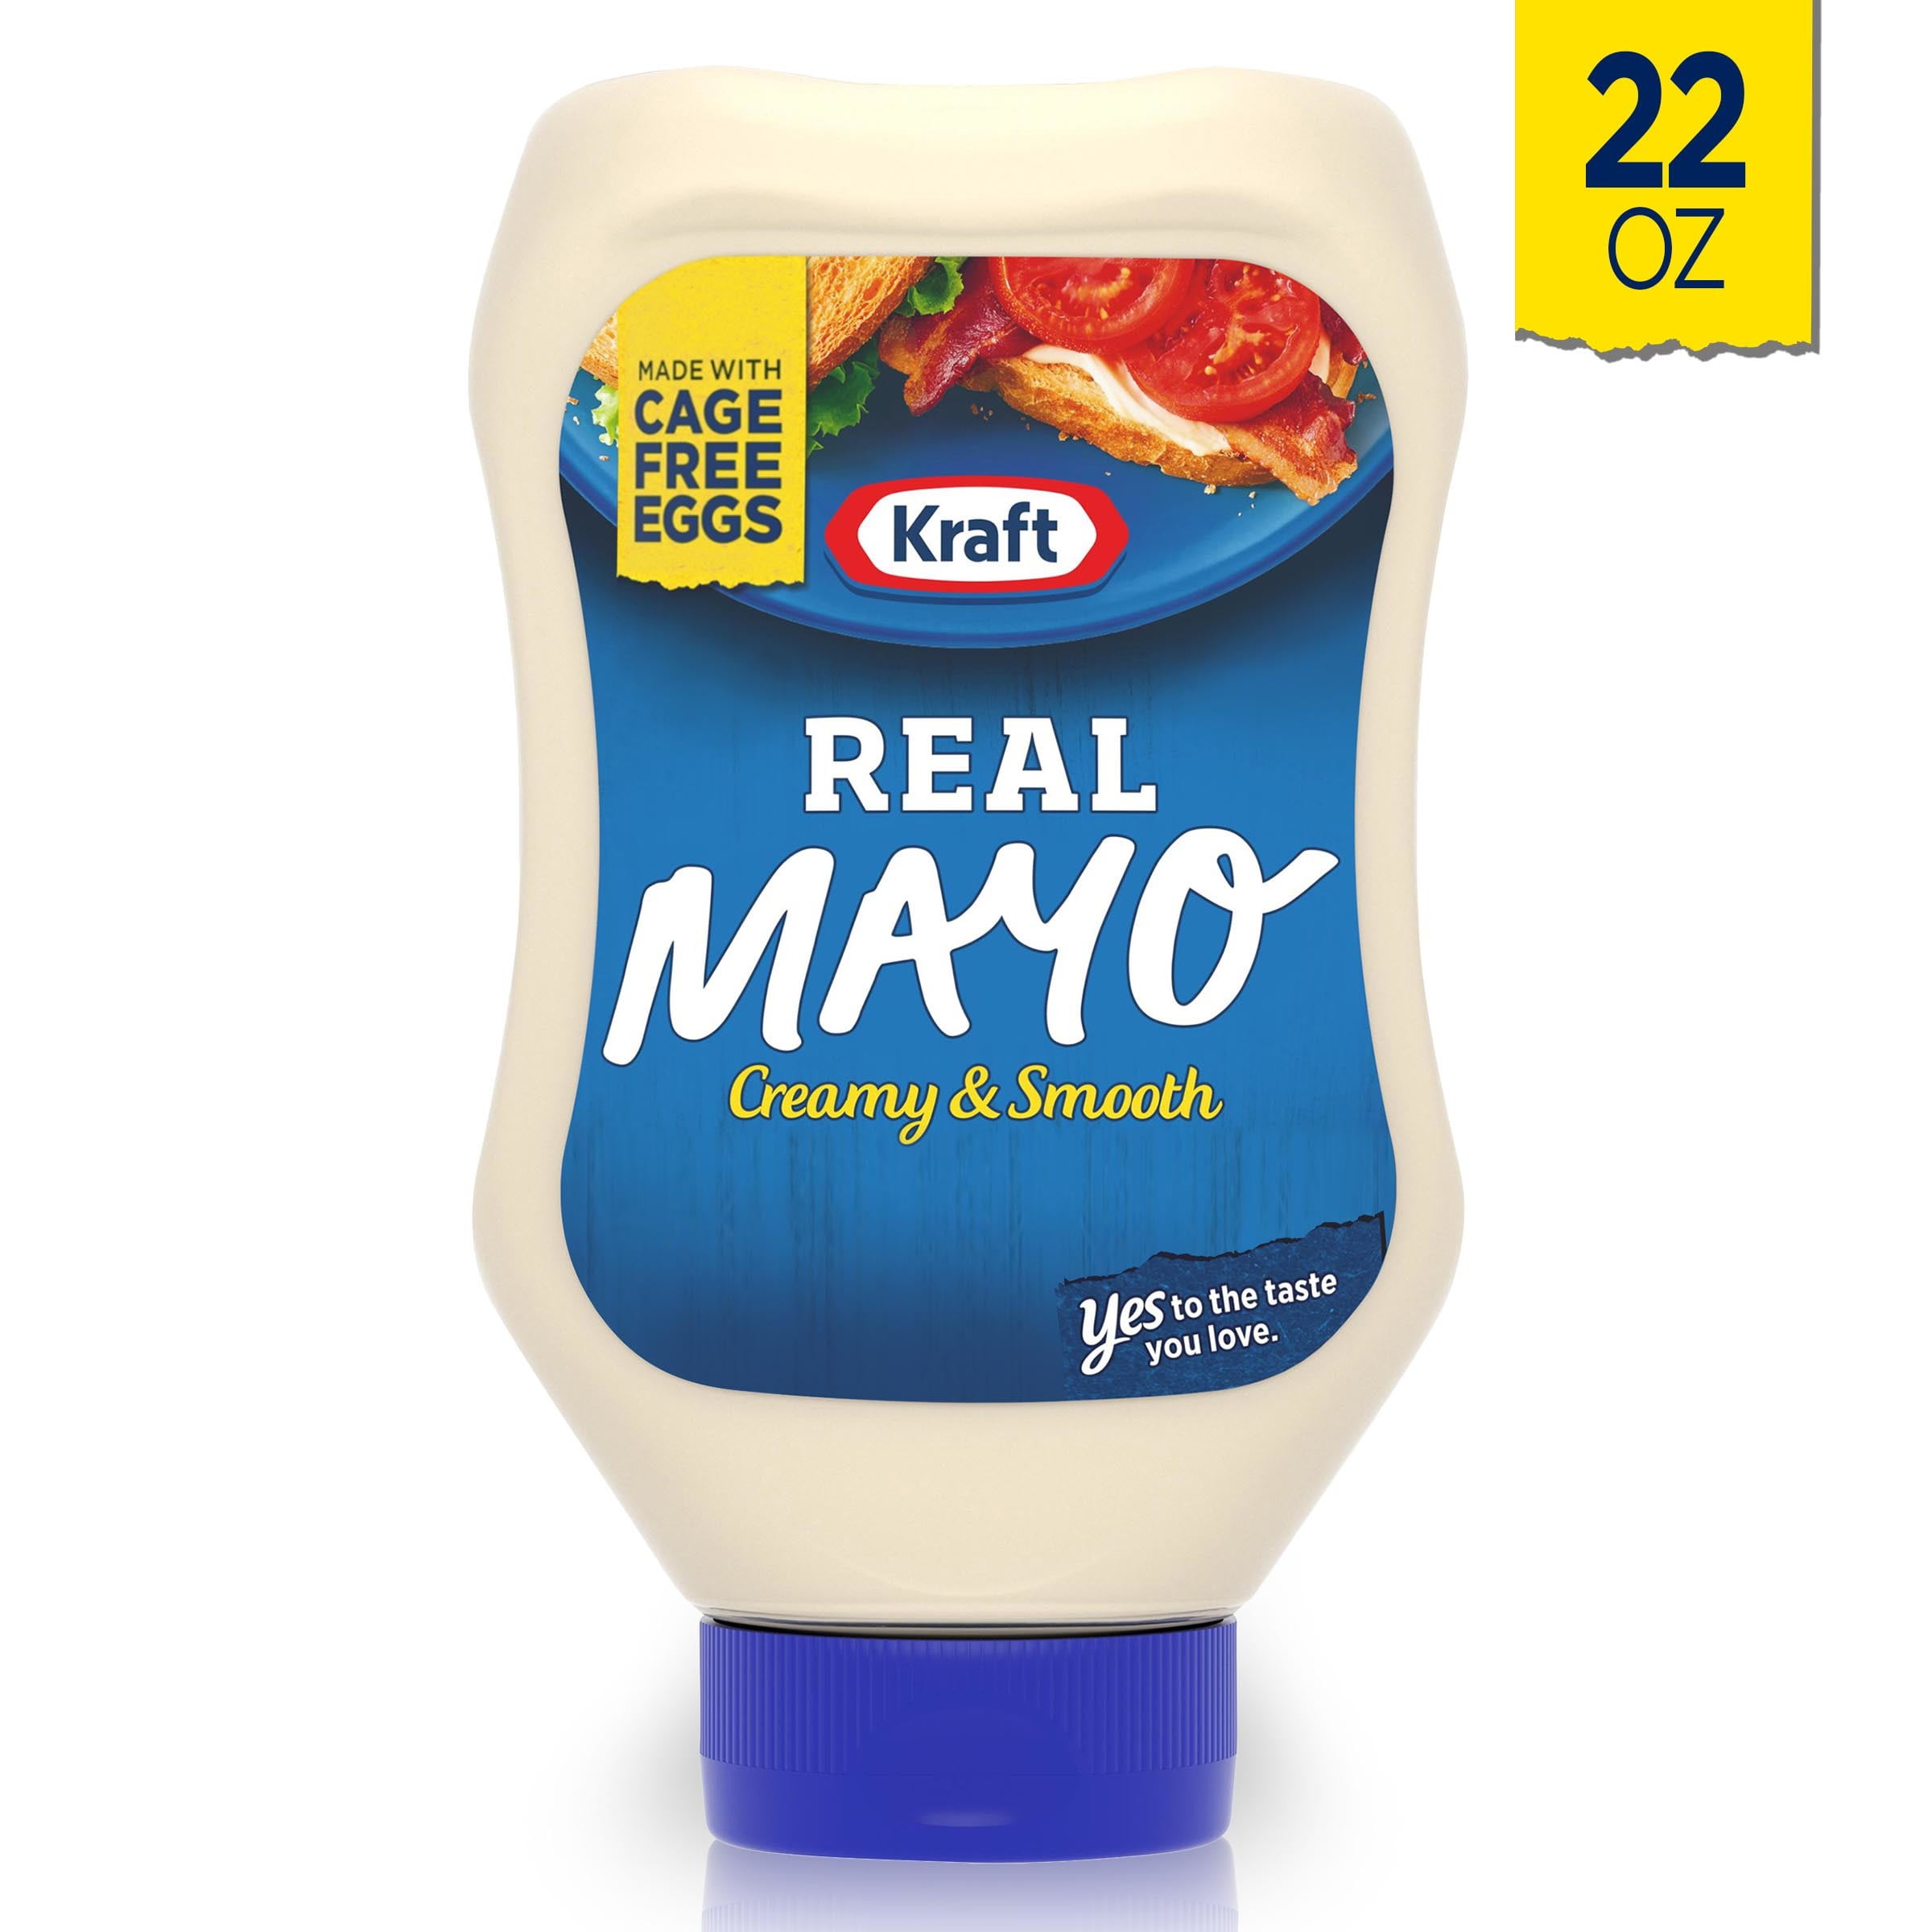
Mayonnaise, straight from the jar, will make hair soft and shiny. The egg nourishes brittle hair with protein, while the vinegar gives it body and bounce.

Try this mixture to regain supple hair: Mix one teaspoon of powdered brewers’ yeast with four ounces of apple cider vinegar to create an after-wash rinse. Pour it over wet hair and let stand at least a minute before rinsing.

Oily Hair and Skin

Add one teaspoon baking soda to two ounces of your shampoo. This works as an alkali to absorb excess oil.

Baking soda works the same way with skin, it will absorb oil and also neutralize excess acid in your skin. Make a paste with baking soda and water.

Try lemon juice as an astringent facial cleanser.

Remedies for Dry Hands and Nails

Let’s start with some good tips and basics on keeping your hands from getting dry and cracked.

Add moisturizer right after you wash your hands. Apply when your skin is a little wet to help it hang on to some of the water.

Avoid any alcohol-based cleansers on your skin. Consider liquid soap that contains moisturizers.

Use the right moisturizer! Look for products that list ceramides (oils), dimethicone (a type of silicone), and shea butter to provide a good seal for your hands. The thicker the cream, the better.

If you polish your nails, find an acetone-free polish remover, as acetone is a serious drying agent.

It goes without saying that you need to wear gloves when using any harsh or chemical ingredient to clean the house.

Also make sure to wear gloves or mittens when you go outside to prevent the dry winter air from drawing moisture from your hands and nails.

If your hands get so dry that they crack, be careful of infection. Clean the area with hydrogen peroxide and apply an over-the-counter antibiotic ointment.

Some dermatologists suggest coating hands and nails with Vaseline or another strong barrier and wearing cotton gloves overnight to treat dry nails and cuticles.

To prevent brittle nails and ragged cuticles, try this handmade cuticle massage:

Cuticle Massage:
5 red seedless grapes
1 tablespoon sugar
Wash the grapes, then slice them in half widthwise. Dip the cut side into the sugar. Using half a grape for each finger, massage the skin around each fingernail for about 30 seconds each. Wipe off the excess sugar with a soft towel, then rub hand cream onto hands and cuticles.

Remedies for Dry, Itchy Skin

Again, let’s start out with some basic tips on caring for your skin so that it doesn’t become dry and itchy.

Apply moisturize every day or even twice a day if you are over 40. Apply immediately after showering or bathing when your skin is still a little damp. Do not scrub skin dry.

Choose a lotion brand that has petroleum jelly or lanolin high on the ingredients list.

For super-dry skin, use olive oil. Rub it in prior to a bath or shower. You may substitute peanut, sesame or sunflower oil.

Avoid steaming hot water or lengthy immersions, which will strip your skin of its natural oils. Dermatologists suggest taking shorter baths or showers in warm (not hot) water. If you have severe dry skin problems, keep your showers to no longer than 5 minutes and use lukewarm water.

Use a mild, glycerin-based soap. And stay away from hair or skin-care products that contain any forms of alcohol, which are drying agents. 

Wash gently. Vigorous scrubbing can further irritate sensitive skin. Gently clean around the “fold” areas of your skin—underarms, neck, and groin—and feet. Use very little, if any soap, on your trunk and limbs.

Don’t go outside in any season without using SPF of at least 15 on your face and hands.

To soften dry skin, add 1 cup powdered milk to your bath. (It worked for Cleopatra, supposedly.)

Try adding lemon juice or vinegar to your bathwater. Soap, being highly alkaline, may make your skin feel itchy.

Oatmeal Bath for Itchy Skin

If you have itchy skin, try a soothing oatmeal bath. 

Blend one cup of oats in a food processor or blender. Run a lukewarm bath (NOT hot). Pour the oat into the warm water and stir. Soak in bath for 15 to 20 minutes and very gently rub into skin.
Rinse with warm water and pat skin dry. While skin is still moist, apply a hypoallergenic moisturizing cream.

A quart of milk in a hot bath is a luxury as well as a skin toner. It’s a trick nearly as old as time.

Homemade Oatmeal Scrub

For a homemade scrub, mix ground oats and honey. Rub all over your face—especially your nose. The abrasive will remove dry, scaly skin while the honey seeps in as a moisturizer. Rinse completely off and pat dry, and your skin will be glowing and baby soft. Only use this remedy once a week.

More Remedies and Tips at ALMANAC

SOURCE: ALMANAC

What to do With That One Sock?

Dust Cloth Extraordinaire

Your socks should fit over your hands, so put one on when it’s time to clean the house. In addition to using it to dust the furniture, socks are especially suited to wiping baseboards, shutters, blind slats, ceiling fans and even houseplants. In the garage, use single socks to clean and polish your car inside and out. When you’re finished cleaning your house or vehicle, remove the sock from your hand by pulling it off inside-out, so the mess stays off your hand.

Wipe a Dog’s Paws and Toys

If your dog comes back from a walk wet or dirty, slip a sock on your hand and wipe off her paws and any other affected areas. You may also wish to put a sock on your hand when you’re tossing a ball, Frisbee or other toy that may be returned to you full of slobber.

Rejuvenate Dry Skin

Do you have a problem with dry and cracked skin on your hands or feet? One of the best ways to heal your skin is to cover the affected area with an appropriate moisturizer or petroleum jelly before you retire for the evening, then cover with a sock. The sock will keep the lotion or salve from getting all over your bedding, plus help your skin better absorb the moisturizing agent. (If both feet need moisturizing, just use two odd socks.)

Roll Out Knotted Muscles

One of the more annoying things in life is having a tight muscle in an area you can’t quite reach, like the middle of your back. When that happens, place a tennis ball into a long sock, knotting the end. Find a hard surface like a wall or door, then toss the sock over your shoulder and position the ball over the knot in your back. Press against the ball as you move it all over the knotted area to roll out that muscle.

Bust Bad Smells

Fill a stray sock with cat litter, knot the end, and place it in your tent before rolling it up for the season. This will keep mustiness at bay. You can also put coffee grounds or baking soda in leftover socks, knot them, and stick into your shoes for an overnight deodorizing. One more odor-buster: Place potpourri or lavender into a sock, secure the end, then place in a dresser drawer, gym bag or closet — any place where you’d like a fresh scent.

Create Kids’ Toys

Sock puppets have been around for centuries, although they haven’t always been crafted from stray socks. Take those strays (longer socks work best) and add whatever embellishments you’d like, such as eyes, hair and glasses, to make your own puppet. You can also make stuffed animals from socks.

Prevent Drafts

If your home has a drafty door or window, take a sock (long ones and tube socks work best) and fill with popcorn kernels or dried beans, plus stuffing; e.g., quilt batting or polyester fiberfill. Sew the open end closed, then place against the bottom of your drafty door or window. The popcorn or beans will weigh down the sock so it stays in place, while the stuffing will block the wind from getting through any cracks or crevasses.

Make Dryer Balls

Typically made of compressed wool, plastic or rubber, dryer balls bounce between your clothing and sheets to prevent them from clumping together. They also combat static and wrinkles, soften clothes and fluff them out. But dryer balls can be pricy. To make your own, fold up one sock into a small ball, then place it on top of another sock. Then, roll the first sock up into the second, pulling the cuff over it all to make a larger ball. A slightly easier way to make a dryer ball is to drop a tennis ball into an old sock and secure the top. If you prefer store-bought dryer balls, you can still use a leftover sock to clean the dryer balls monthly. Simply place the balls in a few socks, tie the tops and toss into the wash.

Organize Wrapping Paper

Take a sock with a cuff several inches tall and cut off the cuff. Slip the sock cuff over a roll of wrapping paper to keep it tidy and in place.

SOURCE: HOWSTUFFWORKS

DIY: Wine Cork Reindeer

Today’s project is SUPER EASY, but it’s one you can certainly dress up in many ways if you like!

The basic reindeer is a couple of wine corks—one for the body and one cut slight shorter for the head, several twigs for the legs, neck and antlers, a red bead for the nose (or brown bead if you’re not making Rudolph) and a little garland if you want for a decoration. 

This image has an empty alt attribute; its file name is 6413602cef6e4b498e74ccceb399a240.jpg

If you really want to jazz up your creations use beads for the legs and neck, pipe cleaners for the antlers and tail, and add a larger bead for the nose.

This version uses a thumbtack for the nose, some flannel scraps for scarves and added pompoms for earmuff or a little knitted hat.

Then there’s this one, which focuses on the reindeer head, although I’m not so sure about their antlers.

Finally, there’s the Village People Version…

Today is also GA/FL’s birthday!!!!!!

HAPPY BIRTHDAY to a woman who is giving and loving and patient!!!

National Mason Jar Day

I went searching for things to do with Mason jars since it is National Mason Jar Day! (Who thinks these things up?)  I was astounded by the many, many uses for them!  I have included only a few here, but the links at the end provide many more ideas AND RECIPES!

There are many recipes you can make to put in mason jars and gift them—from cookies to homemade pancake mix to sweet and spicy nuts!  I loved this one because of the festive little Christmas light container.

Sugar Cookie Recipe with mix

If mixes aren’t your thing, how about using the jars to grow herbs?

Mason jar Herb Garden

There are many ideas for filling the jars with non-food related items and gifting them, such as this manicure in a jar idea!

Manicure in a Jar

Getting married and need an idea for the groomsmen?  Get some mini liquor bottles and create a mini bar in a jar!

I like this idea—very simple.  Get some white chocolate covered pretzels, a couple of buttons and viola!  Snowman in a jar!

This idea hubby loved—because hubby loves malted milk balls!

Reindeer Noses (malted milk balls)

This website has dozens of recipes for all sorts of things to put in Mason jars:

https://thefrugalgirls.com/

This website has many ideas for using the jars around the house—as well as some recipes:

https://www.realsimple.com/

The Turkey Toss

When my kids started high school, the school had 2 “fun” fundraisers for the local Rescue Mission during the year.  One, in the spring, was the egg drop.  Participants paid an entry fee, (as well as spectators), and had to develop a method for their egg (supplied by the school so no fake ones allowed) to be dropped from the top of the high school and land unbroken below.  (There was a metal railing and plenty of adults ensuring the safety of all involved.)

The second was the turkey toss. 

Again, the school provided several frozen turkeys to be used by contestants, either singly or as a team, to fling their turkey as far down the football field as possible.  The entrants and spectators, again, paid a fee and there were additional donation boxes provided to bring canned goods for the Mission.  The rules were simple: your method had to be human powered—no electric anything– and you could start all the way down the opposite end of the field if you wanted a running start–but you had to “launch” your frozen turkey from the 50-yard line.  

The first year we went, neither of my kids participated, but we had a great time!  Mostly the contestants were athletes trying to throw the frozen birds like a football.  Winner of the event got his picture and a write up in yearbook. 

The following summer, my son and 2 of his friends spent a lot of their spare time helping a neighbor down the street from us clear out his garage.  My son stored all sorts of pieces of wood and a jar of odd nuts and bolts in our garage.  And then they began to tinker with it all.  Whatever they were doing was a big secret and they covered it with a tarp they begged hubby for.  We all promised not to peek until they were ready.  One afternoon after school started, the whole thing just disappeared. 

And then the mystery deepened.  We got this funny “invitation” on our front door—apparently the entire neighborhood got the same invitation—to go to the wedding venue parking lot at the bend in the road this Saturday morning for the “unveiling”. 

The entire neighborhood it seemed had gathered there to see what the young men had cooked up.  It was their turkey toss entry…a trebuchet!

Theirs was a little cruder than the above drawing, but still looked basically the same—except theirs didn’t have its own wheels.  They had theirs strapped to 2 mechanic’s dollies to transport it.  We watched and cheered as they flung their frozen turkey all the way from one end of the parking lot to the other.  They were a shoe-in to win the turkey toss!

On the Saturday of the contest, hubby loaded up their pieces—it came apart for easy transport—and their tools and drove them to the high school to set it up very early.  They covered it and took turns guarding it till the start of the contest.  When it was finally their turn, they moved it to the 50-yard line and uncovered it.  The crowd was stunned…and then they launched their turkey.  It CLEARED the uprights in the end zone!  The judges then asked the boys if they wanted to move their contraption BACK so they could really establish a winning distance…they readily agreed! They set the school record that morning for the turkey toss.  Got their names and pictures in the newspaper as well. 

DIY: Alternate Uses for Dryer Sheets

FROM HOWSTUFFWORKS:

Many people routinely toss a dryer sheet or two into their dryers before pressing the start button. That’s because these small, papery sheets reduce static cling and wrinkles, soften your duds, and leave them with a pleasing, fresh scent. But dryer sheets are typically thrown in the trash once the clothes are dried. That’s a shame, because they can be repurposed to perform a wide variety of other tasks.

Dryer sheets are stiff, woven pieces of fiber, generally about 9 inches long and 6.4 inches wide. They’re coated with fabric softeners and lubricants as well as a scent like lavender, linen, musk or rain. Some sheets are also sold unscented.

When you start your dryer, these sheets do their magic when the coating melts off them and onto your clothing as they all tumble together, leaving your laundry soft and free of static. Afterward, the dryer sheets are ready for their second incarnation.

Here are 16 ways you can recycle and reuse your old dryer sheets. Some of these hacks are for new sheets, too.

Regular Cleaning

That coating that dryer sheets come with is useful for picking up dust and dirt. Here are some things you can use dryer sheets for as you clean.

Dust almost anything. Take an old dryer sheet and use it as a dust cloth, running it over items such as window blinds, baseboards, ceiling fan blades and your car’s dashboard. Bonus: The sheets are great at picking up pet hair in the process, and any coating still on them will also help the surface you’ve just cleaned repel dust and lint.

Wipe up spills. Spilled some flour, baking soda or seasoning? Dryer sheets are great at cleaning up such messes, as dry ingredients will stick to the sheets. But don’t use them when you’ve spilled something on the floor, as they can make it quite slick and a slipping hazard.

Remove sap and sand. When you’re in the great outdoors, use old dryer sheets to remove tree sap from your hands — it sticks to a dryer sheet better than a wet wipe — and to easily brush sand from your feet and legs.

Tough Cleaning

Scrub pots and pans. Dryer sheets are great at tackling the hard stuff. Take dirty pots and pans. If you’re not in the mood to vigorously scrub them for an indefinite amount of time, fill the pot or pan with hot water, toss in a new dryer sheet and let it soak at least an hour or overnight. In the morning, the sheet will have helped loosen the crusty food so you can more easily wipe it off.

Remove grime from oven racks. If your oven racks become grimy — a common occurrence — fill your bathtub with warm water, a half-cup of dish soap and eight new dryer sheets. Then lower in the racks and let them soak overnight. In the morning, scrub off the gunk with the dryer sheets, then rinse, dry and replace in your oven.

Clean crusty irons. Dryer sheets work well if you need to clean the bottom of your iron, where residue can accumulate from spray starch buildup and even melted synthetic fabrics.

Remove soap scum. Unfortunately, it’s easy to discover a film of soap on your shower door or bathtub. Scrub clean with a used dryer sheet.

Deodorizing

If you’ve got scented sheets on hand, either new or just out of the dryer, they can be used to make any number of household items smell more pleasant. In general, it’s better to use new sheets for deodorizing, as their scent is stronger.

Freshen wastebaskets and vacuum cleaners. Toss a dryer sheet in the bottom of your wastebasket before adding the bag, or in your vacuum cleaner to combat unpleasant smells.

Refresh camping gear. Even outdoorsy people don’t enjoy unpleasant smells. Before you pack away your camping equipment, toss dryer sheets into items like your tent, sleeping bag and backpack. They’ll smell much better the next time you use them.

Get rid of car odors. Tuck a few dryer sheets under your front seats and you may be able to get rid of that pine tree deodorizer hanging from your rearview mirror.

Freshen up workout gear. Stick dryer sheets into your gym shoes and gym bags to keep nasty smells at bay.

Remove stale odors from your suitcase. Travelers should place dryer sheets in their suitcases to avoid the stale smells that can develop when they’re closed up for a while.

Eliminate smells in your home. If a room in your house smells a little funky, tape a dryer sheet to the back of a vent or two so that the air flowing through them will pick up their pleasant scent. If you do this, though, make sure to replace the sheets weekly so no dusty build-up will impede the air flow.

Miscellaneous

Bet you never thought of using your dryer sheets for the following:

De-squeak shoes. Have a squeak in your shoe due to orthotics or insoles that are rubbing against the bottom? Place a new or used dryer sheet in between the bottom of the shoe and the orthotic or insole, and the squeak will disappear. If it comes back, it may be because the sheet has slipped out of place; simply readjust. Or it may be time for a new sheet.

Sharpen scissors. Scissors dull? Then use them to cut up a dryer sheet or two and that should restore some of their cutting ability.

Repel insects. If you enjoy hiking but flying insects keep circling your head, tuck a new dryer sheet into the back of your ball cap, leaving several inches hanging out. Both the scent of the sheet and its movement as you walk may keep insects at bay. (Studies have shown that linalool, a popular floral-scented chemical in cosmetics, perfumes and dryer sheets, repels fungus gnats and some types of weevils. But linalool didn’t seem to have much value at repelling mosquitoes.)


SOURCE: HOWSTUFFWORKS

What Shall We Make Today?

In honor of Halloween later this month, today’s recipe is from Reader’s Digest and it’s for FAKE BLOOD & GUTS, lol.  I am only presenting the fake blood part of the article because the rest is too out there even for me.  But there are many, MANY videos on how to make your own intestines if you really want to know how.

From the article:

Many years ago, I worked as a celebrity makeup artist. And for a while there, I trained in special effects makeup—you know, the gooey, gross, and oozing stuff that makes you gasp or peek through your hands as you’re watching a scary movie. If you’re opting for an easy Halloween costume this year and trying to figure out how to make fake blood to accent your creation, we’ve got you covered. Literally.

Making fake blood is both creative and easy, depending on your needs. The king of modern splatter makeup, Greg Nicotero, who’s best known for his work on The Walking Dead, once told CBS News that creating fake blood was “kind of—oddly—a weird art form.” He’s not wrong. And Nicotero’s creative zombie art has inspired countless Halloween costume ideas and Halloween makeup ideas.

So why should you whip up your own fake blood? Well, what is Halloween without a little gore? Plus, it’s easy, inexpensive, and really fun to make. And let’s not forget about bragging rights. You can reference it in your Halloween Instagram captions, or share a TikTok of yourself scrolling through Halloween face paint ideas and scary Halloween costumes and then pan out to an image of you stirring up a batch of fake blood.

These fake blood recipes are total no-brainers, but keep in mind that a lot of these ingredients will stain your skin and property. And remember: Don’t sacrifice safety for fun. Fake blood that comes in contact with your skin or mouth needs to be edible.

So, what should you expect from this creepy crafts experiment? The DIY fake blood should be slightly runny, like the fake blood in movies. Think Dexter and his blood spatter, and you’ll have an idea of what the texture should look like. Ready to create your own (make-believe) blood? Here’s how:

Ingredients:

3/4 cup corn syrup (if you’re trying for the look of old blood, consider using a few drops of maple syrup as well)

1/4 cup water

1/2 teaspoon red food coloring

5 drops blue food coloring

2 drops green food coloring

1 tablespoon cornstarch

Step 1: Combine the water and corn syrup. You’re trying for runny, but not so runny that it drips off your face or body and just leaves stains.

Step 2: Slowly add the food coloring until you reach your ideal color.

Step 3: Slowly mix in the cornstarch. You can add a drop of water to the cornstarch first to keep it from clumping.

Step 4: Let it sit at room temperature for 10 minutes before use.

Note: This is going to stain your skin and clothing.

The food coloring proportions are optional; only you know the exact color you’re trying to create. That said, using green and blue makes the color more realistic. Bear in mind that red and blue create purple, and green will give your fake blood the sickening look you’re trying for.

How to make fake blood for clothes

If you’re hoping to make your clothes look bloody, you’ll need to create blood that is thicker and darker. The fake blood recipe below is nontoxic and made with edible ingredients. Ideally, you’ll make a bigger batch of this fake blood so you can thoroughly soak your costume.

This fake blood recipe uses a ratio of corn syrup to water, versus exact measurements, so you can make as little or as much as you like. If you and your friends are batting around group Halloween costume ideas, consider making a single batch of blood for everyone to use.

Ingredients:

Corn syrup

Water

Red food coloring

Cocoa powder

Step 1: In a large bowl, combine three parts corn syrup with one part water. Mix thoroughly.

Step 2: Add a couple drops of red food coloring into the mixture while stirring continuously. Keep adding more drops of food coloring until the blood is your desired color. Stir for at least five minutes to distribute the food coloring evenly.

Step 3: Add 3 tablespoons cocoa powder to the mixture and stir. This thickens the blood. Keep adding cocoa powder, a tablespoon at a time, until the blood reaches your desired consistency. The blood will be thick but not lumpy, so it can sit on your clothing and absorb without running.

You can also try using old red paint and water, blending in blue and green paint until you have the right color and texture of dried blood.

SOURCE: READER’S DIGEST

Surprising Coffee Ground Uses

Wondering if you can give all those used coffee grounds another purpose after making a fresh pot? If so, you’re smart to care about sustainable living. “Reusing, repurposing or finding any alternate applications for a product is always a better choice for the environment than throwing it in the trash,” says Natalie Lennick, environmental activist and founder of zero-waste hair-care brand Green Ablutions. Giving coffee grounds another life not only benefits you, it’s also a small act that’s beneficial for the planet.

You may have already heard about using coffee grounds for plants, but they’re way more versatile than that. Used coffee grounds can be used for kitchen hacks and in various other ways, so you can take advantage of this organic material more than once. You’ll likely be surprised at all the uses for coffee grounds, and they’re cost-effective too.

Adding them to your compost pile

This may not come as a total surprise, but you may not know exactly how to use coffee grounds in the garden—or even how to make compost. “Used coffee grounds are an excellent addition to compost because they are high in nitrogen, which is a key component of a healthy compost pile,” explains Chia-Ming Ro, garden consultant and owner of Coastal Homestead in Los Angeles. “They help to balance out the carbon-rich materials in compost, such as leaves and paper.”

Pro tip: Coffee grounds and their paper filters can be added directly to a compost pile with other organic matter like eggshells, leaves, grass clippings, cardboard or paper to produce a well-balanced soil amendment that feeds trees, plants and flowers, says Lennick.

Using them as insect repellent

Want to repel unwelcome bugs in the garden? Coffee grounds can give you an assist. “There is some evidence to suggest that coffee grounds can repel certain insects, such as slugs, ants and mosquitoes,” says Ro. “The exact mechanism by which coffee grounds repel insects is not well understood, but it may have to do with the strong scent of the coffee, which can mask the scent of the plant and make it less attractive to insects.”

Sprinkle coffee grounds at the base of plants or where you’re having an infestation problem in the garden. If you’re wondering how to save money on your gardening habit, now you know you may be able to skip buying the bug spray.

Pro tip: Before you start sprinkling used coffee grounds in your garden, make sure your pets don’t have access to this area. Lennick says the caffeine in coffee is toxic to cats and dogs. “Never use them in an area where your pets might accidentally ingest them,” she says.

“Coffee grounds can be beneficial for flowers because they provide a source of nitrogen, which is an essential nutrient for plant growth,” says Ro. But before you start adding spent coffee granules to your garden bed, you’ll want to look into which flowers may benefit, since it’s possible that used coffee grounds may change the soil composition.

Pro tip: Want to use coffee grounds in some flower beds? Ro suggests sprinkling them around the base of the plant and mixing them into soil.

Creating blue hydrangeas

Love hydrangeas and want to have the blue flowers? Coffee grounds may be the key to that beautiful blue hue you’re after. “The flower color of many hydrangea species is dictated by the pH of the soil,” says Lennick. Coffee is considered acidic—but coffee grounds are often considered to have a neutral pH. There is a debate among gardeners about whether coffee grounds are the answer for modifying the soil composition to get the sought-after blue color. Now, if your hydrangeas have a powdery mildew on the leaves, it may be because the plant has a fungus.

Pro tip: You may want to do a test in your garden before adding coffee grounds to all your hydrangeas. “It’s important to note that the effect of coffee grounds on the color of hydrangeas can vary, depending on the soil composition and other factors,” shares Ro.

Providing food for beneficial worms

If you have a compost bin, you may also be interested in investing in a worm bin for vermicomposting. This is where you feed your produce scraps to your “pet” worms, who eat and break down different leftover veggies and fruit. This leaves you with rich, natural fertilizer. “Worms can benefit from coffee grounds because they provide a source of nitrogen and can help to increase the nutrient content of the vermicompost,” says Ro. Plus, coffee grounds can help increase the moisture-holding capacity of the vermicompost, she adds.

Pro tip: Before you start tossing your coffee grounds into your worm bin each morning, opt for moderation. Ro says it’s important to maintain a balance in there. Too much of one ingredient can affect the composition of the compost and the health of the worms.

Deodorizing the microwave

If these appliances have taken on an odor, used coffee grounds can help. “Coffee grounds can be used to clean and deodorize stinky microwaves,” says Lennick. “It’s a safe, effective and free way to clean.”

Pro tip: Cleaning with used coffee grounds is simple and straightforward. “Apply a small amount of coffee grounds with a damp cloth and then wipe clean a few minutes later,” says Lennick.

Scrubbing pots and pans

If you have tough, hard-to-remove stains caked on your pots or pans, this is one of the handiest uses for used coffee grounds. “The abrasive nature of coffee grounds makes them useful for scrubbing stuck food from pots, pans, grills and griddles,” says Lennick.

Pro tip: Sprinkle the coffee grounds directly onto the stain and then start scrubbing. Certain types of material or surfaces should be avoided. “Do not use it on porous surfaces, as it may cause stains,” Lennick says

Cleaning the kitchen sink

If you notice that your kitchen sink needs a good scrub, and you want to avoid harsh chemicals, used coffee grounds may just be your answer. “Spent grounds can also be used to clean your kitchen sink instead of chalky products that may leave behind a white film,” explains Stacy Savage, founder & CEO of Zero Waste Strategies. “This also reduces the levels of toxicity in your home or office kitchenette areas, as your cleaning habits start to shift away from industrial-grade products.”

Pro tip: Sprinkle coffee grounds in the sink, and then scrub just as you would using another cleaner. Your sink should be shining in no time.

Flavoring baked goods

One wonderful use for coffee grounds that you may not have considered is baking. “Coffee grounds can be used as an ingredient in baked goods like cookies, muffins, scones or even granola to add a delicious coffee flavor,” says Lennick. “They are especially good in brownies, as they complement chocolate and deepen the rich cocoa flavor.”

Pro tip: Use that morning’s coffee grounds the same day you bake. “Fresher is better,” says Lennick. You may need to modify the recipe to account for more liquid. “If your grounds are very wet, you may need to slightly reduce the liquid content of the recipe to accommodate the additional moisture.”

Freshening your garbage disposal

Want to neutralize odors coming from the kitchen drain and want another option aside from your old go-to baking soda? Yup, grab those used coffee grounds. “Coffee grounds naturally trap odors,” says Lennick.

Pro tip: “Put some used coffee grounds down the drain and run the grinder for about 30 seconds to clean the inside of the mechanism,” says Savage.

Dyeing clothes

Ever spilled coffee on your favorite white shirt and then spent a ton of time trying to get the spot out? Coffee stains easily, but it also makes a wonderful natural dye for cotton, linen, silk—and even paper. The process is easy and simple too.

Pro tip: “Just take old coffee grounds, steep them in hot water and place lighter-colored fabrics and fibers into the solution for dyeing,” says Savage. “Hang-dry to allow the dye to set.”

Minimizing cellulite

If you’re looking for a natural approach to minimizing cellulite, used coffee grounds could be worth a shot. Coffee grounds contain caffeine, which has been shown to help with cellulite. “Some people believe that the caffeine in coffee grounds may help reduce the appearance of cellulite when applied topically,” says Savage.

Pro tip: Combine coffee grounds either with water or an oil, such as coconut oil, and rub onto an area affected by cellulite, for 10 minutes, two times a week.

Exfoliating your skin

The gritty and coarse texture of coffee granules makes them wonderful as a skin scrubber. Exfoliating keeps skin glowing and healthy, because it’s beneficial to remove dead skin cells and stimulate the skin. Plus, the caffeine in coffee grounds can help stimulate blood flow, which adds a natural glow to the skin.

Pro tip: “Coffee grounds can be mixed with coconut oil or honey to create an exfoliating scrub that may help remove dead skin cells and improve circulation,” says Savage.

Making a face mask or hair scrub

Shampoo can leave buildup and residue in your hair after continued use. Giving your scalp a massage while exfoliating with coffee grounds can help remove that and help stimulate hair growth—thanks to caffeine, which is known to help with hair growth as well as stimulate blood flow. According to Savage, “Coffee grounds can be used as a hair mask to potentially stimulate hair growth and add shine.”

Pro tip: Here’s the formula you need: “A tablespoon of coffee grounds mixed with an equal amount of olive oil or coconut oil creates a moisturizing face mask or stimulating scalp scrub,” says Lennick.

Minimizing under-eye circles

Coffee grounds are high in antioxidants, which help fight free radicals and are also beneficial for the skin. Caffeine not only has anti-inflammatory properties; it also can stimulate blood circulation when applied below the eyes to minimize dark circles and puffiness. “Some people use coffee grounds as an eye mask to potentially reduce puffiness and dark circles,” shares Savage.

Pro tip: Mix coconut oil or water with used coffee grounds, gently rub below your eyes for around 10 minutes and then rinse. Consider making this part of your daily beauty-care routine.

SOURCE: READER’S DIGEST

Genius Cooking Hacks

Reader’s Digest had an article on genius cooking hacks—some I never heard of.  I thought I’d share!

Use an empty water bottle to separate egg whites and yolks

Crack an egg into a shallow bowl, then hold the mouth of the bottle near the yolk and gently squeeze. When you release the squeeze, the yolk will be sucked out, and you can deposit it into another bowl.

Cut corn with a Bundt pan

To remove corn from the cob quickly, stand the cob upright in the center of a Bundt pan. Holding the top of the cob steady, stroke a chef’s knife downward along the sides to remove kernels. Scrape the cob with the back of the knife to release juices. Kernels and juice collect in the Bundt pan—meaning one less mess for you to clean up.

Skip the pasta rinse

Rinsing noodles washes away flavor and natural starch, which helps yummy sauce stick. It’s why some recipes suggest saving pasta water to use in sauce. Instead, skip the wash and spread drained pasta on a pan to cool.

Don’t cry over a broken cake…

Instead, make a trifle by layering salvaged cake pieces with fresh whipped cream and fruit in a pretty glass bowl, advises Tamar Adler, chef and author of An Everlasting Meal: Cooking with Economy and Grace.

Keep counters clean with a baking sheet

Place all ingredients on an empty baking sheet prior to prepping them. (This will help you catch spills and avoid wasting time hunting for an item as you cook.)

Turn in the chopping knife: Instead, roll over herbs like parsley and cilantro with a pizza wheel for quick and safe slicing. A pizza wheel also effortlessly chops foods like pancakes and pasta for small children

Use a countertop bowl for easy garbage

As you cook, toss scraps, eggshells, and other garbage into a large bowl. This will contain messes and save time if a trash can isn’t readily accessible. Line the bowl with a plastic bag to make cleanup even easier.

For easier hard-boiled eggs, salt is your BFF

Want the shells of hard-boiled eggs to come off in big chunks instead of a million tiny pieces? Add a teaspoon of salt to the cooking water before putting in the eggs.

Clean a blender sans sponge

Fill it one-third full with warm water and a few drops of dishwashing liquid, recommends Woman’s Day. Run it for ten seconds. Rinse and dry.

Whip up gourmet bread crumbs in a pinch

Got extra burger or hot dog buns? Tear into pieces and freeze in a zipper-top bag. Ten to 20 pulses in a food processor will transform them into ready-to-use bread crumbs—no thawing necessary.

Juice a lemon with a microwave

Zap a lemon for ten seconds to break down cells and make the juice flow faster, suggests Laurent Tourondel, chef and partner at Arlington Club in New York City. This is good to remember when trying to squeeze out as much juice as possible for a vinaigrette.

For better pie crusts, use a cheese grater

A cheese grater makes quick work of piecrusts and biscuits. Instead of cutting the butter into the flour, simply grate a stick of frozen butter, and then toss the shreds with flour until a crumbly mixture forms, says Beth Moncel, creator of budgetbytes.com.

Flavor sauces and stews with leftover wine

Freeze leftover wine in ice cube trays (eight cubes = one cup) to add flavor to sauces and stews.  White and sparkling work best in creamy or clear and brothy soups (think chowder and simple vegetable), while red wine goes well with tomato or beef-based varieties (think chili). Add a few generous splashes per portion.

Flip natural varieties of peanut butter upside down

This position allows the pool of oil near the lid to move through the rest of the jar and make the peanut butter creamier (and to skip messy stirring). Just make sure the cap is screwed on tight to avoid a greasy pantry shelf.

Use your porch to refrigerate

If your fridge is full because you’re hosting a party and the temperature is 40°F or below, place hardy perishables (like fruits and vegetables) in a cooler outside near the back door. Doing so will free up a lot of extra shelf space while still keeping food cold.

Leftover Doritos? Think outside the chip bag

Smash a handful of chips, stuff into a clean pepper mill, and grind away onto everything from mac and cheese to broccoli.

Make friends with your kitchen scissors

Use them to chop cooked or tender raw vegetables (especially greens) right in the bowl or pan.

Halve cherry tomatoes fast

Save time on your next salad: Find two similarly sized storage container lids. Place cherry tomatoes on top of one, then firmly hold the other lid on top of the tomatoes. Use a very sharp knife to slice through the entire bunch at once.

Apple cutters slice potatoes

You’ll have perfectly sized pieces to bake as wedges.

Soften ice cream hard as a brick

Heat a sharp knife under warm water, then use it to make one-inch-deep cuts in a grid formation, spacing the lines about an inch apart. This increases your ice cream’s exposed surface area, speeding up the thawing process (similar to the beef trick). Run a scooper under warm water, and easily serve up each section.

Defrost meat last minute

Thank high school science for this neat trick: Remember, metal conducts heat. Place meat in a plastic bag, then put it on top of an upside-down aluminum pot. Fill another pot with room-temperature water, and set it on the meat. In five to ten minutes, your meat will be defrosted.

Cut away the mold

Before you toss suspect-looking leftovers, know this: firm foods are more likely to be salvageable than soft foods. Mold generally can’t penetrate deep into hard cheeses like Asiago and cheddar, so it’s OK to cut off about an inch. The same goes for firm produce like bell peppers and carrots. However, chuck moldy-looking foods with high moisture content—yogurt, soft cheeses, cooked leftovers, and bread. Porous foods are likely to be contaminated beneath the surface.

Chop strawberries with an egg slicer

Use an egg slicer to quickly chop strawberries for fruit salads and desserts. Or cut avocados for sandwiches and uniform mozzarella slices for salads and pizza.

Twist open a mason jar for easy fried eggs

For perfectly round fried eggs (handy for breakfast sandwiches), heat a pan and spritz Mason jar rings with cooking spray. Place the rings on the pan, and slowly drop one cracked egg into each of the rings. Cook for about 5 minutes for a medium yolk. Use tongs to remove the Mason jar rings, and serve.

Whip up French toast in your microwave

Rub a pat of butter on the bottom of a mug; fill it to the top with chopped bread. In a separate cup, mix one egg, three tablespoons of milk, and a sprinkle of cinnamon. Pour the mixture into the mug, and microwave for one minute.

DIY:Bird Seed Bags

I ran across a wonderful and detailed tutorial on how to make reusable bags from bird seed bags!  The tutorial shows a larger bird seed bag, but these bags can be made using smaller quantity bags as well.

The website is From My Carolina Home.

Begin by cutting the bottom off the first bag.  There are two reasons for this.  It makes the bottom square, and cuts off the former stitching that could harbor seed debris and interfere with boxing the corners.

On the top of the bag, cut two strips off, 3-inches wide each.

Cut through each one crosswise to create two long strips.  Fold the edges to the center.

Then fold in half again, enclosing the raw edges inside the strap. Use clips to hold as pins would leave holes.

Turning to the machine, change the needle to a size 16.  I also chose a thicker thread than the kind I usually use for piecing. Next, lengthen your stitch length.  On my machine, I believe the 2.5 setting gives me 12 stitches per inch, and the 4.0 setting is more like 8 stitches per inch.  If you don’t do this, the closer stitching may perforate the bag too closely in a line and weaken the stitching.

Stitch the handles near the double-folded edge to secure the layers together.  Repeat with the other handle.

Turn the bag inside out, and stitch across the bottom.

Fold up that end, and stitch again for strength.

Box the corner 3 inches.

On the inside top, fold the top edge down one inch, then fold again one more inch.  Insert the handle under the fold, with each end 3 inches from the center.

Stitch all the way around on the lower edge.

Fold the handle up, and stitch again around the top edge.

Voila, all done.  This first bag took under an hour to make.

SOURCE: https://frommycarolinahome.com/