DIY: Uses for Bananas (Besides Eating Them)

I found this on Reader’s Digest.  It was updated May 22, 2023.

Make a face mask

Take a moment to pamper yourself!  That’s right: You can use a banana as an all-natural face mask that moisturizes your skin and leaves it looking and feeling softer. Mash up a medium-size ripe banana into a smooth paste, then gently apply it to your face and neck. Let it sit for 10 to 20 minutes, then rinse it off with cold water. Another popular mask recipe calls for 1/4 cup plain yogurt, 2 tablespoons honey and 1 medium banana.

Eat a frozen “banana-sicle”

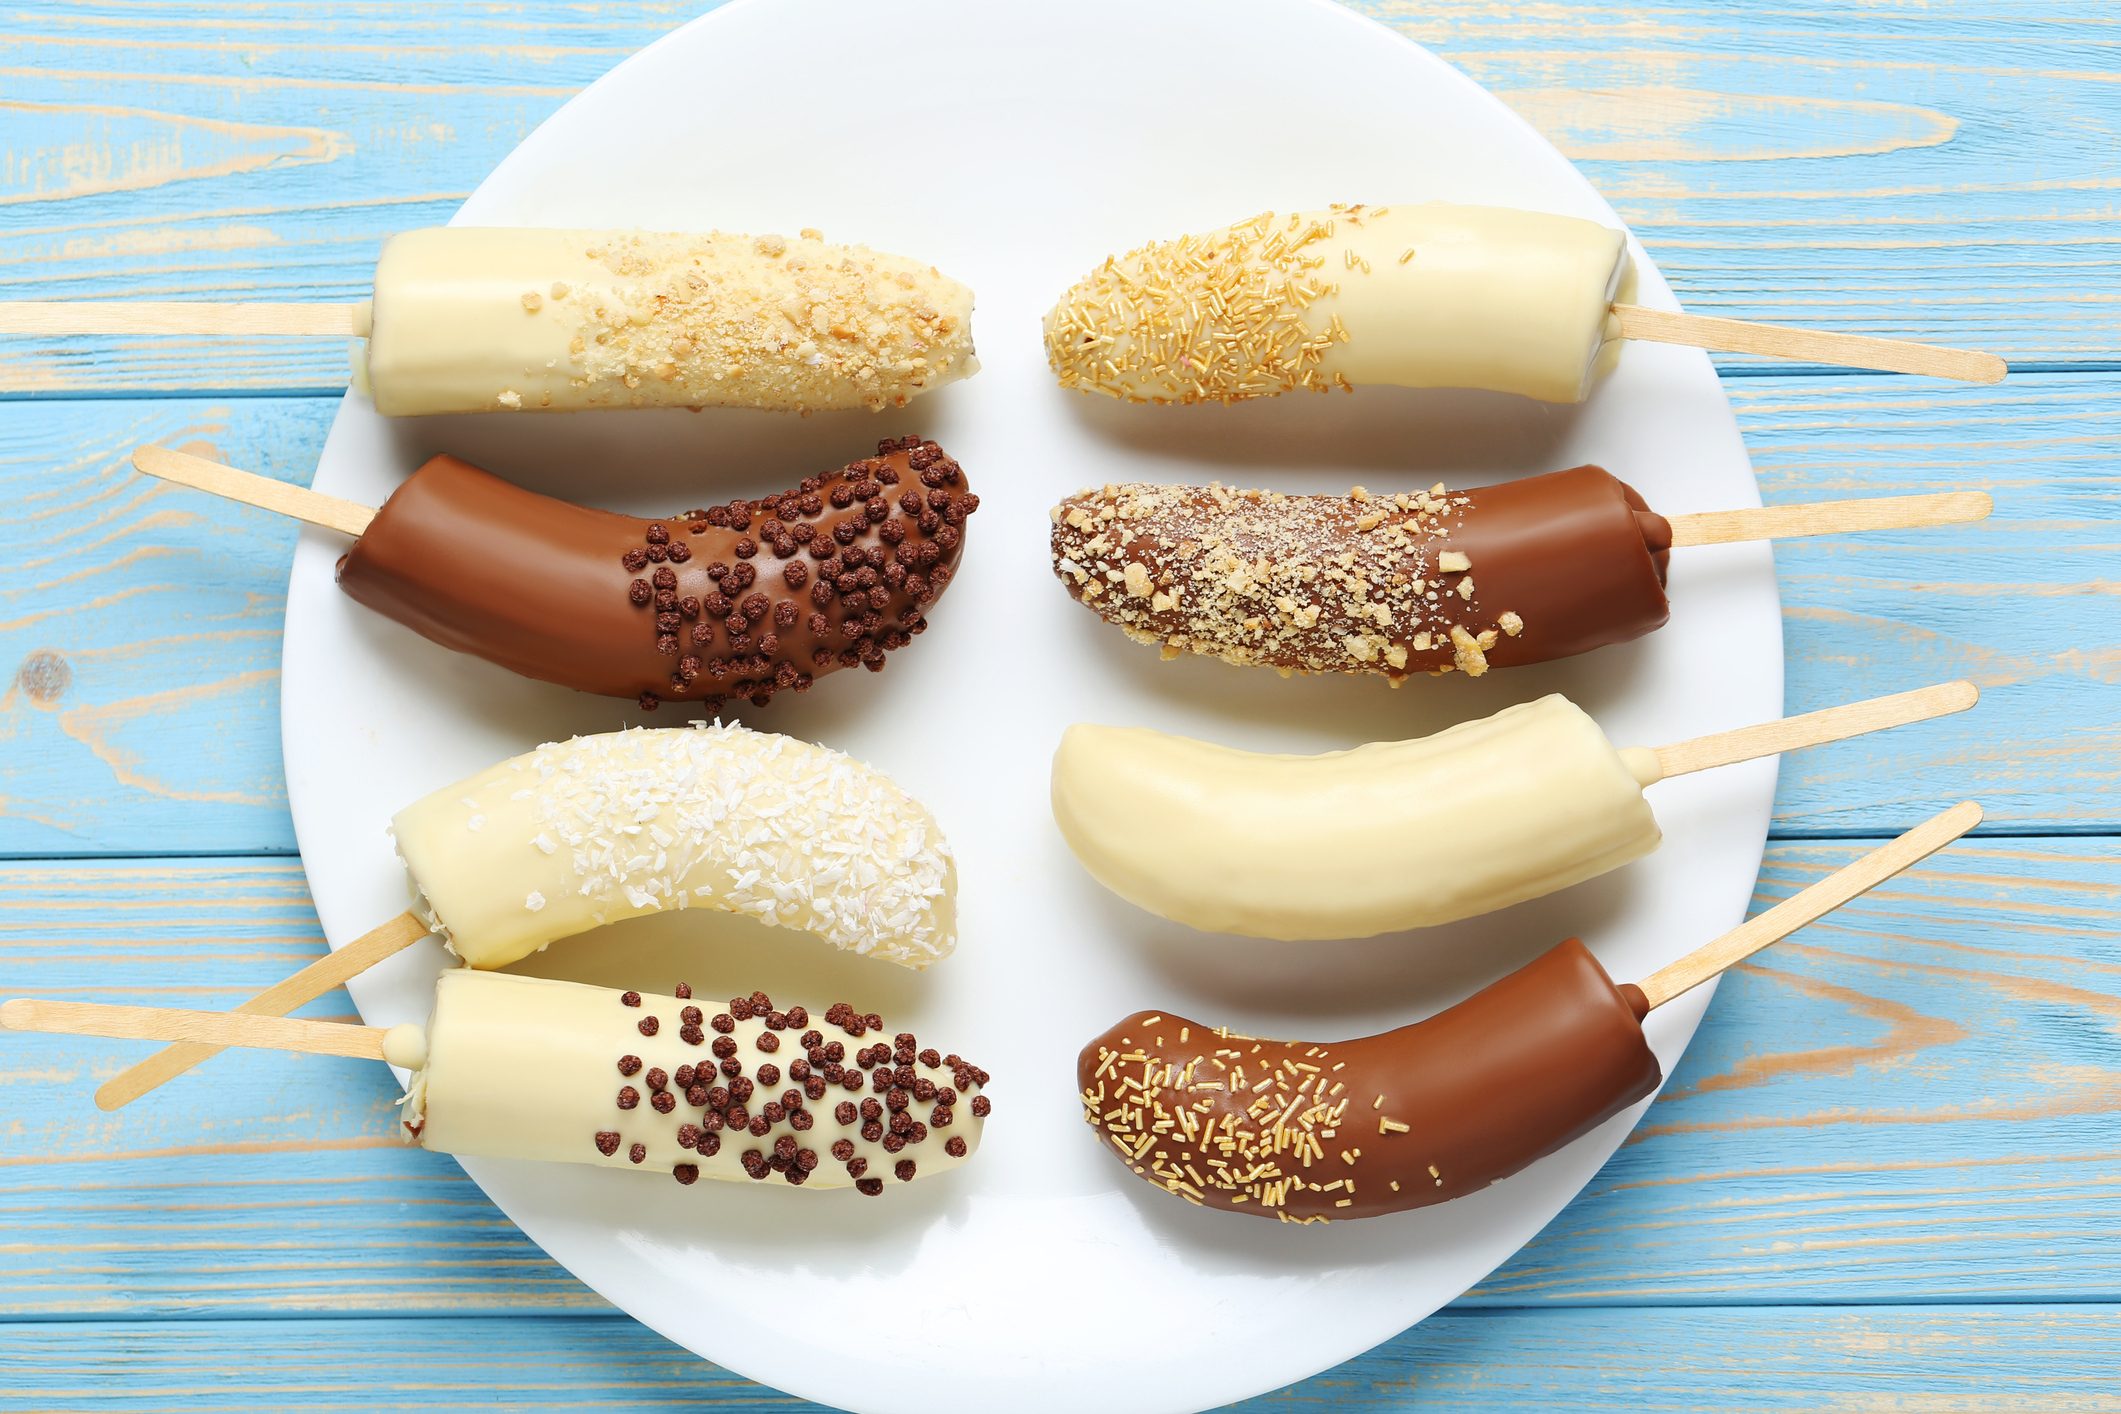
As a treat for friends and family, peel and cut four ripe bananas in half (across the middle). Stick a wooden ice-cream stick into the flat end of each piece. Place them all on a piece of wax paper, and then put it in the freezer. A few hours later, serve them up as simply yummy frozen banana-sicles.

If you want to go all out, quickly dip your frozen bananas in 6 ounces melted butterscotch or chocolate morsels (chopped nuts or shredded coconut are optional), then refreeze.

Polish silverware and leather shoes

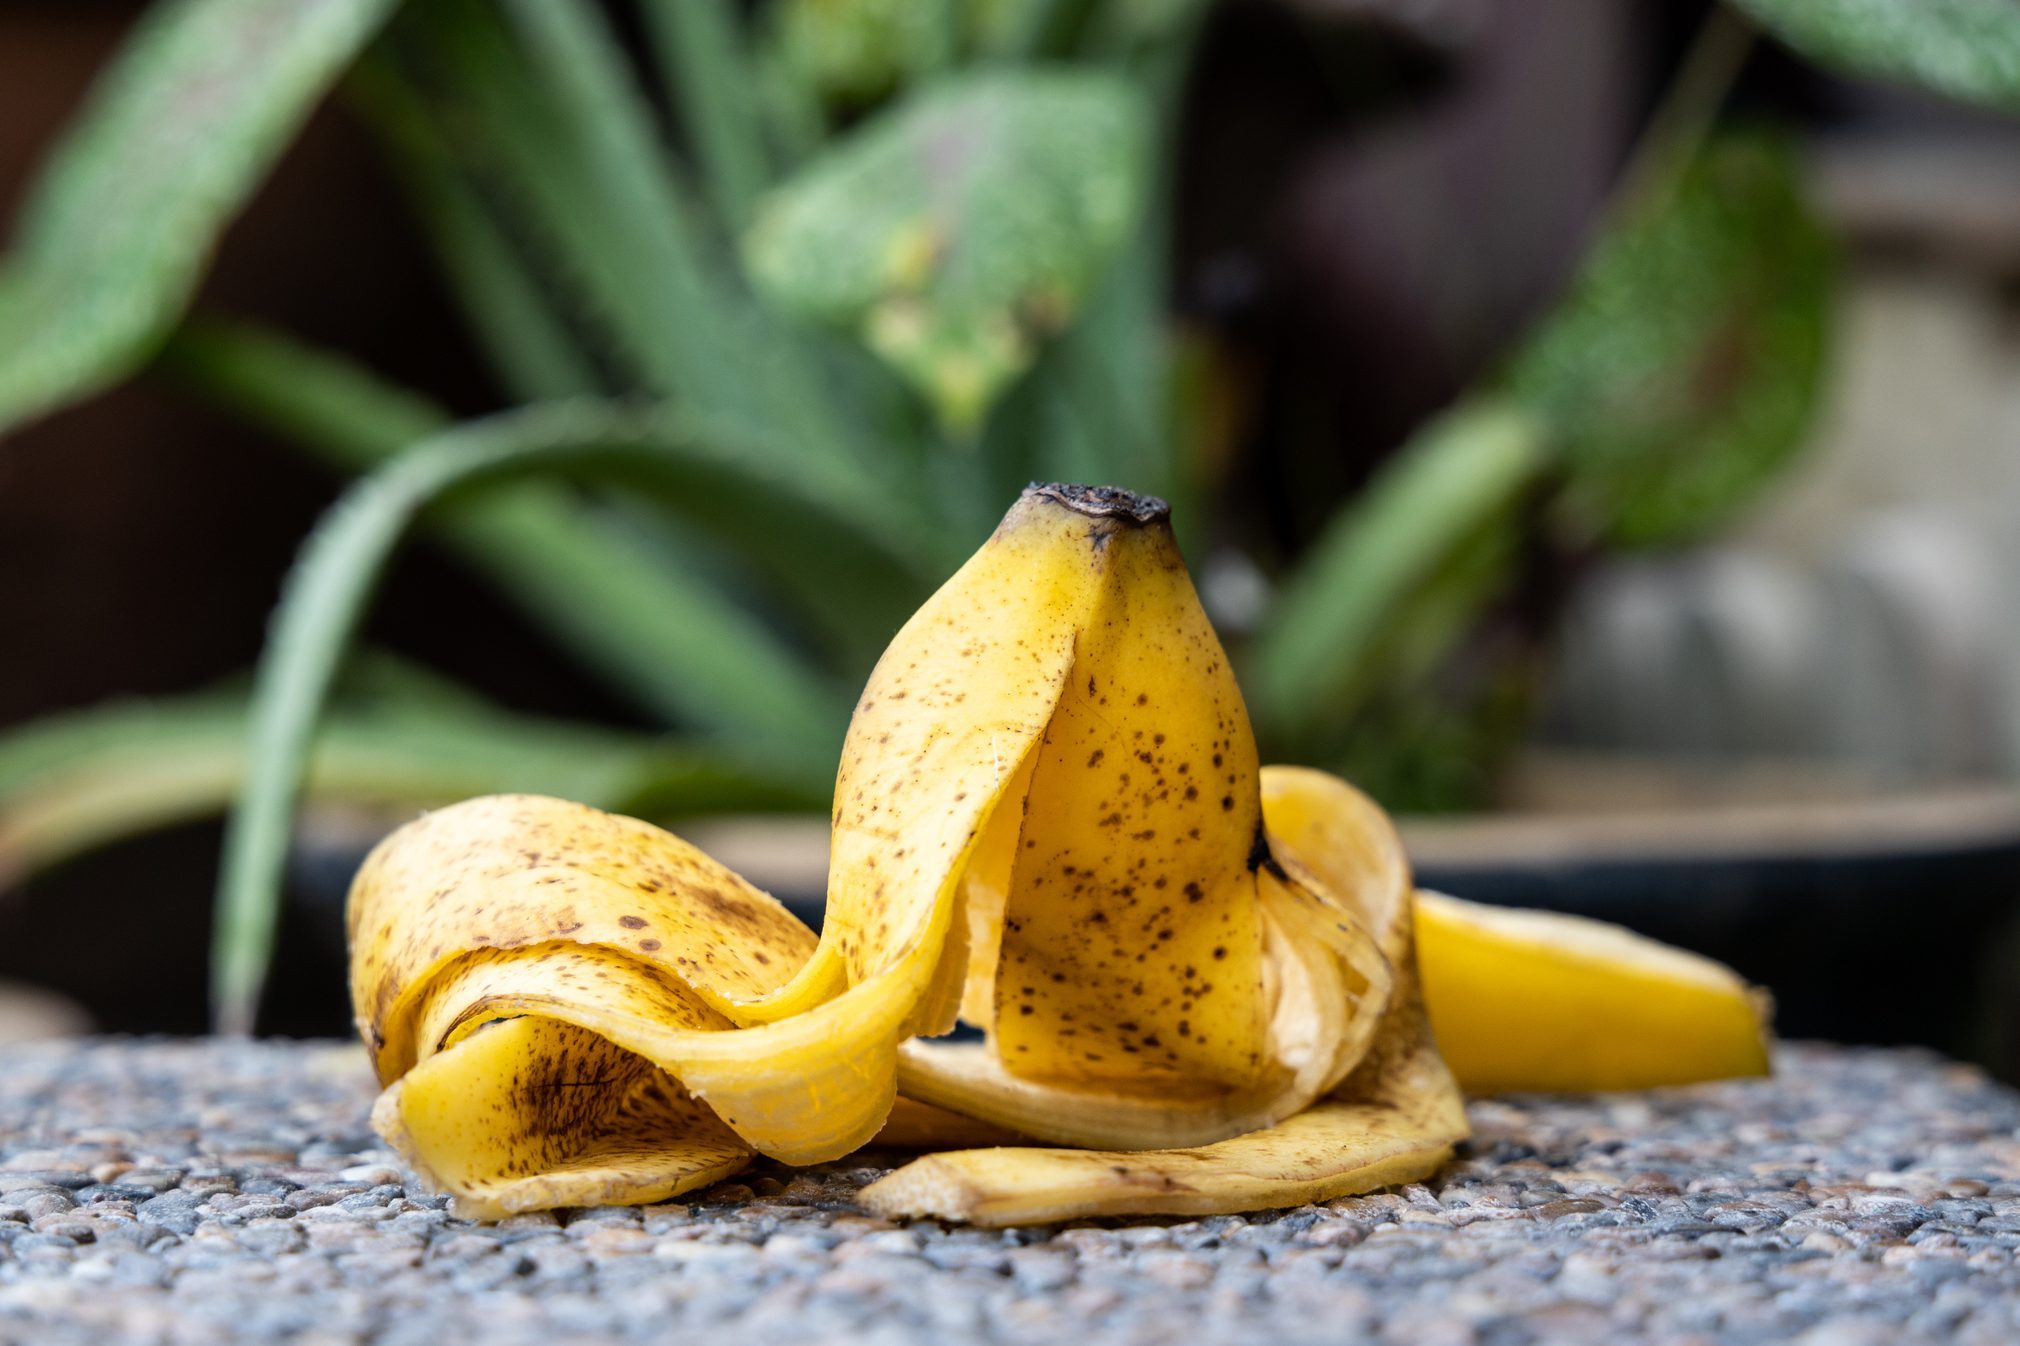
It may sound a bit like a lark, but using a banana peel is actually a great way to put the shine back into your silverware and leather shoes. First, remove any of the leftover stringy material from the inside of the peel, then just start rubbing the inside of the peel on your shoes or silver. When you’re done, buff up the object with a paper towel or soft cloth. You might even want to use this technique to restore your leather furniture. Test it on a small section first before you take on the whole chair.

Tenderize a roast

Banana leaves are commonly used in many Asian countries to wrap meat as it’s cooking, to make it more tender. Some folks say the banana itself also has this ability. So the next time you fear the roast you’re cooking will turn tough on you, try softening it up by adding a ripe, peeled banana to the pan.

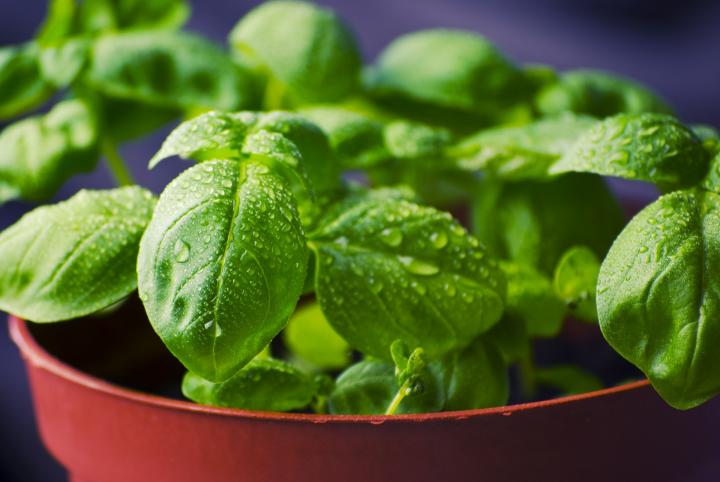
Brighten up houseplants

Are the leaves on your indoor plants looking dingy or dusty? Don’t bother misting them with water; that just spreads the dirt around. Rather, wipe down each leaf with the inside of a banana peel. It’ll remove all the gunk on the surface and replace it with a lustrous shine.

Deter aphids

Are aphids attacking your rosebushes or other plants? Bury dried or cut-up banana peels an inch or two deep around the base of the aphid-prone plants, and soon the little suckers will pack up and leave. Don’t use whole peels or the bananas themselves, though; they tend to be viewed as tasty treats by raccoons, squirrels, gophers, rabbits and other animals, who will just dig them up.

Use as fertilizer or mulch

Banana peels, like the fruit itself, are rich in potassium, an important nutrient for both you and your garden. Dry out banana peels on screens during the winter months. In early spring, grind them up in a food processor or blender and use them as mulch to give new plants and seedlings a healthy start.

Many cultivars of roses and other plants, like staghorn ferns, also benefit from the nutrients found in banana peels; simply cut up some peels and use them as plant food around your established plants.

Assist with first aid

Banana peels have anti-inflammatory properties, which means they are great when it comes to bug bites, minor scrapes, poison ivy and sunburn. All you have to do is put the banana peel on the affected area and press it like you would a cool compress. You can repeat this process until you feel some relief.

Ripen an avocado

Are you an avocado enthusiast? Though you could eat all the avocado toast and guacamole in the world, sometimes avocados just don’t ripen fast enough. In order to satisfy your avocado craving for all your cooking needs, use a banana to help speed up the ripening process.

Bananas release ethylene, which triggers ripening in avocados. Simply place a banana in a brown paper bag and roll it up with an avocado. Check it daily until it is ripe enough.

Slough off dry skin

In order to keep your skin feeling smooth and radiant (without learning all the professional spa etiquette), create a body scrub with a banana. There are many different variations, depending on the kind of scrub you need. For a gentle scrub, you can mix a mashed banana with brown sugar. For a medium scrub try mixing in oatmeal or sea salt. If you really need a heavy-duty scrub, grind apricot pits at home and add it to your banana to really dig deep into your pores.

Remove warts

Warts are stubborn and gross, so needless to say, nobody wants one. A natural way you can go about removing one is by using a banana peel. Cut a piece of ripe banana peel to cover the affected area, placing the inside next to your skin, and keep it there overnight by using some medical tape. In the morning you should notice some improvement, and you can repeat the process nightly until it’s gone!

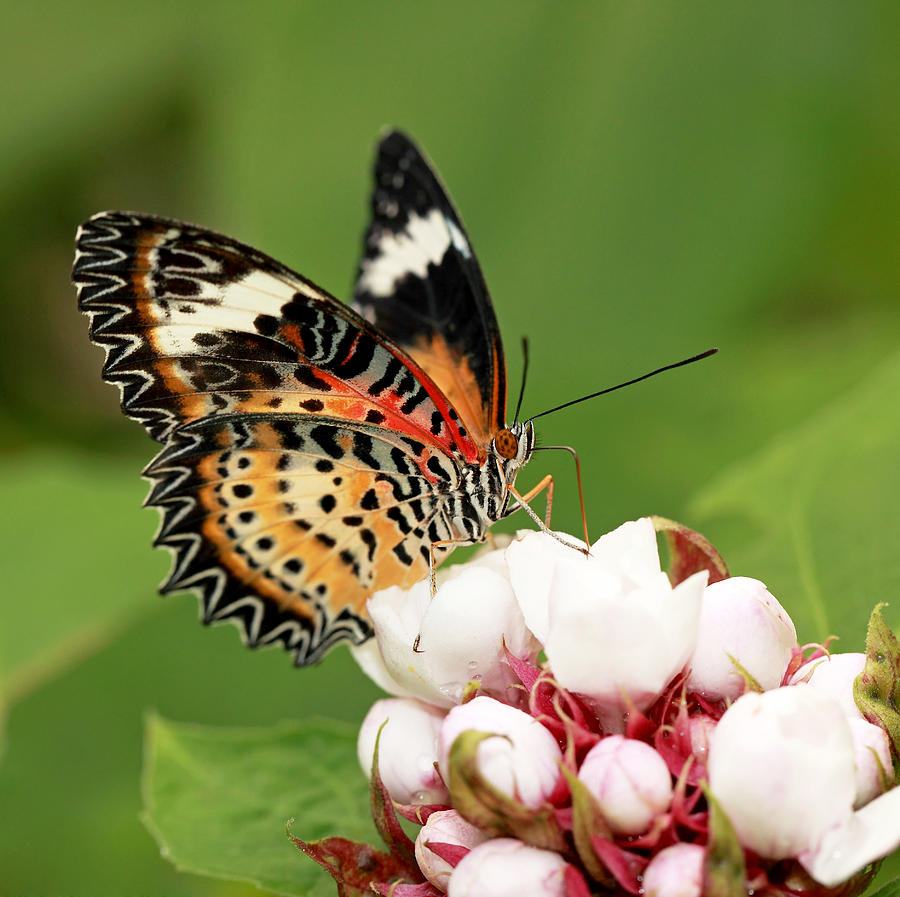
Attract butterflies and birds

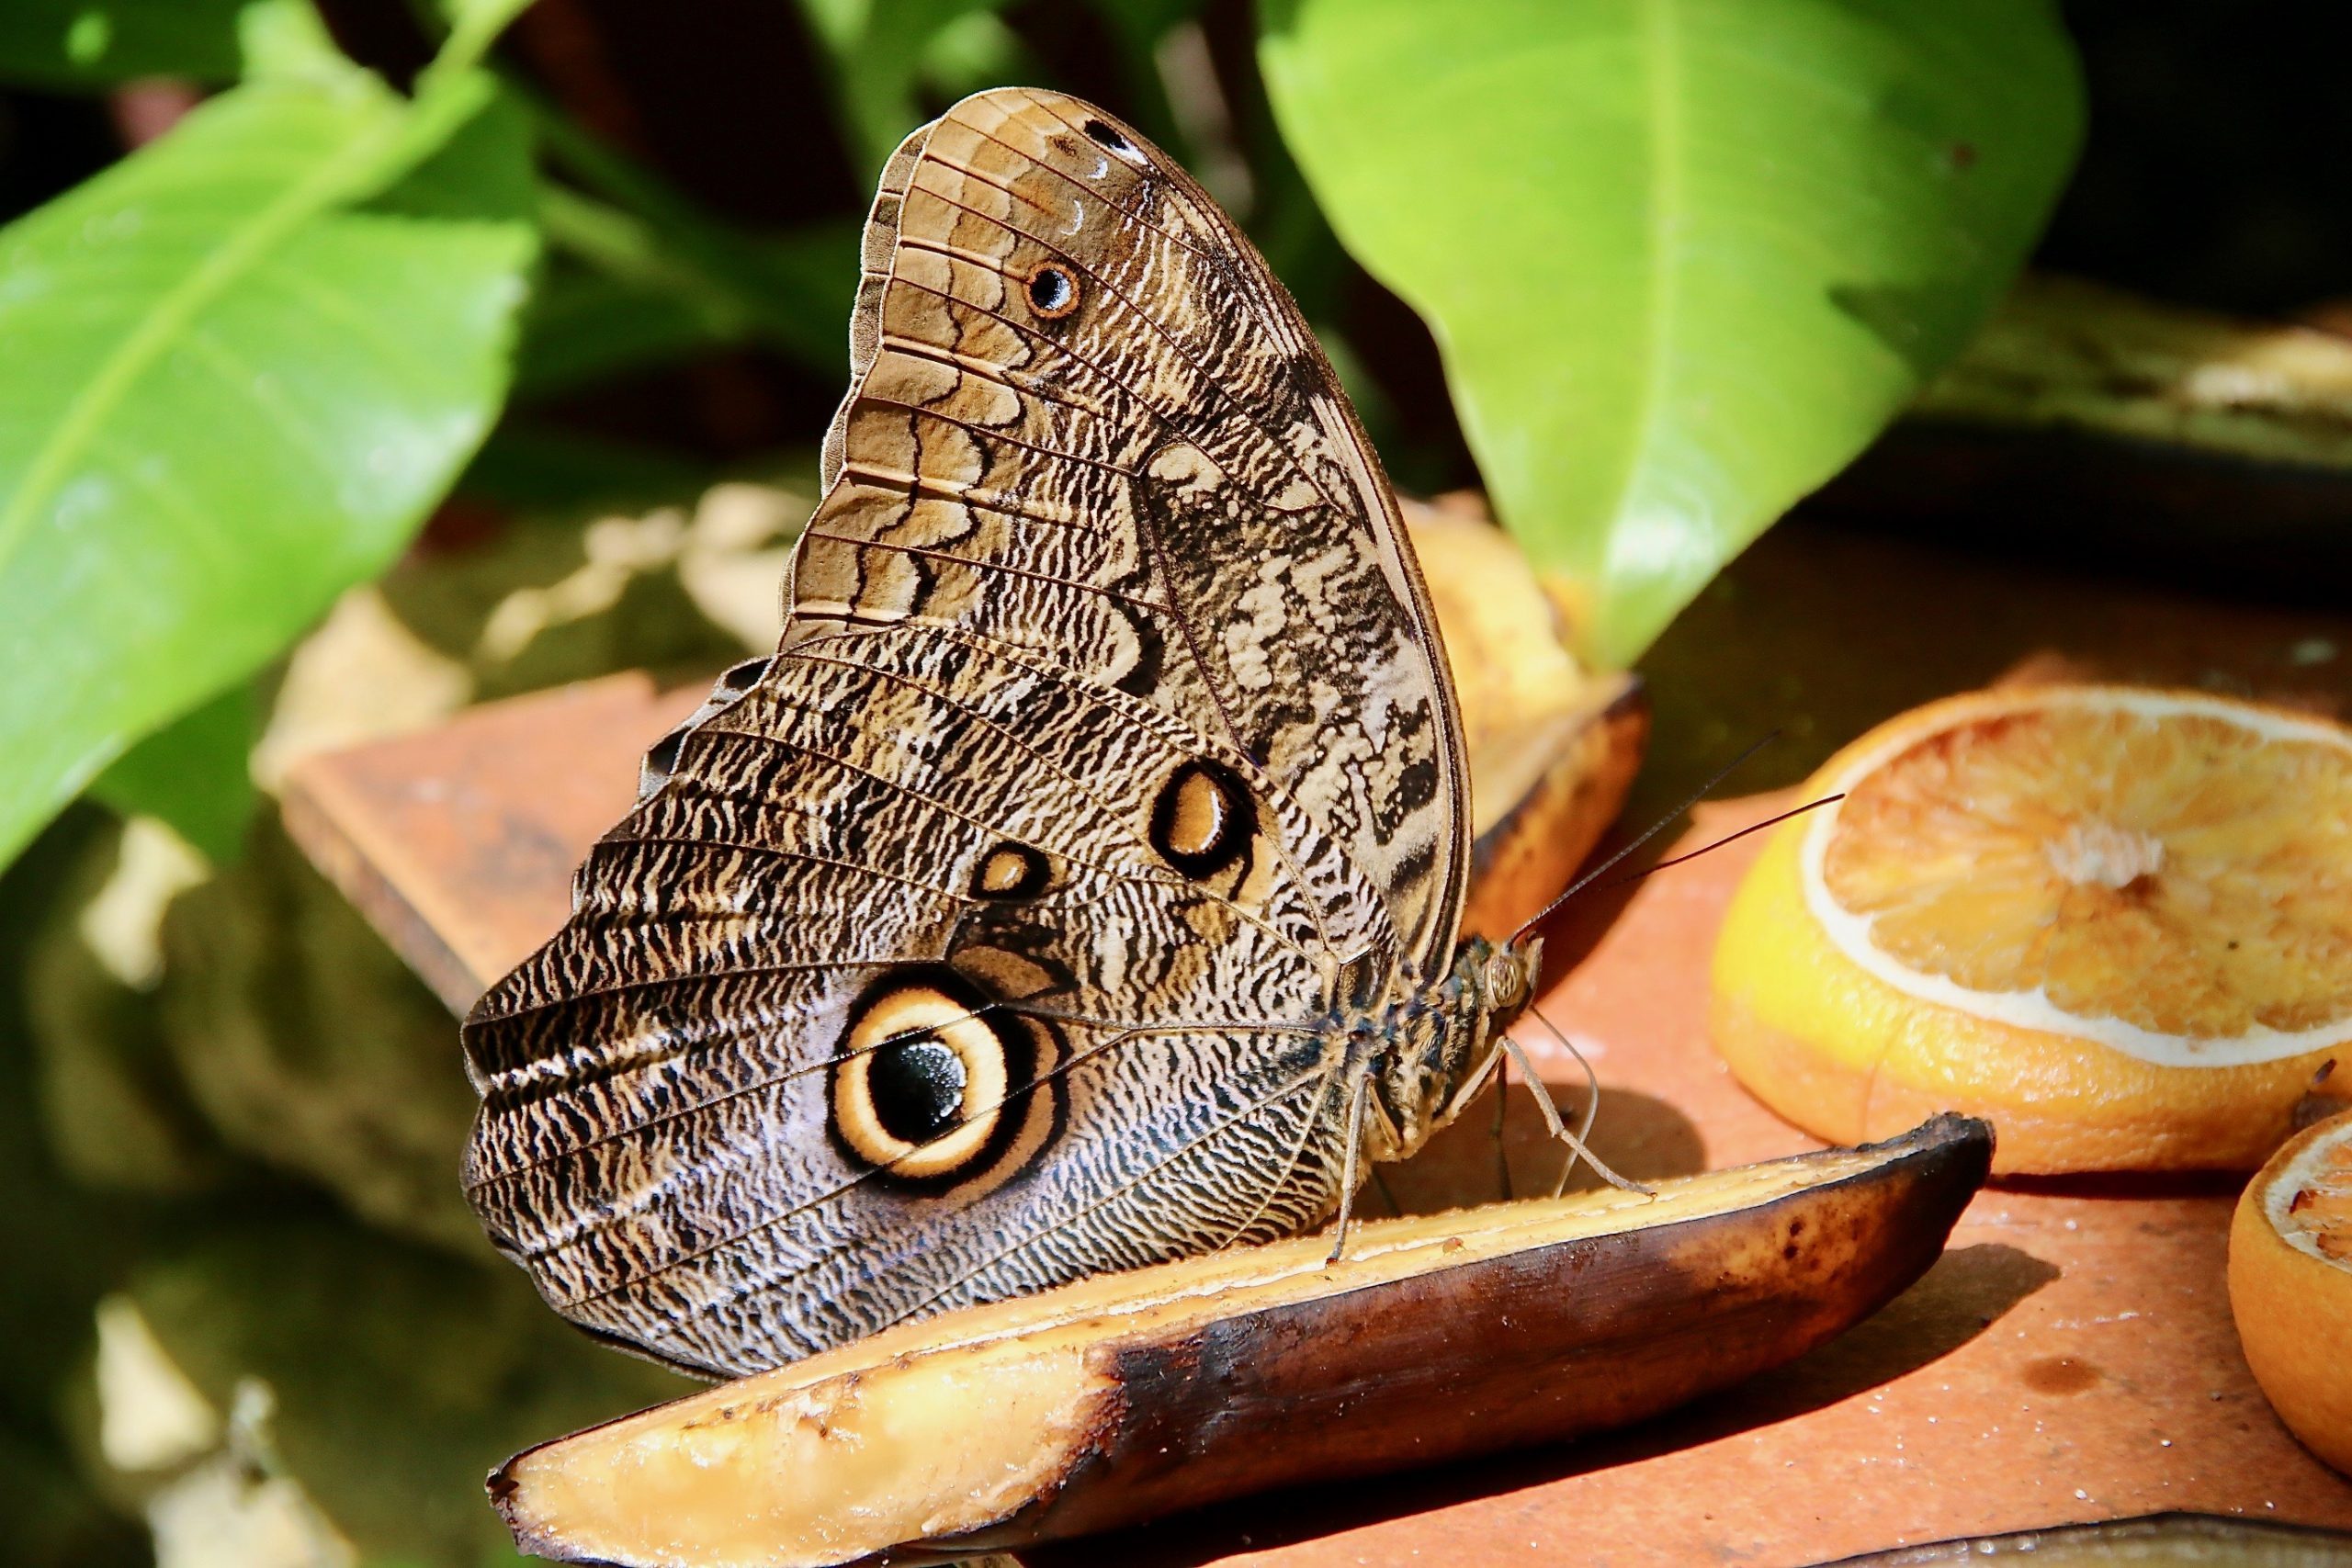
Bring more butterflies and various bird species to your backyard by putting out overripe bananas (as well as other fruits such as mangos, oranges and papayas) on a raised platform. Punch a few holes in the bananas to make the fruit more accessible to the butterflies. Some enthusiasts swear by adding a drop of Gatorade to further mush things up.

The fruit is also likely to attract more bees and wasps as well, so make sure that the platform is well above head level and not centrally located. Moreover, you’ll probably want to clear it off before sunset, to discourage visits from raccoons and other nocturnal creatures.

Add to compost pile

Here’s a great gardening tip: With their high content of potassium and phosphorus, whole bananas and peels are welcome additions to any compost pile, particularly in so-called compost tea recipes. The fruit breaks down especially fast in hot temperatures. But don’t forget to remove any glued-on tags from the peels, and be sure to bury bananas deep within your pile (otherwise they may simply turn out to be a meal for a four-legged visitor).

Whiten teeth on the cheap

Everyone wants pearly whites, but do you really want to spend all that money on treatments? Banana peels contain citric acid, which will help lighten surface stains on your teeth. For natural teeth whitening at home, after giving your teeth a good brush, simply rub the banana peel on the surface for about two minutes every day. Your smile will not only be whiter, but brighter!

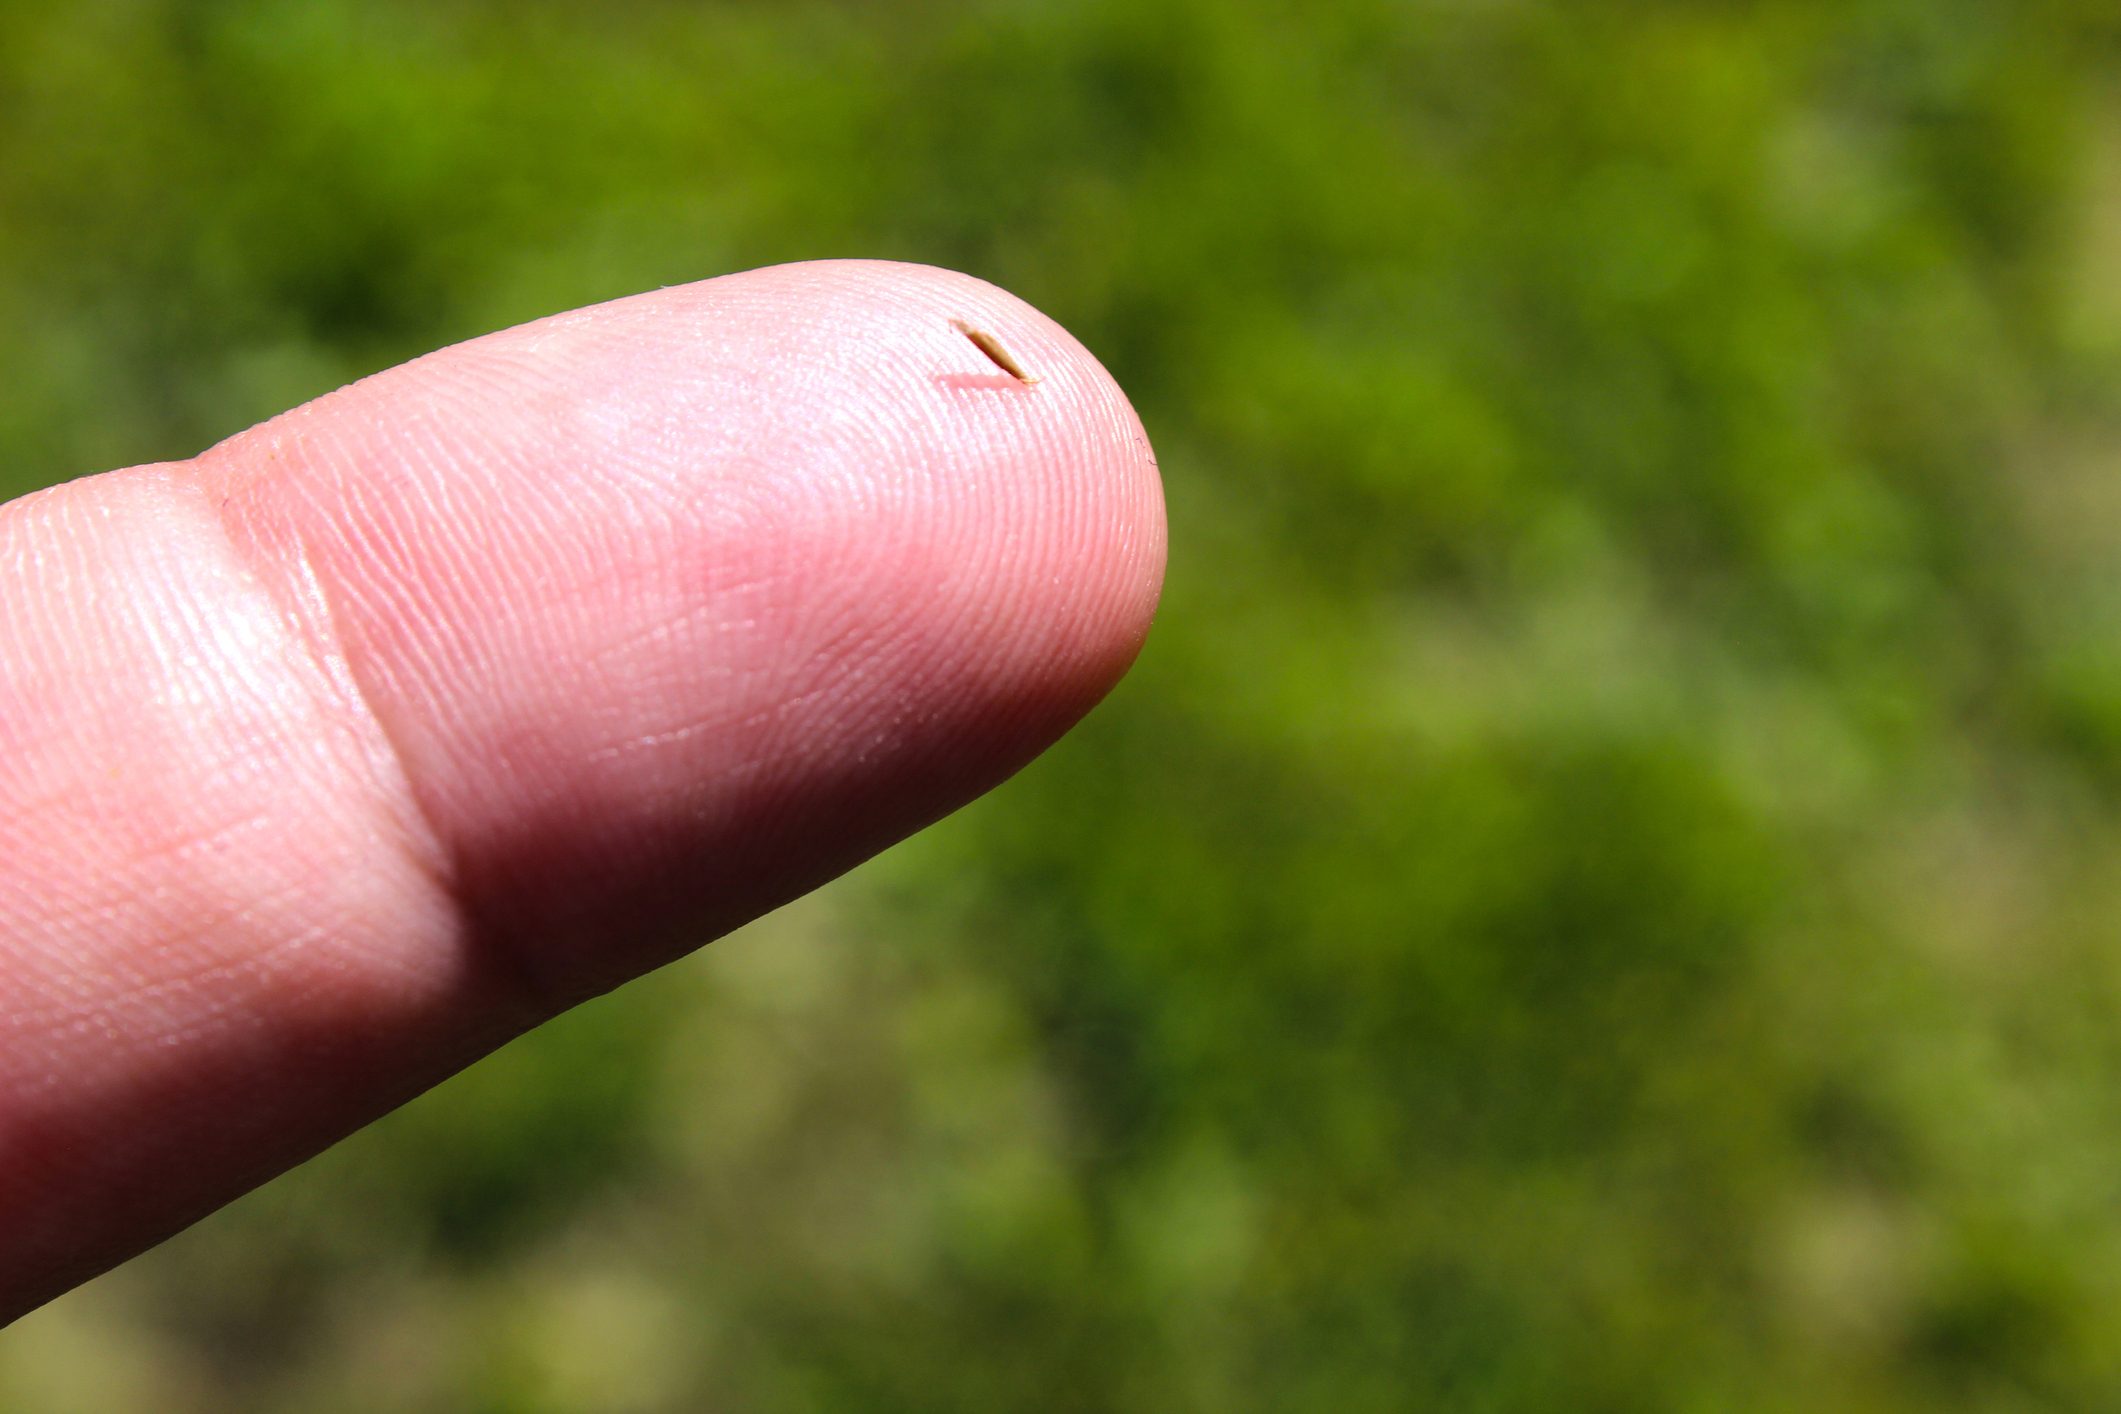
Get rid of splinters

Splinters can be a real pain, literally and figuratively. The natural enzymes in banana peels can help loosen splinters that just don’t seem to want to get out of your skin. Press the inside of the peel on your skin for up to 30 minutes, and it will help move the splinter to the surface for an easy plucking.

Make banana “ice cream”

If you don’t have the time or calories to spare, try making ice cream out of bananas. All you have to do is freeze your peeled bananas and blend them in a food processor or blender. The result is an ice-cream-like consistency and a satisfied craving. Try adding some peanut butter or shredded coconut as toppings.

Create a dog treat

Dogs love human food, but most of the time our cherished pooches cannot digest what we eat. Bananas, however, are foods that our pets can enjoy. They are high in fiber, magnesium and potassium. Mash up a banana and add it to your dog’s favorite food so they can chow down.

Restore dry hair

Bananas are great ways to combat that stringy and brittle feeling. To make a banana hair mask, puree one to three really ripe bananas (depending on your hair length) and then massage it throughout your scalp to your ends. Let it sit for 15 minutes, then rinse it in the shower followed by a shampoo.

Ease heartburn

Bananas are an alkaline fruit, which means they may help neutralize acid in the stomach. You can eat bananas regularly as a home remedy for heartburn and GERD. Add a banana to your breakfast to help coat the stomach for the rest of the day.

Prevent a scratched CD from skipping

Is your favorite DVD or CD playlist for the car scratched? Gently rub the scratched part of the disc with the inside of the peel in a circular motion. Wipe off any residue with a soft cloth and then shine it with some glass cleaner. The wax in the banana peel may help fill in the scratches so you can enjoy your treasured disc once more.

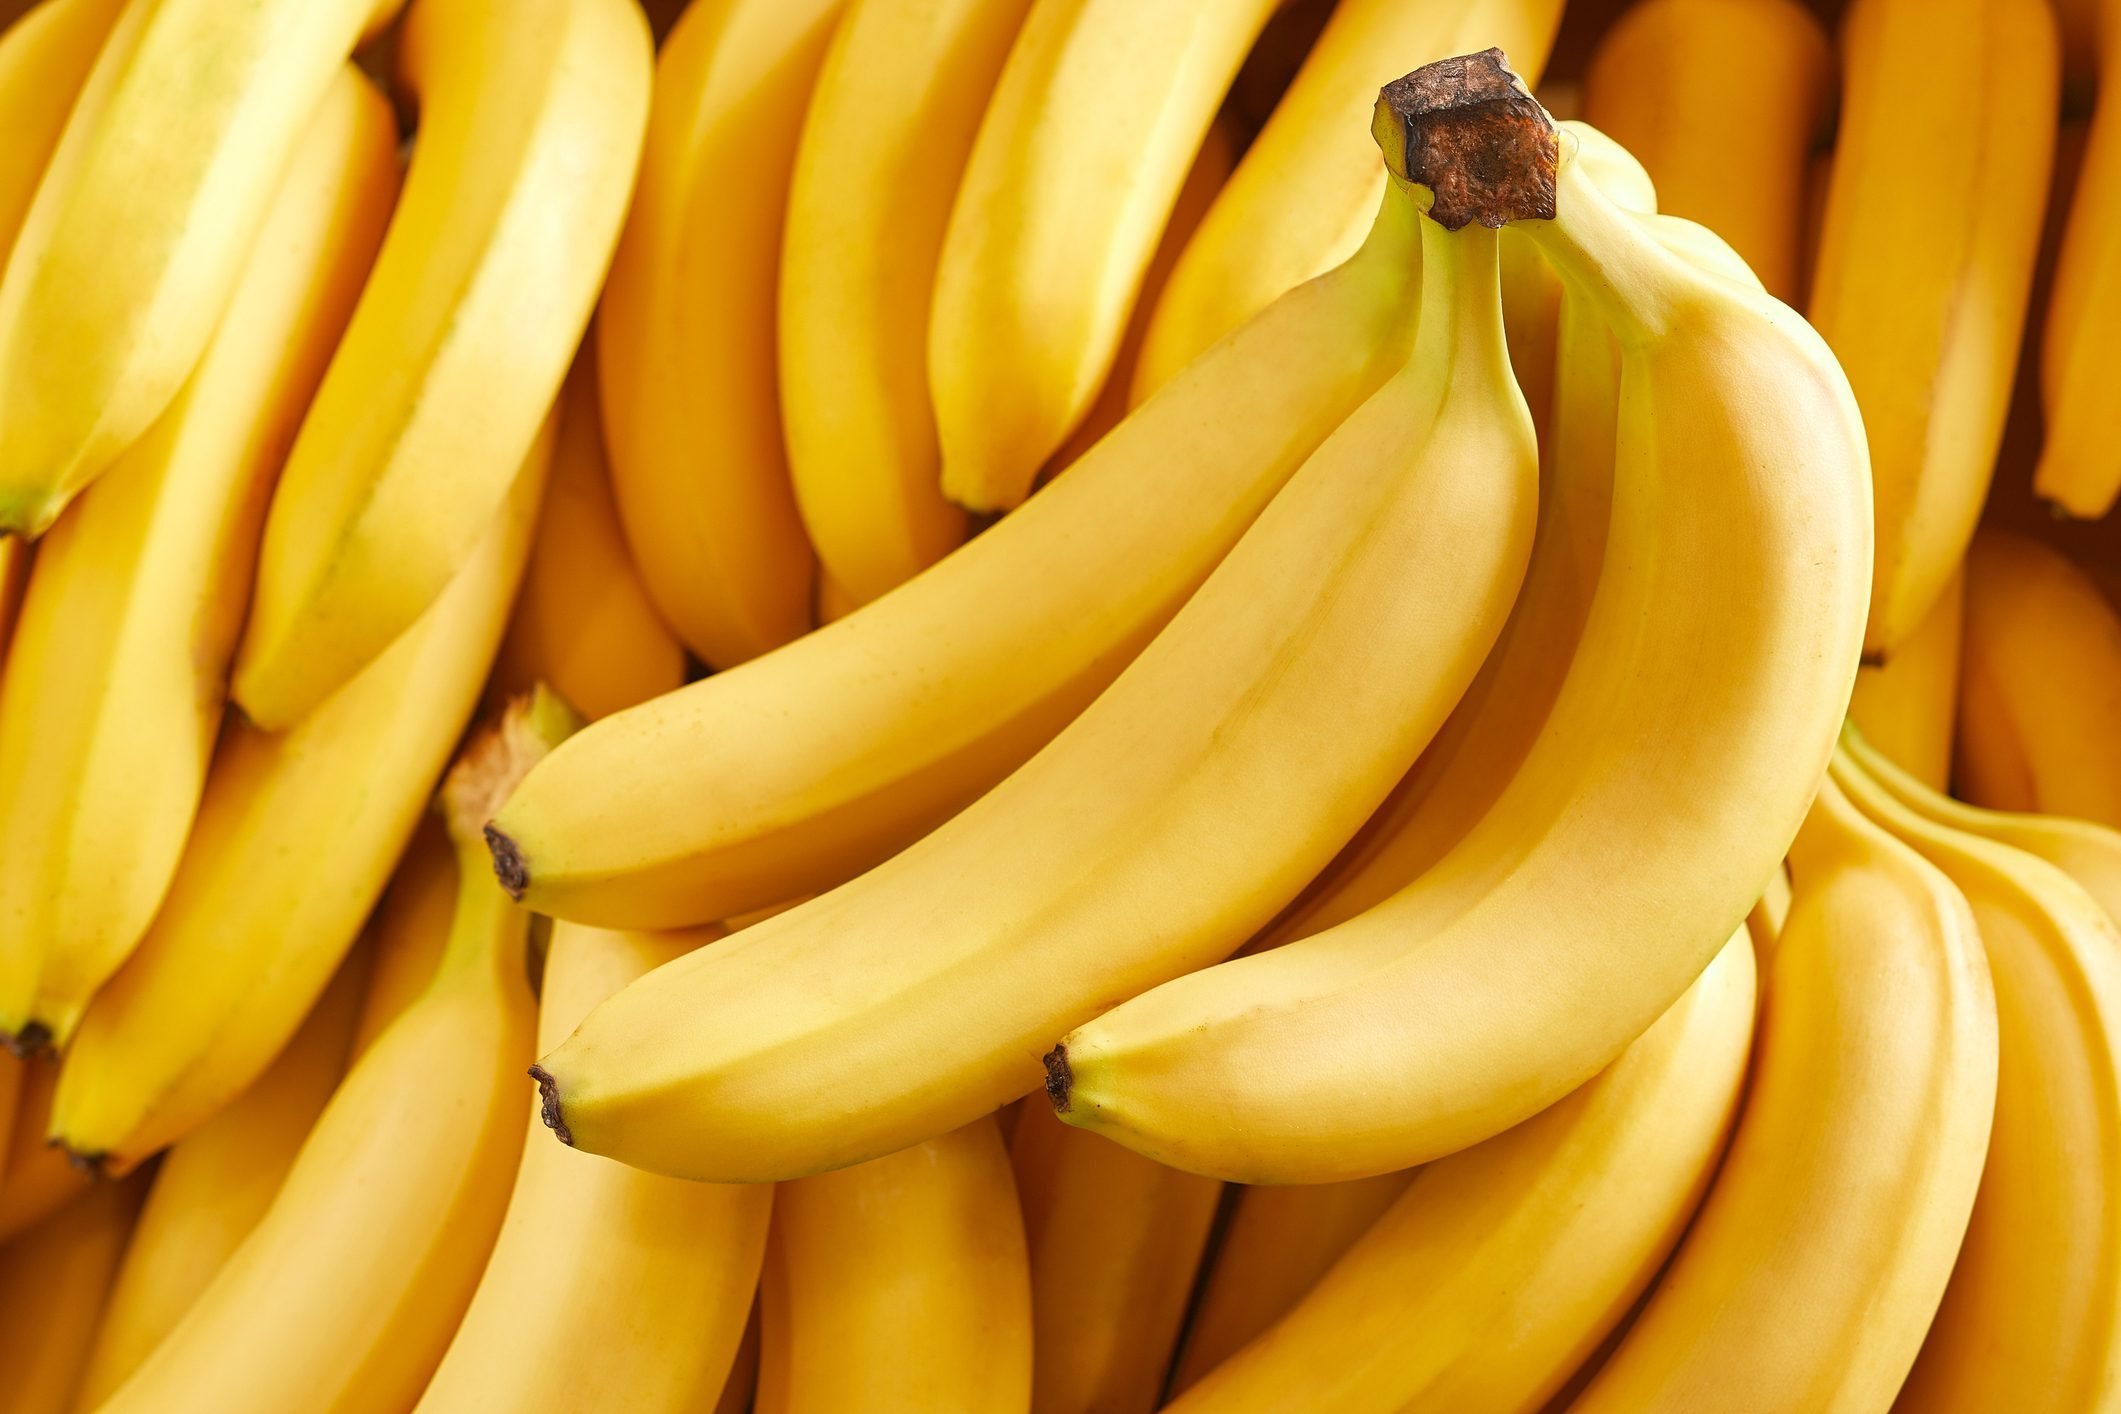
With all these cool banana hacks, be sure you eat at least some of the bananas you’re buying!

SOURCE: Reader’s Digest

Malay Lacewing

 These butterflies are gorgeous! But I found relatively little information about them.  The larvae, Cethosia hypsea, because of their appearance, are often referred to as red wine caterpillars. Lacewings inhabit tropical rain forests and are found only in tropical climate zones. They have toothed edged wings, sawtooth like wings on the hindwings. The color of the dorsal wing surface is bright orange red with wide, pronounced black borders, while the ventral side is orange red with white bands and black dots or stripes forming remarkably intricate patterns.

   The wing borders are dark colored and deeply indented with a lace like pattern of white marking. Adult colors are lighter in color to warn predators that they can be poisonous.  Individual females have a slightly yellowish white patch on the dorsal side and the color of the wings is paler. They fly quite slowly, around flowering shrubs such as Lantana camara¸ Stachytarpheta indica, Ixora javanica and Leea indica. 

Fried Egg Jellyfish

Jellyfish aren’t really fish

Though they have the word “fish” in their name, jellyfish aren’t really fish at all. In fact, they couldn’t be more different. Jellyfish don’t have fins, gills, or scales.

They come from a completely different phylum. Really, the only thing they have in common is that they both live in marine habitats.

They don’t have a brain

They also lack a heart, stomach, and many of the other organs we are familiar with.

While they do have a nervous system, jellyfish don’t possess a brain in the way that we typically think of them.

Instead, they have a network of neurons that allows them to sense different aspects of their environment, like changes in water chemistry or which direction they are facing.

These jellyfish are made up of 95% water

The jellylike material that makes up most of what we consider a jellyfish is called mesoglea.

This material is mainly made up of water, with the exception of a few structural proteins. The other 5% of jellyfish is their muscle and nerve cells.

Jellyfish are the oldest animals on Earth

Fossils dating back to the Cambrian period suggest that jellyfish are at least 500 million years old. This makes them about three times as old as dinosaurs, if not more. 2

Two different species of jellyfish share the Fried Egg name

Phacellophora camtschatica and Cotylorhiza tuberculate are both referred to as fried egg jellyfish. This name comes from the bright yellow dome surrounded by a white or transparent membrane around the edges, making it look like a fried egg floating in the water. However, there are some major differences between these two jellies.

Phacellophora camtschaticas are large jellyfish that can be found in oceans worldwide. The bell can grow to a diameter of about 2 feet long. They have 16 clusters of tentacles that can stretch as long as 20 feet. They typically sit motionless in the ocean, acting as an underwater spider web to capture their prey.

Cotylorhiza tuberculates have short appendages that are a deep purple color. These are much smaller than the other species and are most commonly found in the Mediterranean Sea. This jellyfish is also more apt to move through the ocean by slowly pulsing its bell.

They seem to be adapting well to climate change

Unlike most creatures, jellyfish don’t seem to be having a hard time with climate change. In fact, they may even be thriving in it.

According to experts, jellyfish populations are expected to rise. This is because they can survive on less oxygen than most marine creatures, even plankton. As oxygen levels lower in ocean waters, jellyfish are expected to outlive most of the species. 3

They catch prey in their tentacles

Their tentacles are adapted to sting prey and potential predators such as fish, turtles and sea birds.

You can see the fried egg jellyfish (Cotylorhiza tuberculata) swimming with small fish caught in its tentacles.

They don’t often travel in groups

Though we often see pictures of a large group of jellies floating through the ocean, these creatures are fairly solitary animals. They typically only get clumped together when they are following the same water current or food source.  

However, when they are found in a group, they tend to go by some fun names, including smack, swarm, and bloom.

Jellyfish reproduce asexually

A single jellyfish will reproduce both sexually and asexually in its lifetime.

During the medusa form, jellyfish produce sexually by spawning eggs or sperm into the ocean and fertilization takes place in the open water.

However, jellyfish reproduce in their polyp form as well. This is a process called budding, in which a polyp divides in half to create a genetically identical polyp.

Their lifespan is less than a year

Like many jellyfish, fried egg jellyfish are short-lived. They only live for about half a year, usually from summer to winter. Research suggests that this has to do with the variations in water temperature throughout the seasons. 4

Jellyfish are edible

People living off the coast of China have been eating jellyfish for at least the past 1700 years.

In fact, it is estimated that more and more people will turn to jellyfish as we overfish more desirable fish species.

How do you like your eggs? Sunny-side up, or with a little sand?!

Crabs are known to hitch a ride on these jellies

Occasionally, crabs and small fish will tuck themselves away in the underside of the jellyfish’s bell. Crabs have even been to plant themselves on top of the bell, away from the jellyfish’s stingers.

SOURCE: FACTANIMAL

Basil

Basil is easy to grow, but it only grows outdoors in the summer once the soil has warmed up nicely—and it’s a great companion to tomatoes! Here’s what to know about planting, growing, and harvesting basil.

About Basil

A member of the mint family (Lamiaceae), basil is one of the most popular culinary herbs. It’s a warm-weather annual herb you can plant outdoors once temperatures are consistently above 50°F. 

Basil is not usually seeded directly into the soil; typically, gardeners transplant small starter plants purchased at a nursery. Or, they may start the seeds themselves indoors under grow lights.

Common or sweet basil, Ocimum basilicum, is the most common basil; other types include purple basil (less sweet than common basil), lemon basil (lemon flavor), and Thai basil (licorice flavor)

If you’re planning on making pesto, grow several plants. For other uses, one or two basil plants yield plenty.

Planting

Basil will grow best in a location that gets 6 to 8 hours of full sun daily, though it can perform well in partial sun, too.

Soil should be moderately fertile and moist but well-draining. Basil works great in containers or raised beds, as these allow for better drainage. The pH of the soil should ideally be in the range of 6.0 to 7.5 (slightly acidic to neutral).

If you plan on cooking with these plants, plant in clean soil, don’t use insecticides, and grow them away from driveways and busy streets so exhaust won’t settle on the plants.

When to Plant Basil

To get a jump on the season, start the seeds indoors 6 to 8 weeks before transplanting outside.

To plant outside, wait until the soil has warmed to at least 50°F—preferably around 70ºF for best growth. Nighttime temperatures shouldn’t drop below 50°F.

Don’t rush basil. Without heat, the plant won’t grow well!

How to Plant Basil

If you are sowing seeds directly into the ground sow no more than 1/4-inch deep. Seeds should germinate within 5 to 7 days. Once they have developed 2 to 3 pairs of true leaves, transplant.

If you are planting the germinated seedlings or starter plants in the ground, space 10 to 12 inches apart.  Basil should grow to about 12 to 24 inches in height.

A 2- to 3-inch mulch of compost or ground-up leaves retains soil moisture and minimizes weeds around the plants.

Tomatoes make great neighbors for basil plants in the garden—and on the plate—so many gardeners will plant the two warm-weather friends around the same time.

Growing

How to Grow Basil

Make sure that the soil is moist. Basil plants like moisture.

If you live in a hot area, use mulch around the plants (the mulch will help hold in moisture and suppress weeds).

During the dry periods in summer, water the plants freely.

After the seedlings have produced their first six leaves, prune above the second set. This encourages the plants to start branching, resulting in more leaves for harvest.

Every time a branch has six to eight leaves, repeat pruning the branches back to their first set of leaves.

Fertilize sparingly throughout the season with a 5-10-5 fertilizer.

After about 6 weeks, pinch off the center shoot to prevent early flowering. If flowers do grow, just cut them off.

If the weather is going to be cold or if a sudden frost is imminent, be sure to harvest your basil beforehand, as the cold temperatures will destroy your plants.

Recommended Varieties

Cinnamon basil, to add a hint of cinnamon to a dish

Purple basil, to add some nice color to your garden (when steeped in white vinegar, it creates a beautiful color)

Thai basil, to add a sweet licorice flavor to a dish.

Harvesting

How to Harvest Basil

Start picking the leaves of basil as soon as the plants are 6 to 8 inches tall.

Once temperatures hit 80°F, basil will really start leafing out.

Harvest in the early morning, when leaves are at their juiciest.

Make sure to pick the leaves regularly to encourage growth throughout the summer.

Even if you don’t need the leaves, pick them to keep the plant going. Store them for later use!

If you pick regularly, twelve basil plants can produce 4 to 6 cups of leaves per week.

How to Store Basil

The best method for storing basil is freezing. Freezing will prevent the plant from losing a good portion of its flavor. To quick-freeze basil, package whole or chopped leaves in airtight, resealable plastic bags, then place in the freezer.

Another storage method is drying the basil (although some flavor will be lost). Pinch off the leaves at the stem and place them in a well-ventilated and shady area. After 3 to 4 days, if the plants are not completely dry, place them in the oven on the lowest heat setting with the door slightly open. Remember to turn the leaves (for equal drying) and check them frequently.

Facts about I Dream of Jeannie That You Never Knew

I Dream of Jeannie is a classic fantasy sitcom that ran on NBC from 1965 to 1970. Starring Barbara Eden and Larry Hagman, the show is about a 2,000-year-old genie-in-a-bottle named Jeanie who was acquired by astronaut Captain (later Major) Anthony “Tony” Nelson while stranded on a desert island after a space mission. The astronaut took the genie in the bottle and takes her home with him, and he becomes her master. Hilarious situations ensued between them, with Jeanie falling in love with Tony at first sight. Eventually, they get married in the end.

The show was released to coincide with fantasy comedy shows like Bewitched, which was airing over at ABC. Many critics have noted the similarities between the two shows, but I Dream of Jeannie became a pop culture classic on its own.

Here are some fun facts about the show that you never knew:

Barbara Eden was not the first choice of the producer

Being Jeannie was the role of a lifetime for Barbara Eden, since it catapulted her to stardom. Also, it’s hard to imagine anyone filling in Jeannie’s iconic costume than her. But Sidney Sheldon, the show’s executive producer, originally had reservations about hiring her. Sheldon didn’t want to cast anyone with blonde hair, to avoid comparisons with Bewitched star Elizabeth Montgomery. After various brunette starlets and beauty queens unsuccessfully auditioned for the role, they could not find anyone who could play the role as he wanted it. Eden was cast almost in an act of desperation, as Sheldon’s colleagues recommended her because of her performance in The Brass Bottle.

The show gave conflicting stories of Jeannie’s origins

When the series started, it was shown that Jeanie was transformed into a genie for refusing to marry Blue Djinn (who was played by Michael Ansara, Eden’s real-life husband back then). It became confusing when later on in the middle of the series, they mentioned that Jeannie came from a family of genies.

It was the last network series to be filmed in black and white

The first season of Jeannie was shot in entirely black and white because of budget restraints. Apparently, the studio execs didn’t expect the show to last for more than one season so they weren’t willing to spend extra bucks for the color film. Because of that, this was the last series from the network to be filmed in black and white. But as the show came out successful, they switched to color on the second season.

There was no theme song until the second season

The show didn’t have a theme song on the first season.  The familiar-sounding, catchy Jeannie theme song appeared in the second season, when a new, colored animated opening sequence was introduced.

Censors had problems with Eden showing her belly button

Due to strict television censorship at the time, Eden was restricted from showing off her belly button on screen. But there was one slip-up that caused a bit of commotion during the series. Also, her legs must always be kept covered with baggy pantaloons that must be thick enough so her legs won’t show through. Cleavage, however, was a fair game.

Barbara Eden was an on-set lion expert, too

Besides being the lead star, Barbara Eden also considered herself as somewhat of a lion expert on the set. During the first season, there was an episode where they featured a real lion on one scene. As Eden told her story in her memoir, Jeannie Out of the Bottle, she said she had some prior experience working with lions, so she was thrilled. She offered helpful advices for her co-workers on how to deal with the lion. However, her co-star, Larry Hagman refused to bond with the lion and didn’t feel the same way about the furry friend. When it came to do the scene, Eden was comfortable with the lion’s presence, but when it looked at Hagman, the furry friend let out a frightening roar. The frightened Hagman bolted out of the set, off the studio and into the street. Some crew members bolted off, too.

Barbara Eden was pregnant during filming the first episodes of the series

When the series began shooting in 1965, Barbara Eden was pregnant. During the first 10 episodes, the producers tried to hide her growing baby bump through different techniques, like adding several extra veils to her genie costume. Eden joked about it, saying “I looked like a walking tent.”

Larry Hagman handled his anxieties and frustrations on the set with booze

For an ambitious actor like Larry Hagman, it was hard to play as the second best star to Eden. Also, he would often get frustrated with how the script was written, plus he was carrying some of his own personal anxieties, so he drank away his sorrows. Eden wrote on her memoir that Hagman started every day at the studio drinking champagne, and then enter his dressing room in between scenes to smoke pot and drink more champagne to keep calm. This caused him to undergo a liver transplant in the ‘90s.

Also, Larry Hagman was problematic to work with

Because of Hagman’s alcoholism and unruly attitude, the show was hampered. The staff were irritated by his behavior, so the producers sent him to a therapist. However, it seemed to only make things worse because Hagman started to ingest lots of marijuana, LSD and more champagne “in the interests of maintaining a calm serenity.” He often lost his temper and once voiced his displeasure with the staff by urinating all over the set due to a disappointing script. And it didn’t affect only the staff. Legendary singer Sammy Davis Jr., who appeared in a season 2 cameo, became so enraged with the co-star that he actually threatened to kill Hagman.

Barbara Eden didn’t like that Jeanie and Tony Nelson got married in the end

It seems like Hagman wasn’t the only one who had problems with the script. The show ended with Jeanie and Tony getting married, which Eden didn’t approve of. Part of the whole fun of the show was the palpable sexual tension between the astronaut Tony and the mischievous and attractive Jeanie who both lived under the same roof, while Tony still managed to keep her out of his bedroom. The funny antics ran around watching Jeannie being willing to fulfill his wishes and calling him master, no less. But regarding the characters’ marriage, Eden said it ruined the point of the show and broke credibility, because Jeannie wasn’t human. “This just turned her into a housewife – more like Samantha from Bewitched,” she added.

Larry Hagman only found out that the show was cancelled from a studio guard

After the series’ fifth season, Hagman went to South America to take a vacation. Upon returning to the US, the actor wanted to get something from his dressing room on the set. He ran into a security guard who was perhaps surprised to see him there and told him that there was no sixth season in the offing. Apparently, nobody told him, and he only found out about the news from that guard. Hagman wasn’t surprised and said he halfway expected it, citing decline in ratings and the decision to marry off Jeannie and Tony. But he couldn’t help but observe, “Wow that was real Hollywood.” He lamented, “I expected some kind of formal, pleasant way of telling you you’re out of work.”

Phil Spector made a cameo on the show

Before he became a convicted murderer, Phil Spector was a big record producer during the 1960s and 70s. He appeared on a cameo on the show playing as himself when Jeannie had musical aspirations. Spector was game for poking fun at himself and the music industry in general.

The show had a fun little connection with The Monkees

While it only lasted for two seasons, The Monkeys, a fellow NBC sitcom, had some fun connections with I Dream of Jeannie as both shows referenced each other in some episodes. In one The Monkees episode, Davy Jones rubs a small table lamp and a beautiful genie (not exactly Jeannie) emerged, which led Jones to respond, “Imagine that – wrong show!” Then, cue the laugh track.

In I Dream of Jeannie, Jeannie puts together a rock band featuring Bobby Hart and Tommy Boyce, who wrote some of The Monkee’s most famous songs. At one scene, Hart is shown holding a copy of The Monkees’ first album.

Bill Daily had trouble memorizing his lines, but it turned out all right

Besides Eden and Hagman, I Dream of Jeannie also featured Bill Daily as astronaut Roger Healey. Daily was praised a lot for his comic ability, but little did people know that he suffered from dyslexia, which made him have trouble memorizing lines. The actor often ad-libbed his lines, creating some of the series’ best moments in the process.

The producers burned the set of the show

After the show was cancelled, the show’s producers set to work dismantling the show’s production. During the 50’s and 60’s in Hollywood, it was quite expensive to store collective sets and props, and it was not worth spending the money if it won’t serve any purpose anymore. To resolve this, the crew burned down Jeannie and Major Nelson’s “home” to avoid a big expense with no payback. Barbara Eden did manage to get a hold of one of the series’ magic lamps, which she kept in her personal vault for years. Eventually, she decided to donate it to the Smithsonian Institution, which is one of the most famous and visited TV props in history.

SOURCE: MENTALITCH

Christmas Cookie Countdown

Recently one of my oldest friends and her husband came for a visit (and to pick up my mom’s contributions to their flea marketing endeavor.) She has begun to have muscular tremors and is undergoing tests to determine their origin and best course of treatment.  Sadly, she has had to give up her car and rarely goes out anymore because these tremors can occur at any time.  I was truly touched that they decided to come up to visit!

Her husband, with her permission, showed up a brief video of her standing in their kitchen.  She was trembling all over and visibly shaking and then-POOF-she just snaps out of it.  She remembers nothing of what happened at all. 

Understandably, her husband now does the cooking as my friend is afraid to be around a hot stove.  Which brings me to the saddest part of this post.  Every fall, when my friend visits, we would spend the entire time talking cookies—we called it Christmas Cookie Countdown.

We’d sit at the table with our notebooks, recipe files and samples of new cookies.  We’d made and share shopping lists and discuss the new cookies—would they package well?  Are they worth the effort or special ingredients? We had a great time sampling and discussing.

Since I was totally unaware of her condition, I had all my recipes and stuff ready to go on the buffet.  I saw her eye the pile with such sadness but until they divulged what was going on, I had no idea why.  After we ate our lunch and I cleaned up the kitchen, I brought the stack over to the table and said let’s plan!  She said, I can’t bake anymore and it’s senseless to think about.  I opened up my file and said Merry Christmas!  You pick out the cookies you want, and my gift to you this Christmas is to bake them for you! I told her I’d even bake an extra basket for her to share with her flea market friends as well.  Her smile was all the thanks I needed!

What Shall We Bake Today?

Today is National Apple Dumpling Day and I found a twist on the classic recipe—one that doesn’t use homemade pie crust which can be time consuming.  This Pillsbury recipe uses crescent rolls!

Ingredients

2 medium Granny Smith apples (about 2 cups)

2 cans (8 oz) refrigerated Pillsbury™ Original Crescent Rolls (8 Count)

3/4 cup butter, melted

1 cup packed brown sugar

1 teaspoon ground cinnamon

2/3 cup Sprite™ lemon-lime soft drink (from 20-oz bottle)

Steps

Heat oven to 350°F. Spray 13×9-inch pan with cooking spray.

Peel and core apples; cut into 16 slices.

Unroll dough; separate into 16 triangles. Place 1 apple slice on shortest side of each dough triangle. Starting with shortest side of triangle, roll to opposite point, wrapping dough around apple slice; arrange in pan.

In medium bowl, stir together melted butter, brown sugar and cinnamon. Pour mixture evenly over dumplings.

Pour soft drink in center and along edges of pan. (Do not pour on top of dumplings.)

Bake 33 to 36 minutes or until golden brown. Let stand 15 minutes.

Tips from the Pillsbury Kitchens

Don’t have Granny Smith apples? Try Honeycrisp or Braeburn apples instead. These apples, like Granny Smith, are crisp and will hold their shape after baking.

Add more complex flavors to your apple dumplings by adding 1/4 teaspoon of ground nutmeg or cardamom to the cinnamon.

In place of Sprite™, you can also use sodas like ginger ale, 7-Up™ or Mountain Dew™.

Top apples with a few chocolate chips before rolling up for an extra sweet dessert!

Serve dumplings with vanilla ice cream and caramel sauce!

NOTE TO FILLY: You can easily substitute PEACHES for the apples in this recipe!

National Collect Rocks Day

When my granddaughter was younger, one of the first crafts we ever did together was painting rocks.  We went out into the driveway to collect rocks for a “leaf with lady bugs on it” project.

We chose angular rocks for the leaves and smaller rounded pebbles for the lady bugs.  We hosed them off and let them dry and then started painting them.  She has hers sitting in the flowerbed outside her bedroom window.  I have mine on an end table in the great room.

Over the years, our projects evolved into sketching animals, painting jars and canvases, and other similar projects, but last summer we returned to the rocks. We hatched a brilliant plan to paint rocks with “inspirational” or “motivational” messages and place them in the little creek bank at the bottom of the driveway.  She thought they’d be cool for anyone visiting to see AND, she said, maybe they would get washed downstream during a thunderstorm and someone else might find them.

So, Project Rock Inspire was born.  We gathered a bucketful of rocks from along the driveway and washed them all and let them dry in the sun while we planned colors and messages. Our first session included things like SMILE, BE HAPPY, LAUGH, LIVE FREE, and BE THANKFUL.  Of the dozen we put in the bank, more than half remains.  But that means 5 have made their way on to other places.  We plan on placing more the next time she comes.

Hopefully someone will find one and wonder where it came from…

Morning Glory

The common morning glory is a favorite of gardeners everywhere for good reason. The eye-catching vines are very low maintenance—they can be easily started from seed in early spring, and you don’t need to prune or deadhead them as they grow. Have a trellis or other support in place wherever you plant your seeds and the vines will soon find the support and train themselves to grow on it.

With regular watering, morning glories can start blooming by mid-summer, but many times they are slow to begin setting flowers, earning them the nickname “back to school vine.” If you want to try and speed up the flowering time of morning glories you seed yourself, you can try sowing the seeds even earlier in the spring by scattering them on the frozen ground and even on snow.

Light

Planting your morning glory in a spot that gets full sun is especially important. The flowers will only open when they are in direct sunlight, so daily exposure to full sun (at least 6 to 8 hours a day) will give you the longest amount of bloom time. If they are in a spot that doesn’t get sun until the afternoon, don’t expect “morning” glories.

Soil

Morning glories do best in soil that is moist but well-draining. A neutral soil pH of 6.0 to 6.8 is best, but morning glories will grow just about anywhere. However, they do bloom better in soil that is not too rich in organic matter. You can always amend the soil later if the vines look like they are struggling.

Water

Provide your morning glories with regular water, about one inch per week, and mulch around the roots to retain moisture. The biggest moisture needs come during the plant’s growing period. Once established (and in the winter, if your zone is warm enough to grow the plant as an annual), you can slow your watering cadence.

Temperature and Humidity

Morning glories easily tolerate both cold and warm temperatures; they are hardy and can even make it through the first frost and continue to bloom. They are grown as an annual in areas where the temperature drops below 45 degrees Fahrenheit and can be perennials in tropical and subtropical climates. They have no special humidity needs.

Fertilizer

Feed your morning glories with a low-nitrogen fertilizer every four to five weeks throughout their growing period. If you notice a lack of blooms, you can try a fertilizer blend that is high in phosphorous.

Morning Glory Species and Varieties

In addition to cultivars of the common morning glory, there are other Ipomea species with similar appeal:

Star of Yelta: Deep purple blooms with dark red stars and small white throats

Kniola’s Black: Another purple-flowered cultivar but with blooms even darker than those of ‘Star of Yelta’

Heavenly Blue: A popular cultivar with large azure flowers and heart-shaped leaves

alba: Also called moonflower or belle de nuit; a night-blooming species with 6-inch-wide white flowers

multifida: Known as the cardinal climber; a hybrid with relatively small but deep red flowers resembling morning glory blooms

Sapphires

Sapphire is the most precious and valuable blue gemstone. It is a very desirable gemstone due to its excellent color, hardness, durability, and luster. In the gem trade, Sapphire without any color prefix refers to the blue variety of the mineral Corundum. However, the term Sapphire encompasses all other gem varieties and colors of Corundum as well, excluding Ruby, the red variety of Corundum, which has its own name since antiquity.

The most valuable color of Sapphire is a cornflower blue color, known as Kashmir Sapphire or Cornflower Blue Sapphire. Another extremely valuable Sapphire form is the very rare, orange-pink Padparadschah. An exotic type of sapphire, known as Color Changing Sapphire, displays a different color depending on its lighting. In natural light, Color Changing Sapphire is blue, but in artificial light, it is violet. (This effect is the same phenomenon well-known in the gemstone Alexandrite). Yellow and pink Sapphire have recently become very popular, and are now often seen in jewelry

Going way back in time, Sapphires (excluding blue) were often called the same name as a popular gemstone of that color with the prefix “oriental” added to it. For example, green Sapphire was called “Oriental Emerald”. The practice of applying the name of a different gemstone to identify the sapphire was misleading, and these names are no longer used. What was once called “Oriental Emerald” is now called “Green Sapphire”. The same holds true for all other color varieties of Sapphire. However, the word “Sapphire” in its plain context refers only to blue Sapphire, unless a prefix color is specified. Sapphire with a color other than blue is often called a “fancy” in the gem trade.

Sapphire is a tough and durable gem, and the only natural gemstone harder than Sapphire is Diamond. Despite this, Sapphire is still subject to chipping and fracture if handled roughly, and care should be taken to ensure it is properly handled. Sapphire was first synthesized in 1902. The process of creating synthetic Sapphire is known as the Verneuil process. Only experts can distinguish between natural and synthetic Sapphire.

Sapphire is one of the most popular gemstones, and is used extensively in Jewelry. Fine colored Sapphire with a deep blue color and excellent transparency can reach several thousand dollars a carat. The blue variety is most often used in jewelry, but the yellow, pink, and orange “fancies” have recently become very popular. Green and light blue Sapphires are also known, but are less commonly used in jewelry. Opaque Black Sapphire is also used a minor gemstone.

Sapphire is used in all forms of jewelry, including bracelets, necklaces, rings, and earrings. It is used both as centerpiece gemstone in pendants and rings, as well as a secondary stone to complement other gemstones such as Diamonds. Star Sapphires are polished as cabochons, and, if clear, are extremely valuable.

The rare orange-pink variety, known as Padparadschah, can be even more valuable than fine blue Sapphire. Blue Sapphire is sometimes carved into cameos or small figures, especially the less transparent material. Synthetic Sapphire is often used as a cheap substitute for the natural material.

Besides for the varieties of Sapphire listed below, Sapphire with color other than blue are prefixed with their color names. The main gemstone colors in addition to blue Sapphire include:
Yellow Sapphire (sometimes also called “Golden Sapphire” if intensely colored)
Pink Sapphire
White Sapphire (describes Sapphire that is colorless)
Green Sapphire
Purple Sapphire
Orange Sapphire
Black Sapphire