What Shall We Bake Today?

Every year I try and make one new cookie for Christmas—that way I have a lot of “testers” to let me know if it’s a keeper or not.  This year I’m trying Oatmeal Coconut Cookies!

Ingredients

1 cup shortening

1 cup sugar

1 cup packed brown sugar

2 large eggs, room temperature

1 teaspoon vanilla extract

2 cups all-purpose flour

1 teaspoon baking powder

1 teaspoon baking soda

1/4 teaspoon salt

1 cup old-fashioned oats

1 cup sweetened shredded coconut

Directions

In a large bowl, beat shortening and sugars until blended. Beat in eggs and vanilla. In another bowl, whisk flour, baking powder, baking soda and salt; gradually beat into sugar mixture. Stir in oats and coconut.

Divide dough into 4 portions. On a lightly floured surface, shape each into a 6-in.-long log. Wrap in waxed paper; freeze 2 hours or until firm.

Preheat oven to 350°. Unwrap and cut dough crosswise into 1/2-in. slices, reshaping as needed. Place 2 in. apart on ungreased baking sheets. Bake until golden brown, 10-12 minutes. Cool on pans 5 minutes. Remove to wire racks to cool completely.

ENJOY!

What Shall We Bake Today?

It’s December!  December is normally COOKIE month in my house, but I thought I’d start the month with an EASY holiday treat…Snowman Cupcakes!  You can go through all the fuss of using  homemade cake and frosting recipes or you can use box mixes and canned frosting and get right to the fun!

Ingredients

24 cupcakes (mixed and baked according to box directions—any flavor)

1 tub prepared WHITE frosting

Shredded coconut

Black food coloring

Orange food coloring

Directions

Frost cupcakes. Press shredded coconut into frosting. 

Stir together 1 cup frosting and black food coloring in a bowl until desired shade is reached. Transfer to a piping bag fitted with a small round piping tip or a zip-top bag with a small hole cut in one corner.

Stir together ½ cup frosting and orange food coloring in a second bowl until desired shade is reached. Transfer to a second piping bag fitted with a small round piping tip or a zip-top bag with a small hole cut in one corner.

Pipe a carrot-shaped nose in the center of each cupcake. With the black frosting, pipe two eyes and five or six smaller dots for the mouth. Store cupcakes, covered, at room temperature up to 2 days.

Enjoy!

What Shall We Make Today?

Our last turkey cookie has a peanut butter cookie base!

Ingredients

1 package (16 oz) ready-to-bake refrigerated peanut butter cookie dough (24 cookies)

1/3 cup milk chocolate chips

24 Reese’s miniature cups (wrapped in gold foil, but unwrap for the cookies)

120 pieces candy corn

48 small edible eyeballs

24 yellow or orange Reese’s Pieces

24 red mini M&M’s

Instructions

Prep : Preheat the oven based on the peanut butter cookie dough directions.

Line two cookie sheets with parchment paper, baking mat, or spray with nonstick cooking spray.  Place 12 cookie dough balls per cookie sheet making sure to leave 2-inches of space between each one. Use the palm of your hand, or a flat bottomed glass, to flatten the dough balls so the top is flat.

Bake the cookies according to the package directions. When done, allow the cookies to cool on the warm tray for about 10 minutes before removing them to a cooling rack to cool completely before decorating.

Decorate The Turkey Cookies

Melt the chocolate chips in a microwave-safe bowl in 20 second increments, stirring well after each one, until the chocolate is smooth and melted. Dip the bottom of a miniature Reese’s peanut butter cup into the melted chocolate and place it in the center of the cookie, in the lower third of the cookie, to create the turkey head. Create the turkey feathers by dipping one side of five pieces of candy corn into the chocolate. Then place them in a fan shape above the Reese’s. Dip a Reese’s Pieces into the chocolate (just the bottom side) and then press it into the Reese’s cup to form the beak. Gently press a mini M&M next to the beak to form the wattle of the turkey. You may need to dip the mini M&M in the melted chocolate or it might just stay by itself. Dip the bottom side of two candy eyeballs into the melted chocolate and add them to the top of the Reese’s cup for the eyes, above the beak.

Allow the cookies to set for 20-30 minutes before serving.

ENJOY!

What Shall We Make Today?

This turkey cookie uses Oreos!

Ingredients

10 Oreo cookies

½ cup Chocolate Melted

2 cups Candy corn

20 Eyeball candies

10 Pumpkin chocolate chips

Instructions

Separate an Oreo cookie so that you have one cookie with filling and one without filling.

Pour some melted chocolate on the side with filling.

Arrange the candy corns in the shape of feathers.

Place the other cookie on top and press gently to stick everything together.

Use melted chocolate to stick eyes and chocolate chip beak on top of the Oreo and you are done. 

ENJOY!

Let’s Talk Turkey!

From Williamsonsource.com website:

Cooking a turkey for the Thanksgiving meal can be overwhelming. Butterball Turkey hotline has been assisting home chefs for over 30 years. And in that time, you can imagine that they have had some pretty interesting questions.  Here is a list of the most interesting questions they have been asked over the years.  If you need that hotline, it’s open on Thanksgiving, call 1-800-288-8372 from 7am-7pm and normal hours are from 9am-7pm daily. This year, Butterball has also added the option of texting.  Now through Thanksgiving, you can text the Butterball Turkey Talk-Line experts 24/7 at 844-877-3456.

1. So I’m looking at a turkey from 1969 sitting here in my father’s freezer … any tips on the best way to cook a 30-year-old bird?
A man found a turkey in his dad’s freezer from 1969. The Talk-Line suggested the man throw out the old turkey and purchase a new one. Then, the Talk-Line suggested to cook the turkey in the open roasting pan method.

2. How do I roast my turkey so it gets golden brown tan lines — in the shape of a turkey bikini?
A strange request in deed, but the Talk-Line can help in any turkey situation! The experts helped to create a “bikini look” by using aluminum foil in certain places on the turkey.

3. How to carve a turkey when all of its bones have been broken?
A proud gentleman called to tell the staff how he wrapped his turkey in a towel and stomped on it several times, breaking the bones so it would fit in his pan. The experts wouldn’t recommend this approach — if you have several folks coming to your holiday meal but a small pan, the Talk-Line would recommend trying a different method, maybe deep frying the turkey. Or, buy two smaller turkeys in place of a large one.

4. I carved my turkey with a chainsaw … is the chain grease going to adversely affect my turkey?
A gentleman called to tell the operator he cut his turkey in half with a chain saw and wanted to know if the oil from the chain would adversely affect the turkey. The Talk-Line wouldn’t recommend serving a turkey with chainsaw grease! Instead, let your turkey rest at least 20 mins after cooking to make carving easier. Then, using a carving knife you would find in your kitchen.

5. Why does my turkey have no breast meat?
A disappointed woman called wondering why her turkey had no breast meat. After a conversation with a Talk-Line operator, it became apparent that the woman’s turkey was lying on the table upside down. The Talk-Line experts recommend cooking your turkey breast side up in the open roasting pan method. This will give you a flavorful turkey and make it easier when transferring your turkey to a plate so you don’t have to flip it over.

6. It’s my first Thanksgiving and I have a tiny apartment-sized oven … how much will my turkey expand when cooking?
A new bride cooking Thanksgiving dinner for the first time in a small, apartment-sized oven, wanted to make sure her turkey wouldn’t expand during cooking (as baked goods do) and get stuck in the oven. Rest assured, your turkey will not expand in the oven. But be sure to use a pan with at least 2″ sides so your turkey juices don’t spill over during the cooking process … you want to save the juices for turkey gravy.

7. How do I get my turkey to stop sudsing? Is a soapy turkey recoverable?
A first-time Thanksgiving chef called after she had washed her turkey with dish soap. You don’t have to clean your turkey, simply pat the extra juices dry with paper towels before stuffing or roasting the turkey – quite a bit easier than washing with soap!

8. For the sake of delicious smells, can I cook my turkey over the course of four days?
The Talk-Line doesn’t recommend slow-cooking your turkey over the course of multiple days. You are able to use a slow cooker if needed, but experts would recommend 6-8 hours in the slow cooker. If cooking in the oven, it should only take a few hours to cook

9. How do I baste a pre-basted turkey?
Some folks love to baste the turkey while it’s cooking. If you’re one of them, the Talk-Line suggests basting only a few times during the cooking process so you don’t continuously let out the heat of the oven.

10. My turkey thawed on my lap … can I eat it?
A gentleman won a turkey at the casino, and brought it home on the bus where it had thawed. The safest way to thaw your turkey is in the refrigerator — it takes one day for every four pounds of turkey. The Talk-Line experts wouldn’t recommend eating a turkey that has been thawed in warmer temperatures.

What Shall We Bake Today?

Our next turkey cookie uses less chocolate and uses peanut butter cookies!

Ingredients 

Cookie

1-17.5 oz. pkg sugar cookie mix

1/2 cup butter, {softened}

1 egg

Toppings

24 mini Nutter Butter Cookies

48 edible eyeballs

24 yellow candy coated sunflower seeds

24 red long sprinkles

120 candy corn candies

1 can white frosting

Instructions 

Preheat the oven to 350 degrees.

Cookies

Combine the sugar cookie mix, butter and egg in a medium bowl until you have a soft dough. Use a medium cookie scoop and scoop 12 mounds of dough onto a silicone mat {or parchment} lined baking sheet. Bake for 8-10 minutes or until cookies are cooked through. Remove from oven and cool completely on cookie sheet.

Assembly

Apply frosting to the back of a mini Nutter Butter Cookie and place frosting side down on top of sugar cookie on the bottom half. We want to be sure and leave enough room for the candy corn feathers.

Add to small spots of frosting on the top of the Nutter Butter for the eyes. Place two edible eyeballs on the frosting and press down slightly.

Add another spot of frosting in the middle and below the eyeballs for the beak. Add the candy coated sunflower seed on the frosting.

For the wattle, take a longer red sprinkle. Add a little frosting to the top/side of the sprinkle and attach it to the side of the beak.

Finally, add five candy corn to each cookie. Make a fan shape above the Nutter Butter head being sure to add enough frosting that they will stay in place.

Allow the frosting to set up before stacking the cookies.

ENJOY!

Trout

I remember an episode of Everybody Loves Raymond where Debra decides to serve TROUT for Thanksgiving dinner.  I am not a fish lover, but hubby loves all kinds of fish.  So, I decided to see if I could find a recipe for making trout. Disclaimer: I have not tried this and I WILL NOT be trying this, so proceed at your own risk…lol

From The Cooking Books website:

Cooking fresh trout can transform a simple meal into an exquisite dining experience. This flavorful fish is not only rich in omega-3 fatty acids but also offers a delightful texture and taste that can be easily enhanced with various cooking methods and herbs. In this comprehensive guide, we will explore everything you need to know about how to cook fresh trout, including preparation techniques, mouthwatering recipes, and tips for achieving the best results.

Understanding Fresh Trout

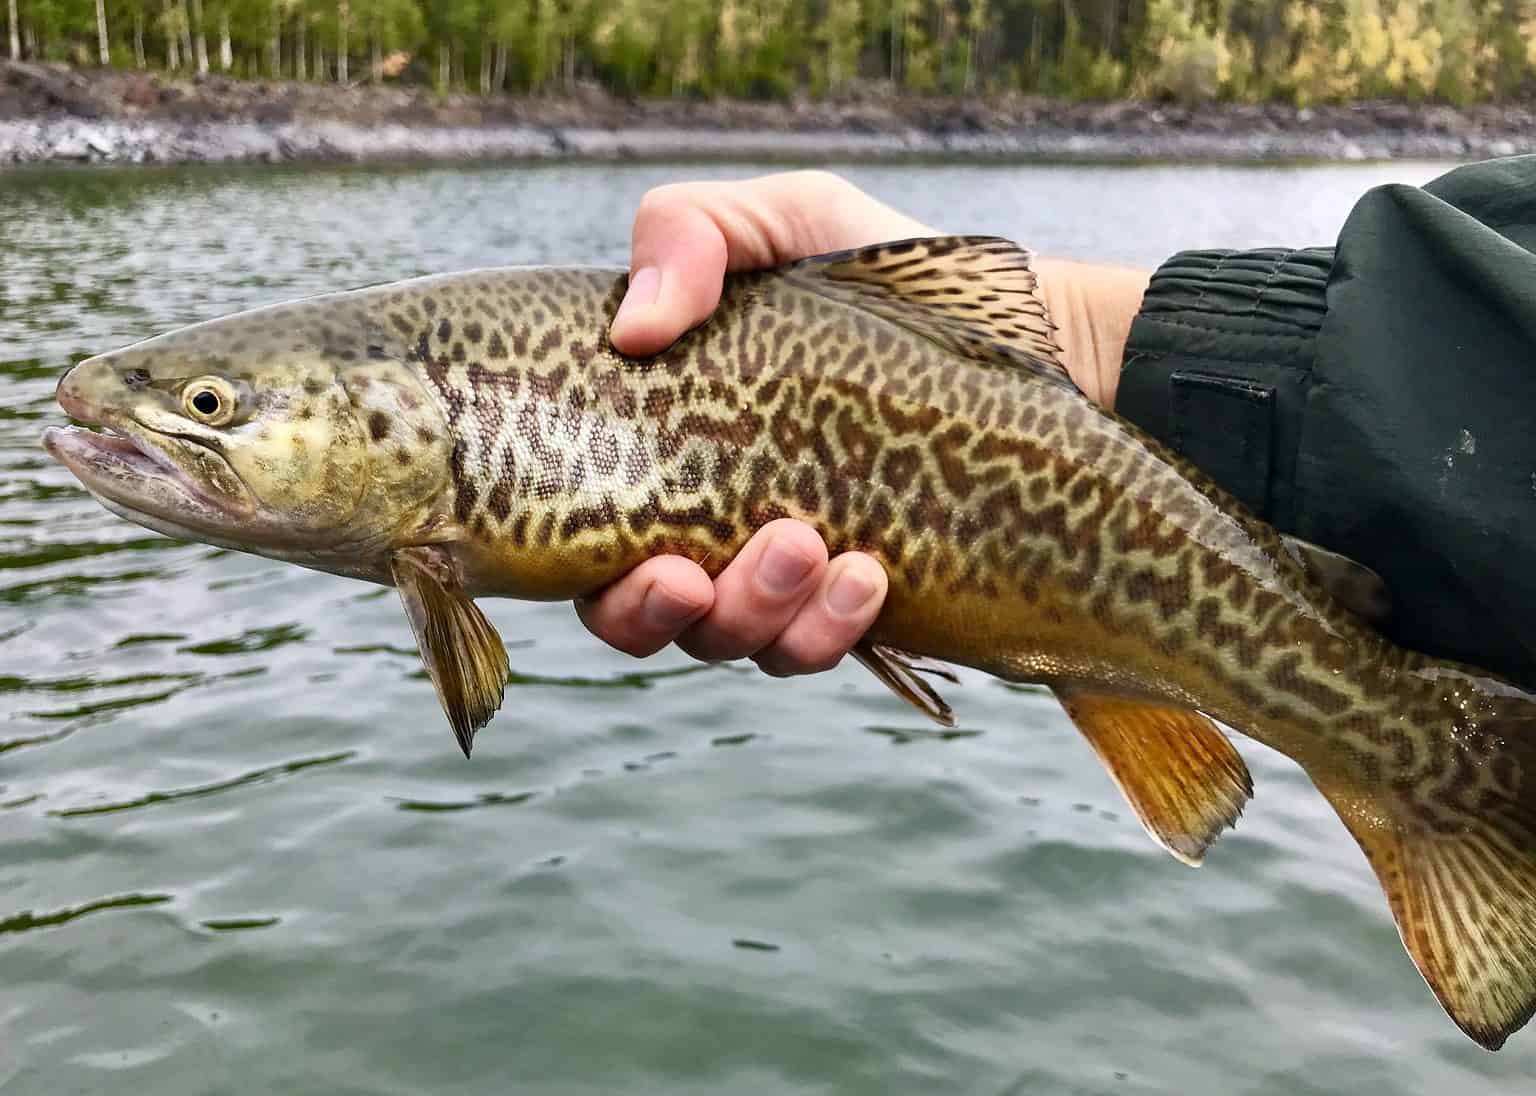
Before diving into the cooking methods, it’s essential to understand what makes fresh trout a sought-after fish. Caught in freshwater lakes and rivers, trout belongs to the salmon family and has various species, including rainbow, brown, and brook trout. Each type has its unique flavor profile, but all varieties are adaptable to numerous recipes.

Why Choose Fresh Trout?

  1. Nutritional Benefits: Fresh trout is an excellent source of protein and healthy fats. It is low in calories yet high in essential nutrients.
  2. Versatile Flavor: The delicate yet slightly nutty flavor of trout pairs well with various herbs, spices, and cooking methods, making it versatile in the kitchen.
  3. Sustainable Choice: Many trout species are farmed sustainably, making them an environmentally friendly seafood option.

Preparing Fresh Trout for Cooking

The first step in cooking fresh trout is preparation. Properly preparing your fish ensures a delicious end result. Here’s how to do it.

Cleaning Trout

Whether you catch your trout or buy it from the store, it’s crucial to clean it before cooking.

  1. Ingredients and Tools:
  2. Fresh trout (whole, gutted)
  3. Cold running water
  4. A sharp knife
  5. A cutting board
  6. Paper towels
  7. Steps:
  8. Rinse the trout under cold running water to remove any slime and gut residue.
  9. Place the fish on a cutting board, belly side up.
  10. Use a sharp knife to carefully remove the head if desired, and make an incision along the belly to remove the entrails.
  11. Rinse the inside thoroughly once again and pat the fish dry with paper towels.

Seasoning Fresh Trout

A simple seasoning can elevate your trout dish tremendously. Here’s a basic but flavorful blend:

  • Salt and Pepper: Season the inside and outside of the trout generously.
  • Fresh Herbs: Dill, parsley, or thyme work exceptionally well and enhance the delicate flavors of trout.
  • Citrus Zest: Adding some lemon or orange zest can brighten the dish.

By following these steps, you will prepare your fresh trout properly and ensure an unforgettable culinary experience.

Cooking Methods for Fresh Trout

Now that you have cleaned and seasoned your trout, it’s time to explore various cooking methods. Below are some popular techniques to prepare fresh trout, each offering a unique flavor experience.

Grilling Trout

Grilling provides a smoky flavor and crispy texture that complements trout beautifully. Here’s how to do it.

  1. Prepare the Grill: Preheat your grill to medium-high heat (about 375°F to 400°F).
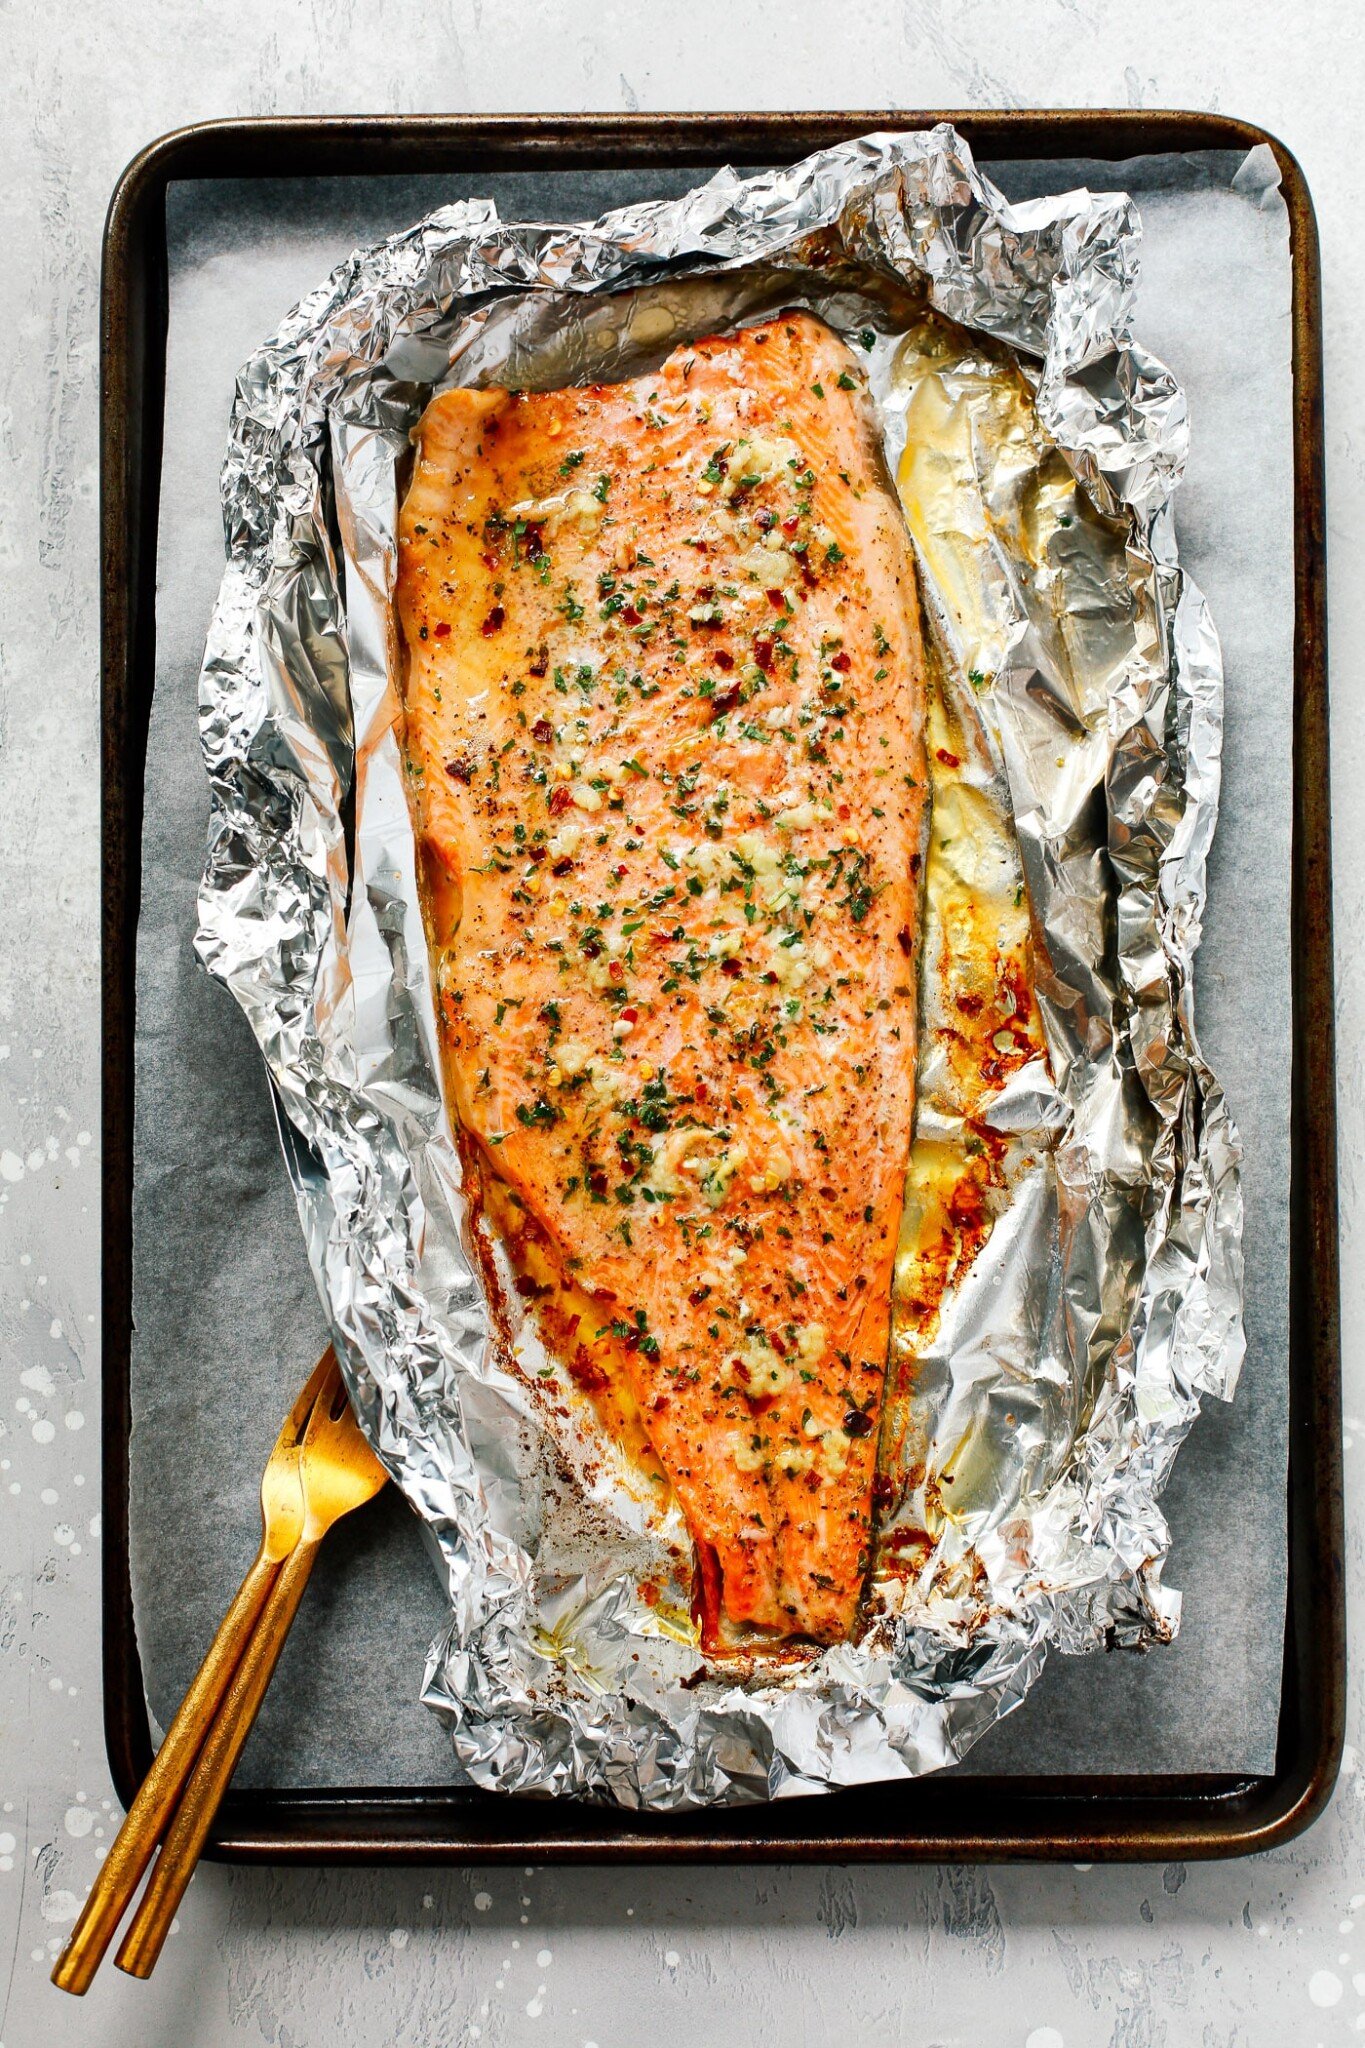
  2. Wrap in Foil: For easy handling and added flavor, wrap the seasoned trout in aluminum foil with sliced lemon and fresh herbs.
  3. Grill Time: Place the wrapped trout on the grill and cook for about 10-15 minutes per side, depending on the size. When done, the fish will flake easily with a fork.
  4. Serve: Unwrap the foil and serve with a side of grilled vegetables for a complete meal.
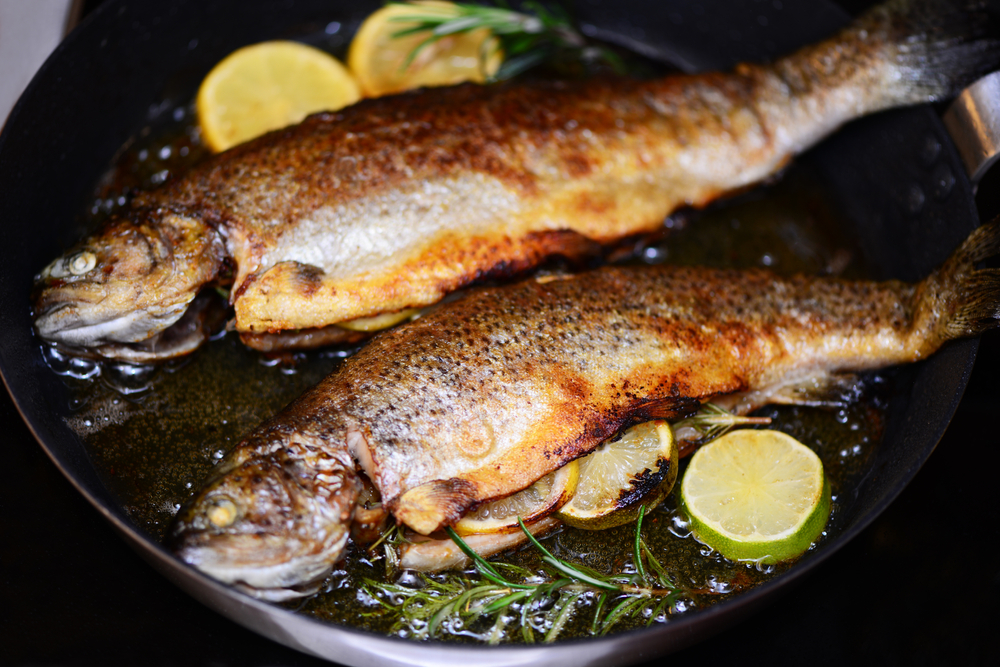
Pan-Frying Trout

Pan-frying trout is one of the quickest methods and is ideal for a weeknight dinner.

  1. Ingredients:
  2. 2 trout fillets
  3. 3 tablespoons of olive oil or butter
  4. Salt and pepper
  5. Fresh herbs
  6. Steps:
  7. Heat the olive oil or butter in a large skillet over medium heat.
  8. Season the fillets with salt and pepper.
  9. Place the trout skin-side down in the hot skillet and cook for about 5 minutes.
  10. Carefully flip the fillets and cook for an additional 3-4 minutes, until the fish is golden brown and cooked through.
  11. Serving Suggestion: Serve with lemon wedges and a light salad for a refreshing meal.
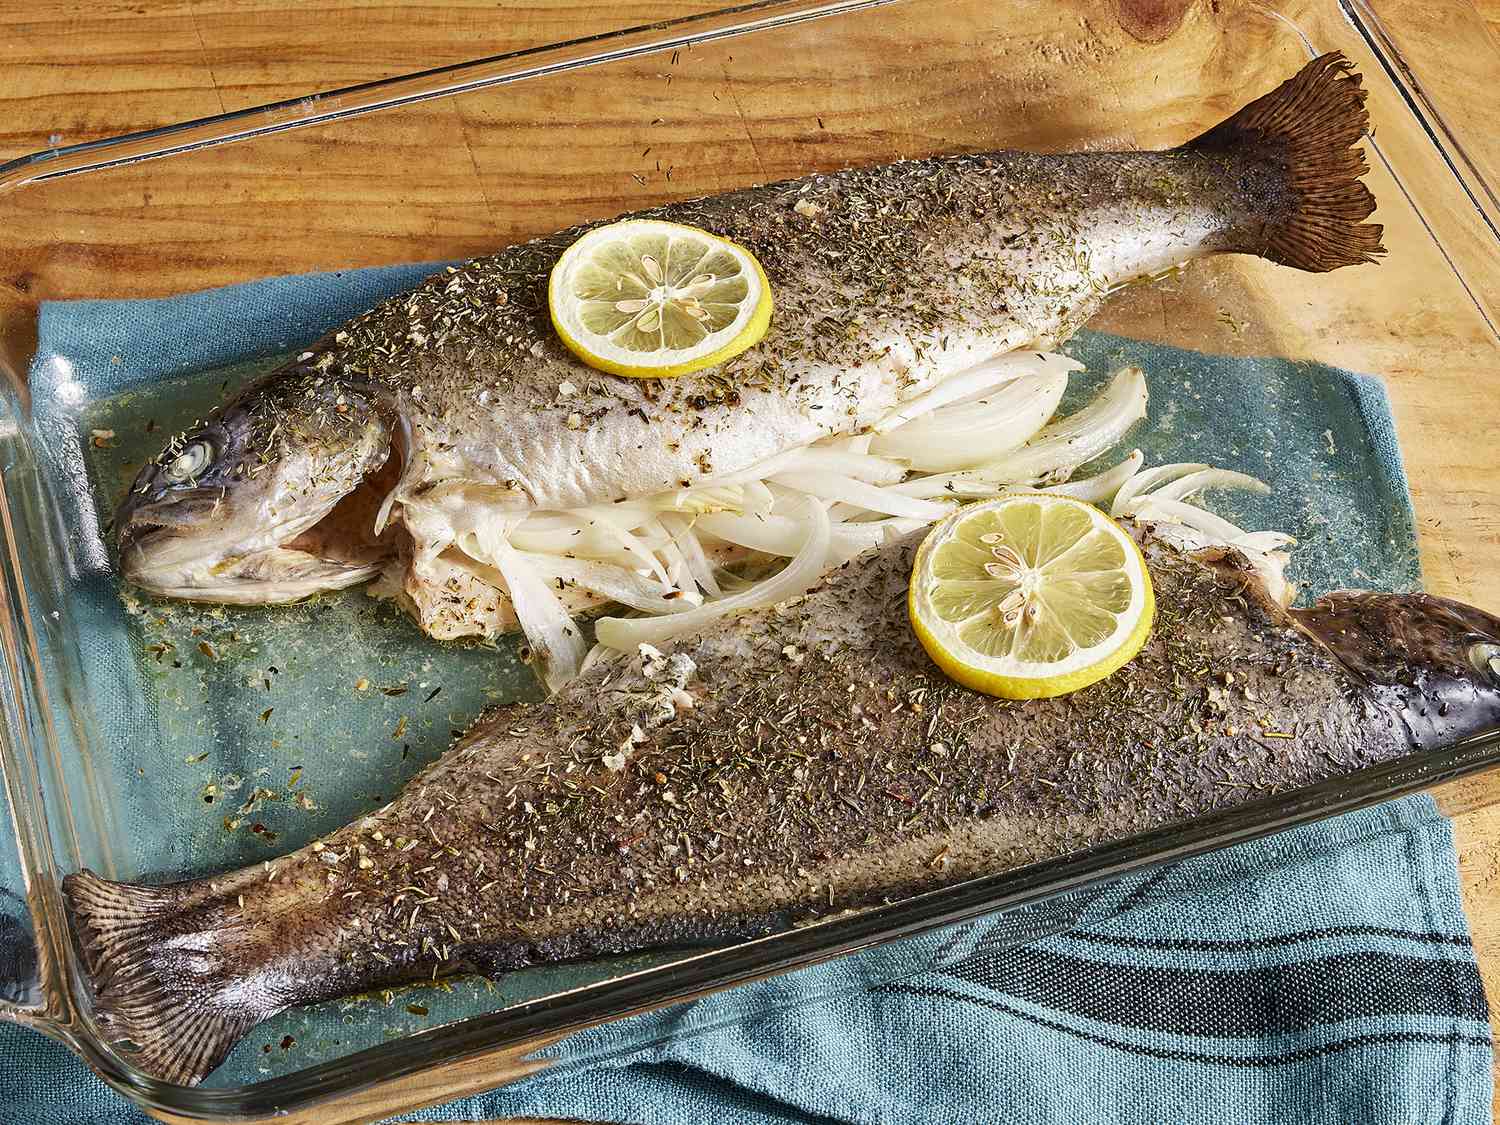
Baking Trout

Baking is a low-effort method that ensures your trout remains moist and flavorful.

  1. Ingredients:
  2. 1 whole cleaned trout
  3. Olive oil
  4. Salt and pepper
  5. Fresh herbs and lemon slices
  6. Instructions:
  7. Preheat your oven to 375°F (190°C).
  8. Brush the outside of the trout with olive oil and season it inside and out with salt and pepper.
  9. Stuff the cavity with fresh herbs and lemon slices for added flavor.
  10. Place the trout on a baking sheet lined with parchment paper.
  11. Bake for 20-25 minutes, or until the flesh is opaque and easily flakes with a fork.

Steaming Trout

Steaming is a healthy cooking method that limits added fats while preserving the fish’s moisture.

  1. Equipment: A steamer basket or a bamboo steamer.
  2. Steps:
  3. Fill a pot with water and bring it to a boil.
  4. Place seasoned trout in the steamer basket, optionally adding slices of ginger or garlic for flavor.
  5. Cover with a lid and steam for about 10-15 minutes, depending on the thickness of the fish.
  6. Finishing Touch: Drizzle with soy sauce or a sesame oil-based dressing before serving.

Flavor Pairings for Fresh Trout

The flavor of fresh trout can be enhanced with various pairs. Here are some recommendations:

Herbs and Seasonings

  • Dill: This herb complements the natural flavors of trout exceptionally well.
  • Thyme: Offers a more earthy flavor that works beautifully with rich trout.

Sauces and Accompaniments

  • Lemon Butter Sauce: A simple sauce of melted butter, lemon juice, and garlic pairs wonderfully with trout.
  • Brown Butter Sauce: Browning butter enhances its nutty flavor, making it a perfect partner for grilled or baked trout.

Final Thoughts on Cooking Fresh Trout

Cooking fresh trout can be a delightful culinary journey, offering numerous flavor profiles and cooking techniques to explore. Remember to choose fresh fish, prepare it with care, and select complementary flavors to create a dish that captivates your palate.

With this guide, you have all the tools needed to cook fresh trout like a pro. Whether you choose to grill, bake, fry, or steam, you’ll enjoy a delicious and healthy meal that shines with the flavors of nature. Don’t forget to pair your trout with the recommended herbs, sauces, and sides for an unforgettable dining experience. Happy cooking!

SOURCE: THECOOKINGBOOKS.COM

What Shall We Bake Today?

This month we focus on cute Thanksgiving or turkey-oriented cookies and desserts! We start off with turkey cookies!

Ingredients

1 cup semisweet chocolate chips

30 candy corn candies, plus 6 white tips of candy corn

6 chocolate sandwich cookies

6 mini peanut butter cups

6 malt balls

1 cup Red Frosting, recipe follows

6 chocolate sandwich cookies with top cookies removed

Red Frosting:

1/2 stick (1/4 cup) unsalted butter, at room temperature

1 1/2 cups powdered sugar

1/2 teaspoon pure vanilla extract

2 tablespoons whole milk

Red food coloring, as needed

Directions

Place the chocolate chips in a medium stainless steel or glass bowl. Set the bowl over a saucepan of barely simmering water. Cook, stirring occasionally, until the chocolate has melted, about 4 minutes. Set aside to cool slightly.

For each turkey, push 5 candy corn candies, tip-side down, into the cream filling of a chocolate sandwich cookie to make the feathers for the turkey. Lay the cookie on a work surface.

Dip the flat, larger end of a peanut butter cup in the melted chocolate allowing any excess chocolate to drip back into the bowl. Place the peanut butter cup, chocolate-dipped end down, onto the sandwich cookie.

Dip a malt ball into the melted chocolate allowing any excess chocolate to drip back into the bowl. Place the malt ball above the peanut butter cup to make the head of the turkey.

Dip the flat end of the white candy corn tip in the chocolate. Place on the malt ball, to make the turkey beak. Refrigerate until the chocolate has set, about 10 minutes.

Place the Red Frosting in a piping bag. Using scissors, cut a small opening in the end of the piping bag. Pipe a small piece of frosting under the malt ball to make the turkey’s beard.

Place a cookie (with top half removed) on a platter. Stand the turkey upright into the cream filling. Repeat with the remaining ingredients.

Red Frosting:

In a medium bowl, using an electric hand mixer, beat the butter until smooth, about 20 seconds. Add the powdered sugar, vanilla extract and milk. Beat on low speed until combined. Increase the speed to high and beat until the mixture is smooth. Color the frosting by mixing in 1 drop of red food coloring at a time until the desired color is reached.

ENJOY!

What Shall We Bake Today?

Our finally entry this month is Witch Fingers!

Ingredients

1 cup butter, softened

1 cup confectioners’ sugar

1 large egg, room temperature

1 teaspoon vanilla extract

1 teaspoon almond extract

2-3/4 cups all-purpose flour

1 teaspoon baking powder

1 teaspoon salt

Red decorating gel

1/2 cup sliced almonds

Directions

In a large bowl, cream butter and sugar. Beat in the egg and extracts. Combine the flour, baking powder and salt; gradually add to the creamed mixture. Divide dough into fourths. Cover and refrigerate for 30 minutes or until easy to handle.

Working with 1 piece of dough at a time, roll into 1-in. balls. Shape balls into 3×1/2-in. fingers. Using the flat tip of a table knife, make an indentation on 1 end of each for fingernail. With a knife, make 3 slashes in the middle of each finger for knuckle.

Place 2 in. apart on lightly greased baking sheets. Bake at 325° until lightly browned, 20-25 minutes. Cool for 3 minutes. Squeeze a small amount of red gel on nail bed; press a sliced almond over gel for nail, allowing gel to ooze around nail. Remove to wire racks to cool.

ENJOY!