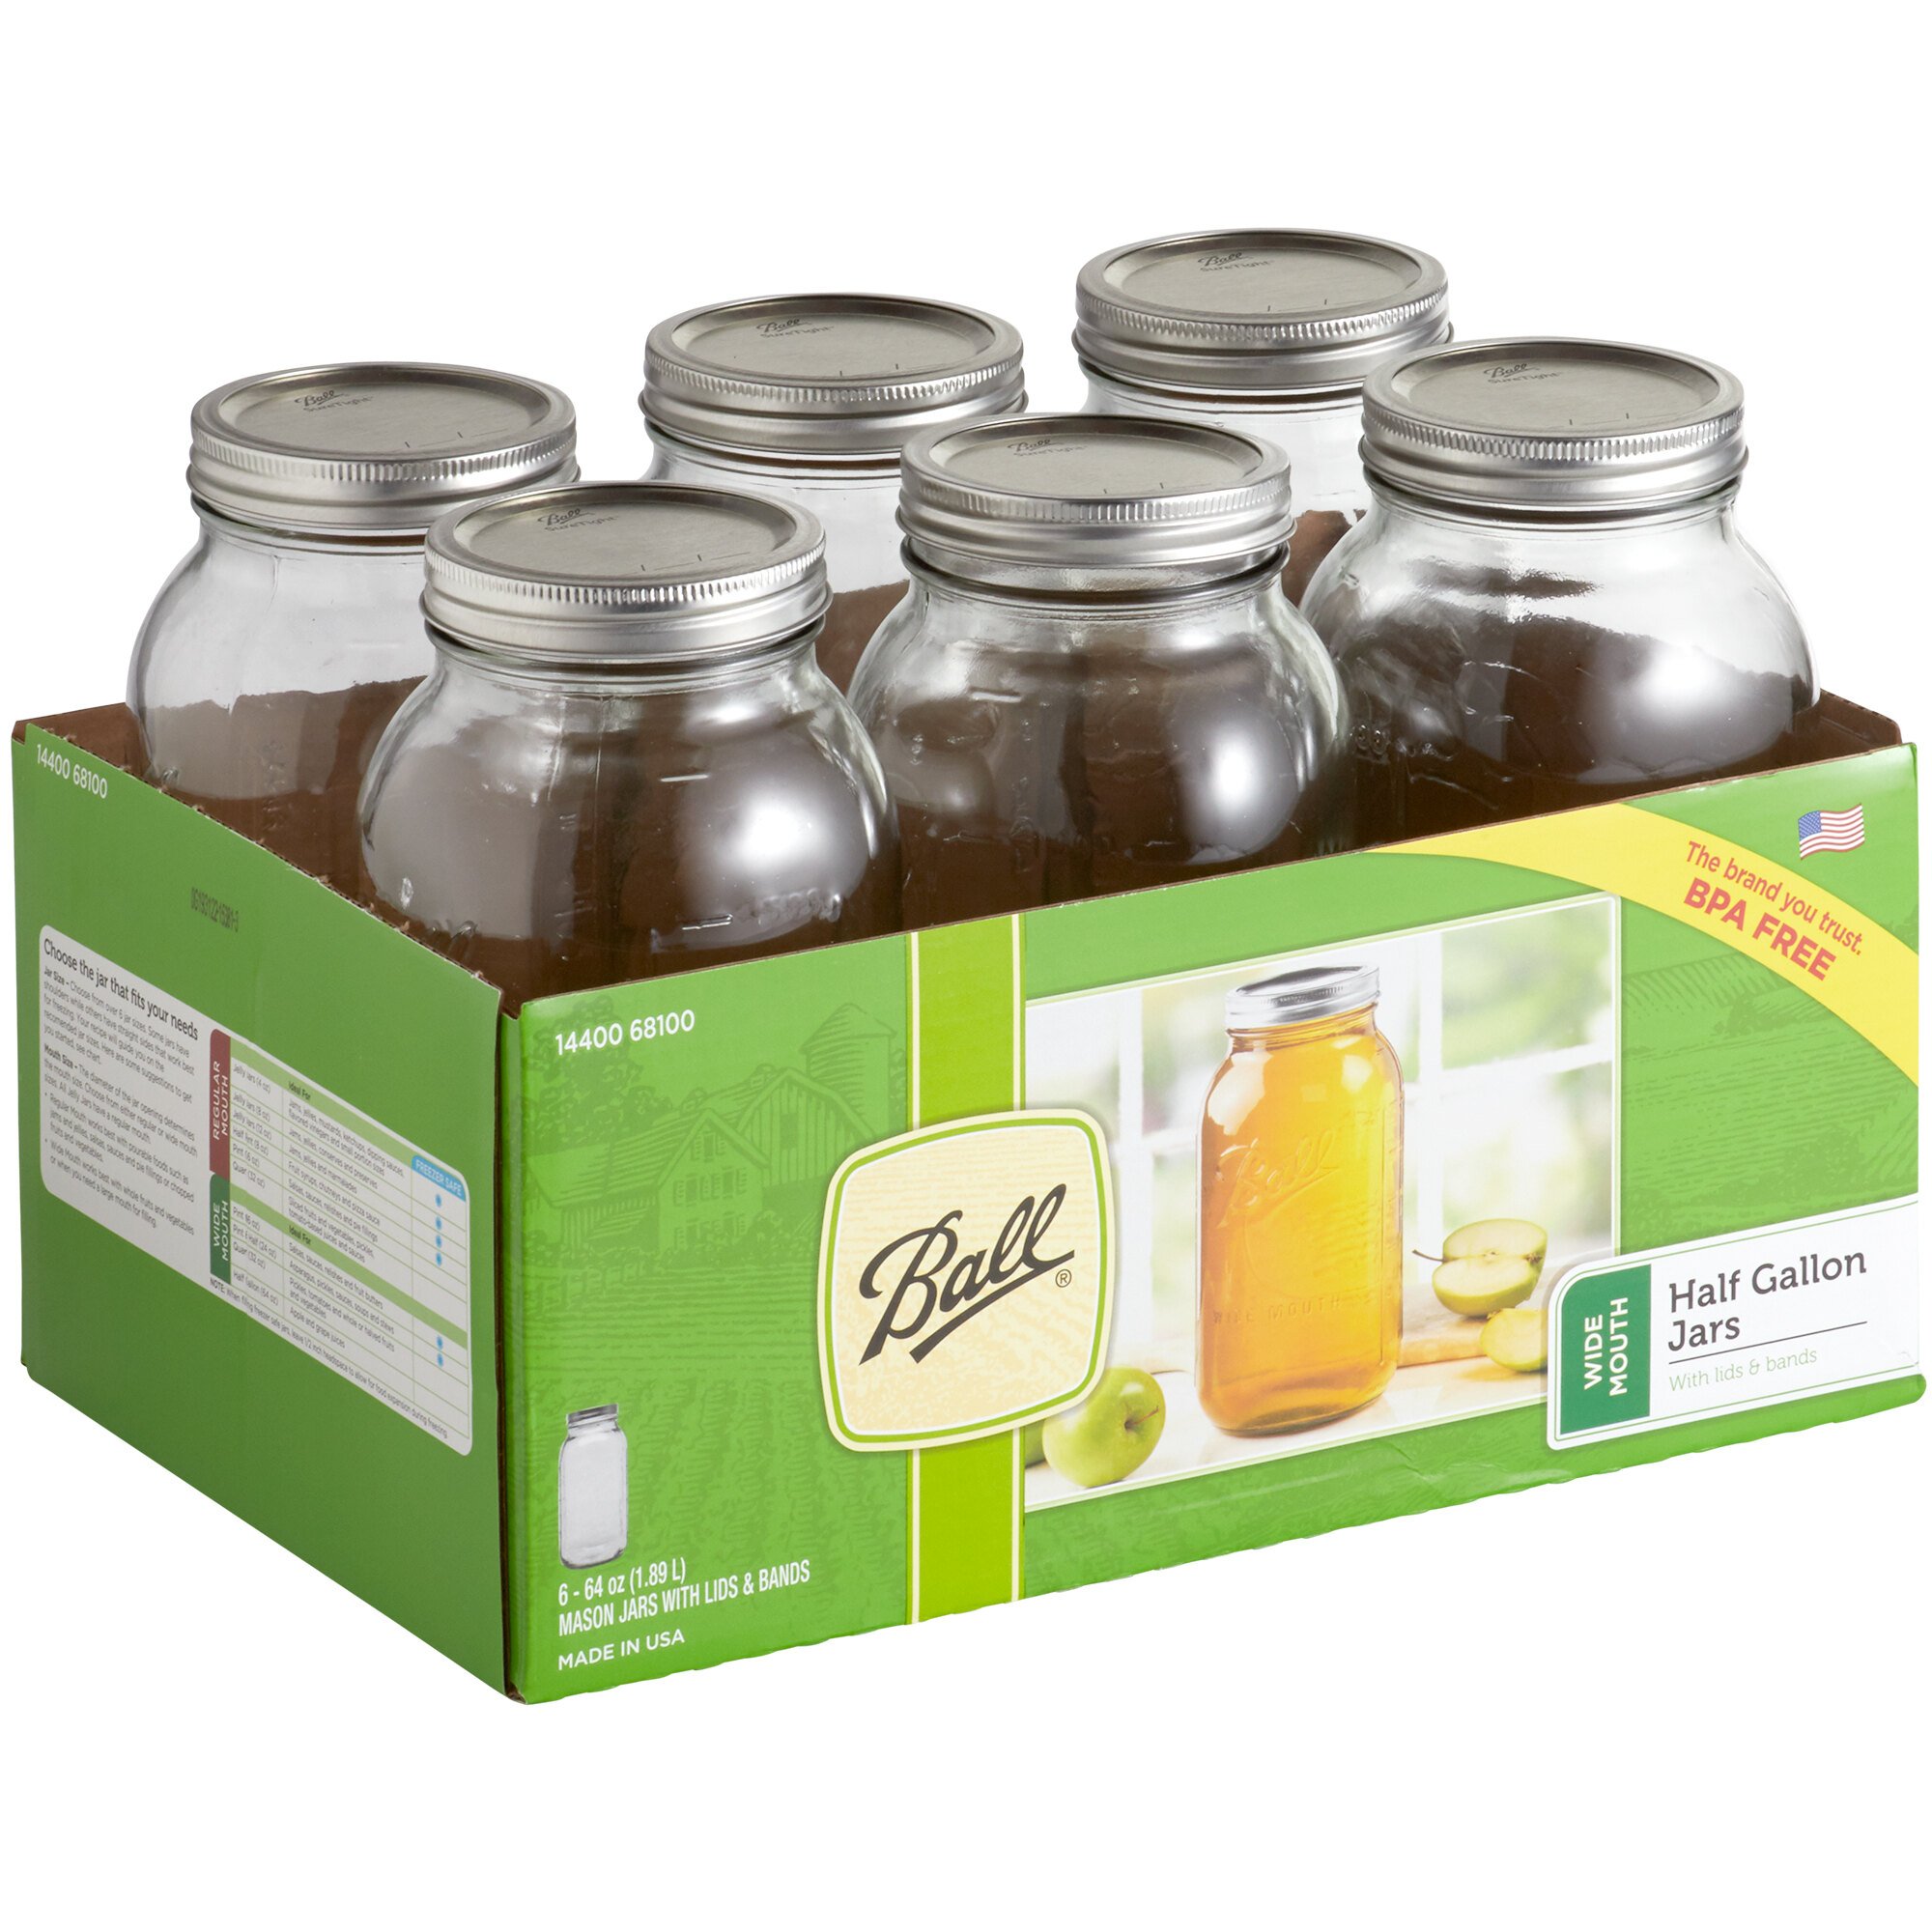
I went searching for things to do with Mason jars since it is National Mason Jar Day! (Who thinks these things up?) I was astounded by the many, many uses for them! I have included only a few here, but the links at the end provide many more ideas AND RECIPES!
There are many recipes you can make to put in mason jars and gift them—from cookies to homemade pancake mix to sweet and spicy nuts! I loved this one because of the festive little Christmas light container.
Sugar Cookie Recipe with mix
If mixes aren’t your thing, how about using the jars to grow herbs?
Mason jar Herb Garden
There are many ideas for filling the jars with non-food related items and gifting them, such as this manicure in a jar idea!
Manicure in a Jar
Getting married and need an idea for the groomsmen? Get some mini liquor bottles and create a mini bar in a jar!
I like this idea—very simple. Get some white chocolate covered pretzels, a couple of buttons and viola! Snowman in a jar!
This idea hubby loved—because hubby loves malted milk balls!
Reindeer Noses (malted milk balls)
This website has dozens of recipes for all sorts of things to put in Mason jars:
When my kids started high school, the school had 2 “fun” fundraisers for the local Rescue Mission during the year. One, in the spring, was the egg drop. Participants paid an entry fee, (as well as spectators), and had to develop a method for their egg (supplied by the school so no fake ones allowed) to be dropped from the top of the high school and land unbroken below. (There was a metal railing and plenty of adults ensuring the safety of all involved.)
The second was the turkey toss.
Again, the school provided several frozen turkeys to be used by contestants, either singly or as a team, to fling their turkey as far down the football field as possible. The entrants and spectators, again, paid a fee and there were additional donation boxes provided to bring canned goods for the Mission. The rules were simple: your method had to be human powered—no electric anything– and you could start all the way down the opposite end of the field if you wanted a running start–but you had to “launch” your frozen turkey from the 50-yard line.
The first year we went, neither of my kids participated, but we had a great time! Mostly the contestants were athletes trying to throw the frozen birds like a football. Winner of the event got his picture and a write up in yearbook.
The following summer, my son and 2 of his friends spent a lot of their spare time helping a neighbor down the street from us clear out his garage. My son stored all sorts of pieces of wood and a jar of odd nuts and bolts in our garage. And then they began to tinker with it all. Whatever they were doing was a big secret and they covered it with a tarp they begged hubby for. We all promised not to peek until they were ready. One afternoon after school started, the whole thing just disappeared.
And then the mystery deepened. We got this funny “invitation” on our front door—apparently the entire neighborhood got the same invitation—to go to the wedding venue parking lot at the bend in the road this Saturday morning for the “unveiling”.
The entire neighborhood it seemed had gathered there to see what the young men had cooked up. It was their turkey toss entry…a trebuchet!
Theirs was a little cruder than the above drawing, but still looked basically the same—except theirs didn’t have its own wheels. They had theirs strapped to 2 mechanic’s dollies to transport it. We watched and cheered as they flung their frozen turkey all the way from one end of the parking lot to the other. They were a shoe-in to win the turkey toss!
On the Saturday of the contest, hubby loaded up their pieces—it came apart for easy transport—and their tools and drove them to the high school to set it up very early. They covered it and took turns guarding it till the start of the contest. When it was finally their turn, they moved it to the 50-yard line and uncovered it. The crowd was stunned…and then they launched their turkey. It CLEARED the uprights in the end zone! The judges then asked the boys if they wanted to move their contraption BACK so they could really establish a winning distance…they readily agreed! They set the school record that morning for the turkey toss. Got their names and pictures in the newspaper as well.
Many people routinely toss a dryer sheet or two into their dryers before pressing the start button. That’s because these small, papery sheets reduce static cling and wrinkles, soften your duds, and leave them with a pleasing, fresh scent. But dryer sheets are typically thrown in the trash once the clothes are dried. That’s a shame, because they can be repurposed to perform a wide variety of other tasks.
Dryer sheets are stiff, woven pieces of fiber, generally about 9 inches long and 6.4 inches wide. They’re coated with fabric softeners and lubricants as well as a scent like lavender, linen, musk or rain. Some sheets are also sold unscented.
When you start your dryer, these sheets do their magic when the coating melts off them and onto your clothing as they all tumble together, leaving your laundry soft and free of static. Afterward, the dryer sheets are ready for their second incarnation.
Here are 16 ways you can recycle and reuse your old dryer sheets. Some of these hacks are for new sheets, too.
Regular Cleaning
That coating that dryer sheets come with is useful for picking up dust and dirt. Here are some things you can use dryer sheets for as you clean.
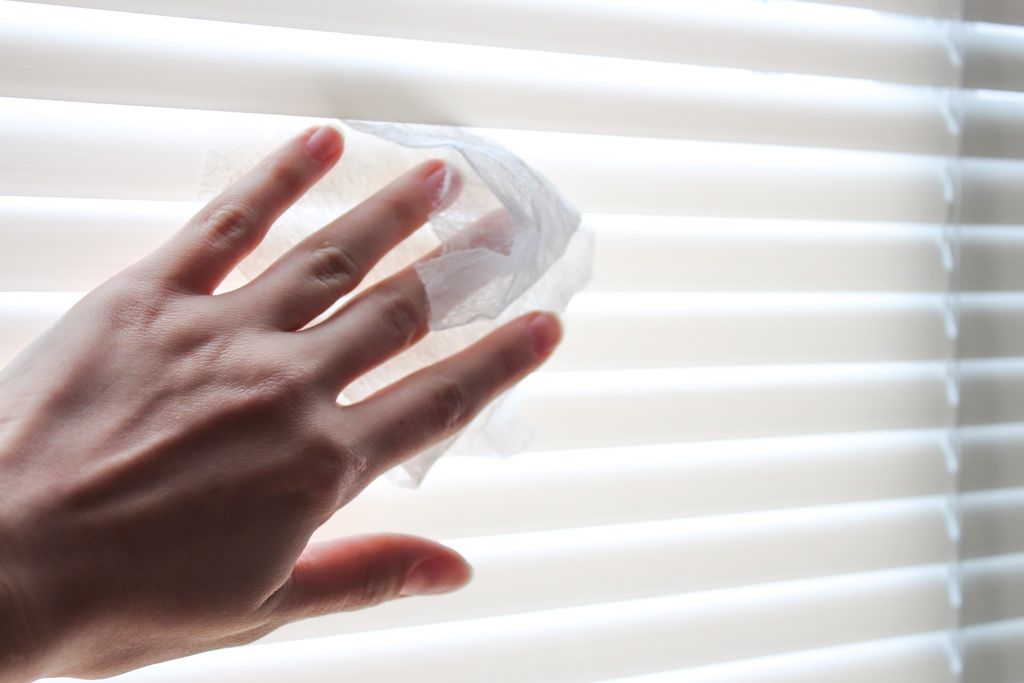
Dust almost anything. Take an old dryer sheet and use it as a dust cloth, running it over items such as window blinds, baseboards, ceiling fan blades and your car’s dashboard. Bonus: The sheets are great at picking up pet hair in the process, and any coating still on them will also help the surface you’ve just cleaned repel dust and lint.
Wipe up spills. Spilled some flour, baking soda or seasoning? Dryer sheets are great at cleaning up such messes, as dry ingredients will stick to the sheets. But don’t use them when you’ve spilled something on the floor, as they can make it quite slick and a slipping hazard.
Remove sap and sand. When you’re in the great outdoors, use old dryer sheets to remove tree sap from your hands — it sticks to a dryer sheet better than a wet wipe — and to easily brush sand from your feet and legs.
Tough Cleaning
Scrub pots and pans. Dryer sheets are great at tackling the hard stuff. Take dirty pots and pans. If you’re not in the mood to vigorously scrub them for an indefinite amount of time, fill the pot or pan with hot water, toss in a new dryer sheet and let it soak at least an hour or overnight. In the morning, the sheet will have helped loosen the crusty food so you can more easily wipe it off.
Remove grime from oven racks. If your oven racks become grimy — a common occurrence — fill your bathtub with warm water, a half-cup of dish soap and eight new dryer sheets. Then lower in the racks and let them soak overnight. In the morning, scrub off the gunk with the dryer sheets, then rinse, dry and replace in your oven.
Clean crusty irons. Dryer sheets work well if you need to clean the bottom of your iron, where residue can accumulate from spray starch buildup and even melted synthetic fabrics.
Remove soap scum. Unfortunately, it’s easy to discover a film of soap on your shower door or bathtub. Scrub clean with a used dryer sheet.
Deodorizing
If you’ve got scented sheets on hand, either new or just out of the dryer, they can be used to make any number of household items smell more pleasant. In general, it’s better to use new sheets for deodorizing, as their scent is stronger.
Freshen wastebaskets and vacuum cleaners. Toss a dryer sheet in the bottom of your wastebasket before adding the bag, or in your vacuum cleaner to combat unpleasant smells.
Refresh camping gear. Even outdoorsy people don’t enjoy unpleasant smells. Before you pack away your camping equipment, toss dryer sheets into items like your tent, sleeping bag and backpack. They’ll smell much better the next time you use them.
Get rid of car odors. Tuck a few dryer sheets under your front seats and you may be able to get rid of that pine tree deodorizer hanging from your rearview mirror.
Freshen up workout gear. Stick dryer sheets into your gym shoes and gym bags to keep nasty smells at bay.
Remove stale odors from your suitcase. Travelers should place dryer sheets in their suitcases to avoid the stale smells that can develop when they’re closed up for a while.
Eliminate smells in your home. If a room in your house smells a little funky, tape a dryer sheet to the back of a vent or two so that the air flowing through them will pick up their pleasant scent. If you do this, though, make sure to replace the sheets weekly so no dusty build-up will impede the air flow.
Miscellaneous
Bet you never thought of using your dryer sheets for the following:
De-squeak shoes. Have a squeak in your shoe due to orthotics or insoles that are rubbing against the bottom? Place a new or used dryer sheet in between the bottom of the shoe and the orthotic or insole, and the squeak will disappear. If it comes back, it may be because the sheet has slipped out of place; simply readjust. Or it may be time for a new sheet.
Sharpen scissors. Scissors dull? Then use them to cut up a dryer sheet or two and that should restore some of their cutting ability.
Repel insects. If you enjoy hiking but flying insects keep circling your head, tuck a new dryer sheet into the back of your ball cap, leaving several inches hanging out. Both the scent of the sheet and its movement as you walk may keep insects at bay. (Studies have shown that linalool, a popular floral-scented chemical in cosmetics, perfumes and dryer sheets, repels fungus gnats and some types of weevils. But linalool didn’t seem to have much value at repelling mosquitoes.)
In honor of Halloween later this month, today’s recipe is from Reader’s Digest and it’s for FAKE BLOOD & GUTS, lol. I am only presenting the fake blood part of the article because the rest is too out there even for me. But there are many, MANY videos on how to make your own intestines if you really want to know how.
From the article:
Many years ago, I worked as a celebrity makeup artist. And for a while there, I trained in special effects makeup—you know, the gooey, gross, and oozing stuff that makes you gasp or peek through your hands as you’re watching a scary movie. If you’re opting for an easy Halloween costume this year and trying to figure out how to make fake blood to accent your creation, we’ve got you covered. Literally.
Making fake blood is both creative and easy, depending on your needs. The king of modern splatter makeup, Greg Nicotero, who’s best known for his work on The Walking Dead, once told CBS News that creating fake blood was “kind of—oddly—a weird art form.” He’s not wrong. And Nicotero’s creative zombie art has inspired countless Halloween costume ideas and Halloween makeup ideas.
So why should you whip up your own fake blood? Well, what is Halloween without a little gore? Plus, it’s easy, inexpensive, and really fun to make. And let’s not forget about bragging rights. You can reference it in your Halloween Instagram captions, or share a TikTok of yourself scrolling through Halloween face paint ideas and scary Halloween costumes and then pan out to an image of you stirring up a batch of fake blood.
These fake blood recipes are total no-brainers, but keep in mind that a lot of these ingredients will stain your skin and property. And remember: Don’t sacrifice safety for fun. Fake blood that comes in contact with your skin or mouth needs to be edible.
So, what should you expect from this creepy crafts experiment? The DIY fake blood should be slightly runny, like the fake blood in movies. Think Dexter and his blood spatter, and you’ll have an idea of what the texture should look like. Ready to create your own (make-believe) blood? Here’s how:
Ingredients:
3/4 cup corn syrup (if you’re trying for the look of old blood, consider using a few drops of maple syrup as well)
1/4 cup water
1/2 teaspoon red food coloring
5 drops blue food coloring
2 drops green food coloring
1 tablespoon cornstarch
Step 1: Combine the water and corn syrup. You’re trying for runny, but not so runny that it drips off your face or body and just leaves stains.
Step 2: Slowly add the food coloring until you reach your ideal color.
Step 3: Slowly mix in the cornstarch. You can add a drop of water to the cornstarch first to keep it from clumping.
Step 4: Let it sit at room temperature for 10 minutes before use.
Note: This is going to stain your skin and clothing.
The food coloring proportions are optional; only you know the exact color you’re trying to create. That said, using green and blue makes the color more realistic. Bear in mind that red and blue create purple, and green will give your fake blood the sickening look you’re trying for.
How to make fake blood for clothes
If you’re hoping to make your clothes look bloody, you’ll need to create blood that is thicker and darker. The fake blood recipe below is nontoxic and made with edible ingredients. Ideally, you’ll make a bigger batch of this fake blood so you can thoroughly soak your costume.
This fake blood recipe uses a ratio of corn syrup to water, versus exact measurements, so you can make as little or as much as you like. If you and your friends are batting around group Halloween costume ideas, consider making a single batch of blood for everyone to use.
Ingredients:
Corn syrup
Water
Red food coloring
Cocoa powder
Step 1: In a large bowl, combine three parts corn syrup with one part water. Mix thoroughly.
Step 2: Add a couple drops of red food coloring into the mixture while stirring continuously. Keep adding more drops of food coloring until the blood is your desired color. Stir for at least five minutes to distribute the food coloring evenly.
Step 3: Add 3 tablespoons cocoa powder to the mixture and stir. This thickens the blood. Keep adding cocoa powder, a tablespoon at a time, until the blood reaches your desired consistency. The blood will be thick but not lumpy, so it can sit on your clothing and absorb without running.
You can also try using old red paint and water, blending in blue and green paint until you have the right color and texture of dried blood.
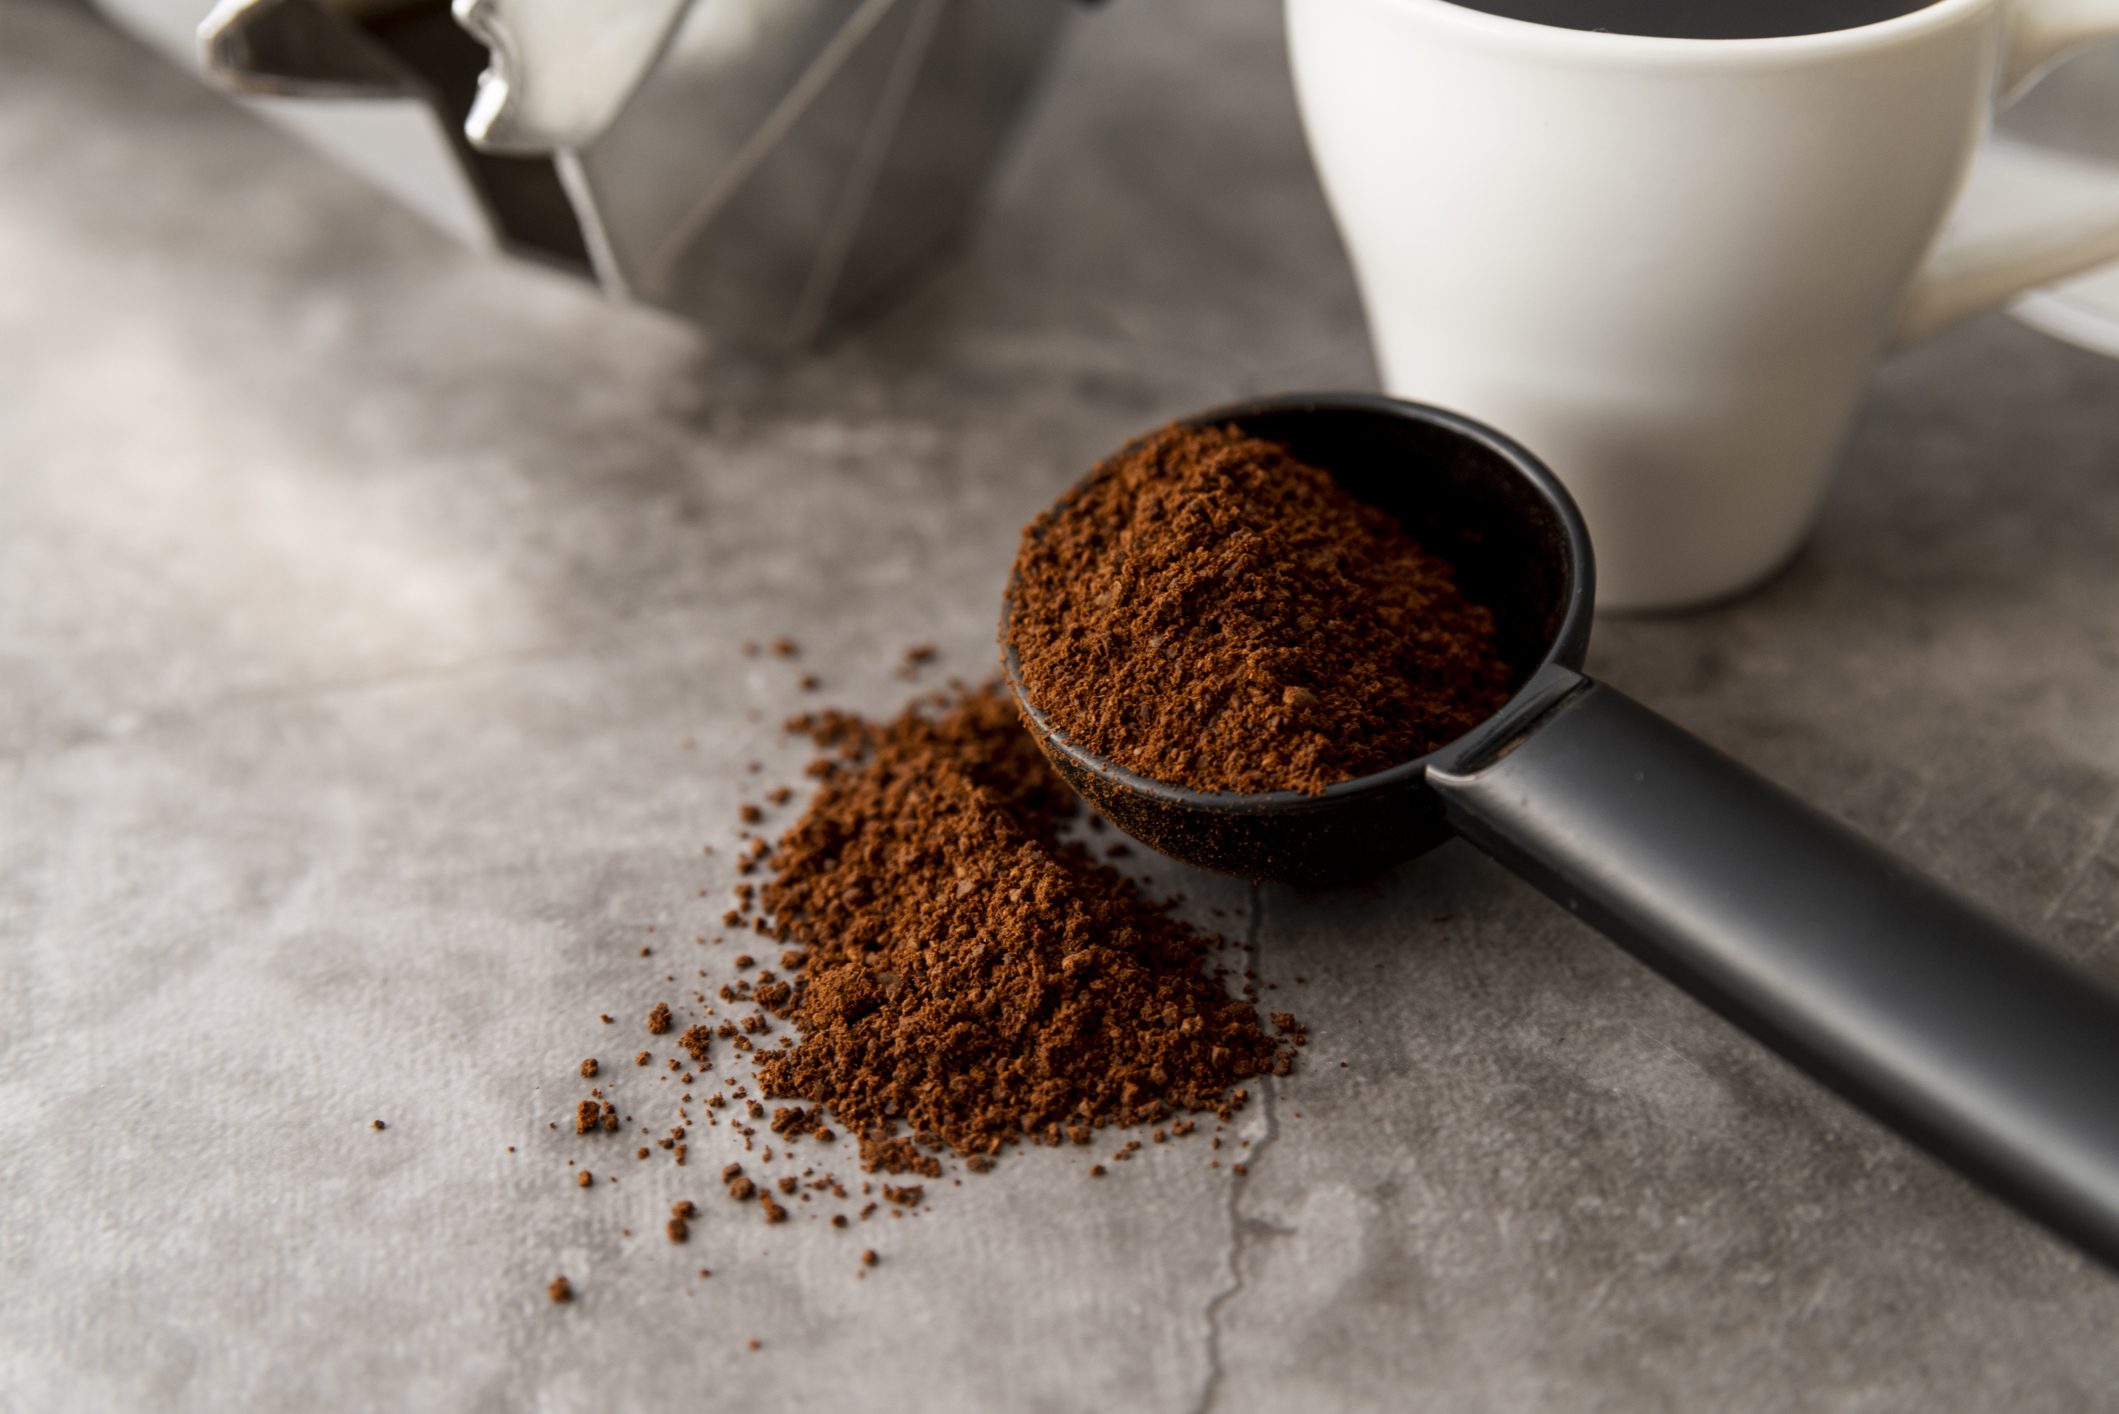
Wondering if you can give all those used coffee grounds another purpose after making a fresh pot? If so, you’re smart to care about sustainable living. “Reusing, repurposing or finding any alternate applications for a product is always a better choice for the environment than throwing it in the trash,” says Natalie Lennick, environmental activist and founder of zero-waste hair-care brand Green Ablutions. Giving coffee grounds another life not only benefits you, it’s also a small act that’s beneficial for the planet.
You may have already heard about using coffee grounds for plants, but they’re way more versatile than that. Used coffee grounds can be used for kitchen hacks and in various other ways, so you can take advantage of this organic material more than once. You’ll likely be surprised at all the uses for coffee grounds, and they’re cost-effective too.
Adding them to your compost pile
This may not come as a total surprise, but you may not know exactly how to use coffee grounds in the garden—or even how to make compost. “Used coffee grounds are an excellent addition to compost because they are high in nitrogen, which is a key component of a healthy compost pile,” explains Chia-Ming Ro, garden consultant and owner of Coastal Homestead in Los Angeles. “They help to balance out the carbon-rich materials in compost, such as leaves and paper.”
Pro tip: Coffee grounds and their paper filters can be added directly to a compost pile with other organic matter like eggshells, leaves, grass clippings, cardboard or paper to produce a well-balanced soil amendment that feeds trees, plants and flowers, says Lennick.
Using them as insect repellent
Want to repel unwelcome bugs in the garden? Coffee grounds can give you an assist. “There is some evidence to suggest that coffee grounds can repel certain insects, such as slugs, ants and mosquitoes,” says Ro. “The exact mechanism by which coffee grounds repel insects is not well understood, but it may have to do with the strong scent of the coffee, which can mask the scent of the plant and make it less attractive to insects.”
Sprinkle coffee grounds at the base of plants or where you’re having an infestation problem in the garden. If you’re wondering how to save money on your gardening habit, now you know you may be able to skip buying the bug spray.
Pro tip: Before you start sprinkling used coffee grounds in your garden, make sure your pets don’t have access to this area. Lennick says the caffeine in coffee is toxic to cats and dogs. “Never use them in an area where your pets might accidentally ingest them,” she says.
“Coffee grounds can be beneficial for flowers because they provide a source of nitrogen, which is an essential nutrient for plant growth,” says Ro. But before you start adding spent coffee granules to your garden bed, you’ll want to look into which flowers may benefit, since it’s possible that used coffee grounds may change the soil composition.
Pro tip: Want to use coffee grounds in some flower beds? Ro suggests sprinkling them around the base of the plant and mixing them into soil.
Creating blue hydrangeas
Love hydrangeas and want to have the blue flowers? Coffee grounds may be the key to that beautiful blue hue you’re after. “The flower color of many hydrangea species is dictated by the pH of the soil,” says Lennick. Coffee is considered acidic—but coffee grounds are often considered to have a neutral pH. There is a debate among gardeners about whether coffee grounds are the answer for modifying the soil composition to get the sought-after blue color. Now, if your hydrangeas have a powdery mildew on the leaves, it may be because the plant has a fungus.
Pro tip: You may want to do a test in your garden before adding coffee grounds to all your hydrangeas. “It’s important to note that the effect of coffee grounds on the color of hydrangeas can vary, depending on the soil composition and other factors,” shares Ro.
Providing food for beneficial worms
If you have a compost bin, you may also be interested in investing in a worm bin for vermicomposting. This is where you feed your produce scraps to your “pet” worms, who eat and break down different leftover veggies and fruit. This leaves you with rich, natural fertilizer. “Worms can benefit from coffee grounds because they provide a source of nitrogen and can help to increase the nutrient content of the vermicompost,” says Ro. Plus, coffee grounds can help increase the moisture-holding capacity of the vermicompost, she adds.
Pro tip: Before you start tossing your coffee grounds into your worm bin each morning, opt for moderation. Ro says it’s important to maintain a balance in there. Too much of one ingredient can affect the composition of the compost and the health of the worms.
Deodorizing the microwave
If these appliances have taken on an odor, used coffee grounds can help. “Coffee grounds can be used to clean and deodorize stinky microwaves,” says Lennick. “It’s a safe, effective and free way to clean.”
Pro tip: Cleaning with used coffee grounds is simple and straightforward. “Apply a small amount of coffee grounds with a damp cloth and then wipe clean a few minutes later,” says Lennick.
Scrubbing pots and pans
If you have tough, hard-to-remove stains caked on your pots or pans, this is one of the handiest uses for used coffee grounds. “The abrasive nature of coffee grounds makes them useful for scrubbing stuck food from pots, pans, grills and griddles,” says Lennick.
Pro tip: Sprinkle the coffee grounds directly onto the stain and then start scrubbing. Certain types of material or surfaces should be avoided. “Do not use it on porous surfaces, as it may cause stains,” Lennick says
Cleaning the kitchen sink
If you notice that your kitchen sink needs a good scrub, and you want to avoid harsh chemicals, used coffee grounds may just be your answer. “Spent grounds can also be used to clean your kitchen sink instead of chalky products that may leave behind a white film,” explains Stacy Savage, founder & CEO of Zero Waste Strategies. “This also reduces the levels of toxicity in your home or office kitchenette areas, as your cleaning habits start to shift away from industrial-grade products.”
Pro tip: Sprinkle coffee grounds in the sink, and then scrub just as you would using another cleaner. Your sink should be shining in no time.
Flavoring baked goods
One wonderful use for coffee grounds that you may not have considered is baking. “Coffee grounds can be used as an ingredient in baked goods like cookies, muffins, scones or even granola to add a delicious coffee flavor,” says Lennick. “They are especially good in brownies, as they complement chocolate and deepen the rich cocoa flavor.”
Pro tip: Use that morning’s coffee grounds the same day you bake. “Fresher is better,” says Lennick. You may need to modify the recipe to account for more liquid. “If your grounds are very wet, you may need to slightly reduce the liquid content of the recipe to accommodate the additional moisture.”
Freshening your garbage disposal
Want to neutralize odors coming from the kitchen drain and want another option aside from your old go-to baking soda? Yup, grab those used coffee grounds. “Coffee grounds naturally trap odors,” says Lennick.
Pro tip: “Put some used coffee grounds down the drain and run the grinder for about 30 seconds to clean the inside of the mechanism,” says Savage.
Dyeing clothes
Ever spilled coffee on your favorite white shirt and then spent a ton of time trying to get the spot out? Coffee stains easily, but it also makes a wonderful natural dye for cotton, linen, silk—and even paper. The process is easy and simple too.
Pro tip: “Just take old coffee grounds, steep them in hot water and place lighter-colored fabrics and fibers into the solution for dyeing,” says Savage. “Hang-dry to allow the dye to set.”
Minimizing cellulite
If you’re looking for a natural approach to minimizing cellulite, used coffee grounds could be worth a shot. Coffee grounds contain caffeine, which has been shown to help with cellulite. “Some people believe that the caffeine in coffee grounds may help reduce the appearance of cellulite when applied topically,” says Savage.
Pro tip: Combine coffee grounds either with water or an oil, such as coconut oil, and rub onto an area affected by cellulite, for 10 minutes, two times a week.
Exfoliating your skin
The gritty and coarse texture of coffee granules makes them wonderful as a skin scrubber. Exfoliating keeps skin glowing and healthy, because it’s beneficial to remove dead skin cells and stimulate the skin. Plus, the caffeine in coffee grounds can help stimulate blood flow, which adds a natural glow to the skin.
Pro tip: “Coffee grounds can be mixed with coconut oil or honey to create an exfoliating scrub that may help remove dead skin cells and improve circulation,” says Savage.
Making a face mask or hair scrub
Shampoo can leave buildup and residue in your hair after continued use. Giving your scalp a massage while exfoliating with coffee grounds can help remove that and help stimulate hair growth—thanks to caffeine, which is known to help with hair growth as well as stimulate blood flow. According to Savage, “Coffee grounds can be used as a hair mask to potentially stimulate hair growth and add shine.”
Pro tip: Here’s the formula you need: “A tablespoon of coffee grounds mixed with an equal amount of olive oil or coconut oil creates a moisturizing face mask or stimulating scalp scrub,” says Lennick.
Minimizing under-eye circles
Coffee grounds are high in antioxidants, which help fight free radicals and are also beneficial for the skin. Caffeine not only has anti-inflammatory properties; it also can stimulate blood circulation when applied below the eyes to minimize dark circles and puffiness. “Some people use coffee grounds as an eye mask to potentially reduce puffiness and dark circles,” shares Savage.
Pro tip: Mix coconut oil or water with used coffee grounds, gently rub below your eyes for around 10 minutes and then rinse. Consider making this part of your daily beauty-care routine.
Reader’s Digest had an article on genius cooking hacks—some I never heard of. I thought I’d share!
Use an empty water bottle to separate egg whites and yolks
Crack an egg into a shallow bowl, then hold the mouth of the bottle near the yolk and gently squeeze. When you release the squeeze, the yolk will be sucked out, and you can deposit it into another bowl.
Cut corn with a Bundt pan
To remove corn from the cob quickly, stand the cob upright in the center of a Bundt pan. Holding the top of the cob steady, stroke a chef’s knife downward along the sides to remove kernels. Scrape the cob with the back of the knife to release juices. Kernels and juice collect in the Bundt pan—meaning one less mess for you to clean up.
Skip the pasta rinse
Rinsing noodles washes away flavor and natural starch, which helps yummy sauce stick. It’s why some recipes suggest saving pasta water to use in sauce. Instead, skip the wash and spread drained pasta on a pan to cool.
Don’t cry over a broken cake…
Instead, make a trifle by layering salvaged cake pieces with fresh whipped cream and fruit in a pretty glass bowl, advises Tamar Adler, chef and author of An Everlasting Meal: Cooking with Economy and Grace.
Keep counters clean with a baking sheet
Place all ingredients on an empty baking sheet prior to prepping them. (This will help you catch spills and avoid wasting time hunting for an item as you cook.)
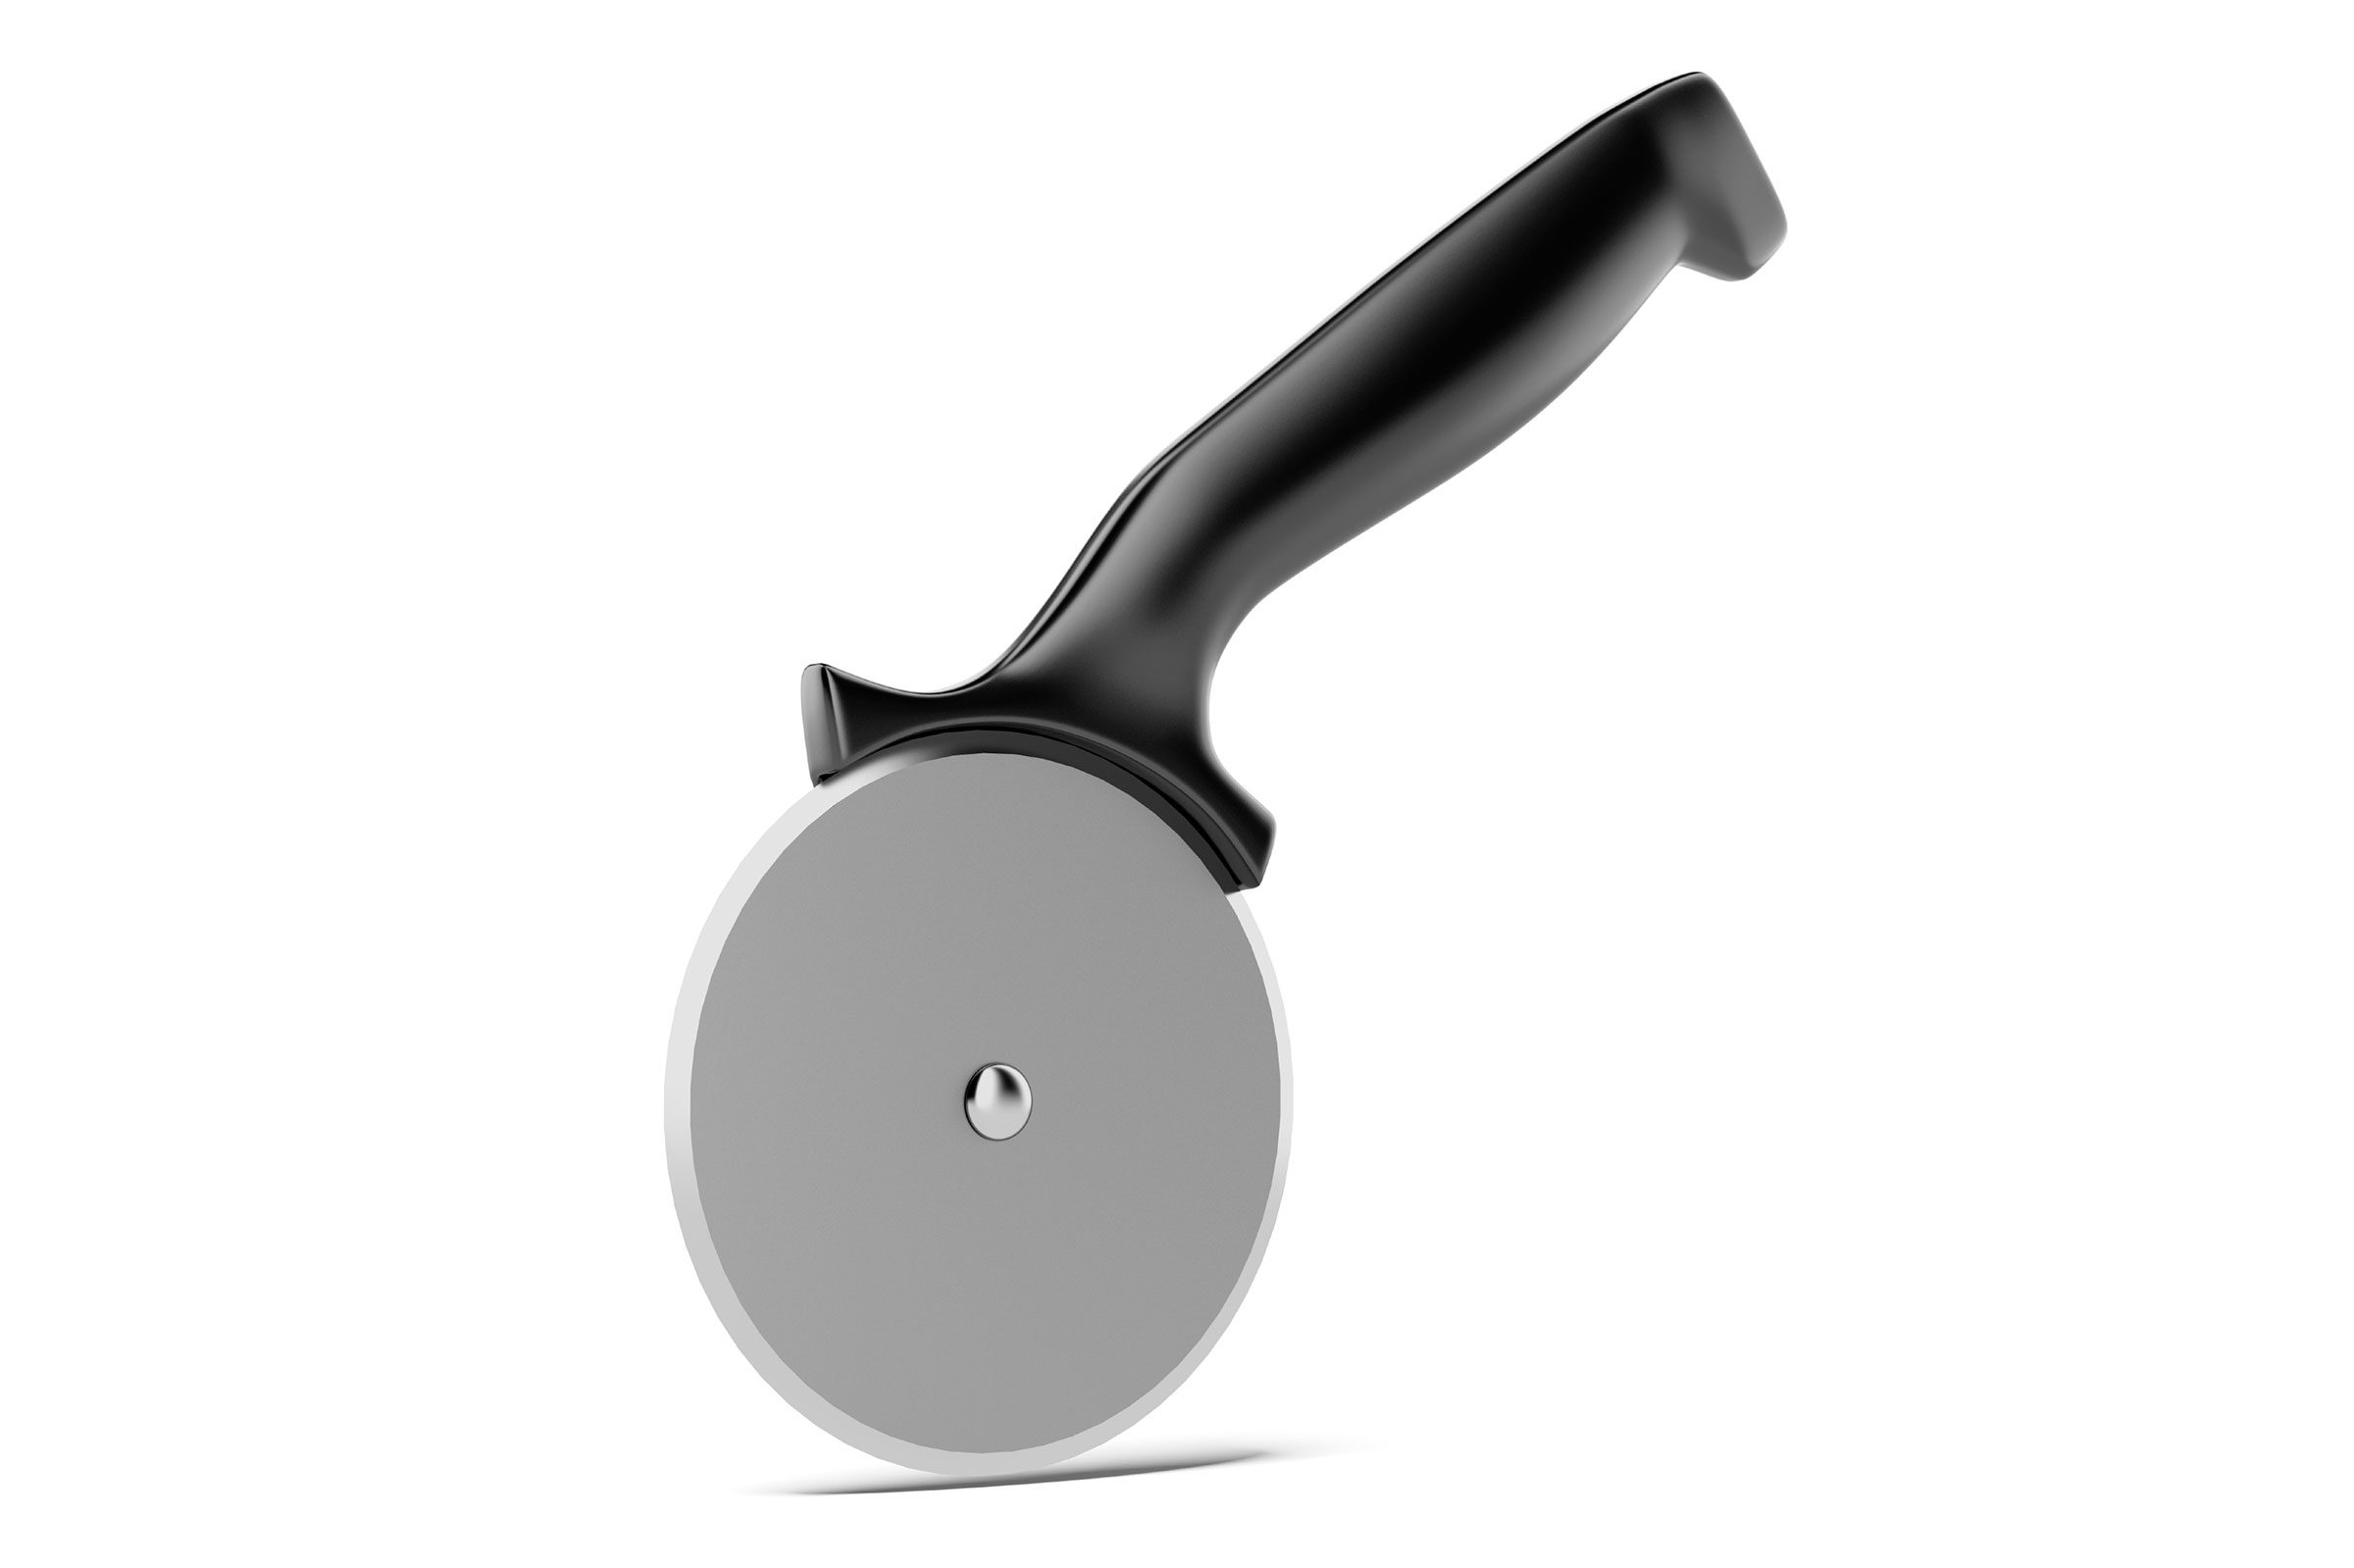
Turn in the chopping knife: Instead, roll over herbs like parsley and cilantro with a pizza wheel for quick and safe slicing. A pizza wheel also effortlessly chops foods like pancakes and pasta for small children
Use a countertop bowl for easy garbage
As you cook, toss scraps, eggshells, and other garbage into a large bowl. This will contain messes and save time if a trash can isn’t readily accessible. Line the bowl with a plastic bag to make cleanup even easier.
For easier hard-boiled eggs, salt is your BFF
Want the shells of hard-boiled eggs to come off in big chunks instead of a million tiny pieces? Add a teaspoon of salt to the cooking water before putting in the eggs.
Clean a blender sans sponge
Fill it one-third full with warm water and a few drops of dishwashing liquid, recommends Woman’s Day. Run it for ten seconds. Rinse and dry.
Whip up gourmet bread crumbs in a pinch
Got extra burger or hot dog buns? Tear into pieces and freeze in a zipper-top bag. Ten to 20 pulses in a food processor will transform them into ready-to-use bread crumbs—no thawing necessary.
Juice a lemon with a microwave
Zap a lemon for ten seconds to break down cells and make the juice flow faster, suggests Laurent Tourondel, chef and partner at Arlington Club in New York City. This is good to remember when trying to squeeze out as much juice as possible for a vinaigrette.
For better pie crusts, use a cheese grater
A cheese grater makes quick work of piecrusts and biscuits. Instead of cutting the butter into the flour, simply grate a stick of frozen butter, and then toss the shreds with flour until a crumbly mixture forms, says Beth Moncel, creator of budgetbytes.com.
Flavor sauces and stews with leftover wine
Freeze leftover wine in ice cube trays (eight cubes = one cup) to add flavor to sauces and stews. White and sparkling work best in creamy or clear and brothy soups (think chowder and simple vegetable), while red wine goes well with tomato or beef-based varieties (think chili). Add a few generous splashes per portion.
Flip natural varieties of peanut butter upside down
This position allows the pool of oil near the lid to move through the rest of the jar and make the peanut butter creamier (and to skip messy stirring). Just make sure the cap is screwed on tight to avoid a greasy pantry shelf.
Use your porch to refrigerate
If your fridge is full because you’re hosting a party and the temperature is 40°F or below, place hardy perishables (like fruits and vegetables) in a cooler outside near the back door. Doing so will free up a lot of extra shelf space while still keeping food cold.
Leftover Doritos? Think outside the chip bag
Smash a handful of chips, stuff into a clean pepper mill, and grind away onto everything from mac and cheese to broccoli.
Make friends with your kitchen scissors
Use them to chop cooked or tender raw vegetables (especially greens) right in the bowl or pan.
Halve cherry tomatoes fast
Save time on your next salad: Find two similarly sized storage container lids. Place cherry tomatoes on top of one, then firmly hold the other lid on top of the tomatoes. Use a very sharp knife to slice through the entire bunch at once.
Apple cutters slice potatoes
You’ll have perfectly sized pieces to bake as wedges.
Soften ice cream hard as a brick
Heat a sharp knife under warm water, then use it to make one-inch-deep cuts in a grid formation, spacing the lines about an inch apart. This increases your ice cream’s exposed surface area, speeding up the thawing process (similar to the beef trick). Run a scooper under warm water, and easily serve up each section.
Defrost meat last minute
Thank high school science for this neat trick: Remember, metal conducts heat. Place meat in a plastic bag, then put it on top of an upside-down aluminum pot. Fill another pot with room-temperature water, and set it on the meat. In five to ten minutes, your meat will be defrosted.
Cut away the mold
Before you toss suspect-looking leftovers, know this: firm foods are more likely to be salvageable than soft foods. Mold generally can’t penetrate deep into hard cheeses like Asiago and cheddar, so it’s OK to cut off about an inch. The same goes for firm produce like bell peppers and carrots. However, chuck moldy-looking foods with high moisture content—yogurt, soft cheeses, cooked leftovers, and bread. Porous foods are likely to be contaminated beneath the surface.
Chop strawberries with an egg slicer
Use an egg slicer to quickly chop strawberries for fruit salads and desserts. Or cut avocados for sandwiches and uniform mozzarella slices for salads and pizza.
Twist open a mason jar for easy fried eggs
For perfectly round fried eggs (handy for breakfast sandwiches), heat a pan and spritz Mason jar rings with cooking spray. Place the rings on the pan, and slowly drop one cracked egg into each of the rings. Cook for about 5 minutes for a medium yolk. Use tongs to remove the Mason jar rings, and serve.
Whip up French toast in your microwave
Rub a pat of butter on the bottom of a mug; fill it to the top with chopped bread. In a separate cup, mix one egg, three tablespoons of milk, and a sprinkle of cinnamon. Pour the mixture into the mug, and microwave for one minute.
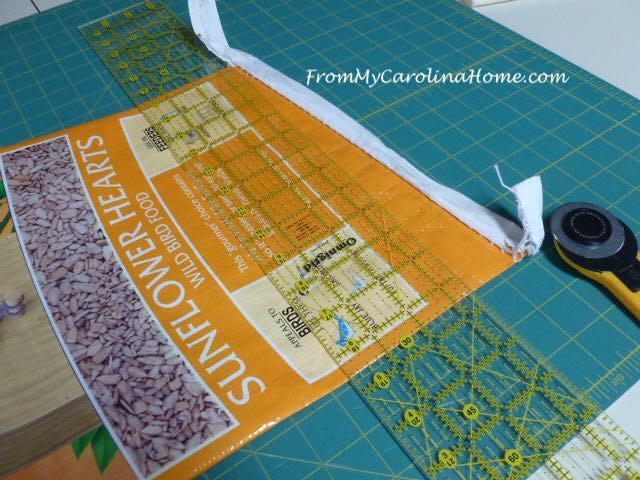
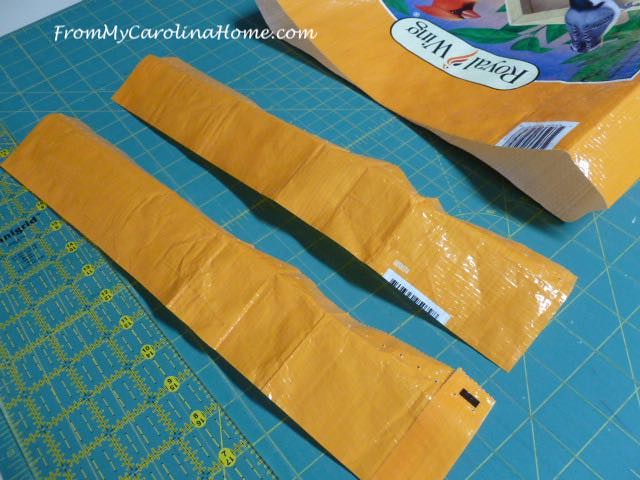
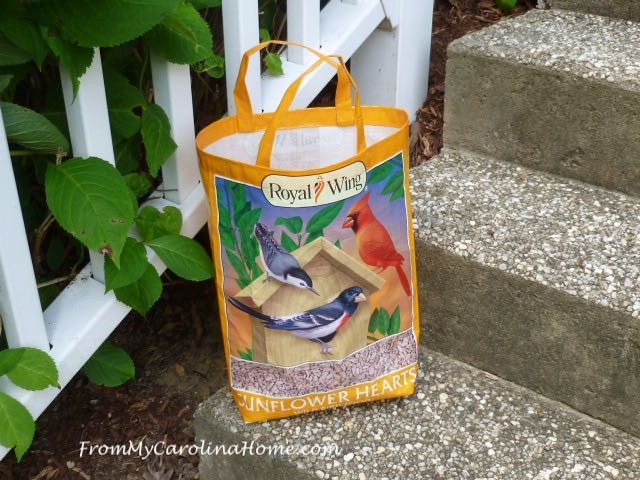
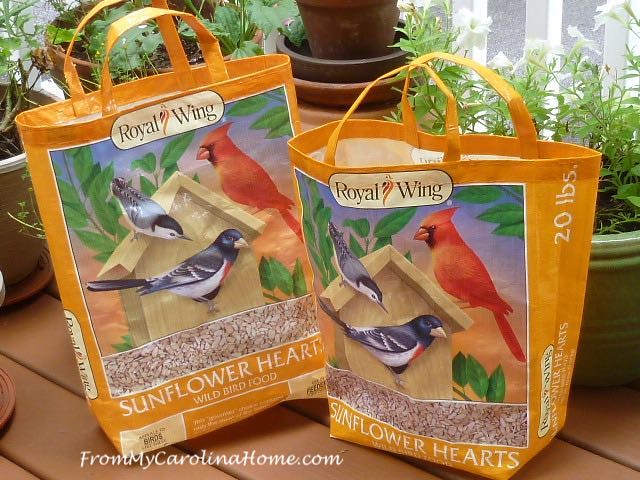
I ran across a wonderful and detailed tutorial on how to make reusable bags from bird seed bags! The tutorial shows a larger bird seed bag, but these bags can be made using smaller quantity bags as well.
The website is From My Carolina Home.
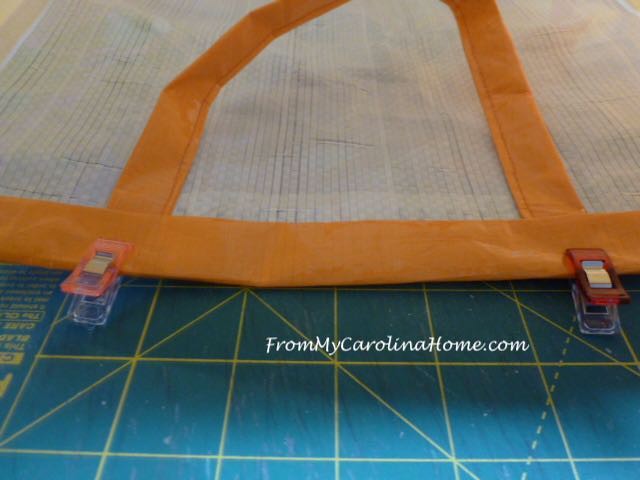
Begin by cutting the bottom off the first bag. There are two reasons for this. It makes the bottom square, and cuts off the former stitching that could harbor seed debris and interfere with boxing the corners.
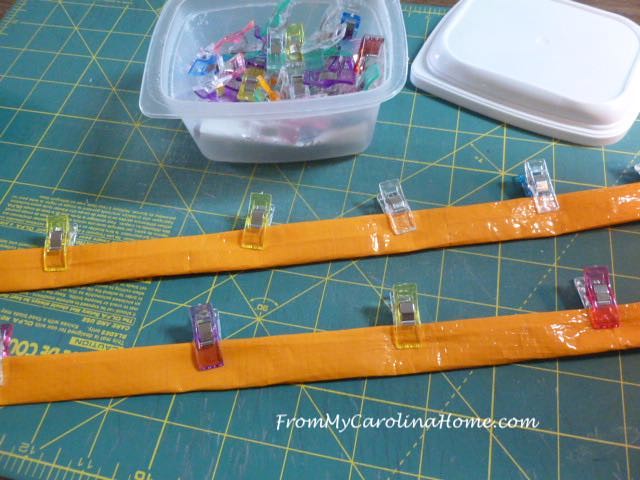
On the top of the bag, cut two strips off, 3-inches wide each.
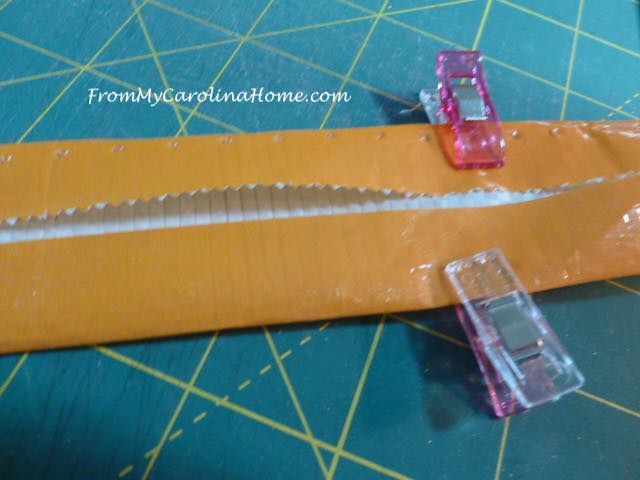
Cut through each one crosswise to create two long strips. Fold the edges to the center.
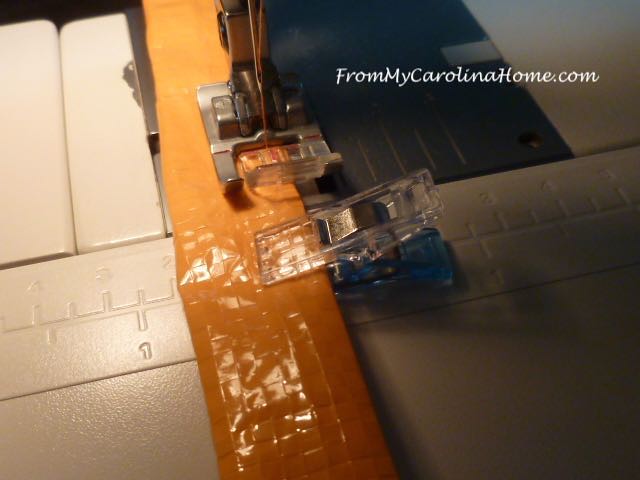
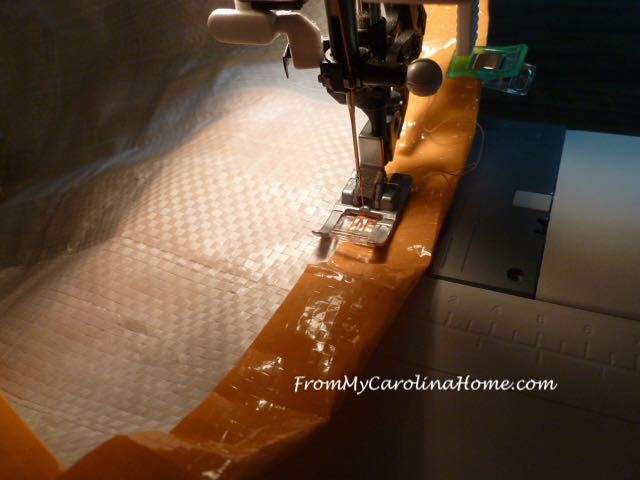
Then fold in half again, enclosing the raw edges inside the strap. Use clips to hold as pins would leave holes.
Turning to the machine, change the needle to a size 16. I also chose a thicker thread than the kind I usually use for piecing. Next, lengthen your stitch length. On my machine, I believe the 2.5 setting gives me 12 stitches per inch, and the 4.0 setting is more like 8 stitches per inch. If you don’t do this, the closer stitching may perforate the bag too closely in a line and weaken the stitching.
Stitch the handles near the double-folded edge to secure the layers together. Repeat with the other handle.
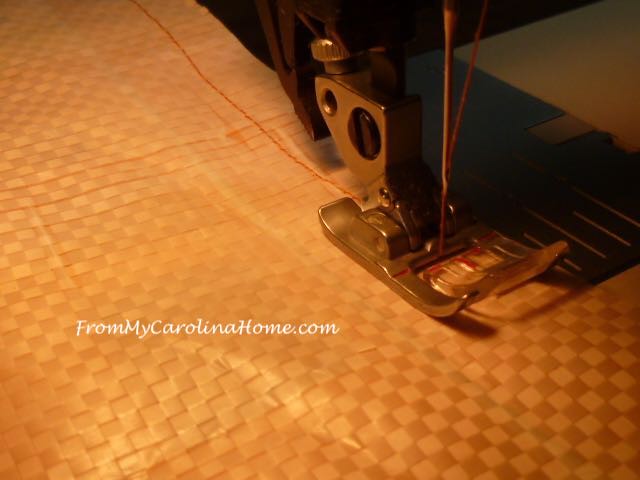
Turn the bag inside out, and stitch across the bottom.
Fold up that end, and stitch again for strength.
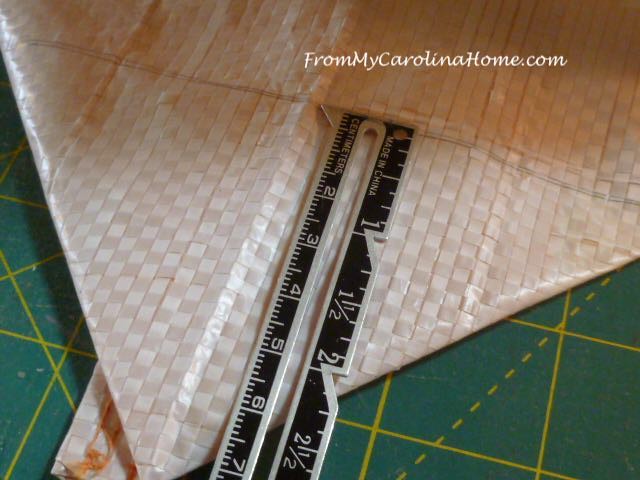
Box the corner 3 inches.
On the inside top, fold the top edge down one inch, then fold again one more inch. Insert the handle under the fold, with each end 3 inches from the center.
Stitch all the way around on the lower edge.
Fold the handle up, and stitch again around the top edge.
Voila, all done. This first bag took under an hour to make.
I found this on Reader’s Digest. It was updated May 22, 2023.
Make a face mask
Take a moment to pamper yourself! That’s right: You can use a banana as an all-natural face mask that moisturizes your skin and leaves it looking and feeling softer. Mash up a medium-size ripe banana into a smooth paste, then gently apply it to your face and neck. Let it sit for 10 to 20 minutes, then rinse it off with cold water. Another popular mask recipe calls for 1/4 cup plain yogurt, 2 tablespoons honey and 1 medium banana.
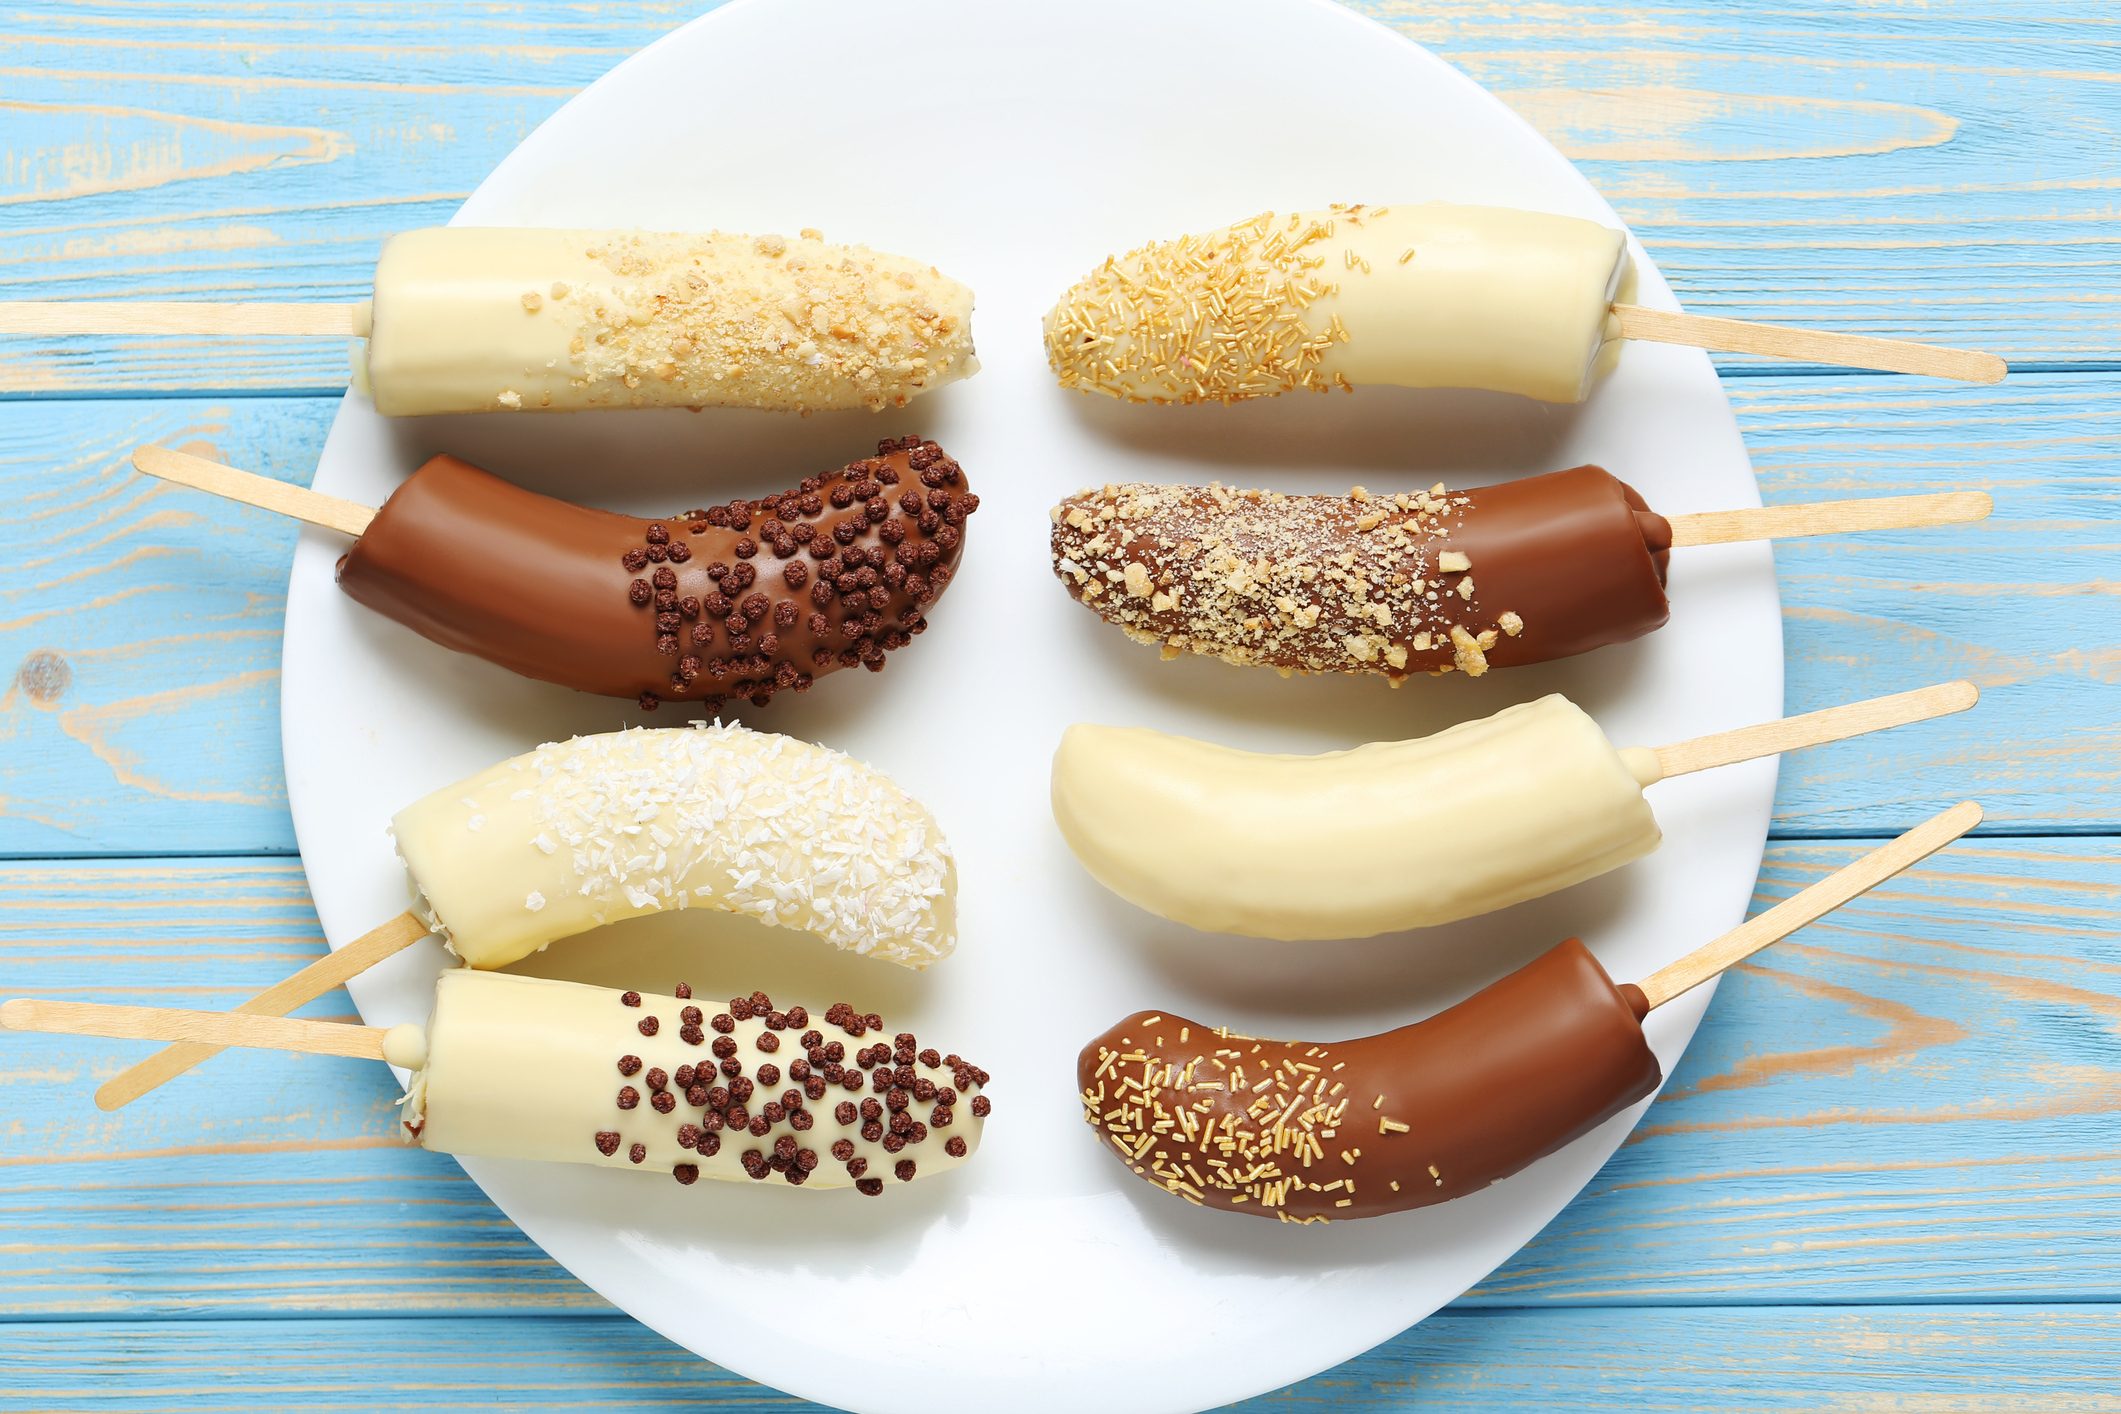
Eat a frozen “banana-sicle”
As a treat for friends and family, peel and cut four ripe bananas in half (across the middle). Stick a wooden ice-cream stick into the flat end of each piece. Place them all on a piece of wax paper, and then put it in the freezer. A few hours later, serve them up as simply yummy frozen banana-sicles.
If you want to go all out, quickly dip your frozen bananas in 6 ounces melted butterscotch or chocolate morsels (chopped nuts or shredded coconut are optional), then refreeze.
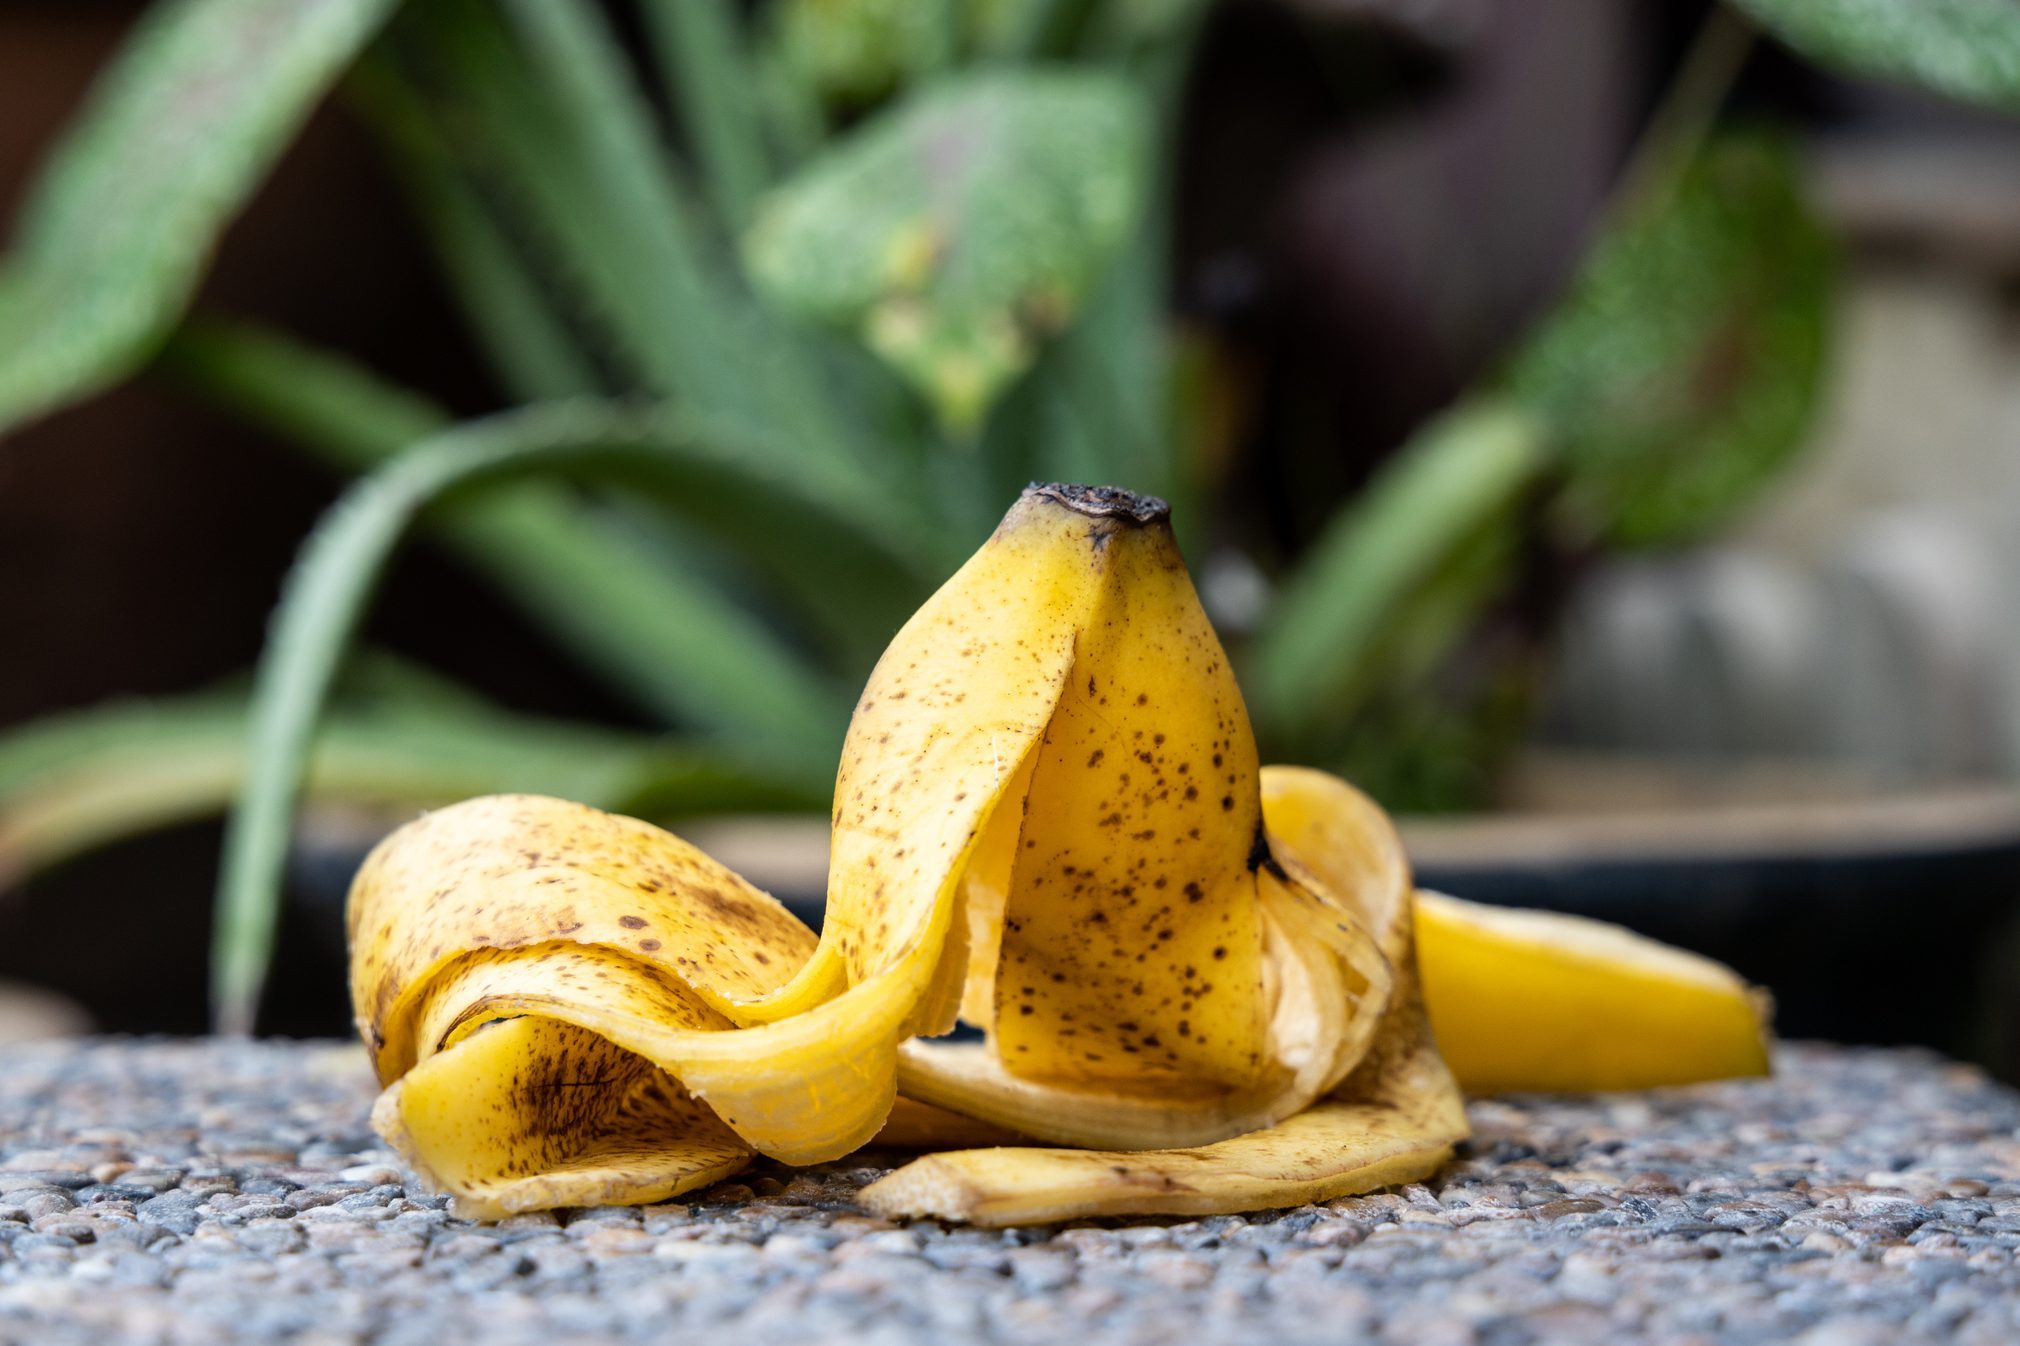
Polish silverware and leather shoes
It may sound a bit like a lark, but using a banana peel is actually a great way to put the shine back into your silverware and leather shoes. First, remove any of the leftover stringy material from the inside of the peel, then just start rubbing the inside of the peel on your shoes or silver. When you’re done, buff up the object with a paper towel or soft cloth. You might even want to use this technique to restore your leather furniture. Test it on a small section first before you take on the whole chair.
Tenderize a roast
Banana leaves are commonly used in many Asian countries to wrap meat as it’s cooking, to make it more tender. Some folks say the banana itself also has this ability. So the next time you fear the roast you’re cooking will turn tough on you, try softening it up by adding a ripe, peeled banana to the pan.
Brighten up houseplants
Are the leaves on your indoor plants looking dingy or dusty? Don’t bother misting them with water; that just spreads the dirt around. Rather, wipe down each leaf with the inside of a banana peel. It’ll remove all the gunk on the surface and replace it with a lustrous shine.
Deter aphids
Are aphids attacking your rosebushes or other plants? Bury dried or cut-up banana peels an inch or two deep around the base of the aphid-prone plants, and soon the little suckers will pack up and leave. Don’t use whole peels or the bananas themselves, though; they tend to be viewed as tasty treats by raccoons, squirrels, gophers, rabbits and other animals, who will just dig them up.
Use as fertilizer or mulch
Banana peels, like the fruit itself, are rich in potassium, an important nutrient for both you and your garden. Dry out banana peels on screens during the winter months. In early spring, grind them up in a food processor or blender and use them as mulch to give new plants and seedlings a healthy start.
Many cultivars of roses and other plants, like staghorn ferns, also benefit from the nutrients found in banana peels; simply cut up some peels and use them as plant food around your established plants.
Assist with first aid
Banana peels have anti-inflammatory properties, which means they are great when it comes to bug bites, minor scrapes, poison ivy and sunburn. All you have to do is put the banana peel on the affected area and press it like you would a cool compress. You can repeat this process until you feel some relief.
Ripen an avocado
Are you an avocado enthusiast? Though you could eat all the avocado toast and guacamole in the world, sometimes avocados just don’t ripen fast enough. In order to satisfy your avocado craving for all your cooking needs, use a banana to help speed up the ripening process.
Bananas release ethylene, which triggers ripening in avocados. Simply place a banana in a brown paper bag and roll it up with an avocado. Check it daily until it is ripe enough.
Slough off dry skin
In order to keep your skin feeling smooth and radiant (without learning all the professional spa etiquette), create a body scrub with a banana. There are many different variations, depending on the kind of scrub you need. For a gentle scrub, you can mix a mashed banana with brown sugar. For a medium scrub try mixing in oatmeal or sea salt. If you really need a heavy-duty scrub, grind apricot pits at home and add it to your banana to really dig deep into your pores.
Remove warts
Warts are stubborn and gross, so needless to say, nobody wants one. A natural way you can go about removing one is by using a banana peel. Cut a piece of ripe banana peel to cover the affected area, placing the inside next to your skin, and keep it there overnight by using some medical tape. In the morning you should notice some improvement, and you can repeat the process nightly until it’s gone!
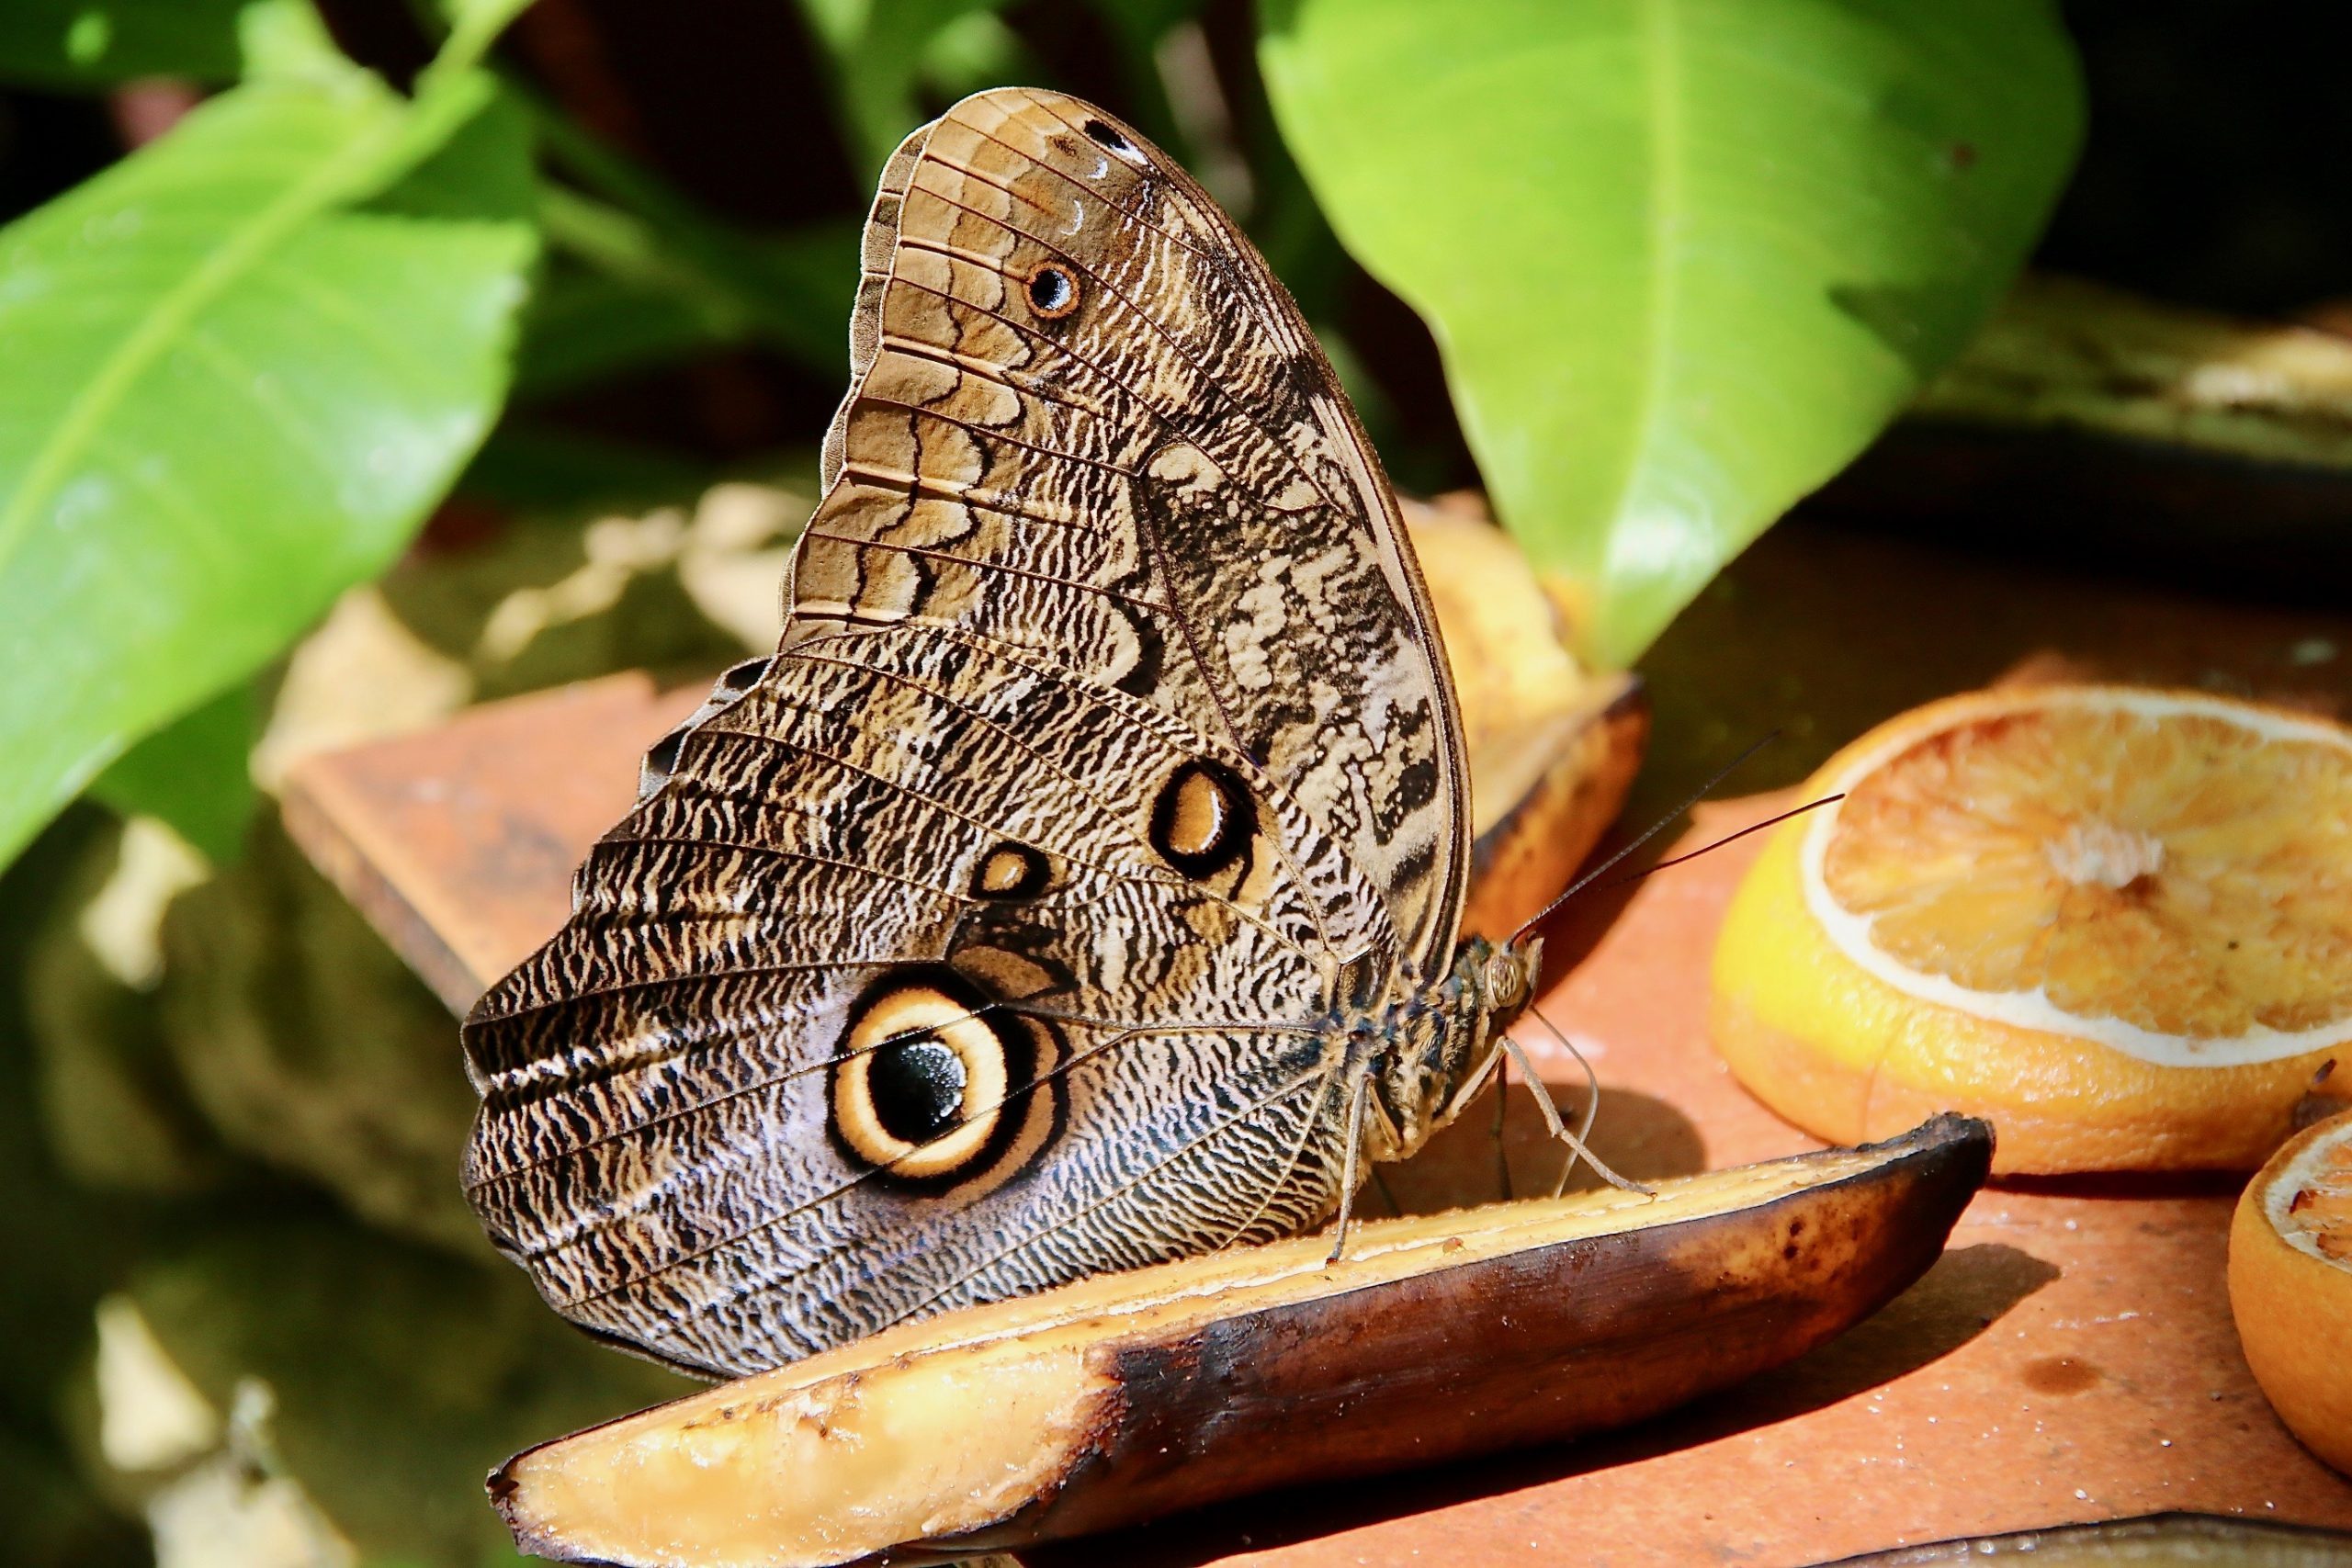
Attract butterflies and birds
Bring more butterflies and various bird species to your backyard by putting out overripe bananas (as well as other fruits such as mangos, oranges and papayas) on a raised platform. Punch a few holes in the bananas to make the fruit more accessible to the butterflies. Some enthusiasts swear by adding a drop of Gatorade to further mush things up.
The fruit is also likely to attract more bees and wasps as well, so make sure that the platform is well above head level and not centrally located. Moreover, you’ll probably want to clear it off before sunset, to discourage visits from raccoons and other nocturnal creatures.
Add to compost pile
Here’s a great gardening tip: With their high content of potassium and phosphorus, whole bananas and peels are welcome additions to any compost pile, particularly in so-called compost tea recipes. The fruit breaks down especially fast in hot temperatures. But don’t forget to remove any glued-on tags from the peels, and be sure to bury bananas deep within your pile (otherwise they may simply turn out to be a meal for a four-legged visitor).
Whiten teeth on the cheap
Everyone wants pearly whites, but do you really want to spend all that money on treatments? Banana peels contain citric acid, which will help lighten surface stains on your teeth. For natural teeth whitening at home, after giving your teeth a good brush, simply rub the banana peel on the surface for about two minutes every day. Your smile will not only be whiter, but brighter!
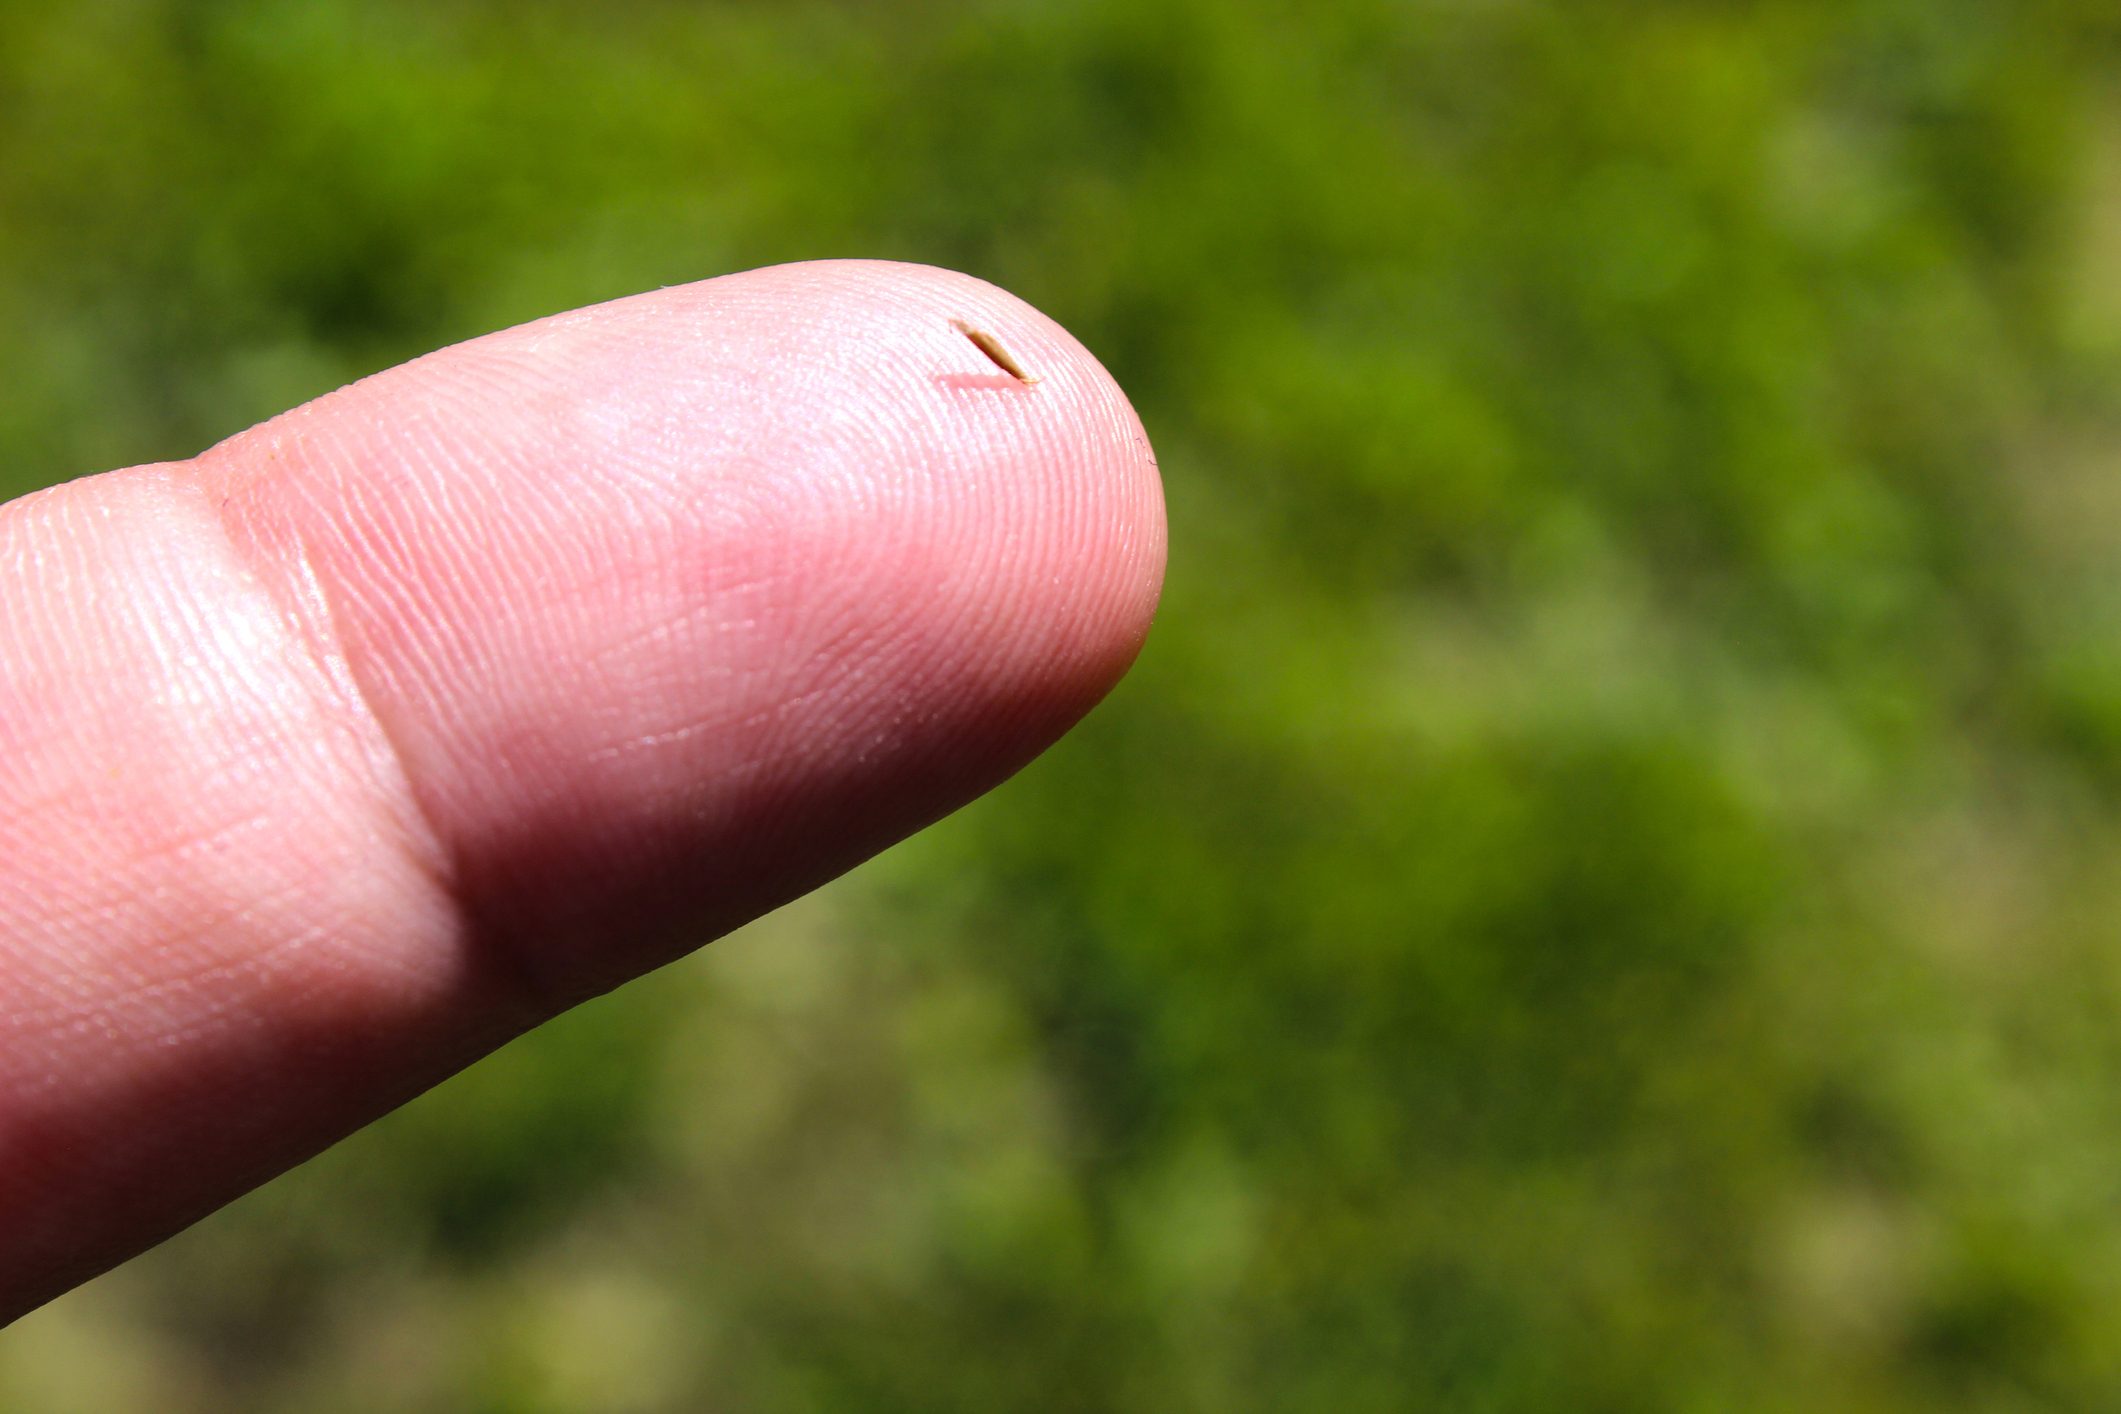
Get rid of splinters
Splinters can be a real pain, literally and figuratively. The natural enzymes in banana peels can help loosen splinters that just don’t seem to want to get out of your skin. Press the inside of the peel on your skin for up to 30 minutes, and it will help move the splinter to the surface for an easy plucking.
Make banana “ice cream”
If you don’t have the time or calories to spare, try making ice cream out of bananas. All you have to do is freeze your peeled bananas and blend them in a food processor or blender. The result is an ice-cream-like consistency and a satisfied craving. Try adding some peanut butter or shredded coconut as toppings.
Create a dog treat
Dogs love human food, but most of the time our cherished pooches cannot digest what we eat. Bananas, however, are foods that our pets can enjoy. They are high in fiber, magnesium and potassium. Mash up a banana and add it to your dog’s favorite food so they can chow down.
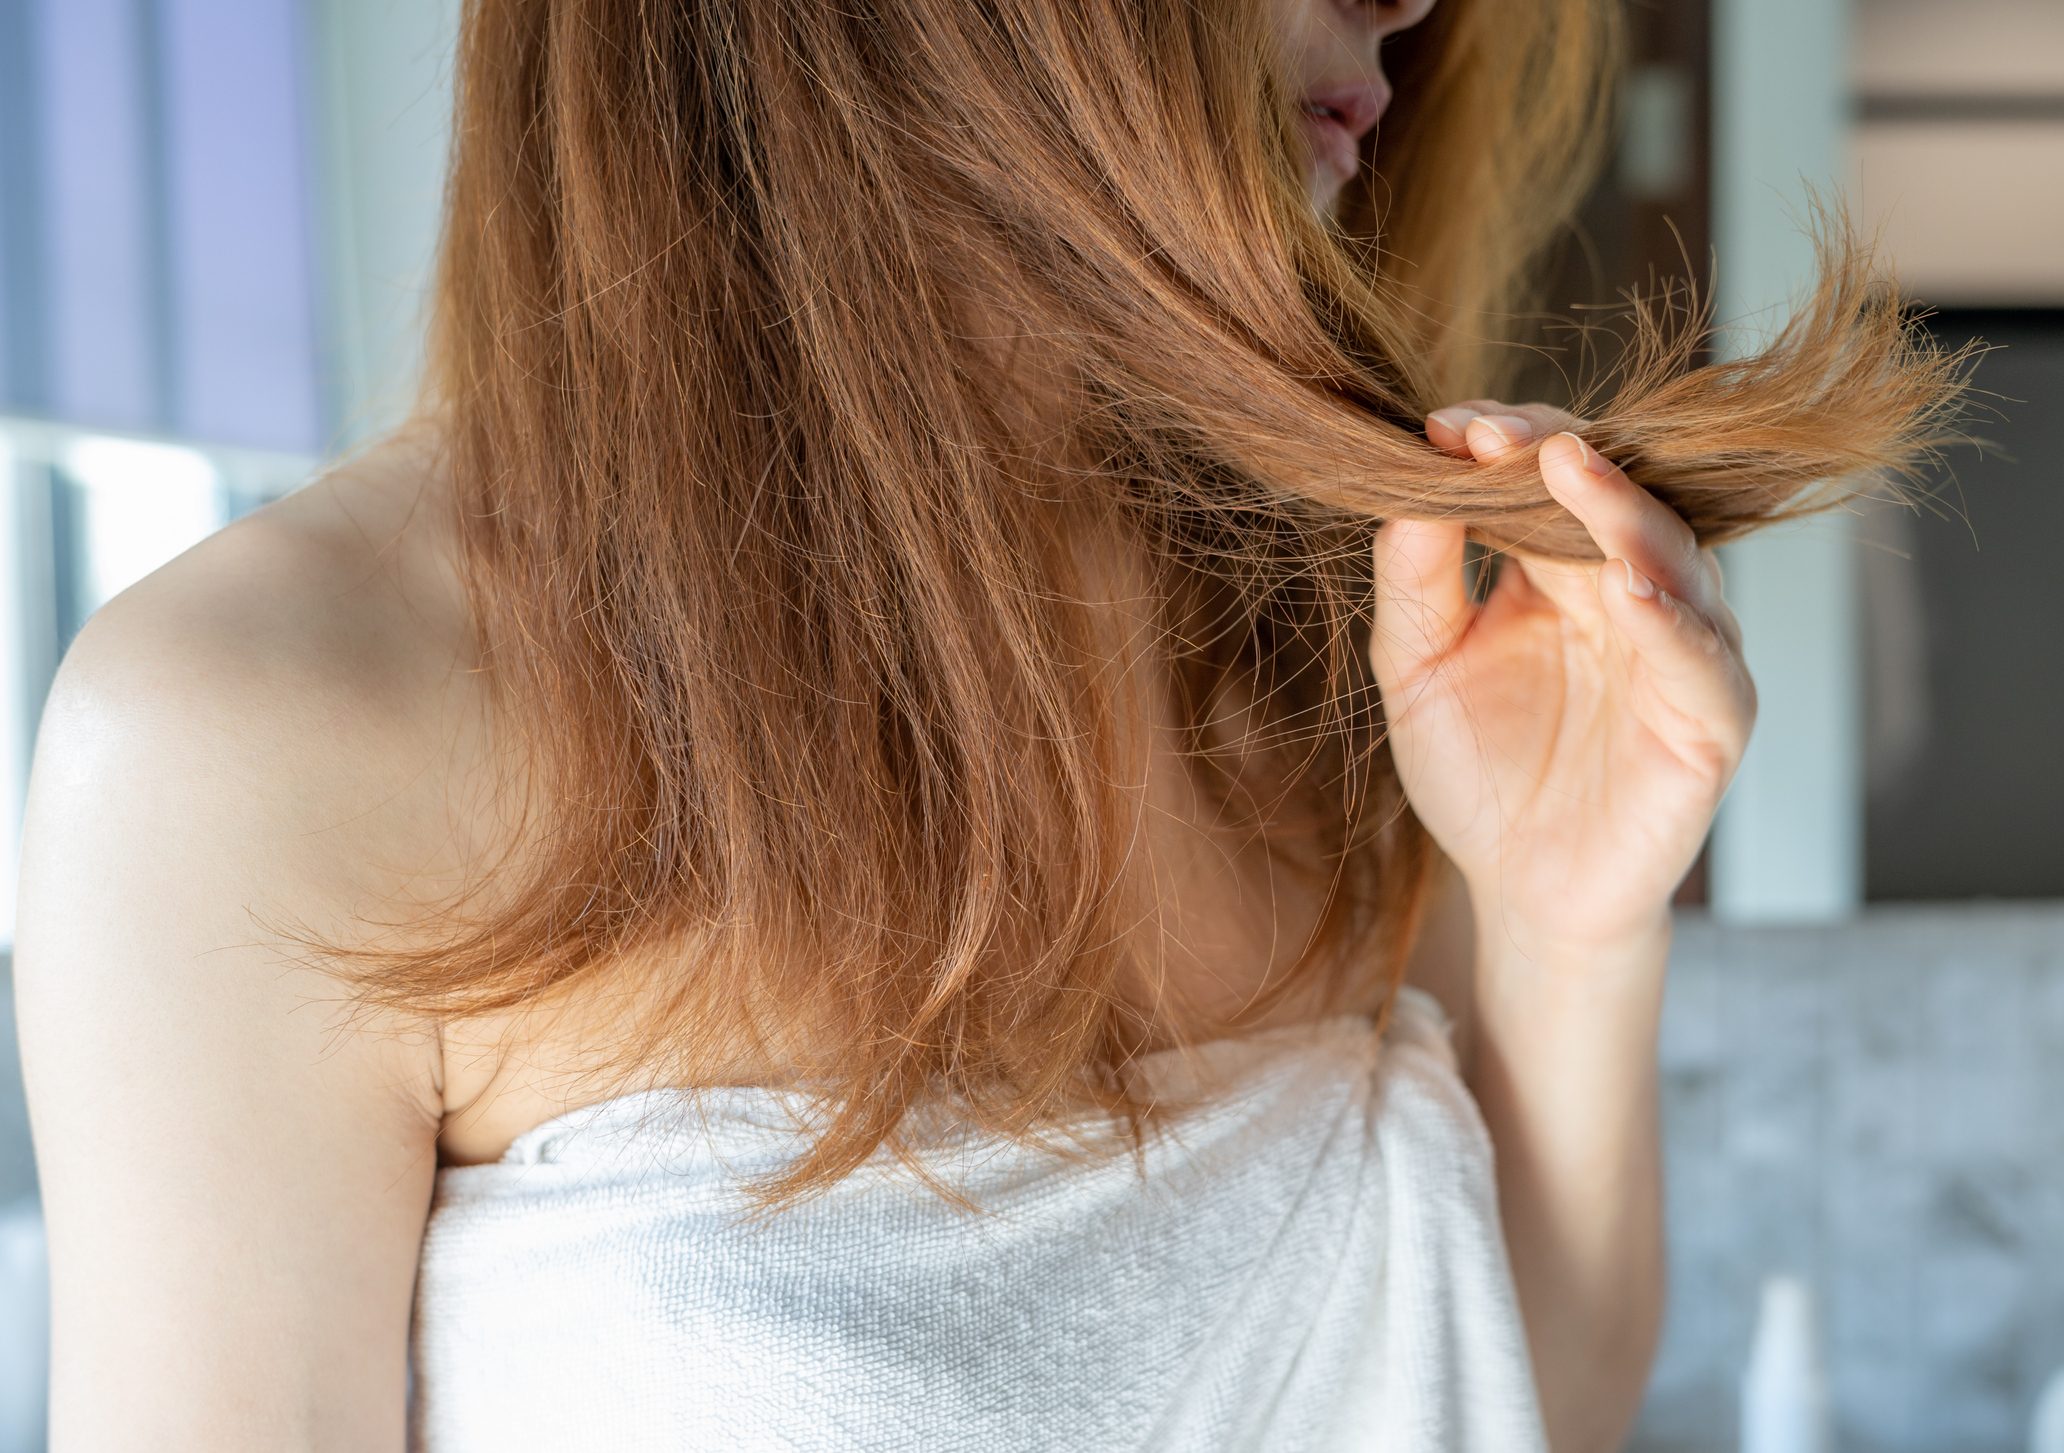
Restore dry hair
Bananas are great ways to combat that stringy and brittle feeling. To make a banana hair mask, puree one to three really ripe bananas (depending on your hair length) and then massage it throughout your scalp to your ends. Let it sit for 15 minutes, then rinse it in the shower followed by a shampoo.
Ease heartburn
Bananas are an alkaline fruit, which means they may help neutralize acid in the stomach. You can eat bananas regularly as a home remedy for heartburn and GERD. Add a banana to your breakfast to help coat the stomach for the rest of the day.
Prevent a scratched CD from skipping
Is your favorite DVD or CD playlist for the car scratched? Gently rub the scratched part of the disc with the inside of the peel in a circular motion. Wipe off any residue with a soft cloth and then shine it with some glass cleaner. The wax in the banana peel may help fill in the scratches so you can enjoy your treasured disc once more.
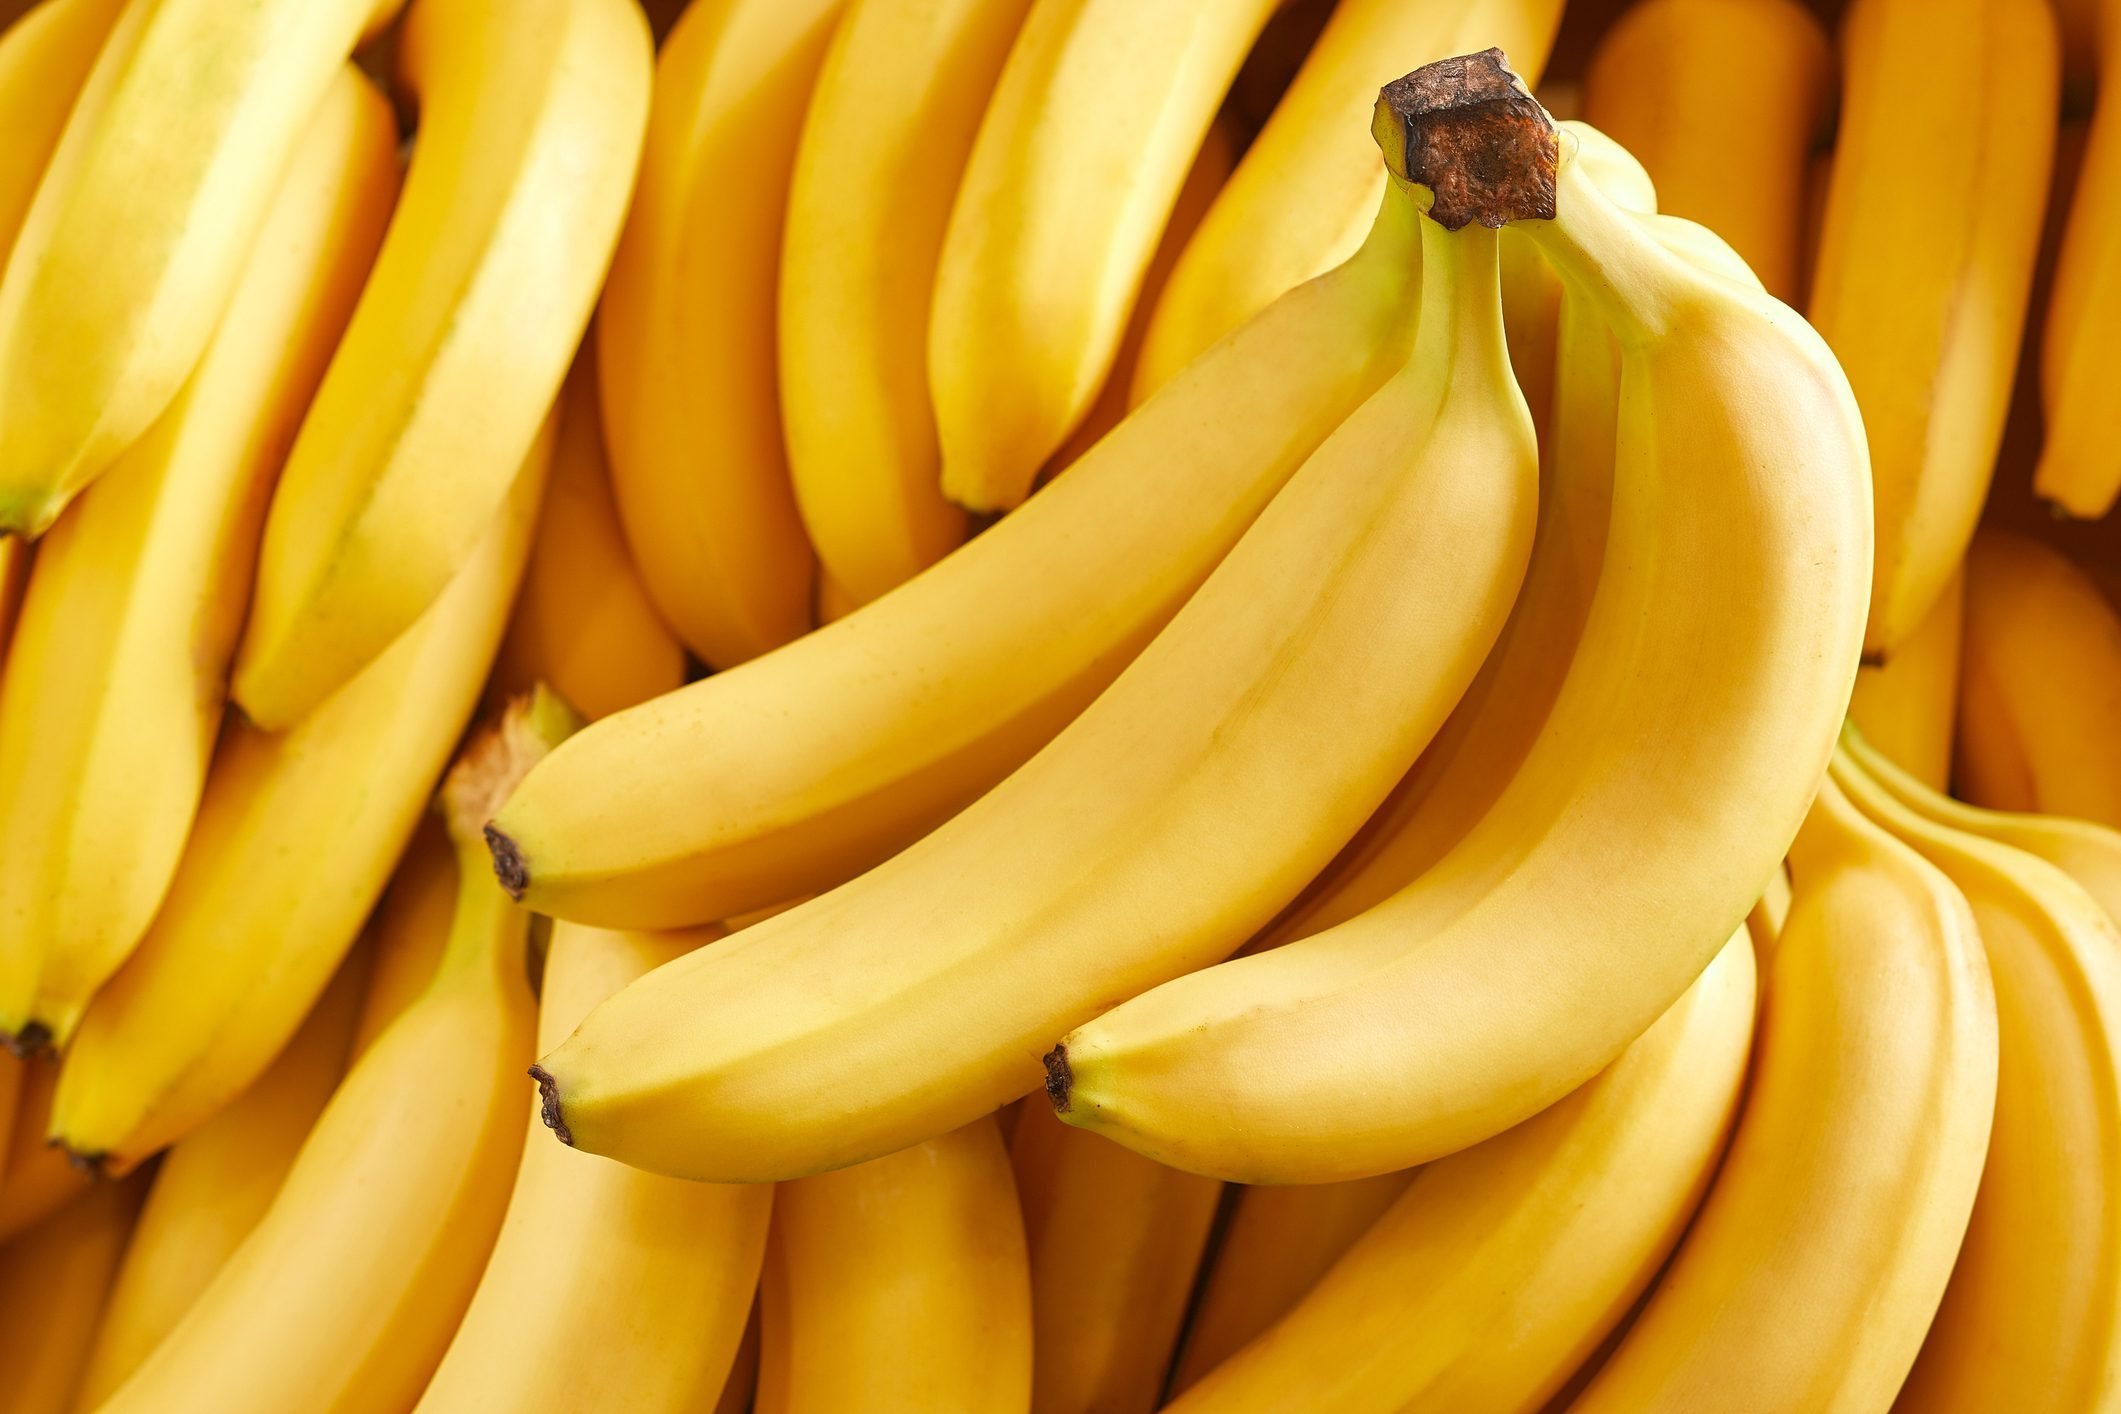
With all these cool banana hacks, be sure you eat at least some of the bananas you’re buying!
The long red tapers you used at last night’s candlelit dinner were a beautiful sight until you saw the candle wax drippings left in the candle holders. Luckily, fixing this issue is one of many Vaseline uses. Next time, apply petroleum jelly to the insides of the holders before you put the candles in. The wax will pop out for easy cleaning.
Lift Lipstick Stains
You set the table at that lovely dinner party with your favorite cloth napkins, but your girlfriends left their mark all over them. Now dotted with lipstick stains, those napkins may be headed for the trash. But try this first. Before you wash them, blot petroleum jelly on the stain. Launder as usual and hopefully you will kiss the stains goodbye.
Remove Chewing Gum From Wood
Did you discover bubble gum stuck under the dining room table or behind the headboard of Junior’s bed? Thanks to these genius Vaseline uses, you can trouble yourself about it no further. Squeeze some petroleum jelly on the offending wad, rub it in until the gum starts to disintegrate, then remove.
Clean Watermarks From Wood
Your most recent party left lots of watermark rings on your wood furniture. To remove water stains from wood, apply petroleum jelly and let it sit overnight. In the morning, wipe the watermark away with the jelly.
Shine Patent-Leather Goods
You’ve got a great pair of patent-leather shoes and a dynamite bag to match. The luster stays longer if you polish the items with petroleum jelly.
Make Leather Jackets Look New Again
You don’t need fancy leather moisturizer to take care of your favorite leather jacket. Petroleum jelly does the job just as well. Apply, rub it in, wipe off the excess, and you’re ready to go.
Stop Battery Terminal Corrosion
It’s no coincidence that your car battery always dies on the coldest winter day. Low temperatures increase electrical resistance and thicken engine oil, making the battery work harder. Corrosion on the battery terminals also increases resistance and might just be the last straw that makes the battery give up. Before winter starts, disconnect the terminals and clean them with a wire brush. Reconnect, then smear with petroleum jelly. The jelly will prevent corrosion and help keep the battery cranking all winter long.
Grease a Baseball Mitt
Got a new baseball mitt, but it’s as stiff as a dugout bench? Soften it up with petroleum jelly. Apply liberal amounts. Work it into the glove, then tie it up with a baseball inside. Do this in the winter, and by the spring you’ll be ready to take the field.
Mask Doorknobs While Painting
You’re about to undertake painting the family room. But do you really want to fiddle with removing all the metal fixtures, including doorknobs? Petroleum jelly rubbed on the metal will prevent paint from sticking. When you’re done painting, just wipe off the jelly and the unwanted paint is gone.
Keep an Outdoor Lightbulb From Sticking
Have you ever unscrewed a lightbulb and found yourself holding the glass while the metal base remains in the socket? It won’t happen again if you remember to apply petroleum jelly to the base of the bulb before screwing it into the fixture. This is an especially good idea for lightbulbs used outdoors.
Stop Squeaking Door Hinges
It’s so annoying when a squeaky door makes an ill-timed noise when you’re trying to keep quiet. Put petroleum jelly on the hinge pins of the door. No more squeaks.
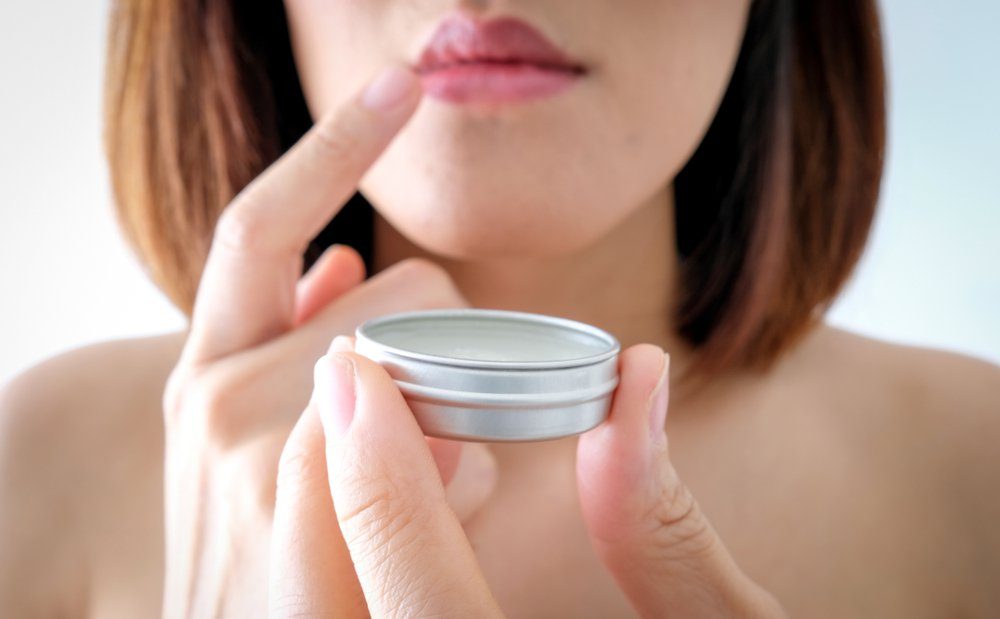
Moisturize Your Lips and More
If you don’t want to pay a lot for expensive lip balm, makeup remover, or even facial moisturizer, then your answer is a tube of petroleum jelly. Some of the best Vaseline uses include soothing lips, plus taking off foundation, eye shadow, mascara, and more. It will even act as a moisturizer on your face.
Remove a Stuck Ring
Wedding ring won’t budge? Trying to get it off can take a lot of tug and pull. Apply some petroleum jelly and it will glide right off.
No More Shampoo Tears
Thinking of buying special no-tears shampoo for your child? Forget about it. If you have some petroleum jelly, you have the solution. Rub a fair amount into your baby’s eyebrows. It acts as a protective shield against shampoo running down into his eyes.
Who knew that vinegar could do so much? Here are some of the many household uses for vinegar—from cleaning to stain treatment to relieving insect bites. Discover vinegar’s versatility, as well as when NOT to use vinegar.
There’s a cheap, safe, and effective product that has hundreds of uses: vinegar! Let’s explore all the ways vinegar is useful, from the uncommon to the common.
Vinegar in the Garden
Defeating garden weeds: Spray white vinegar directly on plants that you want to kill, especially weeds in cracks in your driveway! Spray on a dry, sunny day. Remember that vinegar will kill plants you want to keep as well, so be careful and try to apply it directly on the leaves of the weed you want to get rid of.
Soothing insect bites: Apply full strength vinegar to mosquito or other insect bites to relieve the itching. (Caution: Do not do this if the affected area is raw.)
Insect repellent: Rub a solution of 1 part apple cider vinegar to 2 parts water on your skin to help repel insects. (For sensitive skins, dilute the vinegar further.)
Keeping cut flowers fresh: To extend the life of flowers in a vase, add a few teaspoons of apple cider vinegar to the water, plus a dash of sugar. The acidic vinegar helps to prevent bacterial growth.
White Vinegar and Cleaning
Vinegar is a common ingredient in countless homemade cleaners and is especially helpful for cleaning household appliances.
Coffeepot: Every month, bring a solution of 1 cup of vinegar and 4 tablespoons of baking soda to a boil in teapots and coffeepots to rid them of mineral deposits. To clean drip coffeemakers, fill the reservoir with white vinegar and run it through a brewing cycle. Rinse thoroughly by brewing two cycles with water before using.
Cutting boards: Use white vinegar to disinfect cutting boards, especially those made of wood.
Stovetop: A solution of vinegar and baking soda will easily remove cooking oil from your stovetop.
Oven: For a clean oven, combine vinegar and baking soda, then scrub.
Microwaves: Pour white vinegar into a bowl of water and microwave it for a few minutes, then wipe out.
Dishwasher: Use as a cheap rinsing agent to get your glasses and plates clean. Also, once a year, pour a cup of white vinegar into an empty dishwasher, then run it for a short cycle to get rid of the lime and soap build-up.
Clogged or smelly sink: Pour 1/4 cup of baking soda down the sink, then add 1 cup of vinegar.
Humidifier: Clean the filter on your humidifier by removing it and soaking it in a pan of white vinegar until all the sediment is off.
Tubs and showers: Saturate a cloth with vinegar and sprinkle with baking soda, and then use it to clean fiberglass tubs and showers. Rinse well and rub dry for a spotless shine.
Tile grout: White vinegar is actually safer than chlorine bleach for cleaning grout and caulking in bathrooms and kitchens. Spray, leave for one hour, and then scrub.
Shower curtain: Use a sponge dampened with vinegar to clean shower curtains.
Toilet bowl: Clean and deodorize your toilet bowl by pouring undiluted white vinegar into it. Let stand for five minutes, then flush. Spray stubborn stains with white vinegar, then scrub vigorously.
Windows: Clean windows with a cloth dipped in a solution of one part white vinegar and 10 parts warm water.
Fridge odors: Rid your refrigerator and freezer of bad odors by cleaning the insides with a solution of equal parts vinegar and water, then wiping dry.
Smoke odors on clothes: To remove smoke odors on clothes, hang them above a steaming bathtub filled with hot water and a cup of white vinegar.
Prevent mildew: Wipe down surfaces with vinegar to clean and prevent mildew.
When NOT to use vinegar:
Do not use vinegar on granite or marble countertops.
Avoid using vinegar where there is unsealed grout.
Do not use vinegar on wood surfaces or hardwood floors (or no-wax vinyl floors).
Never use vinegar on your cell phone or computer screen!
Vinegar and Stain Removal
White vinegar is known as an effective stain remover.
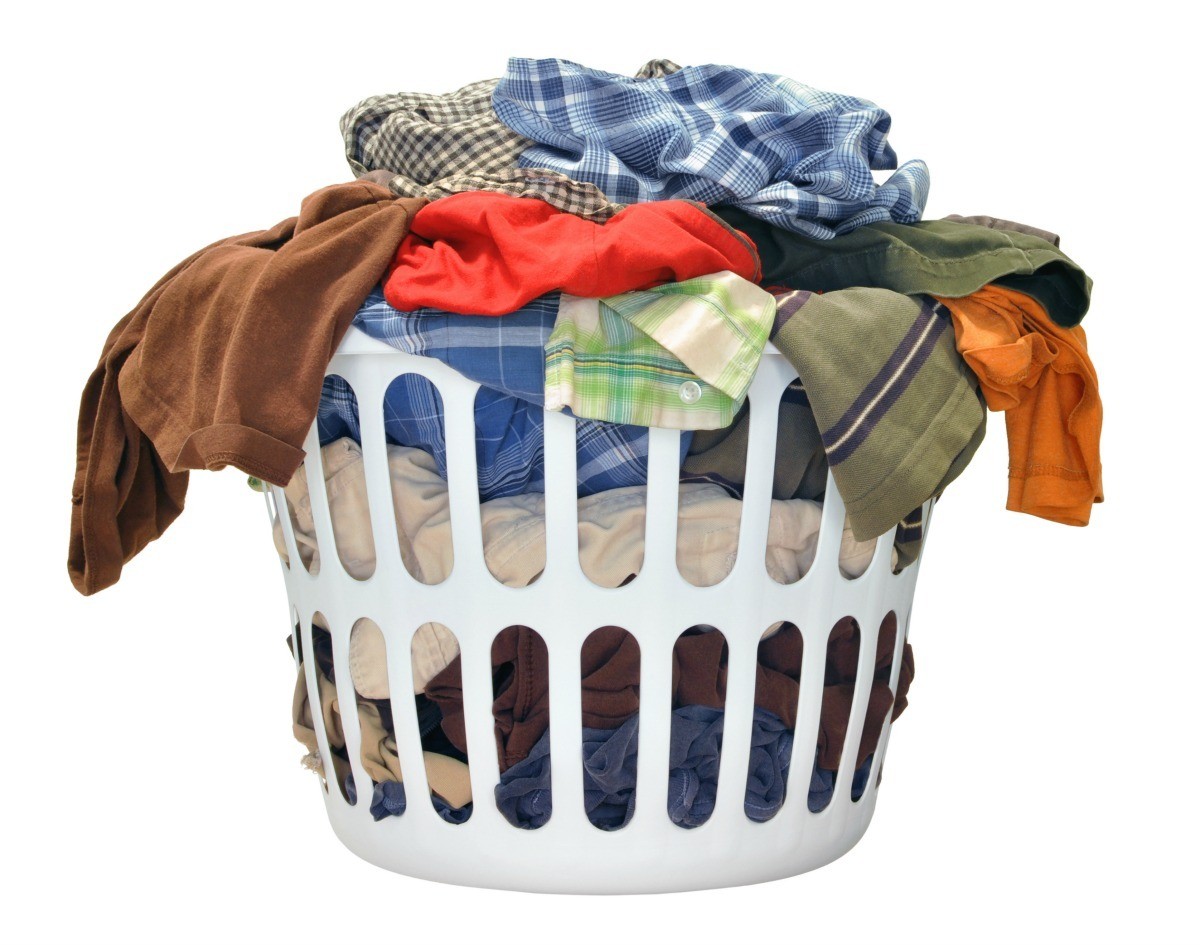
Clothes: Vinegar naturally breaks down uric acid and soapy residue, leaving baby clothes and diapers soft and fresh. Add a cup of vinegar to each load during the rinse cycle. It also gets rid of stinky towel mildew and makes clothes more colorful.
For removing specific stains such as ketchup, tomato sauce, etc., spray a little vinegar directly onto the stain and then launder.
Chewing gum: To remove chewing gum, rub it with full-strength vinegar.
Paint stains: Soak paint stains in hot vinegar to remove them.
Shoes: To remove salt and water stains from leather boots and shoes, rub with a solution of 1 tablespoon white vinegar and 1 cup water. Wipe over the stained area only, and then polish.
Brighten white clothes: Soaking white clothing in vinegar will help bring back their brightness.
Vinegar and Pet Care
Itchy ears: Clean inside of dog and cat ears with a clean washcloth or rag dipped in a white vinegar solution (4 tablespoons water: 1 tablespoon vinegar).
Smelly pets: If your pets get sprayed by a skunk or have other incidents, vinegar can help get rid of the smell!
Vinegar and Car Care
Remove bumper stickers: To remove bumper stickers from car chrome, squirt on vinegar and let it soak in. Next, scrape off the stickers. Decals can be removed similarly.
Keep windows clear: Wipe down windows with diluted vinegar in winter to keep them frost-free. You can also use vinegar spray as a window cleaner.
More Uses for Vinegar!
Sprains: Place a vinegar-soaked brown bag on sprains to ease pain and aid recovery.
Shiny hair: For brunettes, rinsing hair with vinegar after a shampoo makes hair shinier. Use one-tablespoon vinegar to one-cup warm water.
Loosen jar lids: Hold the jar upside down and pour warm vinegar around the neck at the joint between the glass and the top.
:max_bytes(150000):strip_icc():format(webp)/mason-jar-sugar-12f94aa5469d4a5cb7b46a9108a9620f.jpg)
:max_bytes(150000):strip_icc():format(webp)/mason-jar-herb-cb598c39375b4620b3826d8961c998e3.jpg)
:max_bytes(150000):strip_icc():format(webp)/mason-jar-manicure-c175465ecf8d4274b3ca0d4fe69cc964.jpg)

:max_bytes(150000):strip_icc():format(webp)/mason-jar-snowman-10b5aec528804c908a85f05e69029079.jpg)


/GettyImages-476407181-efa26ac4e26443939789b418b273db18.jpg)


/black-granite-countertops-ideas-57fb717f5f9b586c358525f1.jpg)
:max_bytes(150000):strip_icc()/__opt__aboutcom__coeus__resources__content_migration__mnn__images__2018__07__shutterstock_726710044-183d871ad1684ebfb6f578b2c14feb95.jpg)

