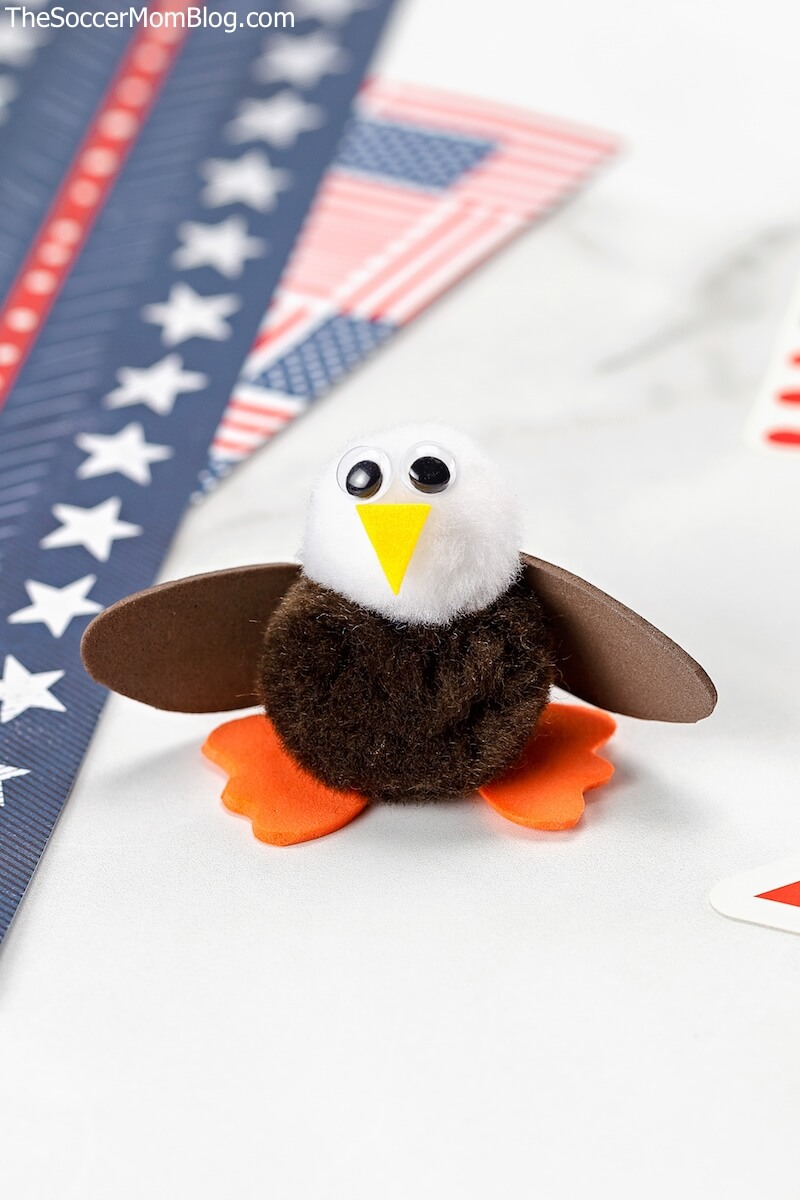
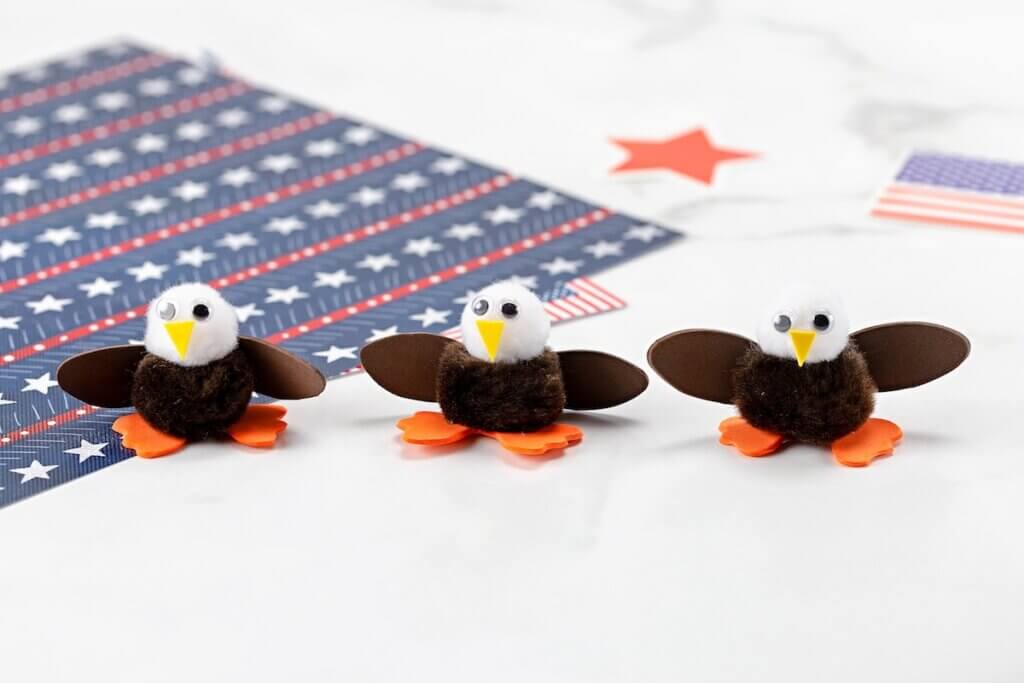
DIY Memorial Day Pom Pom Eagles

I found these eagles on SOCCERBLOG.COM website and they are so cute and so easy to make!

Materials Needed:

Craft foam sheets (brown, yellow & orange)

Large brown pom-poms

Large white pom-poms (slightly smaller than the brown pom poms if possible)

Hot glue gun & glue sticks

Google eyes

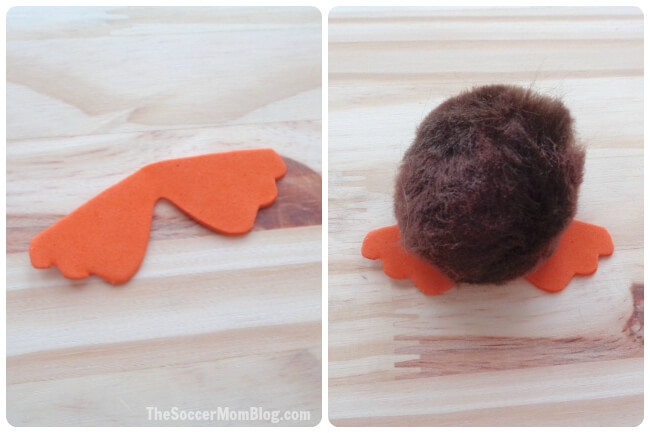
Begin by folding the orange craft foam sheet in half. Cut out feet for your eagle on the bend. They don’t have to be perfect, but you are welcome to use the photo below as a guideline.

Using the hot glue gun, glue the large brown pom pom onto your orange foam feet.

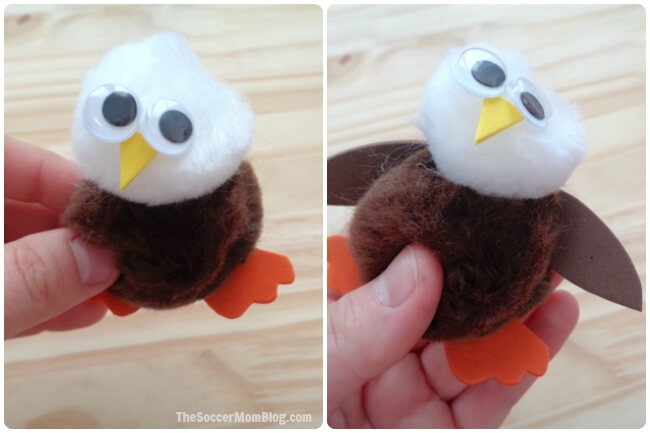
Glue the white pom pom onto the top of your brown pom pom.

Cut a small triangle from your yellow craft foam and glue to the center of the white pom pom. This will be the beak.

Glue two google eyes above the yellow triangle beak.

Cut two eagle wings from brown craft foam. Glue wings onto both sides of your brown pom pom. Your eagle is finished!

SOURCE: SOCCERMOMBLOG.COM

DIY: Garden Markers

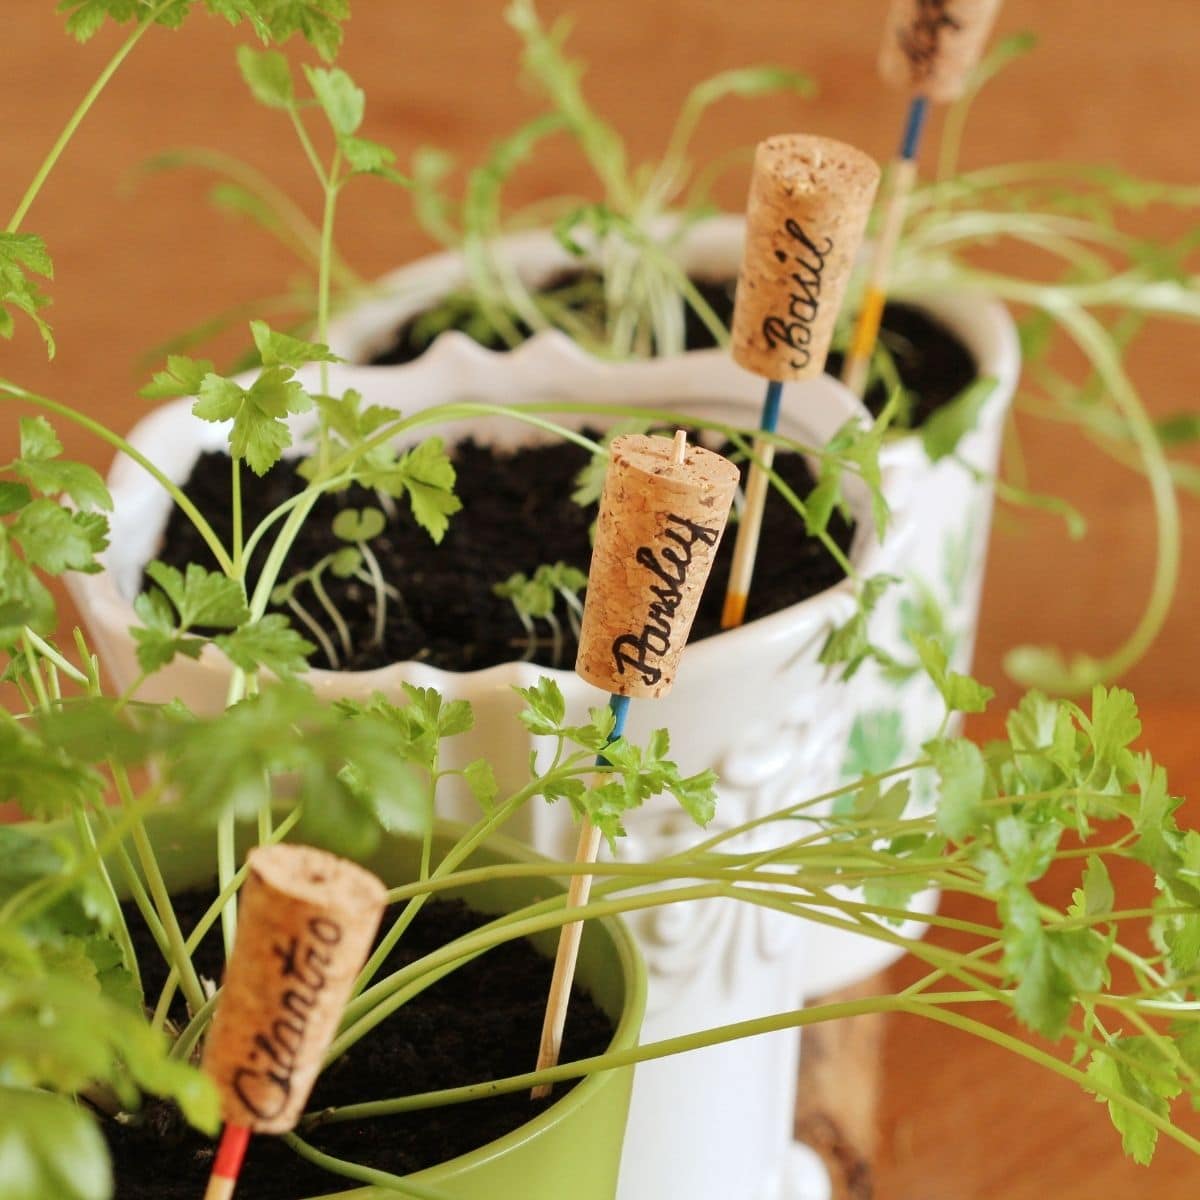
I found this article on simplifylivelove.com that shows some clever and simple garden markers you can make now for your garden later!

From simplifylivelove.com:

Metal Spoons

Wooden Spoons

Painted Rocks

Old Can Lids

Popsicle Sticks

Stir Sticks

Mason Jar Lids

Wine Corks

You can find all the directions to make these garden markers at their website:

20 Cute & Easy DIY Garden Plant Markers To Make – Simplify, Live, Love

DIY:Easter Craft

I found these adorable wood bead bunnies!  They are so simple to make and are quite versatile!

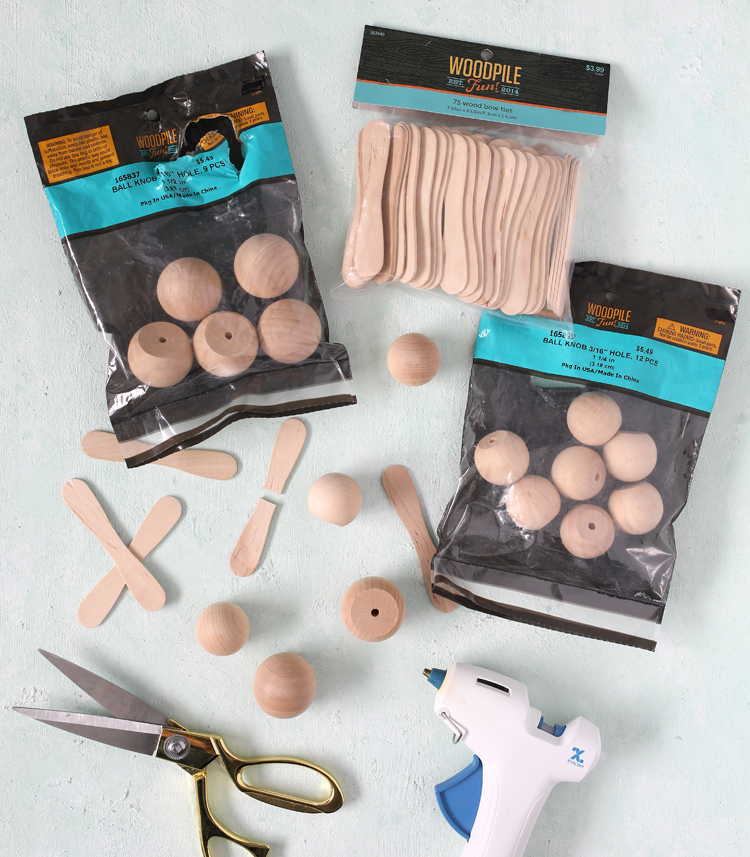
Materials

1 ½“ wood ball knobs

1 ¼” wood ball knobs

Wooden spoons

1 7/8” wood rings (for napkin rings)

Glass jar with wooden lid

Sharp scissors

Glue gun & glue sticks

Instructions

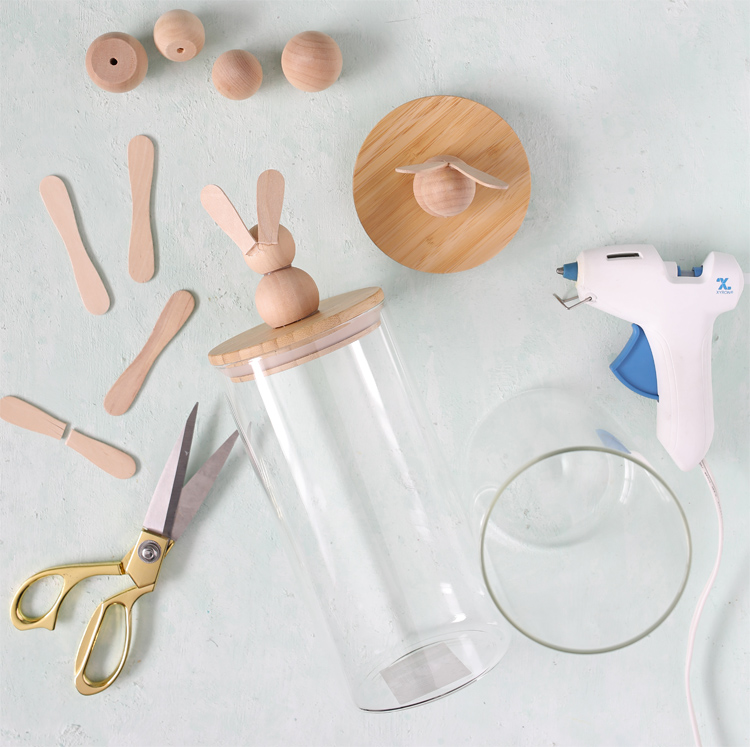
Step 1: Place a dab of hot glue on the flat bottom of the smaller bead, then glue it to the top of the larger wood bead. This forms the bunny’s head.

Step 2: Cut the wood bow tie piece in half with sharp scissors. Attach the two pieces to the back of the smaller wooden bead. This forms the bunny’s ears.

 For Candy Jars: Use hot glue to attach the wooden bunny to the top center of the candy jar lid.

You can leave the bunnies raw wood or paint them. Totally depends on your personal preference, but I couldn’t resist showing you how cute they look painted.

SOURCE: thecraftpatchblog.com

DIY: Spring Garden Projects

Spring is the perfect time to begin lawn and garden projects!  This article from thegardeningcook.com shows you how to get started.

From thegardeningcook:

These early spring garden projects will get a jump start on your garden and will get you outside too! From lawn care ideas to tips for growing perennials in the spring, i’ve got you covered. I know that in most parts of the country, the ground is still covered with snow, but as any good gardener will tell you, “it’s never too early to start thinking about spring gardening!” Spring is just around the corner and daylight savings on the horizon, so now is the time to think of getting our gardens ready. Are you like me in the late winter?  As soon as the sun starts to shine and the temps go up a bit, I seem to feel that urge to get out there and do something. Many times though, it’s far too early to plant anything. However, there are lots of things that you can do to get ready. 

Get your garden ready now with these early spring garden projects

1. Prepare for early lawn care

This is at the top of my early spring garden projects for a reason.   A lush, green lawn is such an important part of a great garden.  We all enjoy entertaining in the summer, and a wonderful lawn adds so much to the atmosphere of your garden setting.  Early spring is the time to take stock of the condition of your lawn after a winter of it not growing.  It will show what needs to be done to get it ready for spring when you can easily see the problems lurking there. I have a lot of lawn area and the back yard has quite a few weeds growing.  It definitely needs some TLC in the spring. I’ll start by raking my lawn early in the spring to remove dead grown and winter debris.  This brings light as well as air to the soil, which encourages the grass to grow.  Now is the perfect time to care for your lawn.  Don’t wait until the heat of summer hits.  When you are hosting a barbecue party in summer and your lawn is lush and green, you’ll be glad you started now.

2. Clean and repair birdhouses

Some birds visit us all year round here in NC and many really start visiting when the weather starts to turn warm.  Now is the time to check the birdhouses.  Make sure they are firmly mounted. Clean bird feeds and fill them with fresh seed, once they are dry.   Consider creating a pile of nesting materials in your yard where the birds can easily take stuff to make their nests. This little bird house needs a makeover this year.  It belonged to my mother who died last year and I will treasure it once I fix the damaged parts.

Now is the time to clear away the junk

One of my most needed early spring garden projects is cleaning up after winter.  Winter can be hard on a garden.   All sorts of garden debris and other refuse seems to gather everywhere around the yard.

3. Clear away refuse

Check the drainage ditches and walk around your yard to see what can be gathered and put out for garden refuse pick up. Our local authority allows me to put yard debris out every week and I have a whole row of old trash cans just waiting for this job.  Plants and lawns grow best in soil that drains well, so gather up those leaves, gather the weeds, and clean out the drainage ditches!  If you have a compost pile, even better.  I use a rolling compost pile. It is not very pretty, as this picture shows, but it is VERY easy to turn and all that yard refuse will turn into “black gold” that will work miracles in my garden and on my lawns. This pile is just LOADED with rich hummus under all the refuse.  Dumping my winter time yard refuse on this pile makes the clean-up part quite easy.

4. Tend to the bird baths

My bird baths are often discolored by the end of the winter.  They all need a good cleaning and scrubbing and then need to be refilled with water.

5. Think spring bulbs

Many spring bulbs start sending up leaf shoots during some warm winter days and then suffer a bit from a cold snap by getting brown edges to the leaves. The bulbs are just fine, they need the cold before they start sending up the flowers, but you can trim the leaves a bit to tidy things up.   While you are at it, make a sketch of where the spring bulbs are and put it in your gardening planner.  Once they have stopped growing, it will be hard to know where to plant your perennials without a sketch showing you where the bulbs are underground.

6. Check your mulched areas

This job is at the top of my must-dos of early spring garden projects. I have 9 large garden beds so I spend a lot of time (and money) on mulching every year.  And no matter how nicely the mulched areas looked last fall, there are still areas where the mulch has degraded or (it sometimes seems) just plain disappeared!  Add composted leaf mulch to the bare areas so that the weeds that we all know are lurking there won’t be able to grow as easily.

7. Check your outdoor seating areas

Last year, I bought new patio cushions for my seating area which rests under a huge Magnolia tree. By mid-winter, the cushions were a green mess and I honestly thought I would need to throw them away. But I threw them in the washing machine with some spray on stain remover (it took two washes) and they look almost like new.  Note to self:  Next year, put the patio cushions in the shed in the fall!  One of my summer projects for this seating area is going to be to sand the seat and bench and give it a fresh coat of paint in a dark green color. Stay tuned for the transformation.

8. Touch up yard decorations

Of all of my early spring garden projects, this one is my favorite.  I love to add decor to my garden.  Do you have some yard decorations that will need a touch up to look their best for spring and summer?  I have an old mail box that I salvaged from a make-over that I did last summer.  I plan to use to hold my gardening tools, and have a garden decoration too.  It’s very rusty, but will make a great project for early spring when I can’t actually be gardening. I plan to paint it and stencil on the side. It will make a lovely yard decoration when done.

9. Cut back ornamental grasses

I let my Japanese Silver grass get very tall in the winter because it sends up beautiful plums above the plant. But early spring is the time to cut it right now to about 6 inches to encourage lush growth during the spring and summer. If I leave this plant for even a few more weeks, ALL of these fronds will be covering my garden bed.  Now is the time to prune them.

10. Scrub those clay pots.

Clay pots get very dirty if they are left out over the winter. Now is the time to soak them so that they will be ready for the plants when the weather is warm enough for them to be planted.  

11. Cut back perennials

 Sometimes I do this in the fall, but more often, I leave this chore for the early spring, to keep some seed pods for winter birds. Perennials can be cut back almost to the ground level in most cases without hurting them at all.

12. Prune your roses

 In most cases, you will be pruning your roses just as the plant will be breaking the winter dormancy.  In warm climates, like NC, this will be fairly early in the year, just after the last frost.  Roses bear flowers on last year’s wood.  Trim off any old, dead canes. Be sure to prune so that the center of the bush is open for best air circulation.  

13. Remove dead wood

This goes for roses but also for other trees and shrubs too. Nothing will grow from dead wood, so get rid of it.  This goes for most suckers too. They sap the life from your plant and should be removed.

TIP:  If it is too early for you to prune shrubs, you can still inspect the plants. Take some ribbon with you and tie it where you want to prune once the weather warms up. So get out those garden gloves and your pruning shears and get rid of the dead wood. You’ll be glad you did come summer time.

14. Spring weeding

Even though I have it listed as #14, weeding is at the top of my list for early spring garden project. Weeding can the bane of my gardening life, if I let it be. Each year, I say that I am going to pull up weeds during the winter on warm days, and each year, I neglect this. But early spring is a good time to weed as long as the ground is not too wet, AND it’s the best time to do this job. The roots of the weeds are shallow and they will come out easily this time of the year.   This border that I planted late last summer looks as though it needs some TLC l right now, but those weeds will be out in less than a half hour and the bed will be beautiful.

15. Early spring Vegetables

Many vegetables thrive when planted in the early spring because they love the cooler weather. Some popular ones are English peas, broccoli, cabbage and Brussels sprouts. Here in NC, these plants don’t do well in the summer at all, so early spring is when I have to plant them if I want to grow them.  See my list of cold hardy vegetables here.

16. Check your lawn edges

 Inspect plastic lawn edging to see if it needs replacing.  If you edge manually with trenches, now is a good time to tidy these up so the edges will be ready when the lawns start to grow. Doing it early means that the edges will only need cutting into soil, not into lawn that is encroaching into the borders.

17. Start seeds indoors

Get a head start on spring but planting seeds for flowers and vegetables indoors.  I have a large plant stand that sits outside during the spring and summer. During the winter, it sits in front of my glass sliders and gets southern sunlight. It is the perfect spot for my plant cuttings and seed starting efforts.

18. Divide perennials

One of my favorite early spring garden projects is to divide my perennials.  Early spring is the perfect time to divide perennials. Many of them really benefit from being divided for best growth. Either plant the divisions in another part of your garden, or share them with some of your plant loving friends.

SOURCE:  THEGARDENINGCOOK.COM

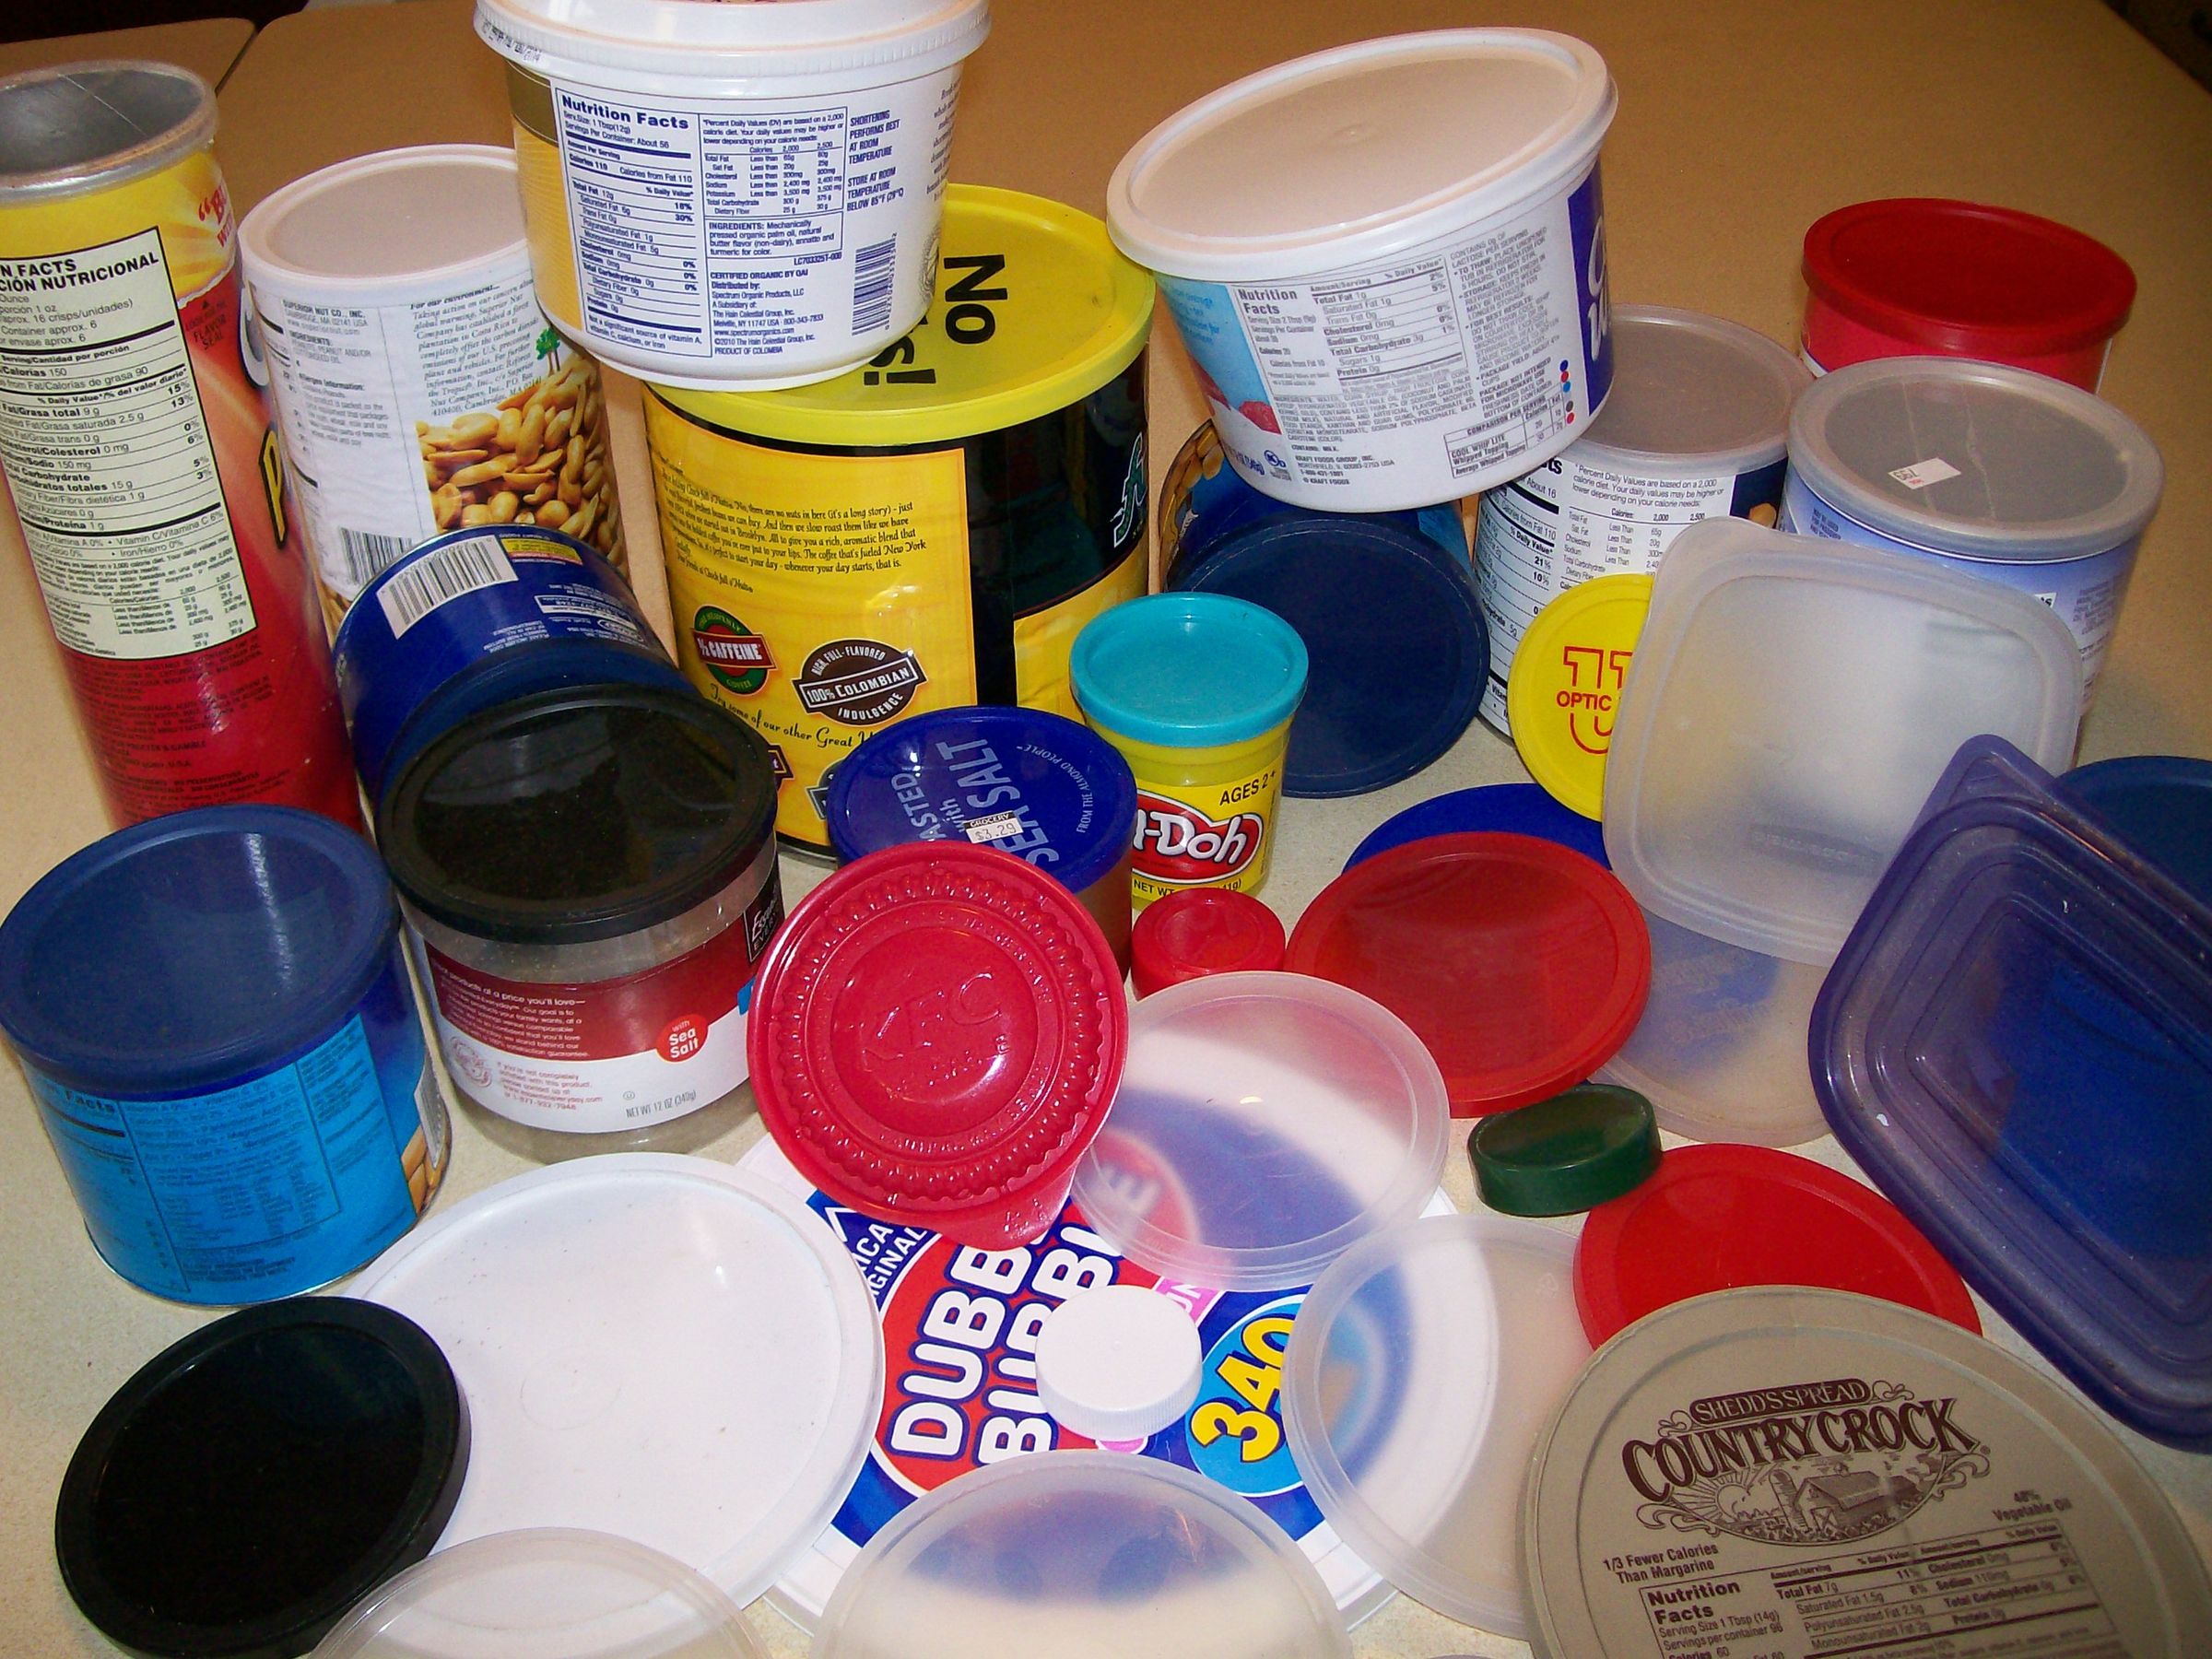
Alternate Uses for Plastic Lids

We all know the struggle: You’re cleaning out your food storage drawer and somehow have way more lids than you do containers. If you can’t find the bottoms to those tops, don’t throw them away! Surprisingly, there are many uses for plastic lids, besides being just a container cover, that can help you around the house. From moving furniture to outsmarting batter splatters, these toppers and more. Keep scrolling for all of the brilliant ways your plastic lids can save you time and money around the house.

1. Avoid a plant watering oops

The new houseplant you picked up is a beautiful addition to your home. The only problem? The hole at the bottom of the pot keeps dripping water all over your windowsill. Dodge the mess by placing a plastic storage container lid under the pot. The lid’s ridge will catch any drips and keep water from spilling onto your windowsill.

2. Uses for plastic lids: Move furniture sans scratches

You want to rearrange your living room after getting a new chair but worry about the legs scraping your floors. What can help: Place a plastic lid under each leg of the furniture before moving it. The lid lets you slide it easily without harming the floor. Bonus? This works on carpet too!  “Using a plastic lid as a slider is an excellent way to save money and your back,” says Sara McDaniel, an interior designer, home renovation expert and owner of Simply Southern Cottage. “Furniture sliders are quite popular, but plastic lids would serve the same purpose and you likely already have them in your pantry.”

3. Tangle-proof a ball of yarn

The last time you knitted a scarf, you ended up with rolls of tangled yarn. Next time: Cut an X in the center of a plastic storage container lid, then thread the yarn through. When you pull the yarn, the slit in the lid will help loosen up any tangles and keep new ones from forming. Or, if you have a leftover iced coffee to-go cup, just use the lid’s straw hole! Easy!

4. Uses for plastic lids: Clog-proof your bath drain

Whenever you bathe Buster, his fur gets caught in the drain and you’re worried about an eventual clog. Don’t have a drain cover? Poke a few small holes through a plastic lid and place it over the drain. Turn on the water and hold the lid until it is suctioned to the tub’s surface, then wash Spot as usual. The holes allow the water to drain while the lid catches your dog’s stray hairs.

5. Easily corral earrings

If you’re tired of digging through your jewelry box to find your favorite hoop earrings, leftover plastic lids can help. Simply grab a sewing needle, poke several holes in a plastic lid, then slide the end of each earring through. You’ll be able to find the pair you need in no time!

6. Uses for plastic lids: Paint without messy drips

“As a home renovator, paint is a big part of all of my projects and I’m always getting paint in places it shouldn’t be,” sighs McDaniel. Her secret to making any paint job neater: Cut a slit in a plastic storage container lid large enough to slip a paintbrush through. “As you paint, spills and splatters will be caught on the lid, keeping the paint contained and reducing messes.”

7. Ward off any rust ring stains

While deep-cleaning your shower or tub, you notice rust rings left from a shaving cream can. To avoid them from forming in the future, just place any plastic lid under metal cans you keep in your shower. The lid will act as a buffer between the tub and the canister, so there are no unwanted stains left behind.

8. Uses for plastic lids: Slice food in half the time

You love adding fresh grapes to your chicken salad, but cutting each one individually takes so much time and effort. “Every day we are looking for ways to save time while cooking without compromising quality, and this tip will help,” says Gabriela Pollack, owner of New York-based chocolate shop Brigadeiro Warehouse: Carefully arrange them close together in one layer on a plastic lid. Then cover with another plastic lid of the same size. Gently hold the top lid down to keep the fruit in place, then slide a knife between the lids. “Just make sure to use a sharp knife,” she warns. Remove the top lid and voilà — you’ll have perfectly sliced grapes for your salad in seconds. No hassle required!

9. Scrape away frost in a flash

Nothing is worse than losing your scraper while your car windshield is covered in frost and you’re running late. To the rescue: a plastic lid! Use the side of the lid to scrape the frost off the window. The soft plastic won’t scratch the glass as it quickly clears away the frost, making your winter mornings a breeze.

10. Uses for plastic lids: Outsmart batter splatters

Using a hand mixer to whip up cupcakes saves you time and energy, but one little misstep means you’re covered in batter, and so is your counter. Shield it all by using a plastic storage container lid. Just cut two small X’s in the top of the lid, then slide the mixer’s attachments through the slits; attach them to the mixer’s body. The lid will act as a shield and keep batter from getting on your clothes and counters.

11. Protect breakables in the dishwasher

You were so careful when you placed your wineglasses in the dishwasher, but somehow one broke during the cycle anyway. To keep this from happening again: Slide a plastic lid between each delicate glass in the dishwasher. The lid will stabilize the glasses so they’re less likely to shift, plus act as a barrier in case other dishes move.

12. Uses for plastic lids: Outsmart sticky honey drips

Even though you wipe your honey jar before putting it away, dribbles sometimes go unnoticed and leave your cupboard shelf sticky. Prevent this by placing a plastic lid underneath the bottle after each use. The rimmed lid will catch any drips, ensuring your cabinet stays clean.

13. Ward off accidental hammer dings

Oops! Last time you hung a photo, you missed the nail and left a dent in the wall. Next time, cut a hole that’s slightly larger than the nail in the center of a plastic lid, then slide the nail into the hole and start hammering as usual. If the hammer slips, the plastic will protect the wall. When you’re done, simply slip the lid off.

14. Uses for plastic lids: Securely close a ­garbage bag  

When you can’t find a twist tie — and there isn’t enough room at the top of the trash bag to tie a knot—enlist the help of a plastic lid. Using a knife or scissors, carefully cut a small X into the center. Twist the top of the bag, then slide it through the slit until it can’t go any further. The lid will bind the plastic together so the garbage bag will stay closed until pickup.

15. Safely scrape nonstick pans

When food particles get stubbornly stuck to your “nonstick” cookware, try using a plastic lid to scrape off the mess. Push the lip of the lid downward against the pan and repeat until all of the cooked-on food is removed. The firm plastic along the edge will get under the grunge so it easily comes off without damaging the pan’s finish.

SOURCE: FIRSTFORWOMEN.COM

New Hampshire State Mammal: White Tailed Deer

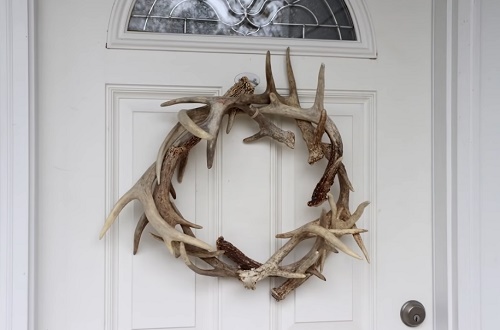
New Hampshire is yet another state that has the white-tailed deer as their state mammal.  Lacking any new information about the deer, I thought I’d go in another direction—a crafty one.  Did you know you can make things from the antlers?? Deer naturally shed these yearly so, if you’re lucky, you can find some discarded antlers in the woods.

If you find a lot of antlers, you can make this wreath.

Or, perhaps this chandelier.

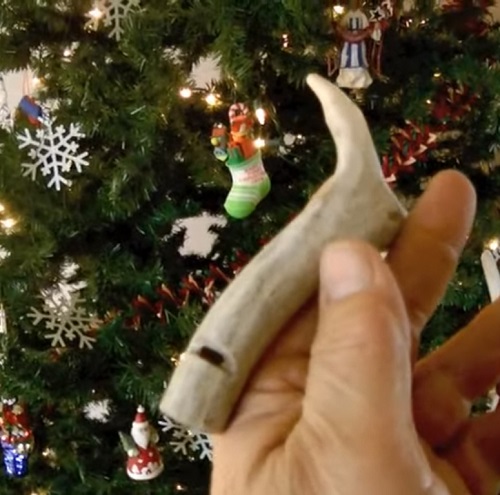
Maybe this deer whistle is more to your liking.

You can find the instructions for these crafts and other craft ideas at brightstuffs.com.

DIY: Spring Cleaning for Your Garden & Lawn: Part 2

10 Scrub those clay pots.

Clay pots get very dirty if they are left out over the winter. Now is the time to soak them so that they will be ready for the plants when the weather is warm enough for them to be planted.  

11 Cut back perennials

 Sometimes I do this in the fall, but more often, I leave this chore for the early spring, to keep some seed pods for winter birds. Perennials can be cut back almost to the ground level in most cases without hurting them at all.

12 Prune your roses

 In most cases, you will be pruning your roses just as the plant will be breaking the winter dormancy.  In warm climates, like NC, this will be fairly early in the year, just after the last frost.  Roses bear flowers on last year’s wood.  Trim off any old, dead canes. Be sure to prune so that the center of the bush is open for best air circulation.  

13 Remove dead wood

This goes for roses but also for other trees and shrubs too. Nothing will grow from dead wood, so get rid of it.  This goes for most suckers too. They sap the life from your plant and should be removed.

TIP:  If it is too early for you to prune shrubs, you can still inspect the plants. Take some ribbon with you and tie it where you want to prune once the weather warms up. So get out those garden gloves and your pruning shears and get rid of the dead wood. You’ll be glad you did come summer time.

14 Spring weeding

Even though I have it listed as #14, weeding is at the top of my list for early spring garden project. Weeding can the bane of my gardening life, if I let it be. Each year, I say that I am going to pull up weeds during the winter on warm days, and each year, I neglect this. But early spring is a good time to weed as long as the ground is not too wet, AND it’s the best time to do this job. The roots of the weeds are shallow and they will come out easily this time of the year.   This border that I planted late last summer looks as though it needs some TLC l right now, but those weeds will be out in less than a half hour and the bed will be beautiful.

15 Early spring Vegetables

Many vegetables thrive when planted in the early spring because they love the cooler weather. Some popular ones are English peas, broccoli, cabbage and Brussels sprouts. Here in NC, these plants don’t do well in the summer at all, so early spring is when I have to plant them if I want to grow them.  See my list of cold hardy vegetables here.

16 Check your lawn edges

 Inspect plastic lawn edging to see if it needs replacing.  If you edge manually with trenches, now is a good time to tidy these up so the edges will be ready when the lawns start to grow. Doing it early means that the edges will only need cutting into soil, not into lawn that is encroaching into the borders.

17 Start seeds indoors

Get a head start on spring but planting seeds for flowers and vegetables indoors.  I have a large plant stand that sits outside during the spring and summer. During the winter, it sits in front of my glass sliders and gets southern sunlight. It is the perfect spot for my plant cuttings and seed starting efforts.

18 Divide perennials

One of my favorite early spring garden projects is to divide my perennials.  Early spring is the perfect time to divide perennials. Many of them really benefit from being divided for best growth. Either plant the divisions in another part of your garden, or share them with some of your plant loving friends.  

SOURCE: THEGARDENINGCOOK.COM

DIY: Spring Cleaning for Your Garden & Lawn: Part 1

Spring is the perfect time to begin lawn and garden projects!  This article from thegardeningcook.com shows you how to get started.

From thegardeningcook:

These early spring garden projects will get a jump start on your garden and will get you outside too! From lawn care ideas to tips for growing perennials in the spring, i’ve got you covered. I know that in most parts of the country, the ground is still covered with snow, but as any good gardener will tell you, “it’s never too early to start thinking about spring gardening!” Spring is just around the corner and daylight savings on the horizon, so now is the time to think of getting our gardens ready. Are you like me in the late winter?  As soon as the sun starts to shine and the temps go up a bit, I seem to feel that urge to get out there and do something. Many times though, it’s far too early to plant anything. However, there are lots of things that you can do to get ready. 

Get your garden ready now with these early spring garden projects

NOW is the time to get started on some very early spring gardening tasks.  These are my tried and true early spring garden projects that will make sure I get these results year after year.

1. Prepare for early lawn care

This is at the top of my early spring garden projects for a reason.   A lush, green lawn is such an important part of a great garden.  We all enjoy entertaining in the summer, and a wonderful lawn adds so much to the atmosphere of your garden setting.  Early spring is the time to take stock of the condition of your lawn after a winter of it not growing.  It will show what needs to be done to get it ready for spring when you can easily see the problems lurking there. I have a lot of lawn area and the back yard has quite a few weeds growing.  It definitely needs some TLC in the spring. I’ll start by raking my lawn early in the spring to remove dead grown and winter debris.  This brings light as well as air to the soil, which encourages the grass to grow.  Now is the perfect time to care for your lawn.  Don’t wait until the heat of summer hits.  When you are hosting a barbecue party in summer and your lawn is lush and green, you’ll be glad you started now.

2. Clean and repair birdhouses

Some birds visit us all year round here in NC and many really start visiting when the weather starts to turn warm.  Now is the time to check the birdhouses.  Make sure they are firmly mounted. Clean bird feeds and fill them with fresh seed, once they are dry.   Consider creating a pile of nesting materials in your yard where the birds can easily take stuff to make their nests. This little bird house needs a makeover this year.  It belonged to my mother who died last year and I will treasure it once I fix the damaged parts.

Now is the time to clear away the junk

One of my most needed early spring garden projects is cleaning up after winter.  Winter can be hard on a garden.   All sorts of garden debris and other refuse seems to gather everywhere around the yard.

3. Clear away refuse

Check the drainage ditches and walk around your yard to see what can be gathered and put out for garden refuse pick up. Our local authority allows me to put yard debris out every week and I have a whole row of old trash cans just waiting for this job.  Plants and lawns grow best in soil that drains well, so gather up those leaves, gather the weeds, and clean out the drainage ditches!  If you have a compost pile, even better.  I use a rolling compost pile. It is not very pretty, as this picture shows, but it is VERY easy to turn and all that yard refuse will turn into “black gold” that will work miracles in my garden and on my lawns. This pile is just LOADED with rich hummus under all the refuse.  Dumping my winter time yard refuse on this pile makes the clean-up part quite easy.

4. Tend to the bird baths

My bird baths are often discolored by the end of the winter.  They all need a good cleaning and scrubbing and then need to be refilled with water.

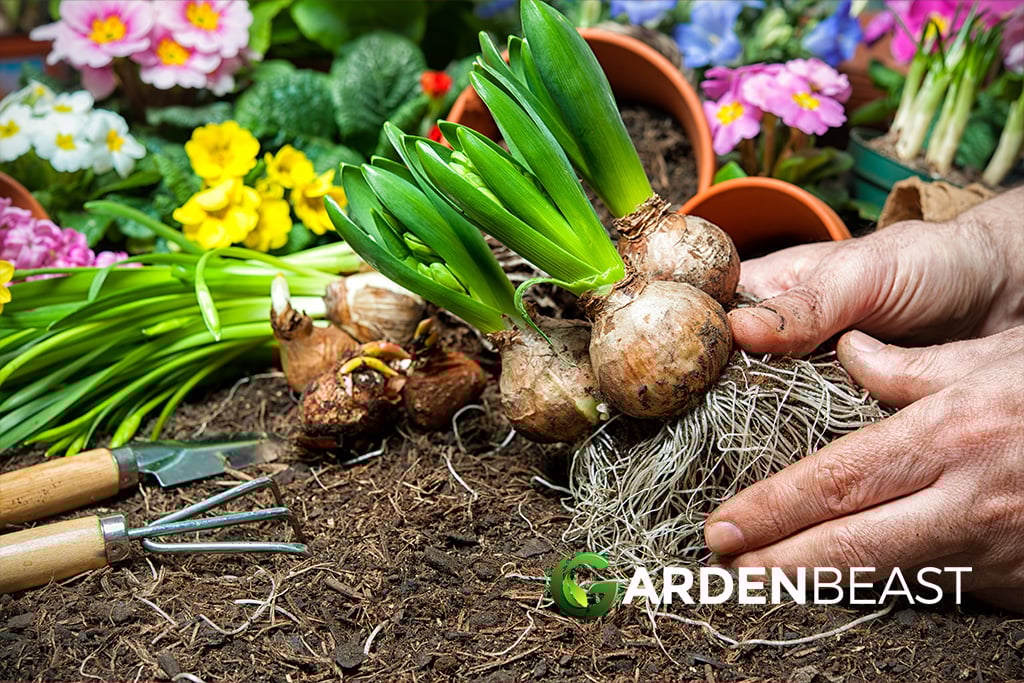
5. Think spring bulbs

Many spring bulbs start sending up leaf shoots during some warm winter days and then suffer a bit from a cold snap by getting brown edges to the leaves. The bulbs are just fine, they need the cold before they start sending up the flowers, but you can trim the leaves a bit to tidy things up.   While you are at it, make a sketch of where the spring bulbs are and put it in your gardening planner.  Once they have stopped growing, it will be hard to know where to plant your perennials without a sketch showing you where the bulbs are underground.

6 Check your mulched areas

This job is at the top of my must-dos of early spring garden projects. I have 9 large garden beds so I spend a lot of time (and money) on mulching every year.  And no matter how nicely the mulched areas looked last fall, there are still areas where the mulch has degraded or (it sometimes seems) just plain disappeared!  Add composted leaf mulch to the bare areas so that the weeds that we all know are lurking there won’t be able to grow as easily.

7 Check your outdoor seating areas

Last year, I bought new patio cushions for my seating area which rests under a huge Magnolia tree. By mid-winter, the cushions were a green mess and I honestly thought I would need to throw them away. But I threw them in the washing machine with some spray on stain remover (it took two washes) and they look almost like new.  Note to self:  Next year, put the patio cushions in the shed in the fall!  One of my summer projects for this seating area is going to be to sand the seat and bench and give it a fresh coat of paint in a dark green color. Stay tuned for the transformation.

8 Touch up yard decorations

Of all of my early spring garden projects, this one is my favorite.  I love to add decor to my garden.  Do you have some yard decorations that will need a touch up to look their best for spring and summer?  I have an old mail box that I salvaged from a make-over that I did last summer.  I plan to use to hold my gardening tools, and have a garden decoration too.  It’s very rusty, but will make a great project for early spring when I can’t actually be gardening. I plan to paint it and stencil on the side. It will make a lovely yard decoration when done.

9 Cut back ornamental grasses

I let my Japanese Silver grass get very tall in the winter because it sends up beautiful plums above the plant. But early spring is the time to cut it right now to about 6 inches to encourage lush growth during the spring and summer. If I leave this plant for even a few more weeks, ALL of these fronds will be covering my garden bed.  Now is the time to prune them.

SOURCE: THEGARDENINGCOOK.COM

DIY: Valentine’s Gifts

Birch Candle

I love, love, love this candle.  It does require being able to drill the hole for the tea light though.  Hubby and I are going to attempt these.  We have tons of birch trees around!

Equipment

Knife

Drill with drill bits including 1 3/8″ spade bit or slightly larger

Materials

1 section birch wood

Tealight candle

Colored pencil(s) light brown

Pencil

Instructions

Trace the tealight in the center of the birch wood piece using a pencil.

Begin drilling with the spade bit, placing the center of the bit in the center of the tealight circle. Rock the drill back and forth a little while drilling to get a good hole.

Sketch the design you want on the front of the birch pillar using a pencil.

Carve the design on the pencil lines using a knife.

Shade in the design using a light brown colored pencil.

Put a tealight candle in the top of the birch candle holder to finish.

Heart Bookmark

The instructions for this bookmark use a cricut machine but I think there’s an abundantly easier method for those of us without those machines.  Simply cut a heart out of construction paper.  Cut a second heart the same size, but add ¼ inch tabs to the sides of the heart.  Place the 2 hearts together, fold and glue the tabs around to the back of the second heart.  Write your message on the top.  Easy peasy. 

SOURCE: THEPIONEERWOMAN.COM

The gift basket in the opening picture is my idea of the perfect gift for Valentine’s Day: a mug, a little Styrofoam, whatever candy the giftee loves the most, some ribbons and doodads from the dollar store and BOOM! A happy valentine!

Winter Insects to Watch For

I always thought winter was a small respite from pests, but as I read in the following article from BackYardBoss, there are several insects we need to keep a look out for.

From BACKYARDBOSS:

Winter can be harsh for wildlife, including insects. As temperatures drop and the days grow shorter, many of the bugs that are common during other seasons become rarer to see. But where do bugs go in winter? Many insects enter a state of dormancy or seek shelter to survive the cold. Some burrow into the soil, finding refuge beneath the frost line, while others hibernate in cozy nooks, such as leaf litter or tree bark. Certain insects, like monarch butterflies, travel south for the winter, according to the U.S. Forest Service. There, the butterflies hibernate until the cold months are over.

But not all insects are intimidated by winter. There’s a world of bizarre and terrifying insects that thrive in the cold.These winter insects are adapted to surviving in harsh conditions, displaying unique characteristics that set them apart from their warm-weather counterparts.From beetles with antifreeze-like blood to spiders that brave cold temperatures, thesewinter bugsare both fascinating and, at times, unnerving. Discover eight weird winter insects you’ll probably see before the season is over.

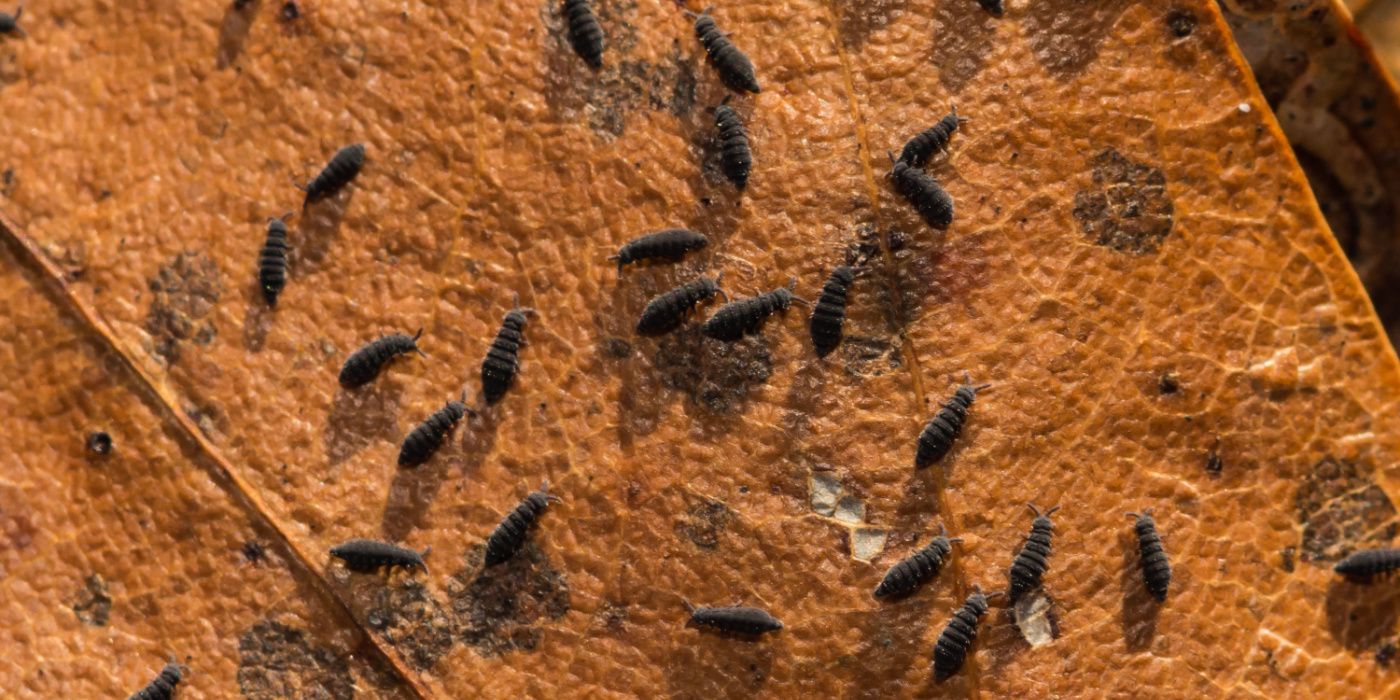
Snow Fleas

Snow fleas, despite their name, are not actual fleas. These minuscule insects are a type of springtail. Found in moist environments, snow fleas are some of the most active insects in winter, and their presence becomes noticeable on snowy surfaces. The winter bugs measure only about ⅒ of an inch, according to the University of Minnesota, and their dark color makes them stand out against the white snow. Despite their ominous appearance, snow fleas are harmless to humans. They feed on organic matter and play a crucial role in breaking down decaying plant material, which can help improve your soil.

Snow fleas produce Hypogastrura harveyi Folsom, a protein that acts as an antifreeze, preventing ice crystal formation within their bodies, and allowing them to remain active even in subzero temperatures. Their ability to jump vast distances helps them navigate through snow, while their dark coloration absorbs sunlight, providing them with warmth in chilly environments.

Snow flies can find their way into your home, but there are some things you can do to keep snow fleas at bay:

Maintain proper ventilation to reduce moisture levels indoors.

Clear snow and debris from around the foundation to limit their access points.

Use natural repellents like diatomaceous earth near entry points.

Apply a thin layer of cedar oil or citrus-based repellent in infested areas.

Use a vacuum cleaner with proper filtration to remove snow fleas indoors.

Consider introducing predatory insects like ground beetles to control populations.

Winter Stoneflies

Winter stoneflies are insects that defy the common perception of insects going dormant in winter. Thesewinter bugsare characterized by their elongated bodies and two pairs of membranous wings. Typically found near cold, running water, winter stoneflies undergo a unique life cycle that involves egg-laying on rocks in freezing conditions. Like snow fleas, winter stoneflies have dark coloration that aids in absorbing sunlight for warmth. Their ability to walk on their tippy-toes prevents direct contact with cold surfaces. Additionally, they seek refuge in crevices to evade harsh winter winds and replace body fluids with glycerol, an alcohol that remains unfrozen, enabling them to regulate their antifreeze levels as necessary.

Fortunately, stoneflies rarely invade your living space. However, if you have discovered them in your space and would like to get rid of them, there are some things you can do:

Use light-colored exterior paint to reduce heat absorption and deter stoneflies.

Install artificial light sources away from water bodies to minimize attraction.

Remove standing water around the property to limit breeding sites.

Apply insecticidal soaps sparingly on stonefly-infested plants.

Winter Moths

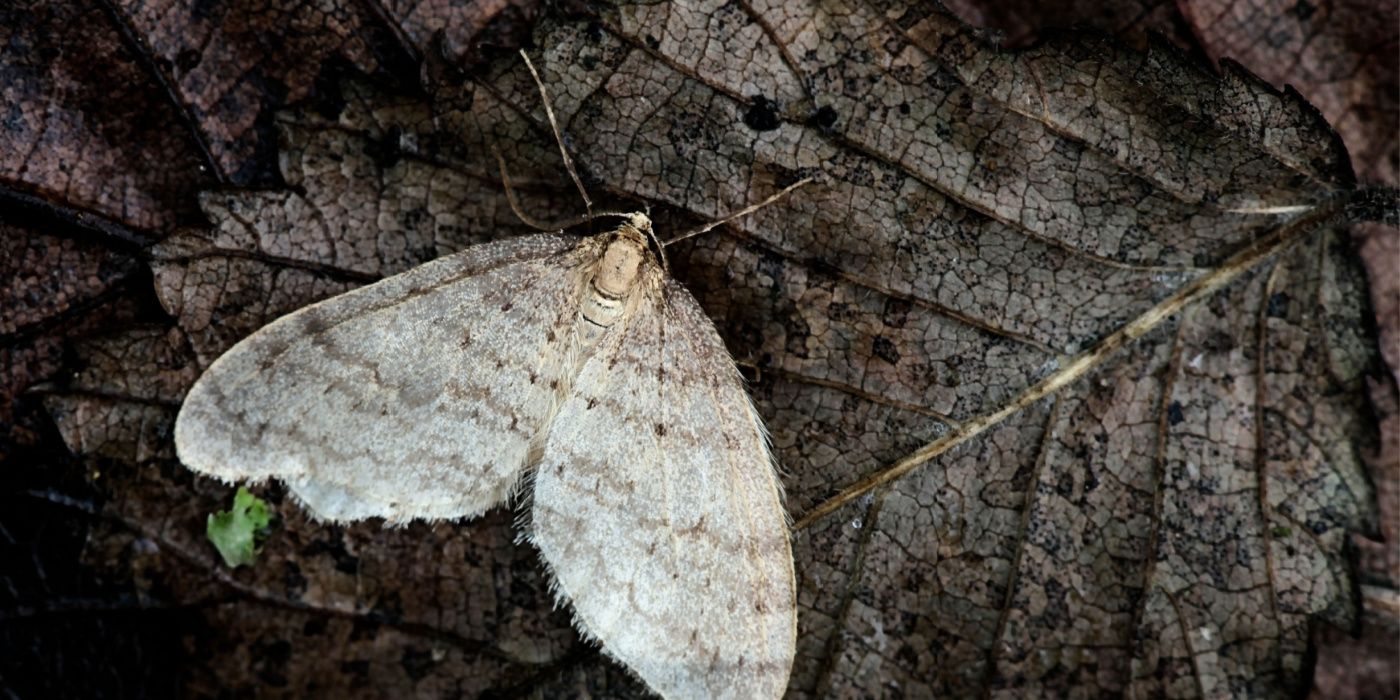
Winter moths are enchanting insects with a problematic reputation. These small, delicate moths have a wingspan of around 1 inch and are known for their ability to fly in cold temperatures. While they may seem harmless, the weird winter insects can be highly destructive to deciduous trees during their larval stage. The caterpillars feed on tree buds, potentially causing extensive damage to forests and ornamental trees. Winter moths have antifreeze in their bodies, aiding survival in freezing temperatures. They can also shiver to generate heat, maintaining their activity levels in cold weather.Moreover, they exhibit the ability to delay hatching until food sources are plentiful, enhancing their survival prospects by synchronizing with blooming cycles.

Winter moths can nest in your home but, there are some considerations for getting rid of these bugs in the winter:

Release natural predators such as parasitic wasps to control caterpillar populations outdoors.

Use organic insecticides such as neem oil to kill winter moths.

Apply horticultural oils on tree trunks to suffocate winter moth eggs.

Introduce pheromone traps to disrupt the mating cycle of adult moths.

Wrap tree trunks with burlap in late fall to prevent egg-laying.

Use sticky bands around tree trunks to trap crawling caterpillars.

Winter Ticks

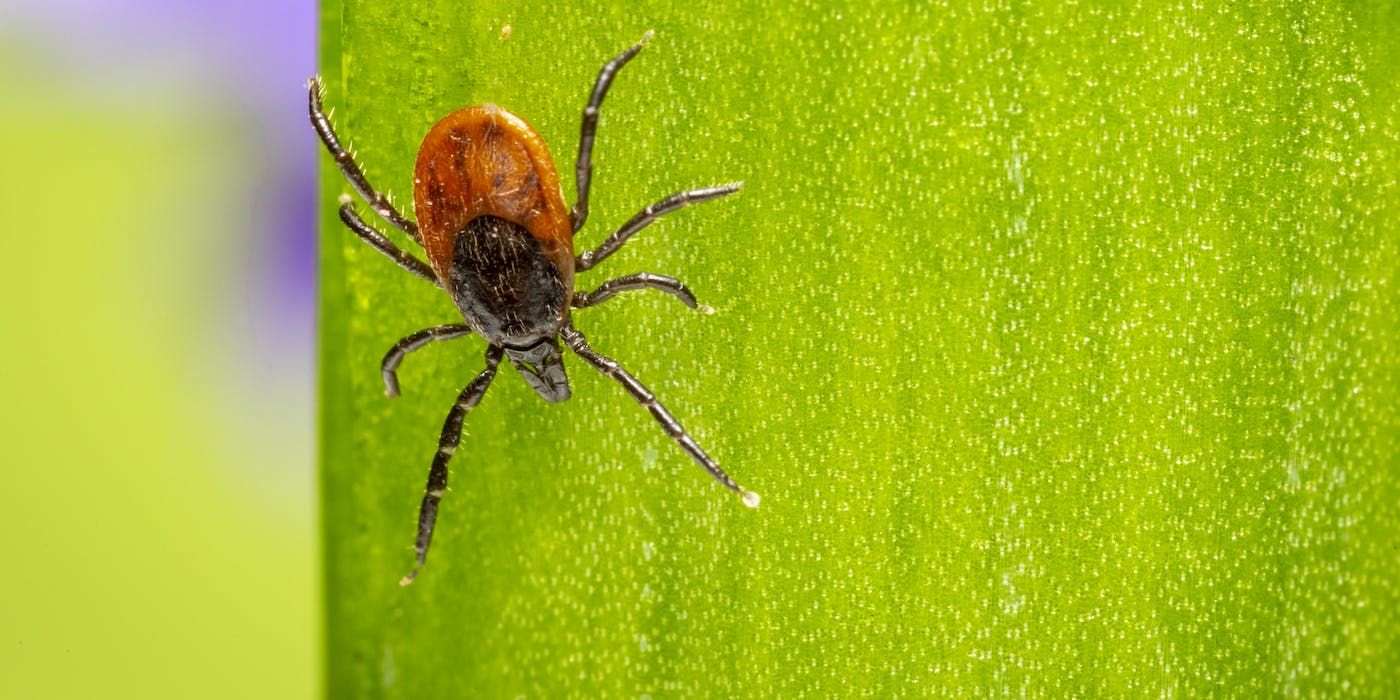
Winter ticks feed on the blood of mammals during the winter months. These tiny, reddish-brown bugs are particularly concerning due to their impact on wildlife and domestic animals. Animals can suffer from significant blood loss when infested with large numbers of winter ticks.

A significant adaptation of these winter bugs is their ability to remain on a host throughout cold winters, unlike other tick species that shift hosts between developmental stages.This strategy ensures their survival by providing consistent access to a blood meal. Furthermore, off-host larvae and adult female winter ticks display remarkable survival techniques underwater, showcasing their adaptability to severe environments. To fight winter ticks:

Regularly check pets and livestock for ticks, especially after outdoor activities.

Safely remove the winter insectsusing fine-tipped tweezers, grasping as close to the skin’s surface as possible.

Create tick-safe zones by clearing tall grass and dense vegetation.

Use botanical repellents on pets, focusing on ears, neck, and paws.

Consult with local wildlife management agencies to control tick-infested wildlife populations.

Snow Scorpionflies

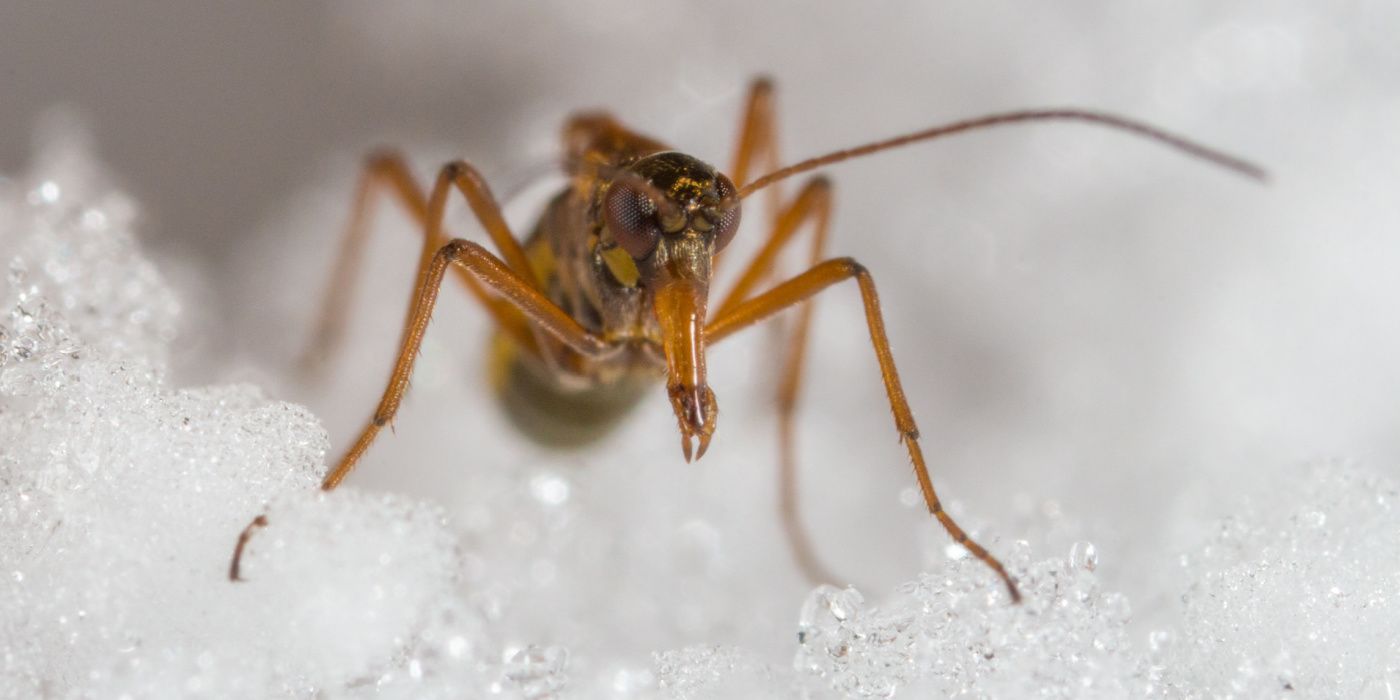
Snow scorpionflies are fascinating insects that add a touch of mystery to winter landscapes. With their distinctive long antennae and tail-like appendages, snow scorpionflies have an otherworldly appearance. This winter flyis commonly found on snow surfaces, where it feeds on small invertebrates and detritus. What makes snow scorpionflies so adept at surviving in the winter? Well, the winter insects can lower the freezing point of fluids in their cells, which prevents the formation of ice crystals and allows them to be active in cold conditions. Snow scorpionflies don’t often infest your living spaces. But if you’re concerned that the winter insects might find their way into your home, there are things you can do to thwart an attack by the bugs in the winter:

Maintain cleanliness to discourage their presence indoors.

Safeguard your living space by fitting screens on windows and doors to block their entry.

Use yellow outdoor lighting to minimize their attraction to illuminated areas.

Clear snow and debris from outdoor spaces to reduce potential habitats.

Plant native vegetation to encourage the presence of natural predators.

Winter Ants

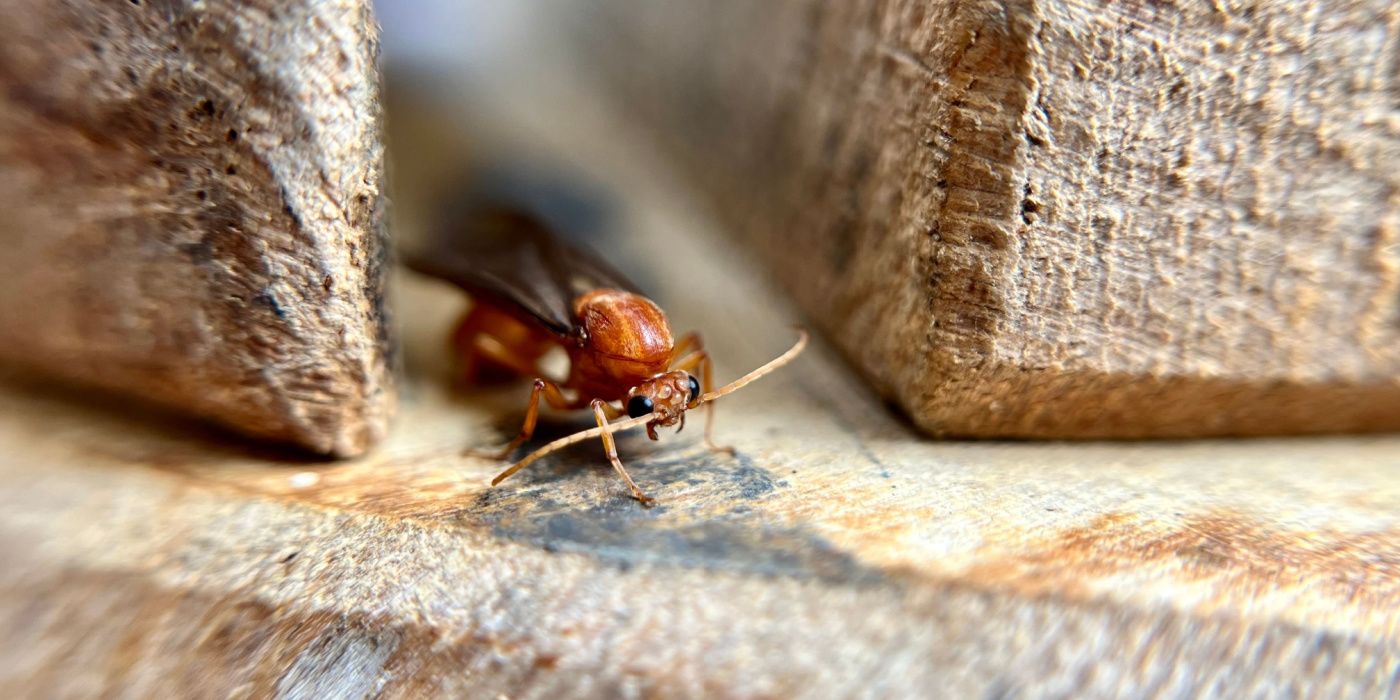
Winter ants, despite their small size, exhibit remarkable resilience in cold weather. The insects remain active during winter, foraging for food sources when temperatures drop. With a preference for sweet substances, winter ants may venture into homes seeking sustenance during the colder months. Ants have several adaptations to survive the winter. In colder months, ants use southern exposure rock surfaces to warm themselves and crowd together to share body heat. Unfortunately, winter ants can infest your home.The good news is that there are things you can do to get rid of ants, including winter ants:

Store food in airtight containers to eliminate potential food sources.

To prevent their intrusion, sealing cracks and eliminating food sources is essential.

Clean up crumbs and spills promptly to discourage ant foraging.

Use a mixture of vinegar and water to clean ant trails, disrupting their pheromone communication.

Sprinkle cinnamon or cayenne pepper near entry points as a natural ant deterrent.

Apply diatomaceous earth around the perimeter of your home to create a physical barrier.

Cold weather bugs reveal the hidden world of insect survival in freezing conditions. From the fascinating adaptations of snow fleas to the potential threat posed by winter moths and ticks, these winter insectsshowcase the diverse strategies employed to endure the harsh environment. Understanding their habits, appearance, and potential risks allows you to coexist with these cold weather bugs while appreciating the intricate balance of nature even in the coldest months.

SOURCE: BACKYARDBOSS.NET