DIY: Spring Cleaning for Your Garden & Lawn: Part 2

10 Scrub those clay pots.

Clay pots get very dirty if they are left out over the winter. Now is the time to soak them so that they will be ready for the plants when the weather is warm enough for them to be planted.  

11 Cut back perennials

 Sometimes I do this in the fall, but more often, I leave this chore for the early spring, to keep some seed pods for winter birds. Perennials can be cut back almost to the ground level in most cases without hurting them at all.

12 Prune your roses

 In most cases, you will be pruning your roses just as the plant will be breaking the winter dormancy.  In warm climates, like NC, this will be fairly early in the year, just after the last frost.  Roses bear flowers on last year’s wood.  Trim off any old, dead canes. Be sure to prune so that the center of the bush is open for best air circulation.  

13 Remove dead wood

This goes for roses but also for other trees and shrubs too. Nothing will grow from dead wood, so get rid of it.  This goes for most suckers too. They sap the life from your plant and should be removed.

TIP:  If it is too early for you to prune shrubs, you can still inspect the plants. Take some ribbon with you and tie it where you want to prune once the weather warms up. So get out those garden gloves and your pruning shears and get rid of the dead wood. You’ll be glad you did come summer time.

14 Spring weeding

Even though I have it listed as #14, weeding is at the top of my list for early spring garden project. Weeding can the bane of my gardening life, if I let it be. Each year, I say that I am going to pull up weeds during the winter on warm days, and each year, I neglect this. But early spring is a good time to weed as long as the ground is not too wet, AND it’s the best time to do this job. The roots of the weeds are shallow and they will come out easily this time of the year.   This border that I planted late last summer looks as though it needs some TLC l right now, but those weeds will be out in less than a half hour and the bed will be beautiful.

15 Early spring Vegetables

Many vegetables thrive when planted in the early spring because they love the cooler weather. Some popular ones are English peas, broccoli, cabbage and Brussels sprouts. Here in NC, these plants don’t do well in the summer at all, so early spring is when I have to plant them if I want to grow them.  See my list of cold hardy vegetables here.

16 Check your lawn edges

 Inspect plastic lawn edging to see if it needs replacing.  If you edge manually with trenches, now is a good time to tidy these up so the edges will be ready when the lawns start to grow. Doing it early means that the edges will only need cutting into soil, not into lawn that is encroaching into the borders.

17 Start seeds indoors

Get a head start on spring but planting seeds for flowers and vegetables indoors.  I have a large plant stand that sits outside during the spring and summer. During the winter, it sits in front of my glass sliders and gets southern sunlight. It is the perfect spot for my plant cuttings and seed starting efforts.

18 Divide perennials

One of my favorite early spring garden projects is to divide my perennials.  Early spring is the perfect time to divide perennials. Many of them really benefit from being divided for best growth. Either plant the divisions in another part of your garden, or share them with some of your plant loving friends.  

SOURCE: THEGARDENINGCOOK.COM

DIY: Spring Cleaning for Your Garden & Lawn: Part 1

Spring is the perfect time to begin lawn and garden projects!  This article from thegardeningcook.com shows you how to get started.

From thegardeningcook:

These early spring garden projects will get a jump start on your garden and will get you outside too! From lawn care ideas to tips for growing perennials in the spring, i’ve got you covered. I know that in most parts of the country, the ground is still covered with snow, but as any good gardener will tell you, “it’s never too early to start thinking about spring gardening!” Spring is just around the corner and daylight savings on the horizon, so now is the time to think of getting our gardens ready. Are you like me in the late winter?  As soon as the sun starts to shine and the temps go up a bit, I seem to feel that urge to get out there and do something. Many times though, it’s far too early to plant anything. However, there are lots of things that you can do to get ready. 

Get your garden ready now with these early spring garden projects

NOW is the time to get started on some very early spring gardening tasks.  These are my tried and true early spring garden projects that will make sure I get these results year after year.

1. Prepare for early lawn care

This is at the top of my early spring garden projects for a reason.   A lush, green lawn is such an important part of a great garden.  We all enjoy entertaining in the summer, and a wonderful lawn adds so much to the atmosphere of your garden setting.  Early spring is the time to take stock of the condition of your lawn after a winter of it not growing.  It will show what needs to be done to get it ready for spring when you can easily see the problems lurking there. I have a lot of lawn area and the back yard has quite a few weeds growing.  It definitely needs some TLC in the spring. I’ll start by raking my lawn early in the spring to remove dead grown and winter debris.  This brings light as well as air to the soil, which encourages the grass to grow.  Now is the perfect time to care for your lawn.  Don’t wait until the heat of summer hits.  When you are hosting a barbecue party in summer and your lawn is lush and green, you’ll be glad you started now.

2. Clean and repair birdhouses

Some birds visit us all year round here in NC and many really start visiting when the weather starts to turn warm.  Now is the time to check the birdhouses.  Make sure they are firmly mounted. Clean bird feeds and fill them with fresh seed, once they are dry.   Consider creating a pile of nesting materials in your yard where the birds can easily take stuff to make their nests. This little bird house needs a makeover this year.  It belonged to my mother who died last year and I will treasure it once I fix the damaged parts.

Now is the time to clear away the junk

One of my most needed early spring garden projects is cleaning up after winter.  Winter can be hard on a garden.   All sorts of garden debris and other refuse seems to gather everywhere around the yard.

3. Clear away refuse

Check the drainage ditches and walk around your yard to see what can be gathered and put out for garden refuse pick up. Our local authority allows me to put yard debris out every week and I have a whole row of old trash cans just waiting for this job.  Plants and lawns grow best in soil that drains well, so gather up those leaves, gather the weeds, and clean out the drainage ditches!  If you have a compost pile, even better.  I use a rolling compost pile. It is not very pretty, as this picture shows, but it is VERY easy to turn and all that yard refuse will turn into “black gold” that will work miracles in my garden and on my lawns. This pile is just LOADED with rich hummus under all the refuse.  Dumping my winter time yard refuse on this pile makes the clean-up part quite easy.

4. Tend to the bird baths

My bird baths are often discolored by the end of the winter.  They all need a good cleaning and scrubbing and then need to be refilled with water.

5. Think spring bulbs

Many spring bulbs start sending up leaf shoots during some warm winter days and then suffer a bit from a cold snap by getting brown edges to the leaves. The bulbs are just fine, they need the cold before they start sending up the flowers, but you can trim the leaves a bit to tidy things up.   While you are at it, make a sketch of where the spring bulbs are and put it in your gardening planner.  Once they have stopped growing, it will be hard to know where to plant your perennials without a sketch showing you where the bulbs are underground.

6 Check your mulched areas

This job is at the top of my must-dos of early spring garden projects. I have 9 large garden beds so I spend a lot of time (and money) on mulching every year.  And no matter how nicely the mulched areas looked last fall, there are still areas where the mulch has degraded or (it sometimes seems) just plain disappeared!  Add composted leaf mulch to the bare areas so that the weeds that we all know are lurking there won’t be able to grow as easily.

7 Check your outdoor seating areas

Last year, I bought new patio cushions for my seating area which rests under a huge Magnolia tree. By mid-winter, the cushions were a green mess and I honestly thought I would need to throw them away. But I threw them in the washing machine with some spray on stain remover (it took two washes) and they look almost like new.  Note to self:  Next year, put the patio cushions in the shed in the fall!  One of my summer projects for this seating area is going to be to sand the seat and bench and give it a fresh coat of paint in a dark green color. Stay tuned for the transformation.

8 Touch up yard decorations

Of all of my early spring garden projects, this one is my favorite.  I love to add decor to my garden.  Do you have some yard decorations that will need a touch up to look their best for spring and summer?  I have an old mail box that I salvaged from a make-over that I did last summer.  I plan to use to hold my gardening tools, and have a garden decoration too.  It’s very rusty, but will make a great project for early spring when I can’t actually be gardening. I plan to paint it and stencil on the side. It will make a lovely yard decoration when done.

9 Cut back ornamental grasses

I let my Japanese Silver grass get very tall in the winter because it sends up beautiful plums above the plant. But early spring is the time to cut it right now to about 6 inches to encourage lush growth during the spring and summer. If I leave this plant for even a few more weeks, ALL of these fronds will be covering my garden bed.  Now is the time to prune them.

SOURCE: THEGARDENINGCOOK.COM

DIY: Valentine’s Gifts

Birch Candle

I love, love, love this candle.  It does require being able to drill the hole for the tea light though.  Hubby and I are going to attempt these.  We have tons of birch trees around!

Equipment

Knife

Drill with drill bits including 1 3/8″ spade bit or slightly larger

Materials

1 section birch wood

Tealight candle

Colored pencil(s) light brown

Pencil

Instructions

Trace the tealight in the center of the birch wood piece using a pencil.

Begin drilling with the spade bit, placing the center of the bit in the center of the tealight circle. Rock the drill back and forth a little while drilling to get a good hole.

Sketch the design you want on the front of the birch pillar using a pencil.

Carve the design on the pencil lines using a knife.

Shade in the design using a light brown colored pencil.

Put a tealight candle in the top of the birch candle holder to finish.

Heart Bookmark

The instructions for this bookmark use a cricut machine but I think there’s an abundantly easier method for those of us without those machines.  Simply cut a heart out of construction paper.  Cut a second heart the same size, but add ¼ inch tabs to the sides of the heart.  Place the 2 hearts together, fold and glue the tabs around to the back of the second heart.  Write your message on the top.  Easy peasy. 

SOURCE: THEPIONEERWOMAN.COM

The gift basket in the opening picture is my idea of the perfect gift for Valentine’s Day: a mug, a little Styrofoam, whatever candy the giftee loves the most, some ribbons and doodads from the dollar store and BOOM! A happy valentine!

Winter Insects to Watch For

I always thought winter was a small respite from pests, but as I read in the following article from BackYardBoss, there are several insects we need to keep a look out for.

From BACKYARDBOSS:

Winter can be harsh for wildlife, including insects. As temperatures drop and the days grow shorter, many of the bugs that are common during other seasons become rarer to see. But where do bugs go in winter? Many insects enter a state of dormancy or seek shelter to survive the cold. Some burrow into the soil, finding refuge beneath the frost line, while others hibernate in cozy nooks, such as leaf litter or tree bark. Certain insects, like monarch butterflies, travel south for the winter, according to the U.S. Forest Service. There, the butterflies hibernate until the cold months are over.

But not all insects are intimidated by winter. There’s a world of bizarre and terrifying insects that thrive in the cold.These winter insects are adapted to surviving in harsh conditions, displaying unique characteristics that set them apart from their warm-weather counterparts.From beetles with antifreeze-like blood to spiders that brave cold temperatures, thesewinter bugsare both fascinating and, at times, unnerving. Discover eight weird winter insects you’ll probably see before the season is over.

Snow Fleas

Snow fleas, despite their name, are not actual fleas. These minuscule insects are a type of springtail. Found in moist environments, snow fleas are some of the most active insects in winter, and their presence becomes noticeable on snowy surfaces. The winter bugs measure only about ⅒ of an inch, according to the University of Minnesota, and their dark color makes them stand out against the white snow. Despite their ominous appearance, snow fleas are harmless to humans. They feed on organic matter and play a crucial role in breaking down decaying plant material, which can help improve your soil.

Snow fleas produce Hypogastrura harveyi Folsom, a protein that acts as an antifreeze, preventing ice crystal formation within their bodies, and allowing them to remain active even in subzero temperatures. Their ability to jump vast distances helps them navigate through snow, while their dark coloration absorbs sunlight, providing them with warmth in chilly environments.

Snow flies can find their way into your home, but there are some things you can do to keep snow fleas at bay:

Maintain proper ventilation to reduce moisture levels indoors.

Clear snow and debris from around the foundation to limit their access points.

Use natural repellents like diatomaceous earth near entry points.

Apply a thin layer of cedar oil or citrus-based repellent in infested areas.

Use a vacuum cleaner with proper filtration to remove snow fleas indoors.

Consider introducing predatory insects like ground beetles to control populations.

Winter Stoneflies

Winter stoneflies are insects that defy the common perception of insects going dormant in winter. Thesewinter bugsare characterized by their elongated bodies and two pairs of membranous wings. Typically found near cold, running water, winter stoneflies undergo a unique life cycle that involves egg-laying on rocks in freezing conditions. Like snow fleas, winter stoneflies have dark coloration that aids in absorbing sunlight for warmth. Their ability to walk on their tippy-toes prevents direct contact with cold surfaces. Additionally, they seek refuge in crevices to evade harsh winter winds and replace body fluids with glycerol, an alcohol that remains unfrozen, enabling them to regulate their antifreeze levels as necessary.

Fortunately, stoneflies rarely invade your living space. However, if you have discovered them in your space and would like to get rid of them, there are some things you can do:

Use light-colored exterior paint to reduce heat absorption and deter stoneflies.

Install artificial light sources away from water bodies to minimize attraction.

Remove standing water around the property to limit breeding sites.

Apply insecticidal soaps sparingly on stonefly-infested plants.

Winter Moths

Winter moths are enchanting insects with a problematic reputation. These small, delicate moths have a wingspan of around 1 inch and are known for their ability to fly in cold temperatures. While they may seem harmless, the weird winter insects can be highly destructive to deciduous trees during their larval stage. The caterpillars feed on tree buds, potentially causing extensive damage to forests and ornamental trees. Winter moths have antifreeze in their bodies, aiding survival in freezing temperatures. They can also shiver to generate heat, maintaining their activity levels in cold weather.Moreover, they exhibit the ability to delay hatching until food sources are plentiful, enhancing their survival prospects by synchronizing with blooming cycles.

Winter moths can nest in your home but, there are some considerations for getting rid of these bugs in the winter:

Release natural predators such as parasitic wasps to control caterpillar populations outdoors.

Use organic insecticides such as neem oil to kill winter moths.

Apply horticultural oils on tree trunks to suffocate winter moth eggs.

Introduce pheromone traps to disrupt the mating cycle of adult moths.

Wrap tree trunks with burlap in late fall to prevent egg-laying.

Use sticky bands around tree trunks to trap crawling caterpillars.

Winter Ticks

Winter ticks feed on the blood of mammals during the winter months. These tiny, reddish-brown bugs are particularly concerning due to their impact on wildlife and domestic animals. Animals can suffer from significant blood loss when infested with large numbers of winter ticks.

A significant adaptation of these winter bugs is their ability to remain on a host throughout cold winters, unlike other tick species that shift hosts between developmental stages.This strategy ensures their survival by providing consistent access to a blood meal. Furthermore, off-host larvae and adult female winter ticks display remarkable survival techniques underwater, showcasing their adaptability to severe environments. To fight winter ticks:

Regularly check pets and livestock for ticks, especially after outdoor activities.

Safely remove the winter insectsusing fine-tipped tweezers, grasping as close to the skin’s surface as possible.

Create tick-safe zones by clearing tall grass and dense vegetation.

Use botanical repellents on pets, focusing on ears, neck, and paws.

Consult with local wildlife management agencies to control tick-infested wildlife populations.

Snow Scorpionflies

Snow scorpionflies are fascinating insects that add a touch of mystery to winter landscapes. With their distinctive long antennae and tail-like appendages, snow scorpionflies have an otherworldly appearance. This winter flyis commonly found on snow surfaces, where it feeds on small invertebrates and detritus. What makes snow scorpionflies so adept at surviving in the winter? Well, the winter insects can lower the freezing point of fluids in their cells, which prevents the formation of ice crystals and allows them to be active in cold conditions. Snow scorpionflies don’t often infest your living spaces. But if you’re concerned that the winter insects might find their way into your home, there are things you can do to thwart an attack by the bugs in the winter:

Maintain cleanliness to discourage their presence indoors.

Safeguard your living space by fitting screens on windows and doors to block their entry.

Use yellow outdoor lighting to minimize their attraction to illuminated areas.

Clear snow and debris from outdoor spaces to reduce potential habitats.

Plant native vegetation to encourage the presence of natural predators.

Winter Ants

Winter ants, despite their small size, exhibit remarkable resilience in cold weather. The insects remain active during winter, foraging for food sources when temperatures drop. With a preference for sweet substances, winter ants may venture into homes seeking sustenance during the colder months. Ants have several adaptations to survive the winter. In colder months, ants use southern exposure rock surfaces to warm themselves and crowd together to share body heat. Unfortunately, winter ants can infest your home.The good news is that there are things you can do to get rid of ants, including winter ants:

Store food in airtight containers to eliminate potential food sources.

To prevent their intrusion, sealing cracks and eliminating food sources is essential.

Clean up crumbs and spills promptly to discourage ant foraging.

Use a mixture of vinegar and water to clean ant trails, disrupting their pheromone communication.

Sprinkle cinnamon or cayenne pepper near entry points as a natural ant deterrent.

Apply diatomaceous earth around the perimeter of your home to create a physical barrier.

Cold weather bugs reveal the hidden world of insect survival in freezing conditions. From the fascinating adaptations of snow fleas to the potential threat posed by winter moths and ticks, these winter insectsshowcase the diverse strategies employed to endure the harsh environment. Understanding their habits, appearance, and potential risks allows you to coexist with these cold weather bugs while appreciating the intricate balance of nature even in the coldest months.

SOURCE: BACKYARDBOSS.NET

DECLUTTER!

The New Year typically represents fresh starts and what better way to have a fresh start than to declutter your life and your home.  This article from thesimplicityhabit.com details how to get started and areas you might want to think about decluttering.

From thesimplicityhabit.com:

24 Things to Declutter for the New Year

To get the fresh start you’re looking for, you’ll need to clear some clutter out of your way. Here are 23 ideas of things to declutter for the new year to get you started.

1 Your wardrobe.

Many people keep old clothes which have become clutter. Consider how often you wear each item. Are they adding value? If not, they’re just getting in the way, or even worse making you feel bad about yourself, and should probably be rehomed. Sort through your closet and dresser drawers and get rid of anything you really aren’t going to wear again. Chances are, you’ll find more stuff than you thought. And when you’re done? Ethically get rid of those clothes by finding a new home for that stuff! Sell it, donate it, swap it with a friend – just don’t send it to the landfill.

2 Your kitchen pantry.

The kitchen pantry is a great area to declutter in the new year. Things tend to get shuffled around, shoved to the back, and pushed out of sight and out of mind that need to be dusted off and brought forward. It’s also a good idea to check your expiration dates and get rid of anything past its prime – it might take a while, but spices, soups, and canned goods do eventually expire.

3 Your medicine cabinet.

Like spices, prescriptions don’t last forever. Every medicine out there has an expiration date, even the over-the-counter stuff you keep around to fight off a cold. For safety reasons, it’s a good idea to declutter expired items. If you haven’t gone through your medicine cabinet recently, it’s a good spot to declutter for the new year. Make sure to check for appropriate ways to dispose of expired medicine.

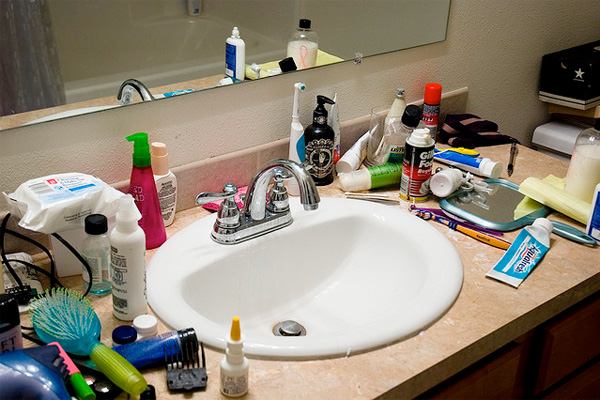
4 Your makeup & toiletries.

Yes, even makeup and toiletry items have a shelf life. Things like lotion don’t seem like they should go bad, but eventually, they do. Old items can also collect bacteria so it’s a good idea to go through these areas in your bathroom from time to time. Even if items aren’t spoiled, you’re likely to find makeup products to declutter because you don’t use them. If there is still a lot of usable product left, consider giving it to a friend or list it with your local Buy Nothing group.

5 Your subscriptions.

One thing you should declutter for the new year that most people don’t consider? Your subscriptions! You can subscribe to virtually anything nowadays. From audio and video streaming services to meal delivery programs, and shaving kits, you can get pretty much anything with a recurring payment. And since those recurring payments are out of sight and out of mind, we don’t think about them and may not realize they’ve become a money drain. Take advantage of the new year as a time to review your subscriptions and declutter – or unsubscribe from – any you no longer need. You’ll eliminate clutter and save some money! 

6 Your email inbox.

Digital clutter is absolutely a thing – and it can be harder to manage than physical clutter. If you’re one of those people whose unread emails are in the thousands, you certainly aren’t alone. But you can take some steps to reduce your digital clutter. It will keep things a little more manageable, making it easier to find what you need and skip over the stuff that you don’t.  You might be amazed to see just how much of an impact a quick ‘unsubscribe’ session and a few inbox filters can make. 

7 Your junk drawer.

Most homes have at least one junk drawer. Filled with the most random assortment of odds and ends you can possibly think of, it’s a place where lots of things go to be totally forgotten. If it’s been a minute since you’ve looked through your junk drawer, add it to your list of things to declutter for the new year. Spend a few minutes getting rid of the stuff you don’t need, and find a proper home for the stuff worth keeping.  When you’re done, you might just realize you don’t even need a junk drawer.

8 Your desk drawer.

One more thing you should declutter for the new year? Your desk drawer! This is especially true if you’re working from home. Between all of the pens, pencils, binder clips, paper clips, extra staples, rubber bands, thumbtacks, and other random odds and ends that find their way in here, it can be difficult to keep everything organized. And without organization, all that stuff quickly becomes a cluttered mess. Finding the thing you need becomes impossible. And what good is that? If you don’t already have one, invest in a desk drawer organizer to keep the stuff you’re going to keep neatly separated and easy to find.

9 Your cords and cables.

Pretty much everyone has one: a random spot where miscellaneous cords and cables are hidden. We keep them around – sometimes without even knowing what they’re even for – on the off-chance something breaks and you just happen to have the right one to swap it with. That’s a whole lot of stuff to hold on to for a just-in-case scenario that doesn’t play out too often. Before the new year, sort through all of those cords and cables – and let go of the ones you realistically don’t need to keep. Spoiler alert – that’s likely most of them!

10 Your craft supplies. 

Love to craft in your spare time, or have a kid who enjoys rolling up their sleeves and getting creative? Chances are, you’ve got more craft supplies than you really need. Between all of the construction paper, glitter glue, googly eyes, pipe cleaners, stickers, and other miscellaneous odds and ends that can be put to good use during art projects, it can be tough to keep it all organized. Take some time in the new year to evaluate what you’ve got and get rid of anything you know you won’t use again. It will make organizing your craft supplies much easier!

11 Your board game collection.

If you and your family love to play board games as we do, you might have a bigger collection than you really need. Go through your collection and keep your favorite games. Make that overflowing game closet manageable by decluttering your games at least once a year and donating the ones you no longer play to someone who could really use them. 

12 Your kitchen counters.

Counters are often a magnet for random household junk. They attract the items waiting to be put away and dealt with. All of those dumped items take away from your counter space making it more difficult to work in there as well as making your home look cluttered. Counters are a great area to declutter for the new year. It doesn’t take too much time and has a big impact on the look, feel, and function of your space.
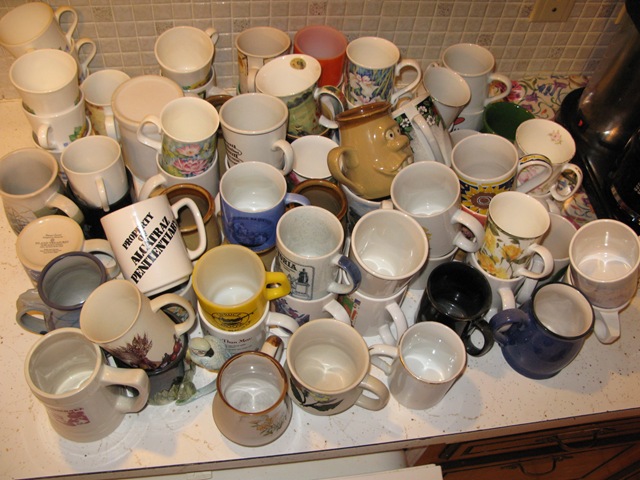
13 Your drinkware.

Some people tend to collect different cups and glasses throughout the year – only to find themselves with a too-full cupboard and nowhere to store the overflow. Others stock up on more water bottles than one person should reasonably own. If you fall into either of these categories, you should absolutely spend a minute decluttering your drinkware. And don’t just throw away the ones you don’t need – you can donate any unwanted glasses, cups, or bottles to a local organization in need.

14 Your schedule.

A new year is a great time to re-evaluate your commitments. See where your schedule reflects your values and where it doesn’t. If you are a people pleaser, you’re more likely to say yes and overcommit, which can leave you feeling exhausted and regretful. Take the opportunity now to declutter your schedule and create boundaries with your time.

15 Your fridge.

Does it smell kinda strange every time you open your refrigerator? Maybe you know this task needs to happen but you’ve been putting it off. Start the year with a clean fridge. Declutter anything that is past its date or smells or looks bad. Once you’ve gotten the gross stuff out, wipe down the shelves with some cleaner. Then you can happily open your fridge without cringing.

16 Your phone.

Our phones get used a lot…probably too much. With all of the apps, tabs, and photos, phones can become a cluttered mess. Take a few minutes here and there to work on deleting apps you don’t use. Eliminate those duplicate and blurry pictures. It may take some time to make your phone a clutter-free zone, but it’s well worth the effort.

17 Your shoes.

Life is too short for uncomfortable shoes. If you have shoes you never wear, shoes that are falling apart, or shoes that hurt your feet, do yourself a favor and start the year off by decluttering them. Improperly fitting shoes can cause problems and pain in your feet. No matter how cute the shoe is, it’s not worth it. Clear that space up in your closet and declutter those shoes. Your feet will thank you.

18 Your books.

If you’re in the camp that thinks that books simply cannot be considered clutter, then I’m sorry to disagree with you. Even if you insist they are not clutter in your home, they can be clutter to other people. From my perspective, books that are never used and sit on a shelf collecting dust for years have become clutter. Books are meant to be read and enjoyed and passed along to others to read. If bookshelves filled to the brim with books are overtaking your space, the new year is a great opportunity to re-evaluate them.

19 Your feed.

If you spend any amount of time on Facebook, Instagram, or any other social media platform, you know your feed can become cluttered. Cultivate a feed that you feel good about by unfollowing, snoozing, or hiding the pages and people that aren’t adding to your life or your mental well-being. Social media can be a positive place, but it does require carefully curating your feed.

The tougher things to declutter for the new year

20 Your thoughts.

Do you often have to-do lists running through your mind and distracting you from your life? It’s time to declutter them by getting them down on paper or saved on your phone. With all of the distractions in today’s world, mental clutter becomes a very real thing. The new year is a great time to get the clutter out of your head and create systems that work for you.

21 Your relationships.

Decluttering relationships is no easy task, but it can be a necessary one. While in some cases you may not be able to shut certain relationships out of your life, you can create definitive boundaries in order to protect yourself. This year consider which relationships you want to invest more time and energy into, and also which ones have potentially become toxic that you need to distance yourself from.

22 Your past.

Likewise, letting go of your past is not easy. That is not to say forget everything that happened in your life, but rather, work through and deal with things if you need to. Prioritize your mental health. Let go of negative self-talk or patterns of behavior that are holding you back in your life. Sometimes letting go of clutter is dealing with the emotional clutter you’re carrying and working to let that go. A new year before you is the perfect time to focus on things you’ve pushed aside, but know in the back of your mind that you needed to address. Let go of those burdens and find freedom in a fresh start.

23 Your unrealistic expectations.

Whether the unrealistic expectations you’ve been holding onto have been of yourself or of others, the new year is an opportunity to let those go as well. Go easy on yourself and be willing to forgive others. That is not to say allow toxic relationships in your life. However, sometimes our unrealistic expectations of others negatively impact relationships that could otherwise be healthy and good. If you have perfectionist tendencies, it can be particularly challenging to let go of what you expect of yourself. Remind yourself that no one is perfect and that your best is good enough. It won’t always be easy, but it’s a worthwhile pursuit.

24 Your negative self-talk.

Sometimes we’re the ones that get in our own way. If you struggle with negativity or are overly critical of yourself, it can not only take you down but also hold you back in life. Consider adding positive mindset habits into your daily routine. Start and end your days with positive thoughts. It will help to set the tone for your day and prepare you for rest. And be kinder to yourself. Often we are our own worst critics. Extend the same grace and care to yourself that you give to others.  If you catch yourself dwelling on destructive or unhelpful thoughts replace them with constructive ones.  A positive life doesn’t come from a negative mindset. Thankfully there are ways to change your mindset and improve how you’re feeling.

SOURCE: THESIMPLICITYHABIT.COM

DIY: Wooden Bead Ornaments

I found these wooden bead ornaments on the Better Homes & Gardens website.  They are super cute and easy—no mess!

Wreaths

Candy Canes

NOTE: for a more kid friendly version, use pipe cleaners instead of wire.

Stars

There were no directions on this site, but I have seen these stars made before.  String 6 beads on a thread.  Insert the thread through the first bead to make a tight circle and knot the thread but do not cut it. Add 6 beads and insert the thread into the second bead on the circle.  Continue adding 6 beads and threading through the bead around the circle. Knot the thread and weave the thread through the inner circle beads to secure.

SOURCE: BHG.COM

DIY: Tabletop Christmas Trees

Admittedly, some people do not like the mess of a real Christmas tree.  I, myself, love the fragrance of a real tree—needles be damned.  But, if you’re one of those people who can’t handle the mess or simply don’t have the room for a real tree, I have found DIY alternatives!

(Most of these seem self-explanatory, but I included the link at the bottom if you need it.)

PASTA NOODLE TREE

PLASTIC SPOON TREE

NORDIC SWEATER TREE

COFFEE FILTER TREE

FLEECE CONE TREE

PUMPKIN SEED TREE

ENJOY!

SOURCE: PRUDENTPENNYPINCHER

(50 DIY mini Christmas Trees)

DIY: Suet Wreath

If you like to feed the birds over the winter, you can make your own suet! I found this project on the KAYTEE.COM website.

Items you’ll need for this craft:

Bundt cake pan – You can use mini Bundt cake molds if you want to make multiple wreaths for multiple gifts.
4 cups Kaytee bird seed – Choose a seed that fits with your region to attract birds in your area.
Cranberries
1 and 1/2 packets of unflavored gelatin
1/2 cup warm water
1/3 cup corn starch 
3 Tablespoons light corn syrup
Thick ribbon
Gift wrap – If you’re making this as a gift, you’ll want to find a box that fits the wreath and wrapping supplies to make it festive.
Kitchen items – You’ll need a drying rack, medium-sized sauce pan, spatula, stove, refrigerator, and measuring utensils. This craft requires heat and cooling, so children will need assistance and supervision if helping with this craft.
Nonstick cooking spray.

Spray the Bundt pan mold liberally with nonstick cooking spray. Place the cranberries in the pan how you would like them to look on the front of the wreath. Set aside for use after the mixture is ready.

Measure out four cups of bird seed in an easy-to-pour container. Set aside and have this ready for when the mixture is ready.

In a medium-sized sauce pan on medium heat, whisk together the packets of unflavored gelatin and warm water. Whisk until it is dissolved. 

Add in the corn starch and light corn syrup, as shown in the image above. Whisk until there are no lumps of cornstarch left. 

The mixture will start to form a thick paste after all the ingredients begin to bind. The paste should be smooth and thick.

Once the paste is formed, remove the pan from the heat and stir in the four cups of bird seed that was set aside from step three. Tip: spray your spatula with nonstick cooking spray before mixing together to make clean up easier! 


Carefully add the combined mixture into the Bundt pan mold, making sure to pack it down and keep the cranberries in place. Evenly distribute the mixture so the wreath will be balanced when it sets.

Pack the seed down with the spatula. Once all the mixture is in the pan, place the entire pan in the fridge. Remove it from the fridge when it’s hard to the touch. This should take no longer than an hour.
After the wreath is hardened, take it out of the fridge and gently remove the wreath from the pan by flipping it upside down onto a cooling rack. Let it dry completely before adding ribbon or handling it too much. It’s best to let it dry for 12-24 hours. 

Tie a thick ribbon around the wreath and then to a tree or feeder hanger. Bring it outside and carefully hang it where the birds will see it. If you’re giving it as a gift, wrap it up gently and give the gift as soon as possible so the wreath materials stay fresh for the birds. 

SOURCE: KAYTEE.COM

DIY: Gravy Mistakes and how to Fix Them

I found this helpful article on the eatingwell.com website:

Gravy—you slather it on turkey and pool it on top of mashed potatoes. You let its rich and meaty flavor mingle a little with sweet potato casserole and sop up what’s left over with a dinner roll. No Thanksgiving dinner is complete without a good old-fashioned gravy. To give you the best shot at success, here are six common mistakes that make gravy less than perfect and how you can fix them.

Mistake to Avoid No. 1: Your Gravy Has Lumps

Nobody likes lumpy gravy. Reasons for lumpy gravy include using a spoon to stir instead of a whisk and dumping your thickener into the gravy without making a roux first. What’s a roux? A roux is a paste made from flour and fat that thickens sauces, and it’s essential to a good gravy. You can make it with fat from the bottom of the roasting pan, butter or oil. Aim for one part fat to one part flour. Heat the fat in a saucepan or directly in the roasting pan. Add the flour and cook, stirring, until the mixture begins to bubble (the longer you cook it, the nuttier the flavor—just don’t take it too far or it will burn). Once your roux is nice and bubbly, add your liquid and whisk (don’t stir!) until the mixture bubbles and thickens. Crisis averted. Now, just in case you ignored the whole roux-making step and you have a finished gravy (with lumps), all is not lost. Pouring the gravy through a fine mesh strainer should do the trick.

Mistake to Avoid No. 2: Your Gravy Is Too Thick

So you made a delicious gravy except it’s too thick. It’s gummy, in fact, and you’re not quite sure where you went wrong or how to fix it. No problem! One mistake that can result in gravy that’s too thick is adding too much thickener (or too little liquid). Another mistake is not taking into account the fact that gravy tends to thicken as it cools. When it’s hot, gravy should be thick enough to just coat the back of a spoon, but not so thick that it sticks to the spoon like glue. If your gravy is hot and still too thick, add broth a little at a time to thin it out. Remember to check the seasoning when you’re done and adjust if needed.

Mistake to Avoid No. 3: Your Gravy Is Too Thin

Gravy’s job is to coat mashed potatoes, turkey, stuffing (or everything) on your plate with a thin layer of meaty goodness, and it can’t do its job if it pools at the bottom of your plate like water. If you started with a roux and your gravy is just too thin, there are a few things you can do to correct it. If you’ve added too much liquid, you can try cooking it longer. Reducing the volume may be enough to thicken it up. However, if your gravy is thin and the seasoning is where you want it, cooking it down may make it too salty. Here is where you’ll have to make a slurry. A slurry is much like a roux with a less attractive name and a few other minor differences. Like the roux it thickens sauces, but unlike the roux, it uses a thickener (like flour) combined with a little bit of liquid like broth or water instead of fat. Simply whisk your thickener (a couple tablespoons of flour is a good place to start) into 1/2 cup or so of liquid and then whisk that mixture into your gravy. As it heats, it will thicken.

Mistake to Avoid No. 4: Your Gravy Is Greasy

Making gravy straight from the roasting pan is always best, but you’ll need to take some steps to prevent your roasting pan gravy from tasting like an oil slick. What we’re really after from the pan are those browned bits that form at the bottom. They’re a flavor powerhouse. You’ll want them in your gravy, but not the fat that they’re often swimming in. The solution? Deglaze the hot roasting pan with broth (or wine if you want to spare some) and pour the liquid into a fat separator or glass measuring cup. This will help loosen those tasty brown bits from the pan while getting rid of the fat that has also collected at the bottom. You can use the fat that floats to the top of your separator for your roux while saving the liquid for the gravy itself. If your finished gravy is oily, let it sit and try skimming any fat that rises to the top. Whisk any fat that’s left into the gravy and serve immediately.

Mistake to Avoid No. 5: Your Gravy Tastes Burnt

This is perhaps the worst-case scenario in the world of gravy-making. It happens when those deliciously concentrated pan drippings burn, and you decide to make gravy out of them anyway. Your choices are (A) Insist that the gravy tastes fine and everyone else must be mistaken, or (B) Have a backup plan. Let’s entertain Plan B…. If you’re fortuitous enough, you can work on Plan B even before disaster strikes, and here it is: Most turkeys come with a neck and a little packet of other pleasantries like the heart, gizzard and liver stuffed into the cavity. Hold onto these. If your pan is burnt, these will provide you with a much-needed flavor boost for your second attempt. You can sauté them in a separate pan with a bit of mirepoix (onion, carrot and celery) to create some new brown bits to work with, then simmer them in broth to add flavor.

Mistake to Avoid No. 6: Your Gravy Is a Salt Bomb

A well-seasoned gravy complements both sweet and savory elements on the plate, but a gravy that’s too salty can ruin everything it touches. As gravy cooks, it loses volume and concentrates the flavor (and hence the saltiness) of your end product. To avoid gravy that tastes like a salt lick, season it at the end of the cooking process, not the beginning. If you’ve got homemade broth or stock, use that as the body of your gravy. If you’re using broth or stock from a box, opt for a low-sodium option. If your gravy is finished and it’s just too salty, add some broth or water to tamp it down. That will also thin it out, so you may have to thicken it back up again.

SOURCE: EATINGWELL.COM