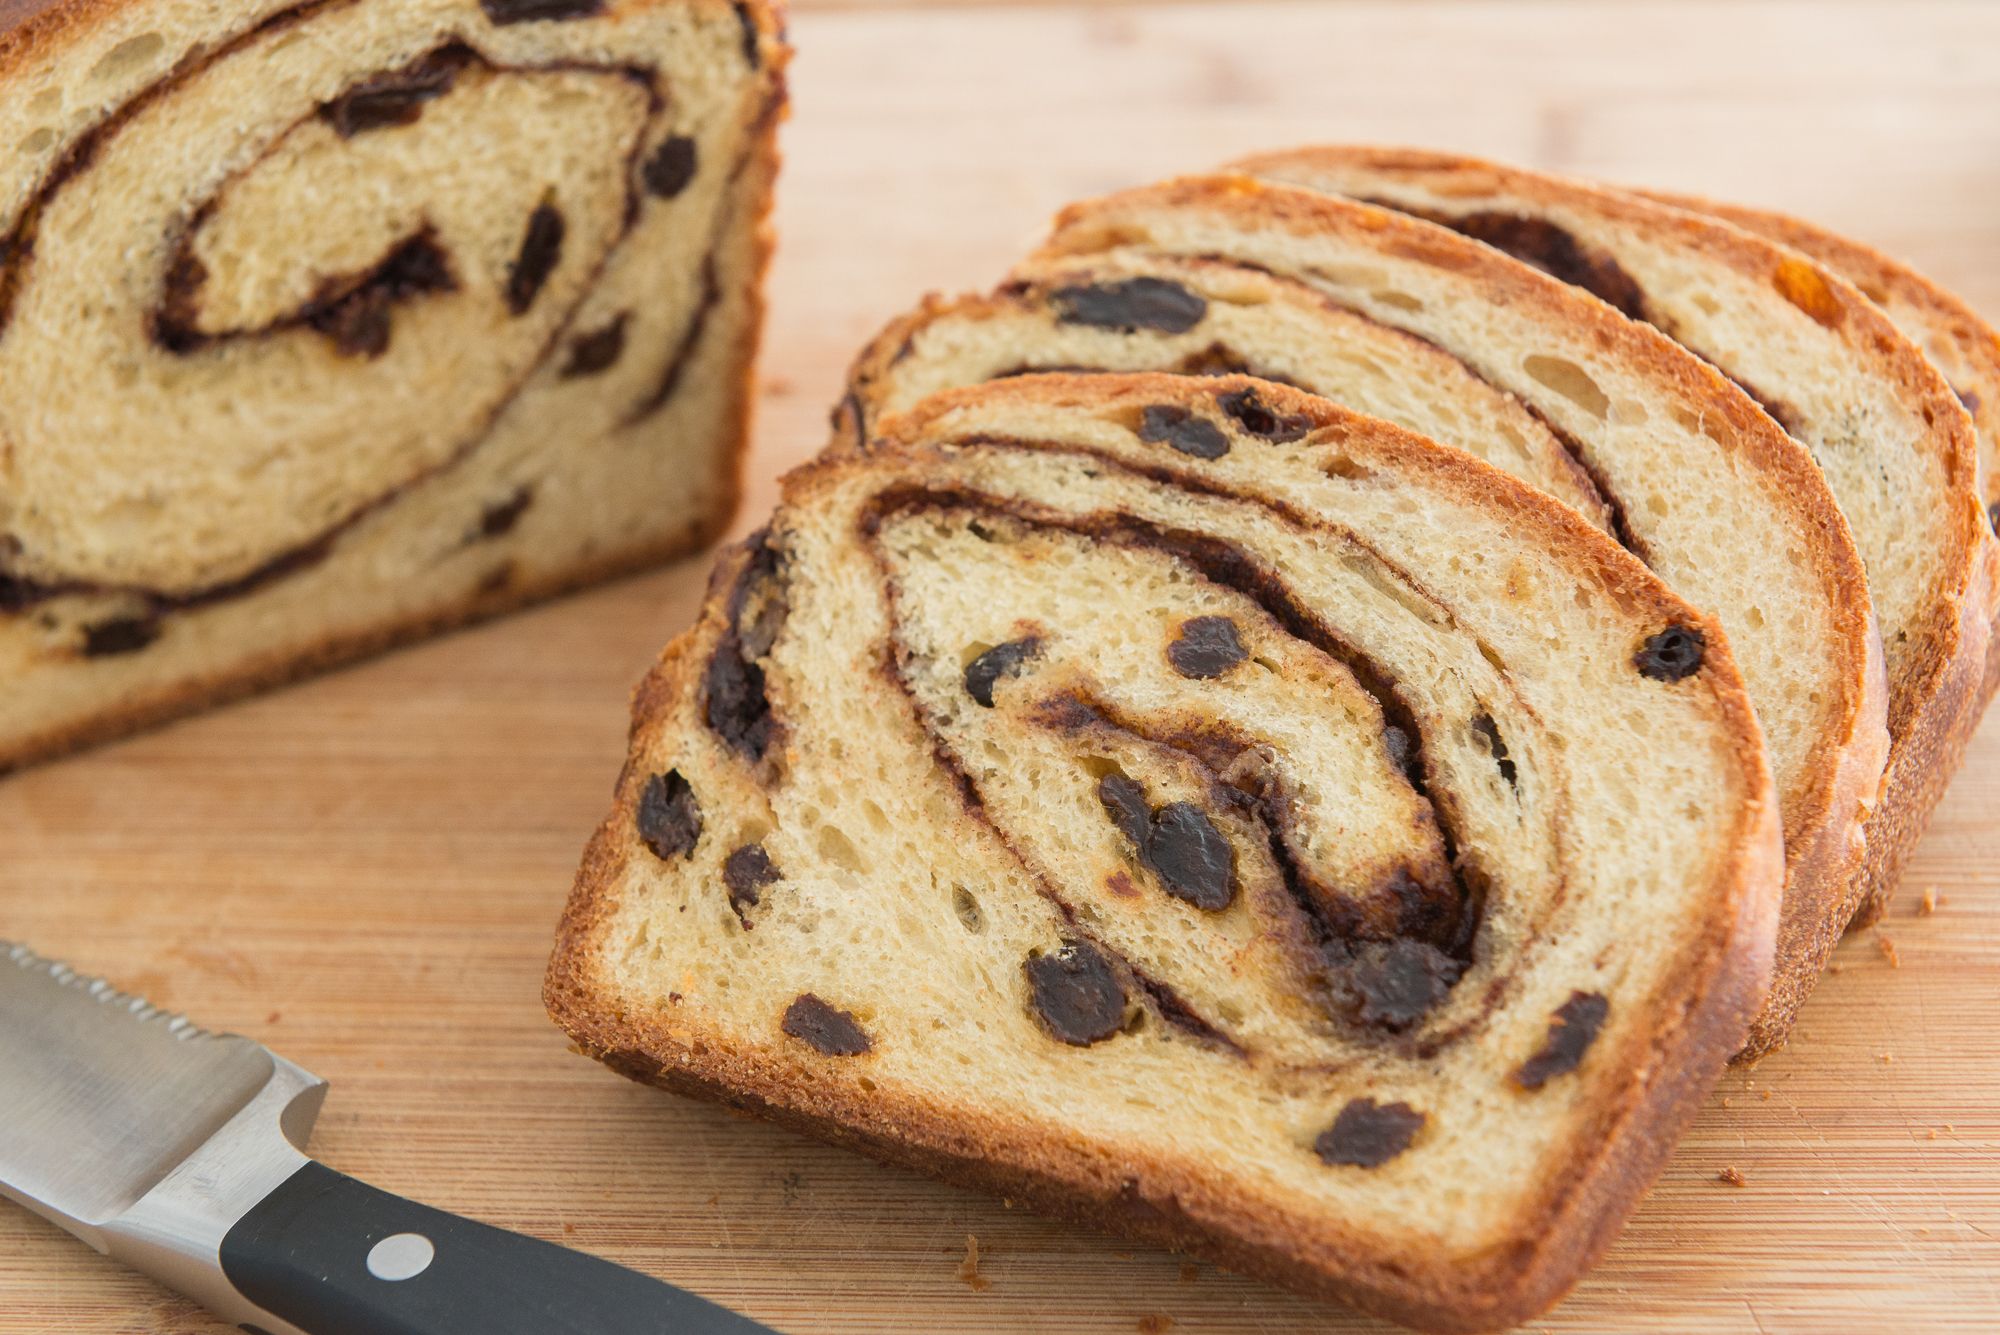
Today is National Cinnamon Raisin Bread Day and this recipe makes 3 loaves!
Ingredients
1 1⁄2 cups milk
1 cup warm water (must be between 110-115 degrees)
2 (1/4 ounce) packages active dry yeast
3 eggs
1⁄2 cup white sugar
1 teaspoon salt
1⁄2 cup unsalted butter, softened
1 cup raisins
8 cups all-purpose flour
2 tablespoons milk
1 cup white sugar
3 tablespoons ground cinnamon
2 tablespoons butter, melted
directions
Warm the milk in a small sauce pan on the stove until it just starts to bubble, stirring occasionally.
Remove from heat.
Let cool until lukewarm, about 120-125 degrees.
Dissolve yeast in warm water and set aside until yeast is frothy, about 10 minutes or so (make sure your water is at the correct temperature or the yeast won’t activate.) Then mix in eggs, sugar, butter salt and raisins (stir in the cooled milk slowly so you don’t cook the eggs.) Add the flour gradually to make a stiff dough.
Knead the dough on a lightly floured surface for a few minutes until smooth.
Place in a large, buttered, mixing bowl and turn to grease the surface of the dough.
Cover with a warm, damp cloth and let rise (I like to let my bread rise in the oven with the light on. It has just the right amount of heat and keeps the bread out of drafts.) Allow to rise until doubled, usually about 1 1/2 hours.
Roll out on a lightly floured surface into a large rectangle 1/2 inch thick.
Moisten the dough with 2 tablespoons milk and rub all over the dough with your hands.
Mix together 1 cup of sugar and 3 tablespoons cinnamon and sprinkle mixture evenly on top of the moistened dough.
Roll up tightly (the long way).
The roll should be about 3 inches in diameter.
Cut into thirds, and tuck under ends and pinch bottom together.
Place loaves into well greased (you can use Crisco or butter for this) 9 x 5 inch pans and lightly grease tops of loaves.
Let rise in warm place, uncovered, again for about an hour.
Bake at 350 degrees for 45 minutes or until loaves are lightly browned and sound hollow when tapped.
Remove from oven and let cool on rack.
Take melted butter and spread over tops of loaves.
After about 20 minutes, lay loaves on their sides and remove from pans.
Today’s recipe has a lot of steps, but it’s not too hard…Copycat Dairy Queen Ice Cream Cake!
This recipe comes from the liveloveandsugar.com website. It’s certainly harder than just buying an ice cream cake; however, the price of a smallish ice cream cake is now around $35!
Ingredients
Chocolate Cookie Crunchies
3/4 cup Oreo crumbs (about 9 Oreos)
1 1/2 tbsp butter, melted
Ice Cream Layers
1.5 quart container vanilla ice cream
1.5 quart container chocolate ice cream
Chocolate Fudge
1 cup semi-sweet chocolate chips*
3 tbsp light corn syrup
1/2 tsp vanilla extract
1/2 cup heavy whipping cream
Whipped Cream
2 cups heavy whipping cream, cold
1 cup powdered sugar
1 1/2 tsp vanilla extract
Sprinkles
Instructions
Preheat oven to 350 degrees. Line a cookie sheet with parchment paper or a silicone baking mat and set aside. Combine the Oreo crumbs and melted butter and stir until well combined. Spread the crumbs evenly onto the prepared cookie sheet. Bake for 8-10 minutes, then allow to cool. Use your fingers to break any big clumps into smaller ones. Set aside. Line an 8×3 inch cake pan* with clear wrap that covers the bottom and goes above the sides of the cake pan. I used two pieces. About 20 minutes before you need it, set the chocolate ice cream out to soften. Once softened, stir it up until smooth and creamy. Add the softened chocolate ice cream to the prepared cake pan and spread into an even layer. Freeze for 30 minutes. To make the fudge layer, add the chocolate chips, corn syrup and vanilla extract to a medium sized bowl. Heat the heavy whipping cream just until it begins to boil, then pour it over the chocolate chips. Allow to sit for 2-3 minutes, then whisk until smooth. Remove the cake pan with the chocolate ice cream from the freezer, then pour the chocolate fudge over the ice cream and spread into an even layer. Freeze for about 10 minutes. Add the cookie crumbles to the top of the fudge layer, then freeze for about 2 hours, until mostly firm. About 20 minutes before you need it, set the vanilla ice cream out to soften. Once softened, stir it up until smooth and creamy. Add the vanilla ice cream to the top of the cake, then freeze until firm, 2-3 hours. Use the clear wrap to lift the frozen cake out of the pan, then place it on a cardboard cake circle or a serving plate. Set it back in the freezer. To make the whipped cream, add the heavy whipping cream, powdered sugar and vanilla extract to a large mixer bowl. Whip on high speed until stiff peaks form. Frost the cake with the whipped cream and decorate as desired. I used Ateco tip 844 for piping the borders. Freeze the cake until ready to serve. Cake is best when stored well covered and eaten within 4-5 days.
Notes
I like using the 8×3 inch cake pan and having a taller cake, but if you don’t have one of those pans on hand and don’t want to purchase it, you could also use a 9 inch pan (including a springform pan). The cake just won’t be as tall.
Semi-sweet chocolate must be used, not milk chocolate or another, for the fudge layer to set properly
Today’s summer dessert is No-Bake Turtle Cheesecake. (Disclaimer: the cheesecake is no bake; the brownie bottom is baked.)
No-Bake Brownie Bottom Turtle Cheesecake
Ingredients:
Brownie Layer
Box of your favorite brownie mix, plus ingredients needed per the box.
Jar of Caramel Sauce
Caramel Cheesecake
16 oz cream cheese, softened
1/2 cup granulated sugar
1/2 cup brown sugar
3/4 cup caramel sauce
1/2 tsp cinnamon
pinch nutmeg
4 oz cool whip
Toppings:
chopped pecans
caramel sauce
hot fudge sauce
Instructions:
Grease a 9″ spring form pan. Combine all brownie ingredients until smooth, pour into prepared pan and bake according to manufacturer’s instructions on box or recipe you are using.
Once brownie is done, remove outer ring of pan and allow brownie to cool completely.
In a large bowl, combine cream cheese and both sugars until smooth. Stir in the 3/4 cup of caramel sauce and spices until combined. Fold in cool whip and mix until everything is incorporated and distributed completely. Place the outer ring to the spring form pan back on. Top the baked brownie with the cheesecake mixture and spread into an even layer. Chill in refrigerator for 3-4 hours.
Before serving, garnish cheesecake with (leftover) caramel sauce, hot fudge sauce and chopped pecans.
This No-Bake Caramel Turtle Cheesecake will stay creamy and fresh for up to 6 days stored in an airtight container in the refrigerator.
Today is National Sandcastle Day and I was surprised to find that there are sandcastle cakes! I won’t attempt to make one (although I will provide the links to websites that show you step by step how to make one. Spoiler: the “sand” is actually crushed Nilla type wafer cookies!)
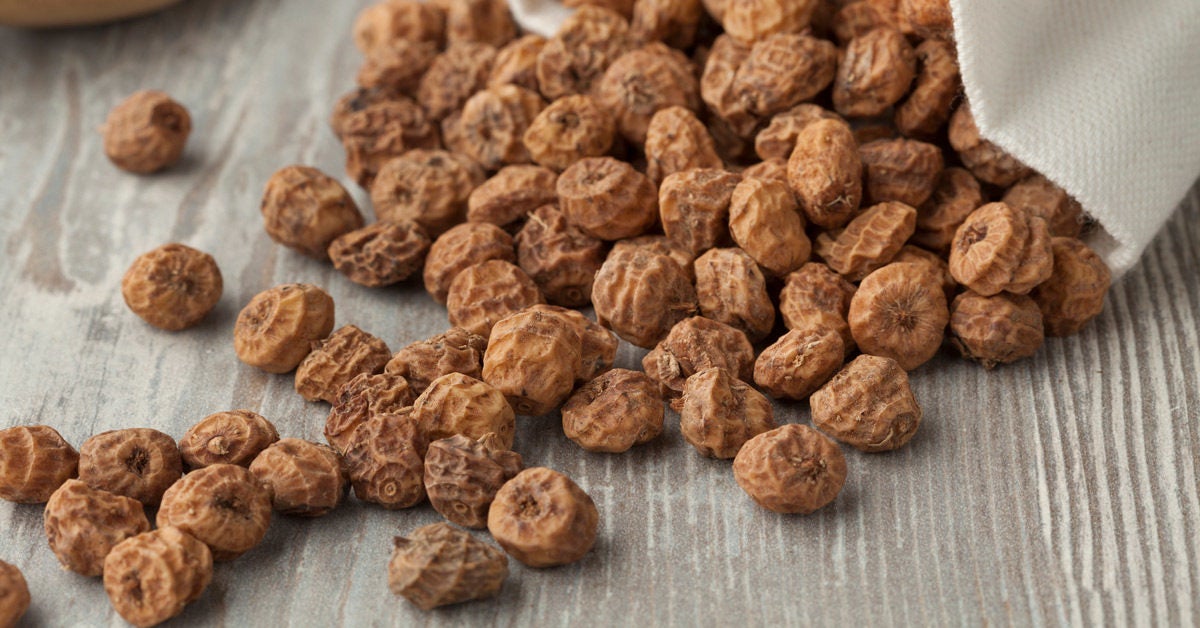
Tiger nuts are not nuts, but tubers with a lightly sweet, nutty flavor with nutrients and health benefits. Here’s what you need to know. Despite their name, tiger nuts aren’t actually nuts. These wrinkly little foods are actually tubers like potatoes and yams.
Tiger nuts are also known as yellow nutsedge, chufa, or earth almonds. This grass-like weed is common in Mediterranean and tropical climates around the world. Tiger nuts have a slightly sweet, nutty flavor. They’re “roughly the size of a garbanzo bean (chickpea)” and “wrinkly, almost like a raisin,” says North Carolina-based RDN Sheri Vettel at the Institute for Integrative Nutrition.
These nuts are also a great source of fiber, magnesium, and potassium. “Their texture is like a Brazil nut but has the sweetness of pecans and the earthiness of a sweet potato” adds Mary Gollan, RDN and board member of the Connecticut Academy of Nutrition and Dietetics.
Tiger nuts were one of the first foods grown in ancient Egypt, and people have been eating them for thousands of years. Now the snack is becoming popular as a healthy, plant-based boost for everything from weight loss to heart health, explains Mascha Davis, RDN. However, it’s important to note that the science behind some of the purported benefits is up for debate.
A 2018 market research study revealed that an increased demand for healthy plant-based snacks has fueled the sales of tiger nuts in recent years.
There’s not a lot of research on these interesting tubers, but here’s what our panel of experts say we know right now. (Learn about these fall superfoods.)
Tiger nut nutrition basics
Nuts are known as a great source of plant-based protein. But what about tubers such as tiger nuts?
“Tubers are vegetables that grow underground attached to the root of the plant and are usually high in starch,” says Melissa Kathryn, RD, a certified holistic nutritionist. She points out that tiger nuts are loaded with fiber and a great source of resistant starch—a kind of carbohydrate that is difficult to digest and can actually help feed healthy bacteria in the large intestine. “They also have complex carbs, which provide energy for the body to function,” says Kathryn.
Tiger nuts are starchy like potatoes but have a similar fiber content to almonds. The fat and protein content is lower than typical tree nuts such as almonds, cashews, or hazelnuts.
“They provide a great number of nutrients such as calcium, magnesium, potassium, sodium, phosphorus, zinc, and vitamins E, C, and folic acid,” says Kathyrn. While you might not get enough of these micronutrients from one handful of tiger nuts, eating them regularly could help you get enough of these vitamins and minerals over time.
The health benefits of tiger nuts
Tiger nuts are packed with resistant starch, fiber, and micronutrients, such as magnesium and potassium. In theory, consuming these nutrients should result in better health. However, research on the direct health benefits of tiger nuts is still limited—at least in humans, anyway. Most research on tiger nuts has been animal or cell studies.
KaNisha L. Hall, MD, physician and wellness coach in Houston, says that although the vegan snack has grown in popularity there is little concrete and reproducible data to support that the actual health benefits are greater than placebo. “Based on the fiber content, claims have been made that it improves digestion and glucose levels. The antioxidants are suggested to prevent harm from free radicals and furthermore prevent heart disease and cancer. Some sources have also claimed the food to be an aphrodisiac,” she says. However, Dr. Hall cautions that “credible research has not supported these findings.”
Tiger nuts may ease constipation
Gollan, Kathryn, and Vettel agree that tiger nuts could help make your bowel movements smoother and easier, relieving constipation. Constipation is usually a clear sign that you’re not eating enough fiber. According to Gollan, the combination of fiber and magnesium “keep our bowels regular and happy.” Kathryn adds that tiger nuts are a good source of insoluble fiber in particular, which is known to add bulk to stools and help clean out the intestinal tract.
Tiger nuts may be an aphrodisiac
Historically, people sometimes have eaten tiger nuts to improve sexual performance. But despite claims in the Middle East and parts of Africa that this snack increases men’s sexual arousal, there is no scientific data to support this claim. In one animal study published in BMC Complementary Medicine and Therapies, male rats that received doses of raw tiger nut powder did engage in more frequent sexual activity than rats without tiger nut powder. However, there’s still a lack of evidence when it comes to linking tiger nuts to human libido.
Tiger nuts may help your heart
“Beyond the tiger nuts’ contribution to a healthy gut, they are also high in iron as well as healthy fats, specifically monounsaturated fatty acids,” says Vettel. “These types of fats, also found in healthy foods such as avocado, olive oil, and nuts such as almonds and walnuts, are known to lower cholesterol and promote heart health.” A 2018 study published in the American Journal of Clinical Nutrition also found that plant-based monounsaturated fatty acids are particularly helpful for reducing the risk of heart disease in both men and women.
Tiger nuts could aid weight loss
While tiger nuts will not directly improve your body’s ability to burn fat, they can be a healthy snack for those trying to lose weight. That’s because of their high percentage of insoluble dietary fiber. According to a tiger nut review published in Comprehensive Reviews of Food Science and Food Safety, “The intake of this kind of fiber is linked to a sensation of satiety since the fiber absorbs water and takes up space in the stomach and diminishes the need to consume more food.” So, eating tiger nuts has the potential to help you feel fuller, reducing cravings, and encouraging you to eat fewer calories.
Beware the side effects of too much fiber
When it comes to excess fiber consumption, our experts do caution against adding too many tiger nuts to your diet all at once.
“Tiger nuts are quite high in fiber at 10 grams per 1 ounce serving. For this reason, they should be added to the diet gradually to assess tolerance and reduce the risk of any digestive issues. It’s also important to note that some individuals may have allergies to tiger nuts, including those who are allergic to pollen,” says Vettel.
Gollan adds that getting bloated or gassy after eating tiger nuts is probably an indication that you’re not getting enough daily fiber. “Any food that contains a high amount of fiber may cause bloating and flatulence,” she says. “If you start eating more fiber-rich foods regularly, you will lessen your chance of experiencing these symptoms.”
Tiger nuts are an allergy-friendly snack
Nutritionists agree that tiger nut products offer a variety of options for people who have food allergies, including gluten, dairy, and nuts.
“Tiger nut milk is a good non-dairy alternative and can add a semi-sweet flavor to the products you use it in,” says Gollan.
“Tiger nut flour is also very popular in gluten- and grain-free baking, as the consistency is very similar to other nut flours. This kind of flour is made by roasting the nuts first and then grinding them into a fine powder,” Vettel adds. “They are similar in size and taste to actual nuts, makes them a wonderful option for those with nut allergies, or for those following dietary approaches where nuts aren’t recommended.” For example, these dietary approaches may include an autoimmune dietary protocol or following a low histamine diet.
How to eat tiger nuts
It’s safe to eat raw tiger nuts, though they can also be cooked, baked into desserts, or made into tiger nut milk. You can boost their antioxidant levels by roasting them before eating to improve the absorption of nutrients. You can germinate, or grow them too.
“Keep in mind that they tend to be softer and much easier to chew when they have been soaked or boiled in water,” Davis says. “Soaking or roasting tiger nuts prior to eating can boost their antioxidant levels and improve your body’s ability to absorb the nutrients.”
Gollan says she enjoys tiger nuts roasted in the oven with cinnamon, while Vettel uses tiger nuts as a crunchy topping on yogurt or smoothie bowls. Kathryn adds that they’re a great, easy snack to have on the go whenever hunger pangs strike.
SOURCE: The Healthy
By Leandra Beabout
Medically reviewed by Elisabetta Politi, CDE, MPH, RD
Today’s offering is another no bake, simple bar recipe…Salted Chocolate & Caramel Pretzel Bars!
Ingredients
12 ounce package semi-sweet chocolate chips, good quality chocolate divided into pieces (I like ghiardelli best for melting)
8 ounces mini pretzel twists, half of a regular 16-ounce bag
11 ounce bags Kraft Caramel Bits, or homemade caramel
sea salt for sprinkling
Instructions
Line a large, rimmed baking sheet with parchment paper.
Melt 8 ounces of the chocolate chips gently in the microwave (on low heat, stirring every 15 seconds) until smooth.
Spread the chocolate evenly over the parchment. Immediately add the pretzel twists over the top (it’s ok if they overlap!) and gently press them into the chocolate.
Add caramel bits to a microwave safe bowl with 2 tablespoons water and melt according to package instructions (on high for 2 minutes). Stir well and drizzle the melted caramel over the top of all of the pretzels.
Melt remaining 4 ounces of chocolate and drizzle over the caramel. Sprinkle with sea salt.
Today’s offering is Peach Crumb Bars…a taste of summer that can be enjoyed all year round!
Ingredients
3 cups all-purpose flour
1-1/2 cups sugar, divided
1 teaspoon baking powder
1/2 teaspoon salt
Dash ground cinnamon
1 cup shortening
1 large egg
1 teaspoon vanilla extract
3 pounds peaches, peeled and chopped
1 teaspoon almond extract
4 teaspoons cornstarch
Directions
Preheat oven to 375°. Whisk flour, 1 cup sugar, baking powder, salt and cinnamon; cut in shortening until crumbly. In another bowl, whisk egg and vanilla until blended; add to flour mixture, stirring with a fork until crumbly.
Reserve 2-1/2 cups crumb mixture for topping. Press remaining mixture onto bottom of a greased 13×9-in. baking pan.
Toss peaches with almond extract. In another bowl, mix cornstarch and remaining sugar; add to peaches and toss to coat. Spread over crust; sprinkle with reserved topping.
Bake until lightly browned and filling is bubbly, 40-45 minutes. Cool completely in pan on a wire rack. Cut into bars.
Test Kitchen Tip
If you’re craving a bit of summer in the off-season, try making these bars with canned peaches. Just substitute 5-1/2 cups canned peaches (drained well before measuring) for the fresh fruit.
Continuing my No-Bake theme, today’s offering is Watermelon Rice Krispie Treats!
For the Green Rind
5 oz mini marshmallows (half a bag)
2 tbsp butter
2 cups Kellogg’s Rice Krispies Cereal
green food coloring
For the White Rind
5 oz mini marshmallows (half a bag)
2 tbsp butter
2 cups Kellogg’s Rice Krispies Cereal
For the Red Fruit
10 oz mini marshmallows (1 bag)
4 tbsp butter
4 cups Kellogg’s Rice Krispies Cereal
½ cup semi-sweet chocolate chips
Instructions
Spray a 9″ spring form or baking pan with baking spray, or grease with butter.
Make the Green Rind
In a microwave-safe bowl, melt the mini marshmallows and butter until puffy (about 1 minute). Immediately add cereal and a few drops of food coloring. Mix with a buttered spatula or spoon. With your fingers, line the pan with the green cereal so that it is about ½” wide and ¾ of the way up the pan.
Make the White Rind
In a microwave-safe bowl, melt the marshmallows and butter until puffy. Add cereal and mix with a buttered spatula. Press it up next to the green cereal, creating another ring a little wider than the green rind. Fill ¾ of the way up the pan.
Make the Red Fruit
In a larger bowl, melt the mini marshmallows and butter. Add the cereal and red food coloring to desired color. Press the cereal into the center of the pan and, with your hands, press down to pack all three colors together. Place the chocolate chips, flat side up, randomly in the red fruit part of the watermelon. Let harden. Cut into wedges. For wedges on a stick, insert a stick into the wedge while the cereal mixture is still soft.


























 Sew Colorful